Home Studio Essentials – Episode 2

Speedlites and flash units are great but after a while the hard light they produce can become a bit limiting. In part 1 of my home studio essential skills I used a bare flash but now it’s time to add an umbrella. It’s almost certainly the first light modifier you’ll buy and for good reason.  They’re very versatile, quick to set up and fold down nice and small which makes them perfect for mobile and small home studio set ups.

Umbrellas come in two basic types, ones you bounce light into (reflective) and translucent umbrellas that you shoot light through. Whichever you use they soften the light by increasing the size of the light relative to the size of the subject. In other words, the bigger the umbrella the softer the light and the closer you get it to your subject the softer the light.

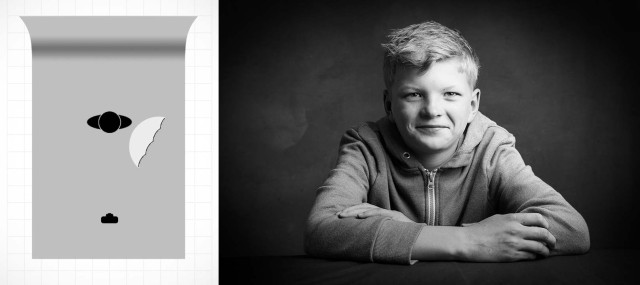
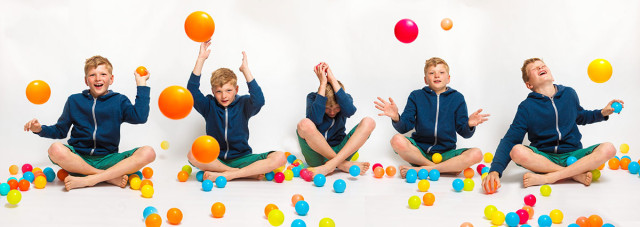
In this video I use a shoot through umbrella to create two very different looks. The first is a moody low key shot but it’s the second, more evenly lit shot that I love and it took lots of balls to make… about 50 colourful plastic balls to be precise!

[youtube]https://www.youtube.com/watch?v=ur58XNQwMXA&list=UU8Pksdbj37CdE00kmE7Z1dw[/youtube]

For this series of videos I want you to do more then just watch it, I’m hoping you’ll get your camera and take a photo based on the ideas you see in the video. That might be the lighting set up, the models pose or the Photoshop post processing. If you do (and you’re on Facebook) then please add them to Adorama’s Facebook page. I’ll be checking it regularly and giving constructive feedback on as many as possible

Joel-Joel-Joel-Joel-Joel

Gear used in this video (Links back to Adorama)

Flashpoint StreakLight 360 Ws Creative Collection (Includes flash, battery, trigger, boom etc)

Canon 5D Mark 2 

Canon 24-105L 

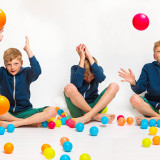
If like me you like to keep a visual record of you’re lighting set ups then this image should come in very handy.
Joel-Lighting-Diagram

My Studio Texture

If you caught my post yesterday then you’ll know that I recently built a textured background in my studio. Well it seems there are quite a few people out there that would love to do the same but don’t have the space, time or need for a similar permanent structure. So for today’s Friday freebie I’m giving away my studio background… OK so I’m not giving away the real thing but I am sharing a photo of it

Full download instructions are below but you can also
Click Here To download my studio background.
FF-Studio-BG1
There are a couple of ways you could use it. You could do exactly what it’s designed for and use it as a background for your studio shots. All you’d need to do is shoot on a clean background (light grey works best) and then simply extract the model and paste them in. I made an in depth video tutorial with Mark Wallace on how that’s done last year. If you missed it take a look here.

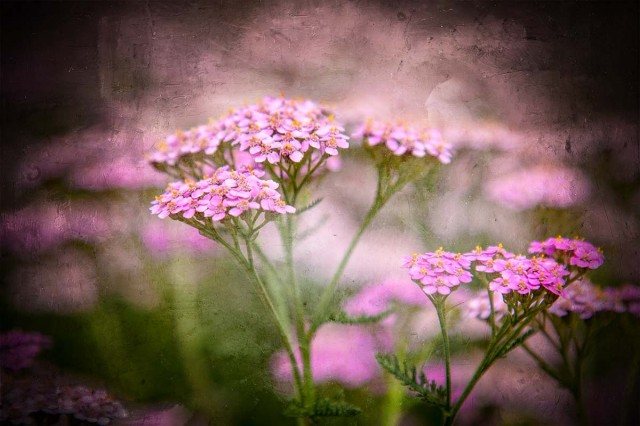
FF-Studio-BG2-Hard-LightOf course you can also use the texture as… well, a texture! Simply paste it over your photo, use a spot of Free Transofrm to make it fit and change the layer blending mode. Multiply, Overlay and Hard Light (as used here) are three to try but don’t stop there.

As always, if you create a photo using the Friday Freebie then let me (and everyone else) know by leaving the link in the comments below.

Usage rules
The image is copyright Gavin Hoey 2014. Use is limited to any personal but non-commercial purposes. Please share the Friday Freebie by linking back to this page. Do not redistribute the original image without my permission.

Download instructions
Click the link https://drive.google.com/file/d/0B_Mmmm3K1utNYW53T3RUbDk0LVE/view?usp=sharing
1. Click the Download button download_icon

2. The download should start automatically

Christmas PSD Template

Christmas-Template-GavtrainWith Christmas rapidly approaching this weeks Friday Freebie couldn’t come at a better time. It’s perfect if you need to make a last minute Christmas card or simply want to show off one of your festive photos.

Full download instructions are below but you can also
Click Here To Christmas PSD template

If you were one of the lucky few who were in the right place at the right time, then you will recognise this template as the one I photographed whilst testing the new live broadcast facilities in my studio. If you missed it never fear, details of my live streaming events in 2014 are coming soon.

I finished the template using the new Perfect Photo Suite 8 from Onone. The colour and texture were added in one click using the “Nicely Toasted” preset.

With several layers and lots of fine textured detail, this weeks Friday Freebie PSD template comes in at around 76mb. If you’re not on a fast internet connection if might take a few minutes to download.

As always, if you create a photo using the Friday Freebie then let me (and everyone else) know by leaving the link in the comments below.

Usage rules
The image is copyright Gavin Hoey 2013. Use is limited to any personal but non-commercial purposes. Please share the Friday Freebie by linking back to this page. Do not redistribute the original image without my permission.

Download instructions
Click the link http://adobe.ly/1koSnxj

1. Click the Download button download_icon

2. The download should start automatically

3. Save the template to your hard drive

4. Open in Photoshop or Photoshop Elements

5. Paste your photo above the “Your Photo Here” layer

6. Use Free Transform (CTRL+T) to adjust the size of your photo

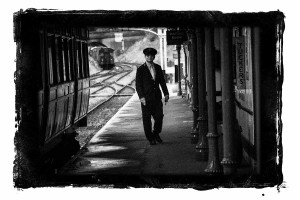
Heavy Painted Border

Steam-Train-Border-FFHere’s another amazing border from my recent painting session. This time I’ve gone for a border that surrounds your photo with a wide painted edge.

Full download instructions are below but you can also
Click Here To Download the Heavy Painted Border

I’ve designed this border so it can be used in two ways and it all depends on if you add your photo above or below the border.

Once you’ve downloaded it you’ll find I’ve removed the centre of the border image but left it transparent. S0 to make the image / border combo you see here all you do is drag your photo below the border layer in Photoshop. The centre area has a short fade so it blends in nicely with the photo.

The second option is to place your photo above the border layer. Doing that will give you a hard edge and you can decide how much of the border is seen.

You’ll need to resize your image or the border with Free Transform (CTRL+T). Use the corner handles to drag the image to the size you want and when done press Enter. The border will work with any photo although it’s especially good with black and white images.

If you create a photo using the Friday Freebie then let me (and everyone else) know by leaving the link in the comments below.

Usage rules
The image is copyright Gavin Hoey 2013. Use is limited to any personal but non-commercial purposes. Please share the Friday Freebie by linking back to this page. Do not redistribute the original image without my permission.

Download instructions

Click the link https://drive.google.com/file/d/0B_Mmmm3K1utNa19JQmtESDNVZjQ/view?usp=sharing
1. Click the Download button download_icon

2. The download should start automatically


Industrial Template

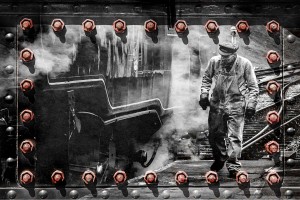
Red-Bolts-FF-FinalThis weeks Friday Freebie is an industrial style border and texture which has a wonderful 3D feel. The standout feature must be the rectangle of red bolts. There’s no Photoshop here’s that’s exactly as I found them.

Click Here To Download the industrial template

With those bright red bolts and the metal texture the sort of photo that’s likely to work best is something with an industrial feel. I found mono images worked well but don’t let that limit your imagination. If the red bolts are a bit too bright then reduce the templates saturation value to suit your taste.

The sample image here was simply placed above the template, resized to fit and the layer blending mode was changed to Overlay. Other blending modes will also work so experiment away.

If you create a photo using the Friday Freebie then let me (and everyone else) know by leaving the link in the comments below.

Usage rules
The template is copyright Gavin Hoey 2013. Use is limited to any personal, non-commercial purposes. Please share the Friday Freebie by linking back to this page. Do not redistribute the original image without my permission

Bonus composite videos

Mark+Gav-2Last week I uploaded the two part video with Mark Wallace and myself. If you missed it the click here to go back and see both videos.

Mark was kind enough to share all the photos he shot with me and it seemed like a terrible waste not make use of at lease one more. So in the video below I’ll show you how I created this photo composite. Going mono was all part of the plan and makes compositing two images together a whole lot easier as you no longer have the issue of matching colours to get in the way.
[youtube]http://youtu.be/vbFlTkkOglU[/youtube]
Can’t see the video? Click here http://youtu.be/vbFlTkkOglU

In this video I do a deep dive tutorial on how to use Photoshop to composite the original photos. I start with how to use Adobe Camera RAW to create an HDR background and then add some light rays with my recent Friday Freebie Light Ray Brushes.
[youtube]http://youtu.be/szQ0kj1xuZc[/youtube]
Can’t see the video? Click here http://youtu.be/szQ0kj1xuZc

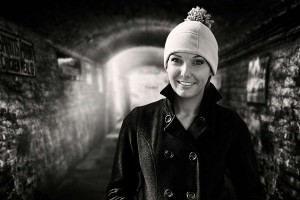
Painted Frame Template

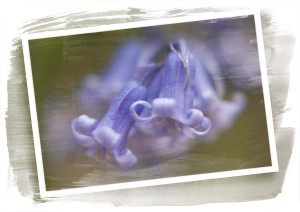
Painted-Frame-FinalHere’s a great Friday freebie for anyone who loves creating painterly effects.

The template is a simple JPG file which you can adjust to your own needs. For example you may wish to adjust the brightness using Levels or add a splash of colour with the Colorize option in Hue/Saturation. All you need to do is add your own photo over the whole image or just the framed area, then change the layer blending mode from Normal to Screen. Although the Screen blending mode will usually give you the best results, experimenting with other blending modes can yield some unexpected results which may be even better.

If you’ve had success with the template and you’d like to share your image with others, please pop a link in the comments section.

Download the Painted Frame Template

Usage rules
The image is copyright Gavin Hoey 2013. Use is limited to any personal, non-commercial purposes. Please share the Friday Freebie by linking back to this page. Do not redistribute the original image without my permission.

Download instructions
Click the link https://drive.google.com/file/d/0B_Mmmm3K1utNVnd4a2twTmNacW8/view?usp=sharing

1. Click the Download button download_icon

2. The download should start automatically

Mug Shot Background

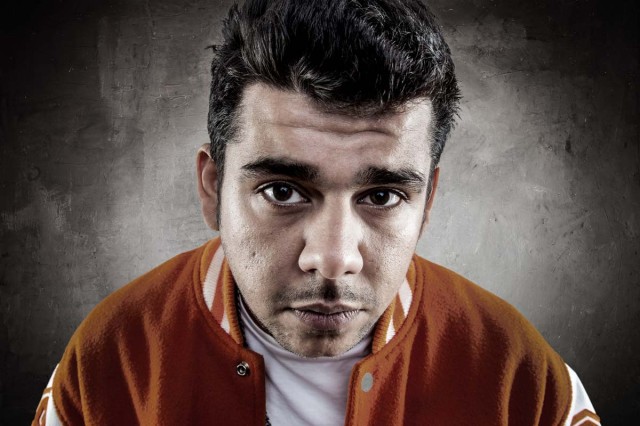
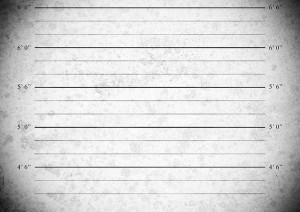
Mug-Shot-1Last week I released a video called two portraits, one light and ever since I’ve been getting a constant stream of requests to share the mug shot background I used in the final photo. The background was one I made a while back for a photography workshop using a combination of grungy textures and a bit of Photoshop know how.

The background is just a simple JPG file which you can adjust to your own needs. For example you may wish to adjust the brightness using Levels or add a splash of colour with the Colorize option in Hue/Saturation.

Download instructions are below and once again I’m sharing the JPG file through my Adobe Creative Cloud page. No sign up is required to get a copy of the template so you’re free to jump in and make your own triptych images.

Download the Mug Shot background by clicking here

Usage rules
The image is copyright Gavin Hoey 2013. Use is limited to any personal, non-commercial purposes. Please share the Friday freebie by linking back to this page. Do not redistribute the original image without permission.

Download instructions
Click the link https://drive.google.com/file/d/0B_Mmmm3K1utNb0duUlQ4eVZQMkk/view?usp=sharing

1. Click the Download button download_icon

2. The download should start automatically