Making A Rustic High Key Background

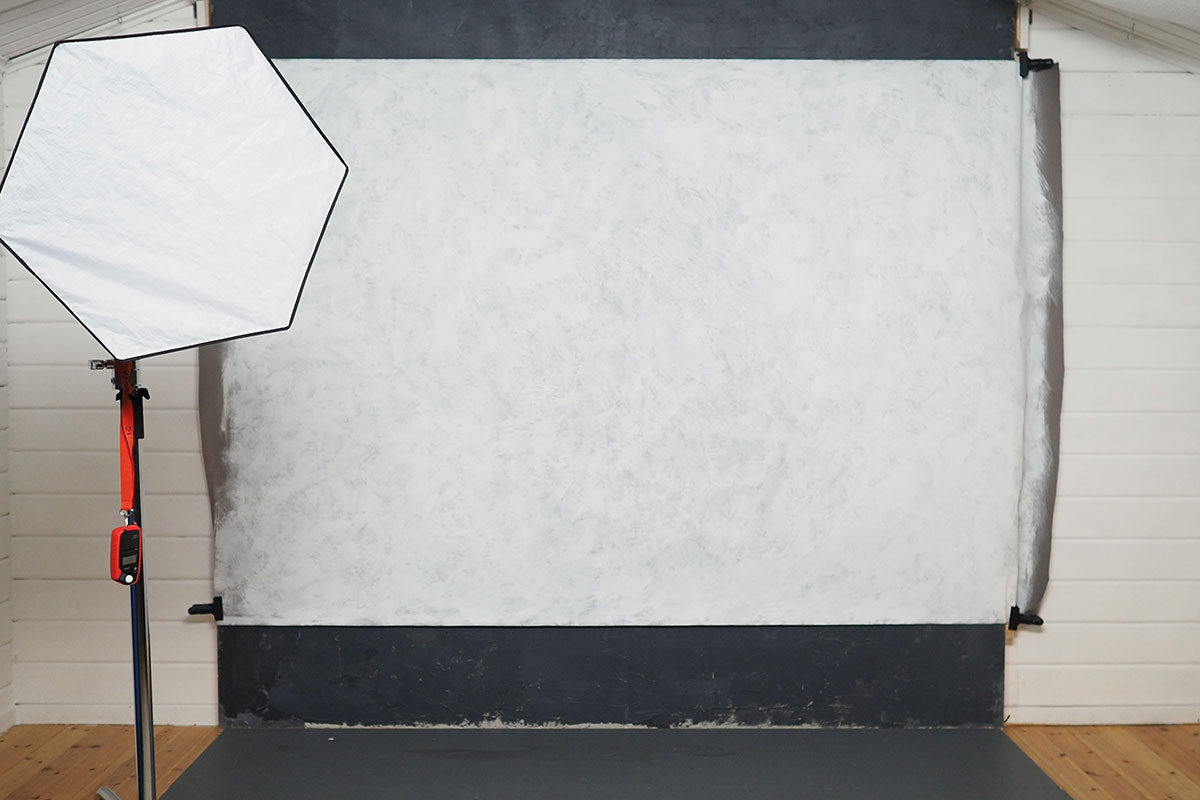
When Gavin decided he wanted to shoot high key portraits in a very small space he wanted to a background that was a little different for the usual pure white seamless look. So I was tasked with creating a more rustic looking light background and I do love a challenge!

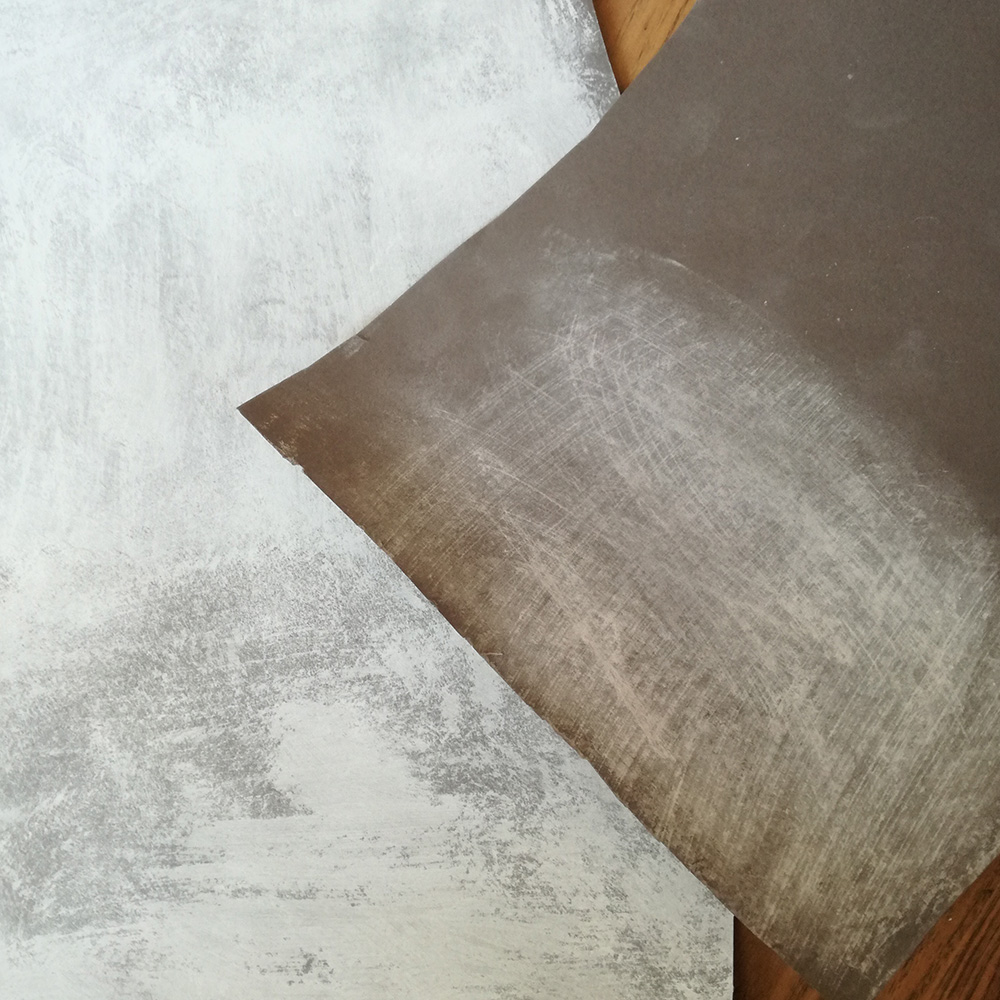
To keep cost down the plan was to re-use Gavin’s favourite grey paper background that had seen better days. I took a sample of the long roll of grey paper and tried out a few methods. Originally I was convinced a chalk coating would be perfect. Well, it looked pretty good but took quite a bit of elbow grease and loads of chalk. But the huge downside was that it smudged and dusted everything in a layer of chalk dust! Not ideal, so back to the drawing board (literally).

I have loads of white paint (most walls are white in the house) so thought a rough coating of paint would be worth a try out. Now, paper and wet paint would not be a great combination, the paper would change shape and be difficult to work with, so I used a dry brushing technique. This is where you dip the paint brush in the paint and then wipe off the excess on kitchen paper towels and then paint what’s left onto the background. This means that it goes on practically dry and doesn’t cause the paper to buckle. Perfecto!

We shot a time lapse, I think it makes me look like I work really quickly and efficiently!! The camera never lies…………
[youtube] https://www.youtube.com/watch?v=v9OBWOy_Eng [/youtube]

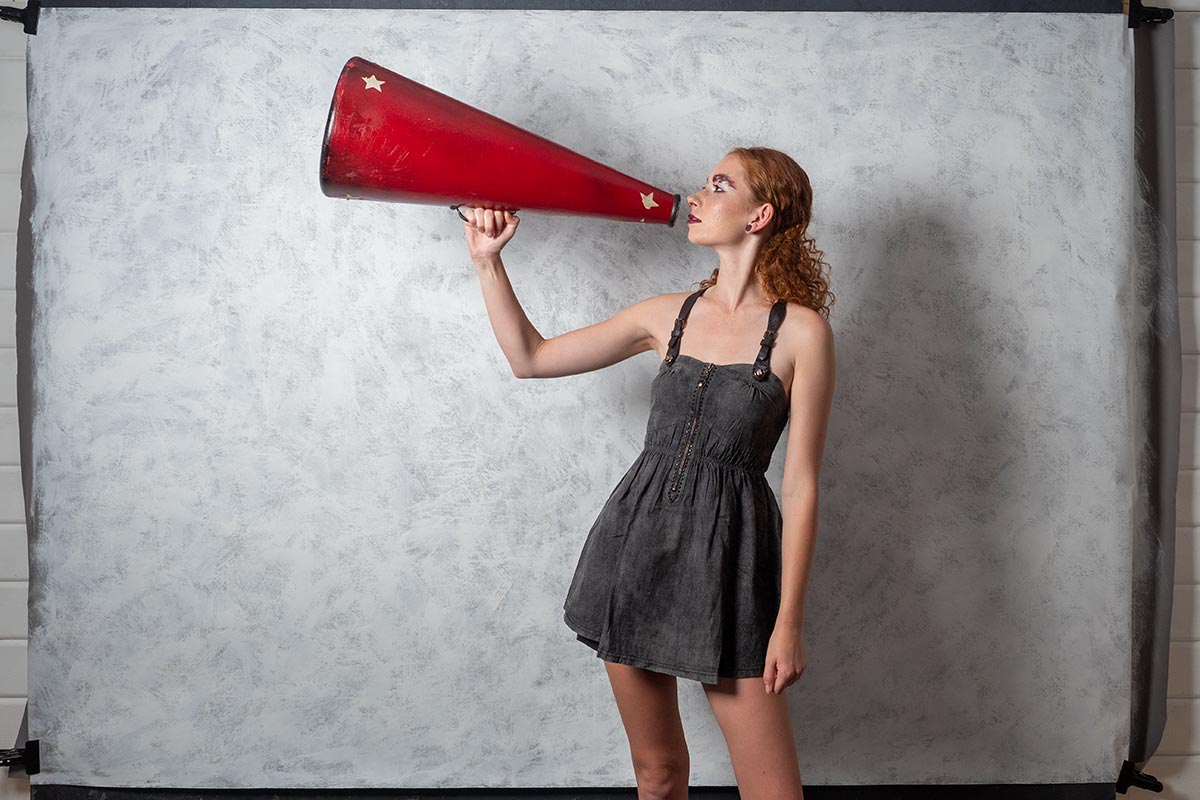
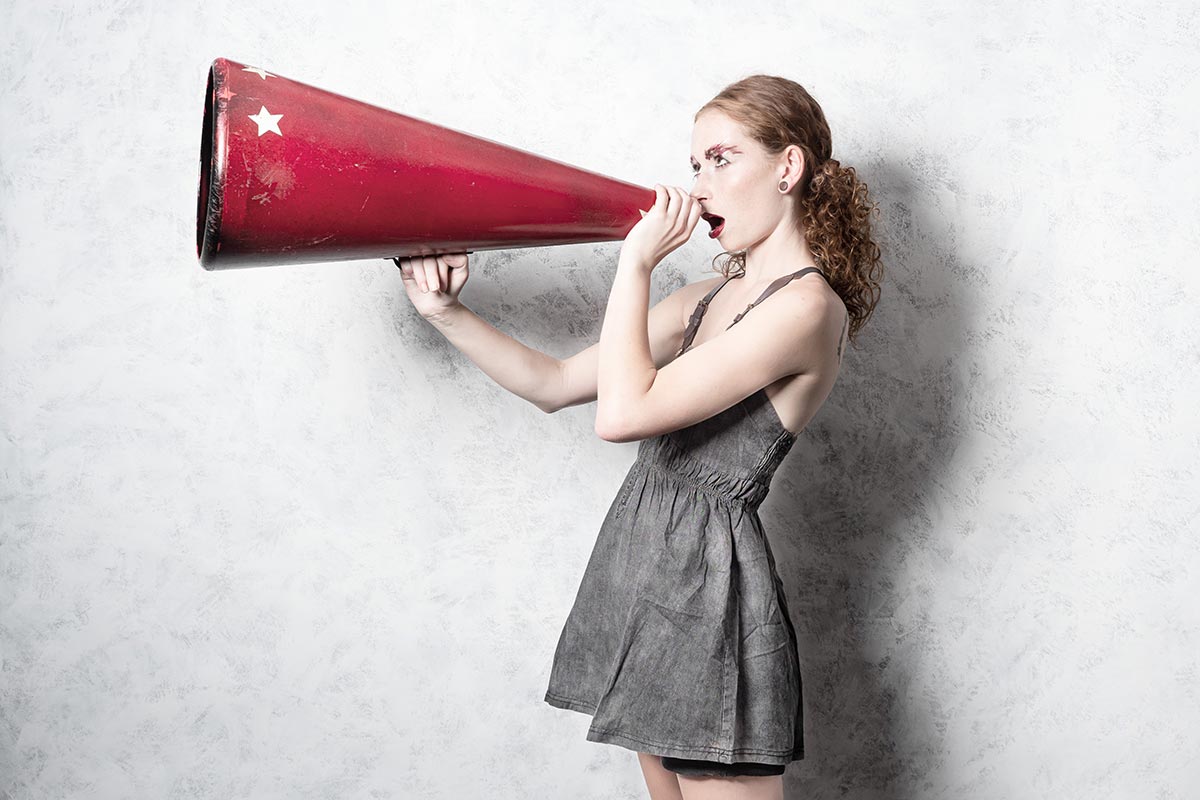
The shoot day was brilliant. We worked with Gracie for the first time, she totally got the idea and it all worked like a charm with the background.

Heavy Painted Border

Steam-Train-Border-FFHere’s another amazing border from my recent painting session. This time I’ve gone for a border that surrounds your photo with a wide painted edge.

Full download instructions are below but you can also
Click Here To Download the Heavy Painted Border

I’ve designed this border so it can be used in two ways and it all depends on if you add your photo above or below the border.

Once you’ve downloaded it you’ll find I’ve removed the centre of the border image but left it transparent. S0 to make the image / border combo you see here all you do is drag your photo below the border layer in Photoshop. The centre area has a short fade so it blends in nicely with the photo.

The second option is to place your photo above the border layer. Doing that will give you a hard edge and you can decide how much of the border is seen.

You’ll need to resize your image or the border with Free Transform (CTRL+T). Use the corner handles to drag the image to the size you want and when done press Enter. The border will work with any photo although it’s especially good with black and white images.

If you create a photo using the Friday Freebie then let me (and everyone else) know by leaving the link in the comments below.

Usage rules
The image is copyright Gavin Hoey 2013. Use is limited to any personal but non-commercial purposes. Please share the Friday Freebie by linking back to this page. Do not redistribute the original image without my permission.

Download instructions

Click the link https://drive.google.com/file/d/0B_Mmmm3K1utNa19JQmtESDNVZjQ/view?usp=sharing
1. Click the Download button download_icon

2. The download should start automatically


White Painted Border

Painted-edge---finalThis was fun to make and not just because things got a bit too messy! This Friday Freebie was lovingly hand crafted from nothing but the finest kids paints, most of which seemed to end up on my desk and not the paper. There is a reason that happened and it’s not just because I’m rubbish at painting.

Over the years I’ve made many borders with paint but not always with paint brushes and this is a perfect example. To get the distressed edge effect I “painted” with the rubber edge of an old ice scraper that had been rolling around in the boot of my car for a few winters. I then photographed the edge and straightened in up in Photoshop.

Full download instructions are below but you can also
Click Here To Download the white painted border

Using the border is as simple as changing the layer blending mode to Screen. For the less advanced users that’s done like this…

Download the Friday Freebie and open it in Photoshop or Photoshop Elements, then open the photo you wish to add to the frame. Flatten any layers (Layer – Flatten Layers) and then press CTRL+A to select it all, followed by CTRL+C to copy. Jump over to the frame and press CTRL+V to paste the image on to the frame.

You’ll need to resize the image with Free Transform (CTRL+T). Use the corner handles to drag the image into the photo area and when done press Enter. Finally change the layer blending mode from Normal to Screen to blend the photo with the template.

If you create a photo using the Friday Freebie then let me (and everyone else) know by leaving the link in the comments below.

Usage rules
The image is copyright Gavin Hoey 2013. Use is limited to any personal but non-commercial purposes. Please share the Friday Freebie by linking back to this page. Do not redistribute the original image without my permission.

Download instructions
Click the link https://drive.google.com/file/d/0B_Mmmm3K1utNZnZxWnQxUGc0dHc/view?usp=sharing
1. Click the Download button download_icon

2. The download should start automatically


Coffee Stain Photoshop Brushes

FF-Coffee-brush-1This weeks Friday Freebie is a set of four high resolution Photoshop brushes. What they do is probably pretty obvious but if you can’t see the photo then the words coffee cup rings should explain everything.

 Click Here To Download the Coffee ring brushes

These brushes were hand crafted in my studio using only the finest tea stains (I’m not a coffee drinker) which I photographed and turned into very high resolution brushes. They are the perfect compliment to your grungy images and add some instant aging to your retro images. They work brilliantly with the ageing texture that I ran as the Friday Freebie a few weeks back. It’s also the same texture I used on the photo opposite.

Once downloaded, the brushes will need to be unzipped before they are installed. The brush set is  compatible with all versions of Photoshop and Photoshop Elements. If you need help installing them then remember to search on Google and YouTube for the answers.

If you create a photo using the Friday Freebie then let me (and everyone else) know by leaving the link in the comments below.

FF-Coffee-brush-2

Usage rules
The brushes are copyright Gavin Hoey 2013. Use is limited to any personal, non-commercial purposes. Please share the Friday Freebie by linking back to this page. Do not redistribute the original image without my permission

Painted Frame Template

Painted-Frame-FinalHere’s a great Friday freebie for anyone who loves creating painterly effects.

The template is a simple JPG file which you can adjust to your own needs. For example you may wish to adjust the brightness using Levels or add a splash of colour with the Colorize option in Hue/Saturation. All you need to do is add your own photo over the whole image or just the framed area, then change the layer blending mode from Normal to Screen. Although the Screen blending mode will usually give you the best results, experimenting with other blending modes can yield some unexpected results which may be even better.

If you’ve had success with the template and you’d like to share your image with others, please pop a link in the comments section.

Download the Painted Frame Template

Usage rules
The image is copyright Gavin Hoey 2013. Use is limited to any personal, non-commercial purposes. Please share the Friday Freebie by linking back to this page. Do not redistribute the original image without my permission.

Download instructions
Click the link https://drive.google.com/file/d/0B_Mmmm3K1utNVnd4a2twTmNacW8/view?usp=sharing

1. Click the Download button download_icon

2. The download should start automatically