Dramatic lighting with just two speedlights

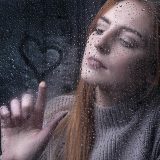
So you only have two bare speedlights and you want to shoot some creative portraits. That’s the challenge I faced recently after discussing how a fellow photographer could get started in portrait photography without spending too much on new equipment.

Don’t get me wrong, bare speedlights will obviously limit how you can light your subject and won’t beat better strobes and a choice of light modifiers but I figured that if I can generate the initial excitement for shooting portraits with basic kit, the rest will grow in time.

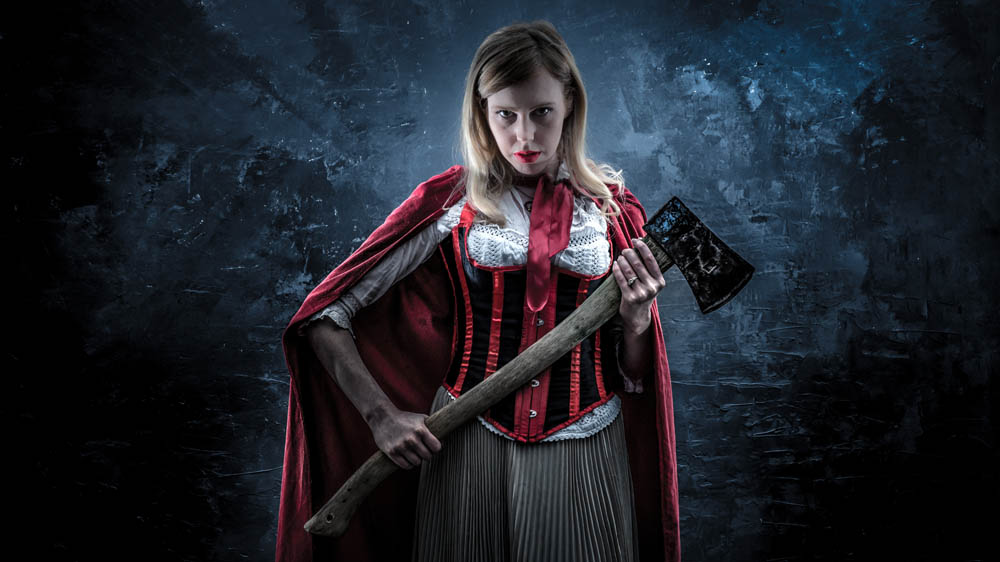
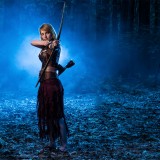
So with a bit of help from model Fern we dusted down the Red Riding Hood cape and set to work.

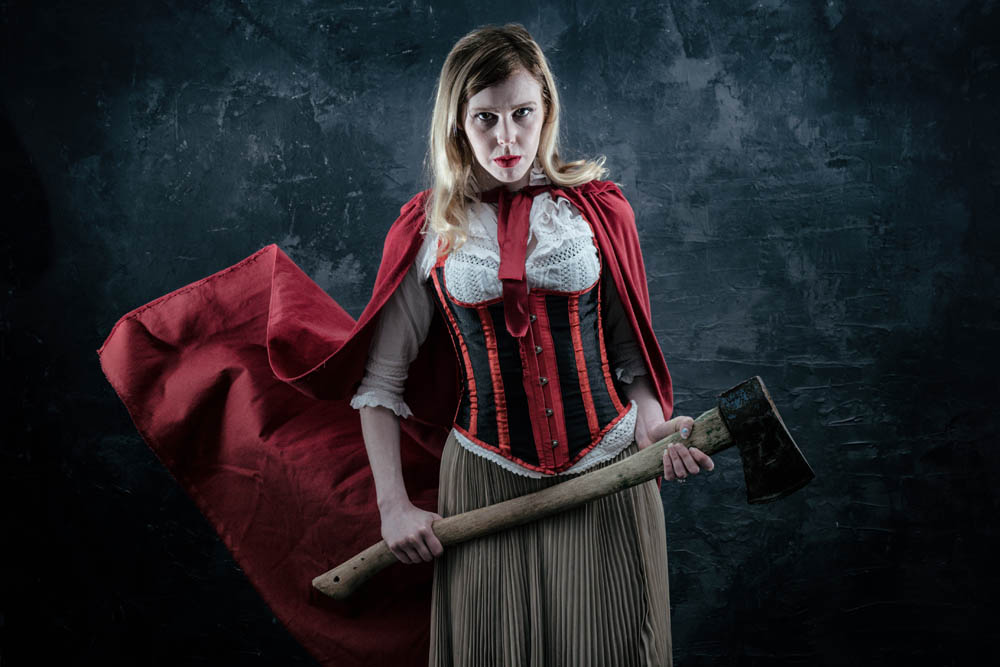
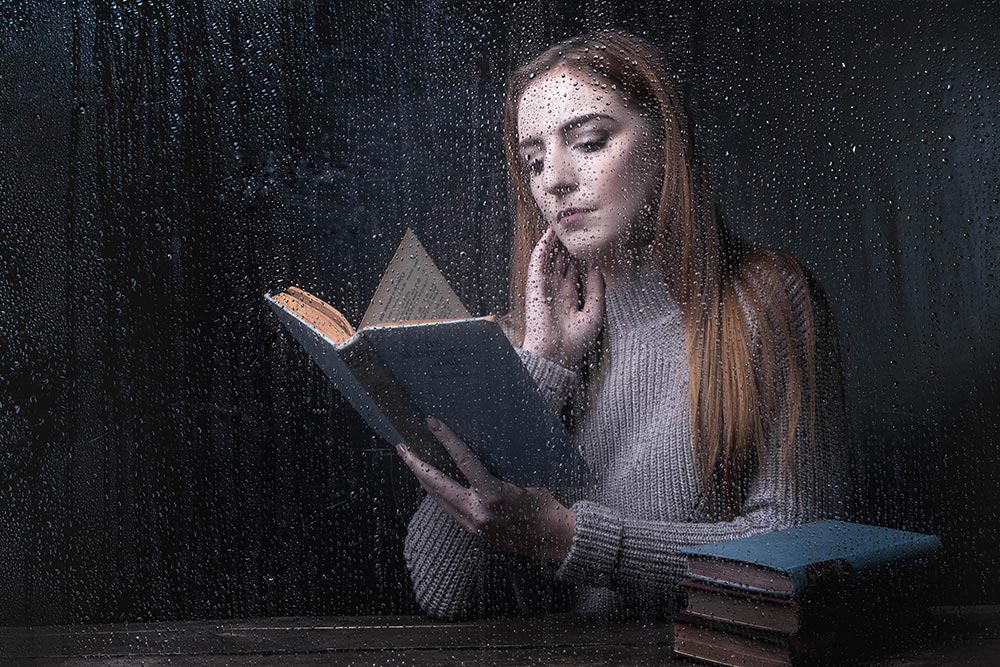
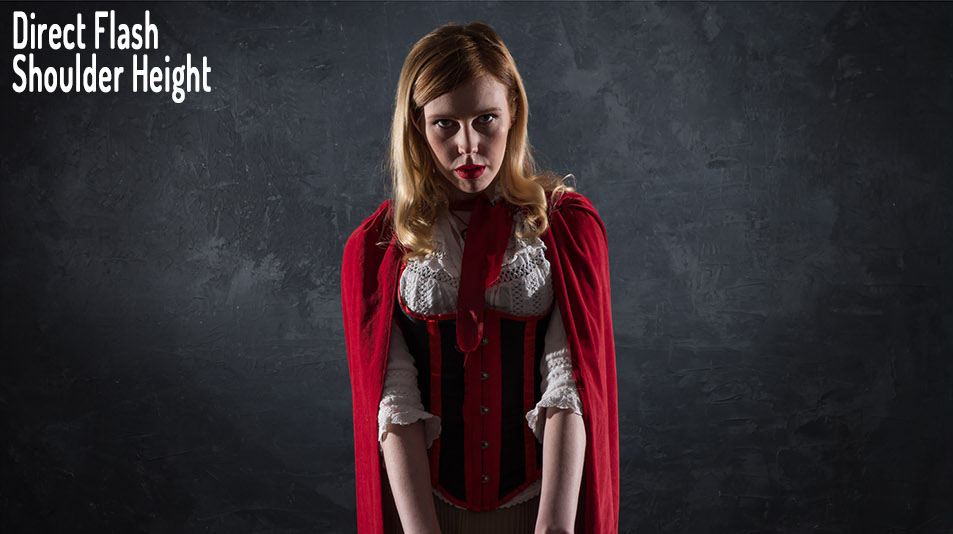
I started by putting the two lights either side of Fern, at 90 degrees to the camera and in line with her shoulders. I carefully made sure they were evenly spaced and that Fern was evenly lit. The end result was a bit too much contrast but very dramatic.


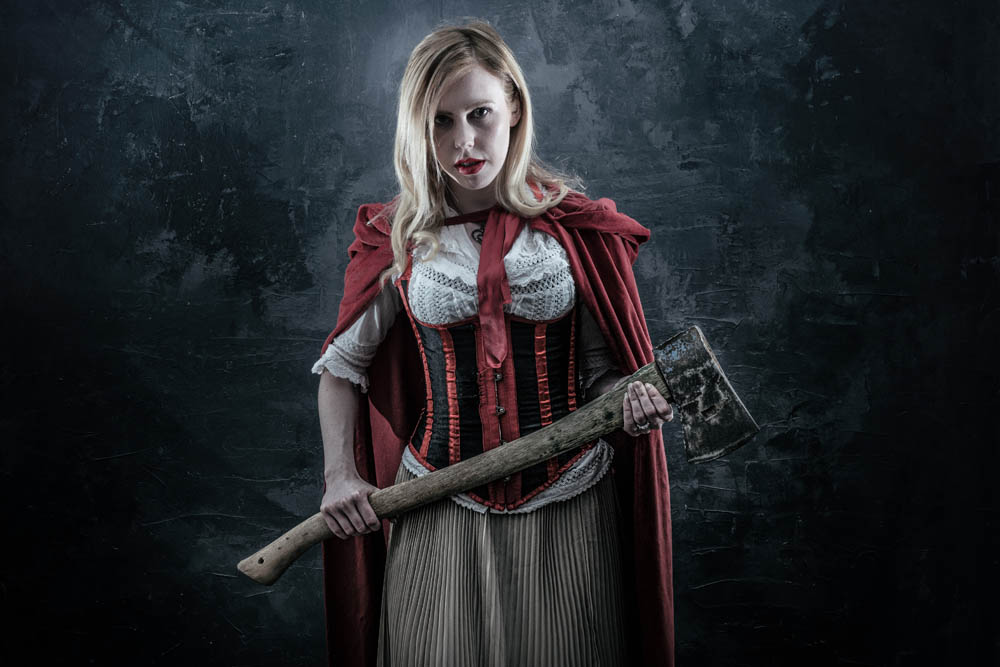
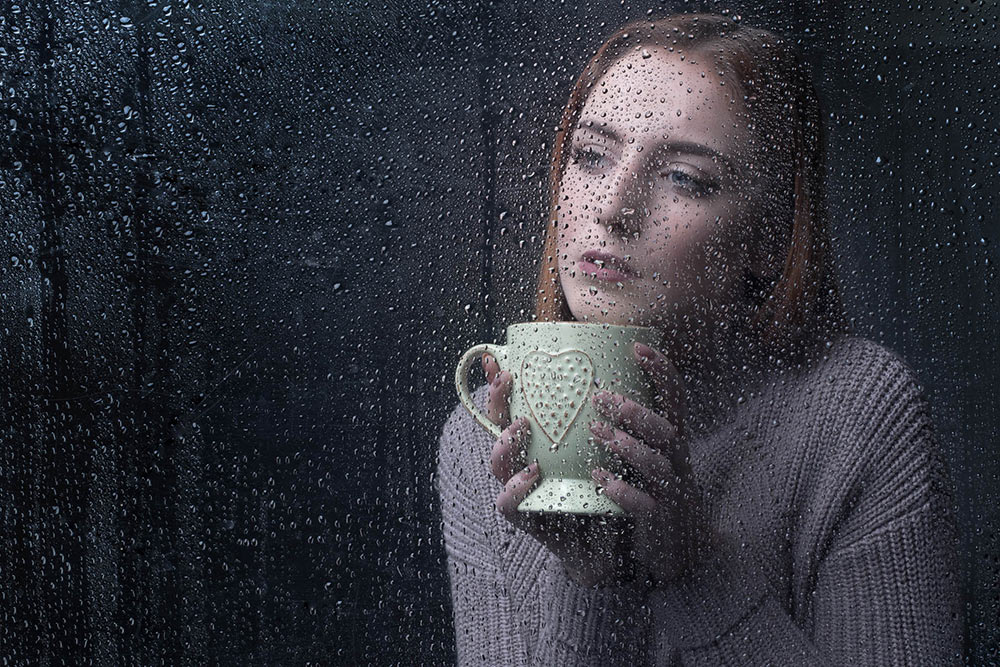
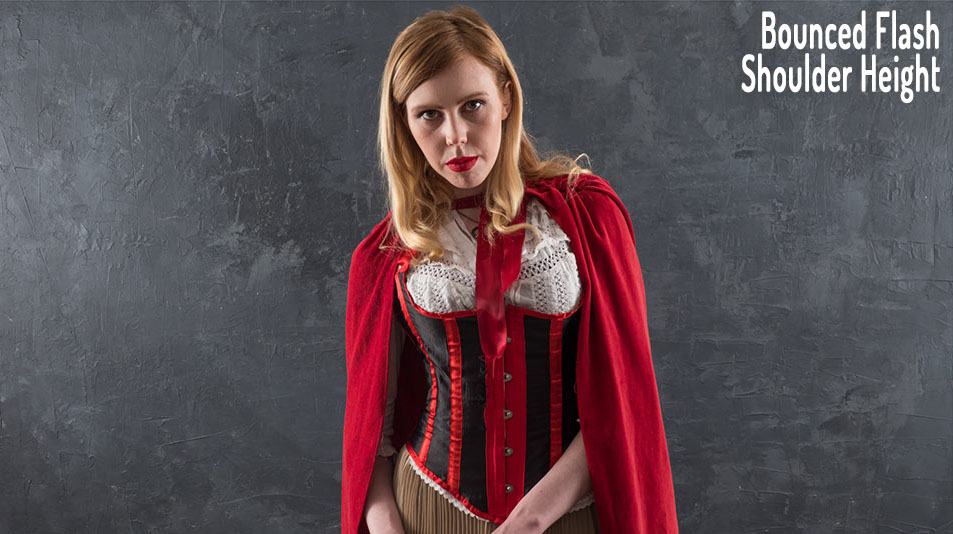
Next I spun the lights around and pointed them at the white walls of my studio. The light was bouncing off the walls which simulated the look of light coming from a source much bigger then a small speedlight. Bigger means softer when it comes to light but it also means more spread and sure enough the photo looked much flatter.


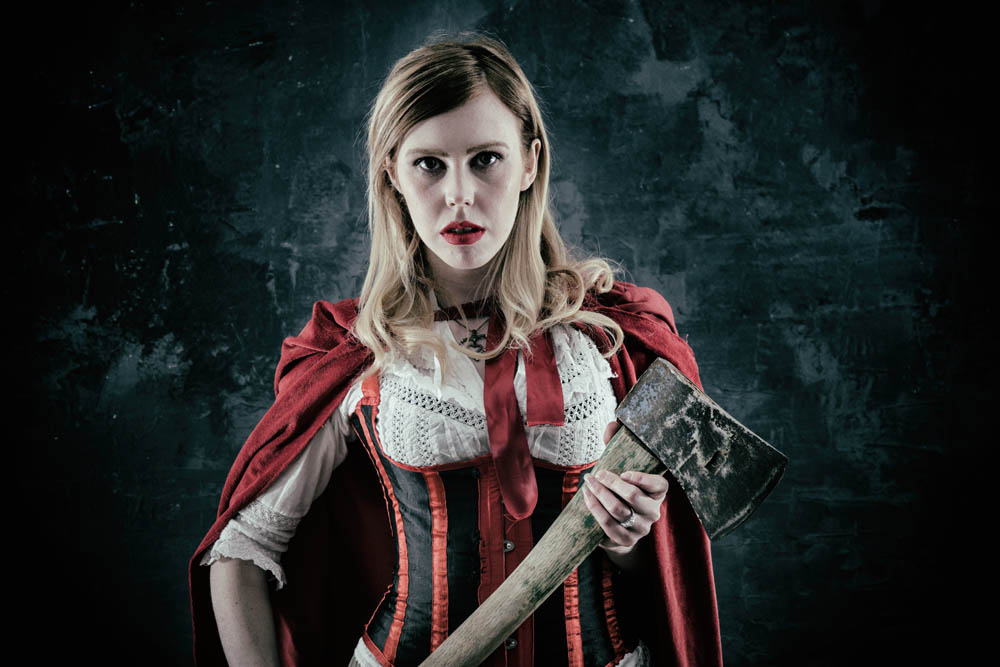
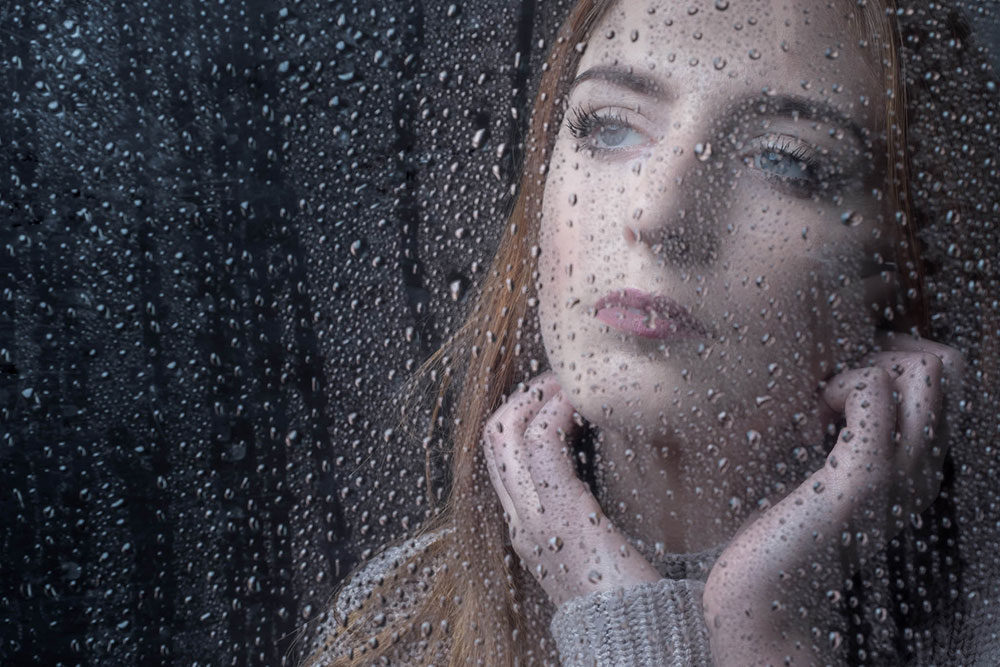
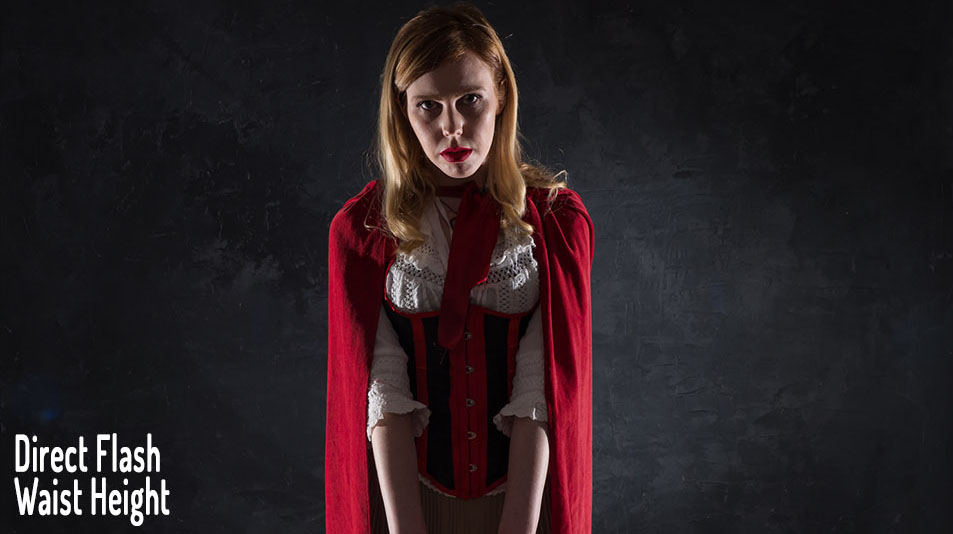
I turned the light back around. If you want a sinister look, put the lights low. It’s not a lighting position I regularly use but in this case it felt right. However the direct light from the bare flashes still looked a bit too harsh for my taste.


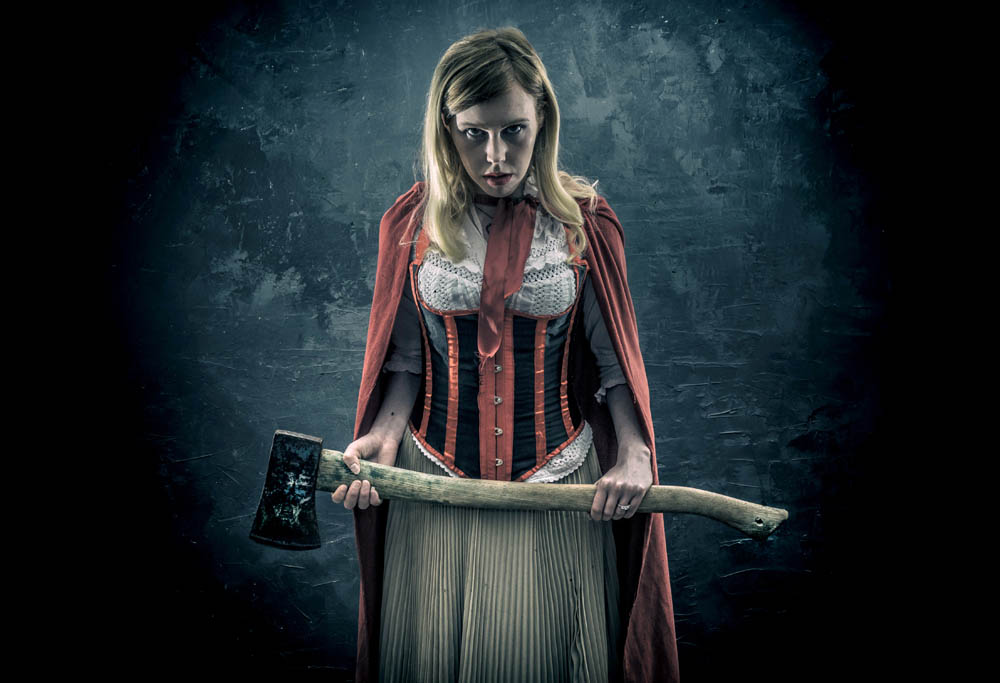
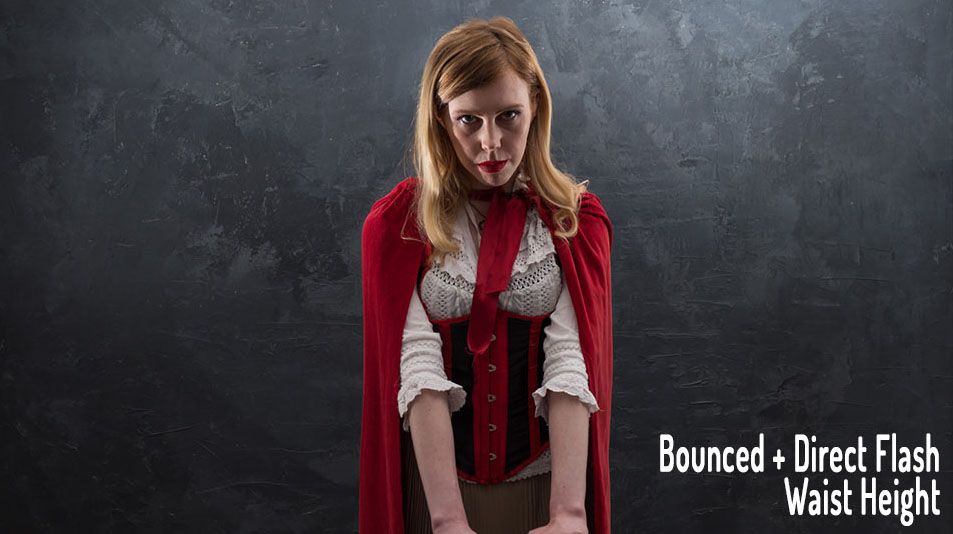
To soften the light a little on Ferns face I kept the lights low but angled them up to the ceiling. The result was a mixture of hard light and soft light that worked perfectly for the look we were going for.

For more information on the shoot and the post processing, check out the video below
[youtube]www.youtube.com/watch?v=LKNSqE8sdrc[/youtube]

Rainy Portraits in the Studio

Rainy days aren’t always the easiest days to get great photos for a whole bunch of reasons but with a bit of effort and a lot of luck, you can get amazing photos.

However if getting wet isn’t your thing, it’s surprisingly simple to bring the rainy weather inside and under your control.

In the video below I’ll show you how you can create a rainy day window portrait using a couple of flashes and some simple props.

[youtube]https://www.youtube.com/watch?v=L4USUxcL49A[/youtube]

The main thing you’ll need is a “window” and although you could use a real one I opted for a sheet of clear Perspex (also called Plexiglas or clear Acrylic). I’ve had my sheet for many years and it’s very scratched but still serviceable. www.wickes.co.uk/Wickes-Durable-Acrylic-Sheet-90cmx1-8m/p/210002

The video has two ways of using the “window”, shooting looking from the outside in and shooting from the inside, out. Both have their own unique feel and if you’re set for one, doing the other is quick and easy.

If you tried the technique yourself, do leave me a comment below and share your photo if it’s online somewhere.

It’s always a pleasure to have Beth Smith model for me. Check out her portfolio at https://purpleport.com/portfolio/bethsmithmodel/

Adobe Photography Jam Re-Watch

I love demoing photography and Photoshop to my fellow photographers, so when Adobe UK invited me to speak at their Photography Jam event in London, I jumped at the chance.

It was an amazing evening of photography education and inspiration. Adobe lined up some really great speakers and invited an audience of around 150 photographers. Despite it being a seriously hot room, the audience’s enthusiasm throughout the evening made the event come alive.

If you couldn’t be there Adobe UK have you covered with all of the talks and demos now available on re-watch including mine.

[youtube]https://www.youtube.com/watch?v=oVvRU78hqUc&index=4&list=PL5JIQFdhtvjb-8SU3lZPYdyy6C_s-_IxQ[/youtube]

I was given about 20 minutes to talk about the new features of Photoshop CC2015.5 (and CC2015) that I actually use day to day. I also threw in a few general Photoshop tips along the way and would have loved to do more but time was not on my side.

You can see the rest of the talks and demos on the Adobe UK YouTube Playlist

Richard Curtis gave a great demo on the new features in Lightroom and Photoshop

Mike Watson passed on some of his Stock industry knowledge

Sophie Ebrard Talks about her amazing career journey
(NOTE: this link contains image that are NSFW – not safe for work viewing)

Bella Kotak shared some of here ethereal portrait work and how they are created.

Photojam-cover

My 2016 UK Photography Show Schedule

There’s just one week to go until The Photography Show opens its doors at the N.E.C. in Birmingham and this year my free demos are bigger and better then ever. Running from the 19th – 22nd March, it’s easily the UK’s biggest and busiest photography show with 30,000 amateur and professional photographers attending. It’s packed with a great mix of stands from the major photographic suppliers to the small independent retailers.

TPS2016

But this isn’t just another trade show, there’s also loads of things to see and do. There’s a constant stream of free demos and talks on various live stages and that’s on top of all the smaller demos on many of the booths dotted around the show.

I’ll be there for the whole four days giving various talks and demos on Photoshop, portrait lighting and photography. I’ll be dashing from demo to demo (see below) but if you’re coming along it would be great to meet you.

Saturday

11.15 am PiXAPRO E91 Small Space, Big Impact Lighting
12.30 pm Adobe Theatre Photoshop CC Hidden Gems
3.15 pm PiXAPRO E91 One Flash Lighting
4.30pm Olympus E31 Losing A Mirror But Finding Focus

Sunday

11.30 am TPS Live Stage Fearless Flash Photography
12.45 pm PiXAPRO E91 Small Space, Big Impact Lighting
2.00 pm Adobe Theatre Photoshop CC Hidden Gems
3.15  pm PiXAPRO E91 One Flash Lighting
5.00 pm TPS Behind the lens Snap Happiness (Talk)

 Monday

11.00 am Adobe Theatre Photoshop CC Hidden Gems
12.15 pm PiXAPRO E91 Small Space, Big Impact Lighting
2.15 pm PiXAPRO E91 One Flash Lighting
3.30 pm Adobe Theatre Photoshop CC for Photographers
5.30 pm TPS Networking Event Mega Mess Ups! (Talk)

 Tuesday

11:00 am Adobe theatre Photoshop CC Hidden Gems
12.15 pm PiXAPRO E91 Small Space, Big Impact Lighting
2.15 pm PiXAPRO E91 One Flash Lighting
3.30 pm Adobe Theatre Photoshop CC for Photographers

All my demos are free and available on a first come first served basis. There’s no need to book but as the Adobe theatre in particular has limited seating I’d recommend getting there early!

Show tickets are free for professional photographers and the trade (if booked in advance) and £13.95 for enthusiasts (£18.00 on the door)

Day to night in a flash

Shoots at night can yield some stunning photos but the lack of light has a bunch of problems that can easily trip you up… literately. However if you have a little bit of flash know how, it is possible to do a portrait shoot and make day turn to night in just a few steps. Here’s how I did it in four steps

Step 1 – Underexpose the ambient

Unless you live in the Polar regions night time is usually associated with a lack of light, so the first thing I had needed to do was convince my camera to see less light. One way to do this is by using exposure compensation and dialing in a negative amount but because I was going to use flash to light the model I took a different route.

Day-Night-1

Flash and Manual mode go hand in glove, so switching to manual is the way to go. After setting the aperture to f/4 and the ISO to 200 the correct shutter speed turned out to be a feeble 1/10th second. By halving the shutter speed to 1/20th I underexposed the ambient light by 1 stop. 1/40th second gave me another stop and finally 1/80th second underexposed by three stops and gave a shot that was dark but not black.

Step 2 – Set the flash

1/80th second gave a nice dark background but also underexposed the model, that’s where flash comes in. With the key light in place all I had to do was set my flash meter to match my camera (1/80th sec, 200 ISO) and adjust the flash power until I hit f/4 on the meter.

Day-Night-2

So now I’ve got the flash power to match my camera setting and giving a perfect exposure on the model, however the same camera settings are under exposing the background keeping it dark.

Once the key light was in I added a second light to separate the unlit side of the model from the dark background.

Step 3 – Moon light

Thanks to Hollywood we assume that the moon always comes out at night and it produces blue light. Of course neither is true but let the dream live I say. Turning the warm afternoon light blue is as simple as setting the wrong white balance. Switching to Tungsten or Incandescent white balance will do the job in camera or it can be changed in Lightroom / Photoshop Camera RAW.

Day-Night-3

The blue looks great on the background but a bit odd on the model, so to warm her up I added an orange gel to the main flash. There are gels marked as CTO (Colour Temperature Orange) which should perfectly balance out the white balance but I don’t have one.  Luckily Lightroom / Photoshop Camera RAW can easily fine tune the colours, especially if you do the same as me and shoot a gray card in the same light.

Step 4 – Moody Mist

This is the fun bit. Again I’ve got the movies to thank for this but adding a little bit of mist seems to sell us the whole night feeling. It also helps to cover up anything distracting in the background and by adding a third light right behind the model (and the smoke) adds a splash of light to an otherwise dark scene.

There are many ways to make smoke. Being a long way from a power supply I opted for smoke grenades. You’ll find them at your local paintball / airsoft park and whilst they’re not cheap, they do offer a safe and reliable source of smoke. I used two Enola Gaye smoke grenades which gave around 90 seconds of smoke each. Yes after all that setting up the whole shoot was over and done in under three minutes!

So there you have it, day to night is perfectly possible and whilst the results are very different from really shooting after dark, they look pretty darn good to me.

[youtube]https://www.youtube.com/watch?v=aGsQxXUEvc4[/youtube]

Curtain Action – Friday Freebie

It’s been a while since I’ve done a Friday freebie so lets put that right with a Photoshop action.

This Action creates a set of beautiful curtains in a theatrical style with a single click of your mouse. There’s four colours to choose from and it’s a brilliant way to frame your vintage style images. The curtains are created from scratch using standard Photoshop filters and effects and to add an extra touch of realism they have a ragged edge and a gentle bow.

Full download instructions are below but you can also Download the Curtain Action

Basic-Curtains

Once downloaded just unzip and install the action into Photoshop. Unfortunately this action is unsuitable for  Photoshop Elements

To use the action, start with the photo you wish to use already open in Photoshop and then play one of the four actions in this set. The first thing it does is make a copy of your photo so the original will be untouched and safe. There’s a lot of things for Photoshop to do with this action so it may take a minute or two to run through.
DO NOT switch to another image whilst running the action.

There are no options or controls for this action but at the end you may need to use Free Transform (CTRL+T) to re-size and re-positing your photo under the curtains

The action will work with Photoshop CC2014, CC, CS6, CS5 and CS4

If you create a photo using the Friday Freebie then let me (and everyone else) know by leaving the link in the comments below.

all-curtains

Usage rules
The action is copyright Gavin Hoey 2015. Use is limited to any personal but non-commercial purposes. Please share the Friday Freebie by linking back to this page. Do not redistribute the original image without my permission.

Download instructions

he direct link to download the actions is https://www.gavtrain.com/wp-content/uploads/2015/05/Cutains-Gavtrain.zip

You must UNZIP the action before installing it in Photoshop

No support is provided with the Friday Freebies. If you need help Google or YouTube the question and you’ll almost certainly find the answer :-)

My Photography Show 2015 Schedule

There’s only two weeks to go until The Photography Show opens its doors at the N.E.C. in Birmingham and I can’t wait. Running from the 21st – 24th March, it’s the UK’s biggest and busiest photography show and it’s packed to the roof with major photographic suppliers and small independent retailers.

TPS-LOGO

But this isn’t just another trade show, there’s also loads of things to see and do. There’s a constant stream of live demos and talks from some of the best photographers in the UK and beyond, there’s also hands on workshops and masterclasses.

I’ll be there for the whole four days giving various talks and demos on Photoshop, Lighting and Photography. If you’re coming along it would be great to meet you and the best place to find me is at one of my talks either in the Adobe theatre, the Guild of Photographers “speakers corner” or in the Behind the lens theatre.

Saturday

10.15 am Adobe theatre Video Editing In Photoshop
1.00 pm Behind the lens Take & Make Great Photos
2.30pm Guild of Photographers J75 Fearless Flash Photography
3.30 pm Adobe Theatre Make your photos look amazing with Photoshop

Sunday

10.15am Adobe theatre Video Editing In Photoshop
2.30 pm Guild of Photographers J75 Fearless Flash Photography
3.30 pm Adobe Theatre Make your photos look amazing with Photoshop

 Monday

10.15 am Adobe theatre Make your photos look amazing with Photoshop
12.30 pm Adobe theatre Hidden gems in Photoshop for photographers
2.30 pm Guild of Photographers J75 Fearless Flash Photography

 Tuesday

11:00 pm Adobe theatre Make your photos look amazing with Photoshop
1.15 pm Adobe theatre Hidden gems in Photoshop for photographers
2 pm Adobe theatre Video Editing In Photoshop
3 pm Guild of Photographers J75 Fearless Flash Photography

All my demos are free and available on a first come first served basis. There’s no need to book but as the Adobe theatre in particular has limited seating I’d recommend getting there early!

Show tickets are free for professional photographers and the trade (if booked in advance) and £13.95 for enthusiasts (£18.00 on the door)

Fractured Paint Brush – Friday Freebie

Back in 2011 I made a video on how to create a fractures or shattered image using Photoshop. I’ve added it to this post in case you missed it. To create the effect I made some fractured paint brushes which I uploaded to the Adobe Exchange website and shared for free. Three and a half years is a long time in the fast moving world of the internet and the Adobe Exchange (as I remember it) is no more, so I’m sharing them again here.

Spatter-copy

Full download instructions are below but you can also
Download the Paint Spatter brushes

Once downloaded just unzip and install the brushes into Photoshop or Photoshop Elements and your ready to go. The video below should give you some ideas of how to use the brushes.
[youtube]https://www.youtube.com/watch?v=JUjXJ5ZPO5M[/youtube]

If you create a photo using the Friday Freebie then let me (and everyone else) know by leaving the link in the comments below.

Usage rules
The brushes are copyright Gavin Hoey 2015. Use is limited to any personal but non-commercial purposes. Please share the Friday Freebie by linking back to this page. Do not redistribute the original image without my permission.

Download instructions
1. Click on the correct download link below (no sign up is needed)
https://drive.google.com/file/d/0B_Mmmm3K1utNcjlPYWRvekRYanc/view?usp=sharing

2. Click the Download button

3. The download should start automatically

4. No support is provided with the Friday Freebies. If you need help Google or YouTube the question and you’ll almost certainly find the answer :-)

Free Webinar This Thursday

If you’re around this Thursday 16th October 2014 at 7pm UK time, then I’d love it if you could join me for a one off exclusive webinar in association with Adobe UK.

The webinar is free but places are limited. All you need to do is register with this link:
https://ccppuk1.creativecloud.adobeevents.com

The title of my talk is “Editing your holiday snaps with Photoshop CC” and the title says it all. I’ll be going through some of the photos I’ve taken during 2014 and editing them in Photoshop CC. Along the way I’ll be passing on some tips and tricks as well as showing off a few of Photoshop’s smart new features.

I hope to see you there.

Adobe-Postcard-template

Using two lights – Home Studio Essentials – Part 5

There are many ways you can use a single flash to take great portraits but sooner or later the limitations of a single flash will be reached. Adding a second flash can be a great way to open up new and creative photo opportunities.

In this video I fire up a second light to act as a hair light and separate the model from a dark background. Then in the final shoot I add a few bubbles to create something a bit special.

[youtube]https://www.youtube.com/watch?v=FcQg0cBncHs&list=UU8Pksdbj37CdE00kmE7Z1dw[/youtube]

More lights means more complexity but my advice is to treat each light separately and meter accordingly. Turning them both on and trying to balance them at the same time sounds easier but trust me it’s not!

Bubbles-Studio

Gear used in this video (Links back to Adorama)

Flashpoint StreakLight 360 Ws Creative Collection (Includes flash, battery, trigger, boom etc)

Flashpoint Streaklight 180 WS

Westcott Apollo Orb Softbox

Canon 5D Mark 2 

Canon 24-105L