Adobe Photography Jam Re-Watch

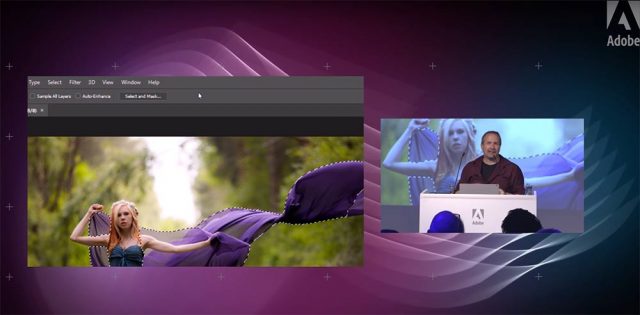
I love demoing photography and Photoshop to my fellow photographers, so when Adobe UK invited me to speak at their Photography Jam event in London, I jumped at the chance.

It was an amazing evening of photography education and inspiration. Adobe lined up some really great speakers and invited an audience of around 150 photographers. Despite it being a seriously hot room, the audience’s enthusiasm throughout the evening made the event come alive.

If you couldn’t be there Adobe UK have you covered with all of the talks and demos now available on re-watch including mine.

[youtube]https://www.youtube.com/watch?v=oVvRU78hqUc&index=4&list=PL5JIQFdhtvjb-8SU3lZPYdyy6C_s-_IxQ[/youtube]

I was given about 20 minutes to talk about the new features of Photoshop CC2015.5 (and CC2015) that I actually use day to day. I also threw in a few general Photoshop tips along the way and would have loved to do more but time was not on my side.

You can see the rest of the talks and demos on the Adobe UK YouTube Playlist

Richard Curtis gave a great demo on the new features in Lightroom and Photoshop

Mike Watson passed on some of his Stock industry knowledge

Sophie Ebrard Talks about her amazing career journey
(NOTE: this link contains image that are NSFW – not safe for work viewing)

Bella Kotak shared some of here ethereal portrait work and how they are created.

Photojam-cover

Free Webinar This Thursday

If you’re around this Thursday 16th October 2014 at 7pm UK time, then I’d love it if you could join me for a one off exclusive webinar in association with Adobe UK.

The webinar is free but places are limited. All you need to do is register with this link:
https://ccppuk1.creativecloud.adobeevents.com

The title of my talk is “Editing your holiday snaps with Photoshop CC” and the title says it all. I’ll be going through some of the photos I’ve taken during 2014 and editing them in Photoshop CC. Along the way I’ll be passing on some tips and tricks as well as showing off a few of Photoshop’s smart new features.

I hope to see you there.

Adobe-Postcard-template

Painted Corner Brushes – Friday Freebie

Here’s a painted border effect with a neat twist. First up these are paint brushes rather then a template and that means you can change the colour, opacity and use them with the Brush or Eraser tools. There’s four brushes in this set so you get one for each corners or mix and match to vary the effect.

You can download the brushes here: Painted Corners – GAVTRAIN

Painted-CornersThe brushes will work with all versions of Photoshop and Photoshop Elements however users of Photoshop CS6, CC and beyond will have the advantage of being able to increase the brush size to a maximum of 5000 pixels and getting bigger borders.

I’ve made a short video as a guide to installing the brushes and a few tips on how to use them. I hope it helps.

[youtube]https://www.youtube.com/watch?v=dkr4rmZef9E&feature=youtu.be[/youtube]

Usage rules
The brush set is copyright Gavin Hoey 2014. Use is limited to any personal, non-commercial purposes. Please share the Friday Freebie by linking back to this page. Do not redistribute the original action without my permission.

Download instructions
The direct link to download the actions is https://www.gavtrain.com/wp-content/uploads/2014/08/Painted-Corners-GAVTRAIN.zip

You must UNZIP the action before installing it in Photoshop / PS Elements

No support is provided with the Friday Freebies. If you need help Google or YouTube the question and you’ll almost certainly find the answer 🙂

Pile of Prints Action – Friday Freebie

Here’s a lovely little Photoshop action which produces a very pleasing effect, all with one click of the mouse. Back in the day I recall the joy and frustration of getting a pile of prints back from the developers and sorting them into a pile of keepers and a big pile of photos fit only for the bin.

You can download the action here: Pile of prints – gavtrain
Pile-Of-Prints-EXAMPLE

To use the action, start with the photo you wish to use already open in Photoshop and then play the action. The first thing it does is make a copy of your photo so the original will be untouched and safe. There’s a lot of things for Photoshop to do with this action so it may take a minute or two to run through. DO NOT switch to another image whilst running the action.

This action works best on landscape format images but will work on upright format photos too. As with most actions, the size of your image will effect the final effect and I’d suggest starting with a photo 3000 pixels (longest edge) or bigger.

The action will work with Photoshop CC, CS6, CS4, CS4, CS3 and should work with Photoshop Elements but I have yet to test that.

Usage rules
The action is copyright Gavin Hoey 2014. Use is limited to any personal, non-commercial purposes. Please share the Friday Freebie by linking back to this page. Do not redistribute the original action without my permission.

Download instructions
The direct link to download the actions is https://www.gavtrain.com/wp-content/uploads/2014/05/Pile-of-prints-gavtrain.zip

No support is provided with the Friday Freebies. If you need help Google or YouTube the question and you’ll almost certainly find the answer 🙂

Four Parts Action

The idea with this Friday Freebie is really simple, take one photo, cut it into four equal parts and give each bit a twist or two. Well that was my plan when I started making this action but I just had to go one step further. So not only do the four parts get a twist but I also added a slight bow and simple shadow to create a feeling of depth. The best part is, all this happens with just one click of the mouse.

You can download the action here: four-parts-gavtrain.zip
Four-Parts---Gavtrain

To use the action, start with the photo you wish to chop up already open in Photoshop and then play the action. The first thing it does is make a copy of your photo so the original will be untouched and safe. There’s a lot of things for Photoshop to do with this action so it may take a minute or two to run through. As with most actions, the size of your image will effect the final effect. The photo above was 3000 pixels on the long edge but you can go bigger or smaller if you wish. The main difference will be the border size, so I’ve left the layer styles open and you can alter the border (Stroke) thickness at the end if you wish.

The action will work with Photoshop CC, CS6, CS4, CS4 and CS3 but WILL NOT work  with any version of Elements, sorry.

Usage rules
The action is copyright Gavin Hoey 2014. Use is limited to any personal, non-commercial purposes. Please share the Friday Freebie by linking back to this page. Do not redistribute the original action without my permission.

Download instructions
The direct link to download the actions is https://www.gavtrain.com/wp-content/uploads/2014/04/four-parts-gavtrain.zip

No support is provided with the Friday Freebies. If you need help Google or YouTube the question and you’ll almost certainly find the answer 🙂

Heavy Painted Border

Steam-Train-Border-FFHere’s another amazing border from my recent painting session. This time I’ve gone for a border that surrounds your photo with a wide painted edge.

Full download instructions are below but you can also
Click Here To Download the Heavy Painted Border

I’ve designed this border so it can be used in two ways and it all depends on if you add your photo above or below the border.

Once you’ve downloaded it you’ll find I’ve removed the centre of the border image but left it transparent. S0 to make the image / border combo you see here all you do is drag your photo below the border layer in Photoshop. The centre area has a short fade so it blends in nicely with the photo.

The second option is to place your photo above the border layer. Doing that will give you a hard edge and you can decide how much of the border is seen.

You’ll need to resize your image or the border with Free Transform (CTRL+T). Use the corner handles to drag the image to the size you want and when done press Enter. The border will work with any photo although it’s especially good with black and white images.

If you create a photo using the Friday Freebie then let me (and everyone else) know by leaving the link in the comments below.

Usage rules
The image is copyright Gavin Hoey 2013. Use is limited to any personal but non-commercial purposes. Please share the Friday Freebie by linking back to this page. Do not redistribute the original image without my permission.

Download instructions

Click the link https://drive.google.com/file/d/0B_Mmmm3K1utNa19JQmtESDNVZjQ/view?usp=sharing
1. Click the Download button download_icon

2. The download should start automatically


Distressed Wood Frame

Distressed-Wood-Template-EGThis week’s Friday Freebie is a frame template that has a slightly dark, moody feel. The background is a sample of flooring bought from a DIY store. It has a wonderfully distressed and weathered look to it, making it the perfect compliment to everything from coastal scenes to urban decay. Once photographed and edited in RAW, I gave the final image a light texture effect using OnOne’s Perfect Photo Suite 8 beta, perfect for adding a touch of grunge!

Full download instructions are below but you can also
Click Here To Download the distressed wood frame

To use the Friday freebie download it and open it in Photoshop or Photoshop Elements, then open the photo you wish to add to the frame. Flatten any layers (Layer – Flatten Layers) and then press CTRL+A to select it all, followed by CTRL+C to copy. Jump over to the frame and press CTRL+V to paste the image on to the frame.

You’ll need to resize the image with Free Transform (CTRL+T). Use the corner handles to drag the image into the photo area and when done press Enter. Finally change the layer blending mode from Normal to Hard Light to blend the photo with the template.

If you create a photo using the Friday Freebie then let me (and everyone else) know by leaving the link in the comments below.

Usage rules
The image is copyright Gavin Hoey 2013. Use is limited to any personal, non-commercial purposes. Please share the Friday Freebie by linking back to this page. Do not redistribute the original image without my permission.

Download instructions
Click the link https://drive.google.com/file/d/0B_Mmmm3K1utNSnFEM1UwRjkxa3M/view?usp=sharing
1. Click the Download button download_icon

2. The download should start automatically


Faking into a sweat

So you want your model to look they’ve done a workout but you don’t have a gym in your studio. What do you do? Well you could send them out for a run or turn the heating up to max, both would work but neither is ideal.

In this video I’ll show you how to apply fake perspiration to a models face.

Now if you’re thinking that you can just spray water in their face, you’re wrong. Water alone doesn’t give beads of sweat, for that you need something more. A little olive oil applied to the forehead, cheeks and noise will make the world of difference and very convincing perspiration. For obvious reasons, don’t put oil close to the eyes.

The video doesn’t stop there. I also have some great lighting tips and I run through the Photoshop processing too.

[youtube]https://www.youtube.com/watch?v=_lyRzp8YEUc[/youtube]

Can’t see the video? Click Here http://youtu.be/_lyRzp8YEUc

Harry-2

Rounded Corner Border – Creative Lightroom Episode 6

cl-7-FINALThis weeks episode of Creative Lightroom has a super quick but very smart looking border effect.

Rounded rectangle borders like this look amazing not only on vintage and retro photos but are just great with any photo. Back when I started taking photos as a VERY young child all the prints would have rounded corners just like this.

In the video I show you just how quick this effect can be made, plus some variations on the look. OK I say variations but in reality you can have a black or white border that’s either soft or heard edged. You can also choose the roundness of the corners too.

To create this effect you’ll need either Lightroom 5, Lightroom 4 or Lightroom 3

In the video I mention my hand painted border effect from episode 2, which you can see here www.gavtrain.com/?p=3162

As always it’s worth mentioning that if you’re a Photoshop user rather then Lightroom user, EVERYTHING I show in the video is the same as Adobe Camera RAW in Photoshop CS6 and Photoshop CC. It’s also possible to pull off the same trick with older version of Photoshop from CS4 onwards.

[youtube]https://www.youtube.com/watch?v=8F_xj4NSb7Y[/youtube]

Can’t see the video? Click here: http://youtu.be/8F_xj4NSb7Y

Squared edged border action

Square-Edge-LargeThis weeks Friday Freebie is a work in progress from my next action set. The new set won’t be ready just yet but once completed it will be the successor to my hugely popular Amazing Borders Set 1.  A good border can really set off a photo but making an action that adds a reasonably border to pretty much any photo you can find is tougher then you might image!

You can download the action here:
Squared edged border action

This action makes a eroded edge border that has a blocky, square edge feel. Personally I blame Minecraft for making blocks fashionable once again 😉 The Action makes a copy of your photo so the original will be untouched. It also flattens the photo at the end, so if you wish to modify the border press CTRL+Z to undo that step.

The action will work with Photoshop CC, CS6, CS4, CS4, CS3, CS2 etc and will work with Elements11 and older versions, if you can jump through the hoops that older Elements put in place to add actions.

If you create a great photo with my action then feel free to link to it by leaving a comment below.

Usage rules
The action is copyright Gavin Hoey 2013. Use is limited to any personal, non-commercial purposes. Please share the Friday Freebie by linking back to this page. Do not redistribute the original action without my permission.

Download instructions
The direct link to download the actions is https://www.gavtrain.com/free/square-border-gavtrain.zip

No support is provided with the Friday Freebies. If you need help Google or YouTube the question and you’ll almost certainly find the answer 🙂