Perfect Photo Suite 8 First Look

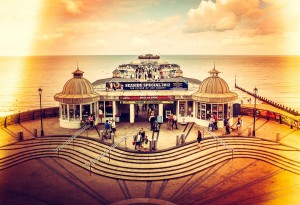
maldon-1There’s no shortage of plugins for Photoshop, Lightroom and Elements and many of them can really help get the most from your photos. For years I’ve been really happy with Nik Software and Color Efex Pro 4 has become a standard part of my workflow, I even did some webinars for them. The problem is, since Nik was sold to Google in late 2012 there’s been little news of upgrades, improvements or even minor tweeks and that’s a shame. At the moment it feels like Nik Software is just going to be left to fade away gracefully.

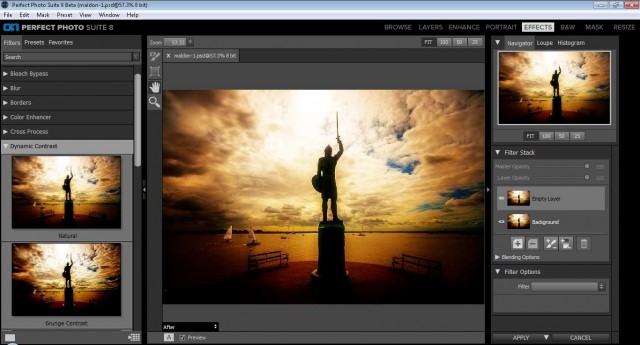
So I’ve been on the hunt for an alternative. Something that does the things I can’t do in Photoshop and makes it quick and easy too. Enter Perfect Photo Suite 8 from onOne software. You can download the free public beta here.

Alternatively if just want to dive in you can Pre-Order Perfect Photo Suite 8 here

I’ve been using the public beta version of Perfect Photo Suite 8 for the past few weeks and my inital reaction has been really positive. It does the things I do with Nik such as enhance detail in a way not possible with Photoshop and it has an excellent black and white conversion section. In fact because it’s a complete suite you could use it as a standalone photo editor or do as I do and use it as an extra add on to my Photoshop work. That does mean I don’t use modules that replicate what I would do in Photoshop but the Perfect Effects and Perfect B&W are getting plenty of use.

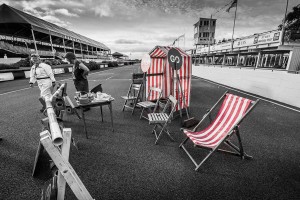
maldon-1-JPG-RAW

OnOne Software have just launched a free to try version of Perfect Photo Suite 8 Beta 2 so my advice is to download a copy and give it a spin. Do keep in mind that it is a Beta and that means they’ll be some bugs, not everything will be 100% working and the final version will be better.

I’d recommend jumping in and trying the Effects module first (File – Automate – Perfect Effects). The example above made use of the sunshine effect to add a warm glow to the image but the thing that caught my eye are the clarity style adjustments. Things Like HDR, Dark Contrasts and Dynamic Contrast are already shaping up to me some of my favourite features. There’s even an effect called Grunge… How can I resist that! All the effects come with a bunch of presets which are previewed on adjustable sized thumbnails. You can also take control with the sliders to create your own style and save it for future use.

If you do give it a go I’d be interested in hearing what you thought, especially if like me you’re a user of Nik.

PPS8-1


Vintage Camera Effect – Creative Lightroom Episode 10

CL-final-10In this weeks episode of Creative Lightroom I take at one of my favourite ways to give my images a retro look in Lightroom. Now I could probably do another 10 videos on all the different styles of vintage style post processing you can do in Lightroom ranging from the very subtle to the over the top effects. This one falls towards the middle of that list.

For me there are a few essential things that make a vintage camera style image. First it need a cross processed colour scheme, in other words the colour need to be just the right side of wrong. Next it needs to lack contrast and finally a spot of vignetting is a nice touch. This technique has all that and more.

As always it’s worth mentioning that if you’re a Photoshop user rather then Lightroom user, EVERYTHING I show in the video is the same as Adobe Camera RAW in Photoshop CC, CS6, CS5 and CS4.

[youtube]http://www.youtube.com/watch?v=oGAOqby364k[/youtube]

Can’t see the video? Click here: http://youtu.be/oGAOqby364k

Infrared Mono – Creative Lightroom Episode 9

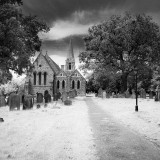
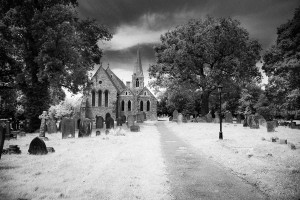
CL-final-9In this weeks episode of Creative Lightroom I take a deep dive into creating stylish infrared style images in Lightroom. I first made mono infrared images way back in my film days, back then it was a tricky business requiring the film to be loaded in complete darkness. Today things are a lot easier, espeically if you’ve had your camera converted to capture near IR.

This technique forms the basis of my favourite way to process ordinary colour photos into stylish mono. It also adds a touch of the classic IR film feel with a slight glow and a touch of grain.

As always it’s worth mentioning that if you’re a Photoshop user rather then Lightroom user, EVERYTHING I show in the video is the same as Adobe Camera RAW in Photoshop CC, CS6, CS5 and CS4.

[youtube]http://www.youtube.com/watch?v=c6_8AQaNhzs&feature=youtu.be[/youtube]

Can’t see the video? Click here: http://youtu.be/c6_8AQaNhzs

Colour Popping with Style – Creative Lightroom 8

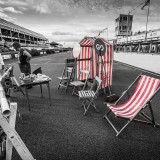
CL-final-8This weeks episode of Creative Lightroom is all about selective colour, also known as colour popping. Now before you say this is a repeat of Creative Lightroom Episode 3 then let’s be clear how this is different. In episode 3 we used selective saturation to leave just one tone of colour (just the reds for example). Colour popping is more about keeping one area in colour even if the area has a mixed bunch of tones.

Where most photographers fail in this technique is by leaving the colours over saturated. That may be OK with a single colour but with mixed colours the end result can be very jarring on the eye.

So in this video I’ll show both how to colour pop and then how to control the popped colours,

As always it’s worth mentioning that if you’re a Photoshop user rather then Lightroom user, EVERYTHING I show in the video is the same as Adobe Camera RAW in Photoshop CC, CS6, CS5 and CS4.

[youtube]http://www.youtube.com/watch?v=ODidMT5Lm6g[/youtube]

Can’t see the video? Click here: http://youtu.be/ODidMT5Lm6g

Rounded Corner Border – Creative Lightroom Episode 6

cl-7-FINALThis weeks episode of Creative Lightroom has a super quick but very smart looking border effect.

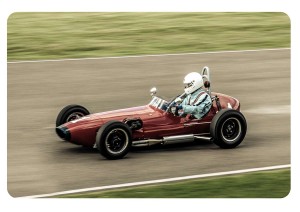
Rounded rectangle borders like this look amazing not only on vintage and retro photos but are just great with any photo. Back when I started taking photos as a VERY young child all the prints would have rounded corners just like this.

In the video I show you just how quick this effect can be made, plus some variations on the look. OK I say variations but in reality you can have a black or white border that’s either soft or heard edged. You can also choose the roundness of the corners too.

To create this effect you’ll need either Lightroom 5, Lightroom 4 or Lightroom 3

In the video I mention my hand painted border effect from episode 2, which you can see here www.gavtrain.com/?p=3162

As always it’s worth mentioning that if you’re a Photoshop user rather then Lightroom user, EVERYTHING I show in the video is the same as Adobe Camera RAW in Photoshop CS6 and Photoshop CC. It’s also possible to pull off the same trick with older version of Photoshop from CS4 onwards.

[youtube]https://www.youtube.com/watch?v=8F_xj4NSb7Y[/youtube]

Can’t see the video? Click here: http://youtu.be/8F_xj4NSb7Y

Pseudo HDR – Creative Lightroom Episode 5

CL-final-5Creative Lightroom has new reached episode 5, the half way point. In this weeks episode I’ve got a quick Lightroom trick which gives your photos a little bit of HDR magic.

When I say HDR don’t think for a second that this is a replacement to the traditional HDR technique of taking multiple images and merging the exposure together in Photoshop, Photomatix or Nik HDR Pro. No what it does is to pull the maximum detail from the shadows and highlights from a single image.

By far the best photos to play with are RAW files that are correctly exposed or a bit underexposed.

To fully pull off this effect you’ll need Lightroom 5 or Lightroom 4.

As always it’s worth mentioning that if you’re a Photoshop user rather then Lightroom user, EVERYTHING I show in the video is the same as Adobe Camera RAW in Photoshop CS6 and Photoshop CC. It’s also possible to pull off the same trick with Elements 11 (but not the vignette in RAW)

[youtube]http://www.youtube.com/watch?v=NJvQWenordQ[/youtube]

Can’t see the video? Click here: http://youtu.be/NJvQWenordQ

Two Curves Tricks – Creative Lightroom Episode 4

CL-final-4-1000In the fourth episode of Creative Lightroom, I have not one but two creative techniques and both of them involve using Curves.

You can still catch the first three episodes here
episode 1, Light leak effect
episode 2, Painted border
episode 3, Selective colour

The two effects couldn’t be more different even though the same tool is used to make them. The first technique is a very gritty posterization effect which looks amazing on the right image. The second effect is perfect for anyone who scans or copies old negatives and wants to make them back into a positive.

As always it’s worth mentioning that if you’re a Photoshop user rather then Lightroom user then remember EVERYTHING I show in the video is the same as Adobe Camera RAW in Photoshop CS3, CS4, Cs5, CS6 and Photoshop CC.

[youtube]http://www.youtube.com/watch?v=IsDg8EV-Byw[/youtube]

Can’t see the video? Click here: http://youtu.be/IsDg8EV-Byw

UPDATE
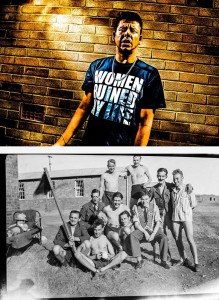
Lots of you have been guessing which of the men in the old photo is my Grandad. The answer is he’s the tallest one, in the middle holding his trademark pipe. As for the question of why the guy on thr right is without trousers, I’m not 100% sure. It’s probably a combination of the heat (they were in South Africa) and being taken in 1943, there was a war on!

Just one colour – Creative Lightroom Episode 3

CL-final-3-1200pxIn the third episode of Creative Lightroom, I have a very quick trick for reducing the number of colour tone ranges in your image to just one.

This is a really quick and simple technique that works with all versions of Lightroom including the latest and greatest version, Lightroom 5.

In the video I show you how to remove almost all the colour and leave just the reds in an image but you can just as easily leave blues, yellows or greens. I then go on to show you how to quickly tidy up any stray colour areas with the adjustment brush.

It’s worth mentioning that if you’re a Photoshop user rather then Lightroom user then remember EVERYTHING I show in the video is the same as Adobe Camera RAW in Photoshop CS3, CS4, Cs5, CS6 and Photoshop CC.

[youtube]http://www.youtube.com/watch?v=wr6fSZY57R0&feature=youtu.be[/youtube]

Can’t see the video? Click here: http://youtu.be/wr6fSZY57R0

Painted Border – Creative Lightroom Episode 2

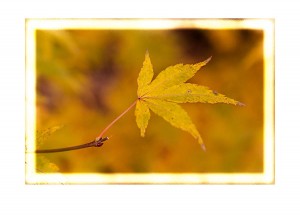
2-Painted-BorderIn the second episode of Creative Lightroom, I have a great border technique which looks amazing especially on pictures with smooth tones at the edges. That means it’s perfect on pictures with blue skies or defocused backgrounds… just like this one.

This is a really quick and simple technique that works with all versions of Lightroom including the latest and greatest version, Lightroom 5.

At the end of the video where I show a quick way to increse the white space around the outside in the Print module but watch carefully, blink and you’ll miss it.

It’s worth mentioning that if you’re a Photoshop user rather then Lightroom user then remember EVERYTHING I show in the video is the same as Adobe Camera RAW in Photoshop CS4, Cs5, CS6 and Photoshop CC.

[youtube]http://www.youtube.com/watch?v=CcfYL-sUDFI[/youtube]

Can’t see the video? Click here: http://www.youtube.com/watch?v=CcfYL-sUDFI

Light Leak Effect – Creative Lightroom Episode 1

CL-final001In the first episode of Creative Lightroom, my new 10 week series, I have a great light leak technique which looks amazing on vintage and retro styled images.

Light leaks were origianlly a problem that affected film cameras and often resulted in a ruined photo. On the rare occasion a light leak would occur which actually enhanced the photo. Using Lightroom it’s very easy to choose which photos would benefit from a light leak and how big it needs to be. On the right photo light leaks will look amazing.

It’s worth mentioning that if you’re a Photoshop user rather then Lightroom user then remember EVERYTHING I show in the video is the same as Adobe Camera RAW in Photoshop CS6 and Photoshop CC.

[youtube]http://www.youtube.com/watch?v=YQzIgb9G6Bs[/youtube]