Rainy Portraits in the Studio

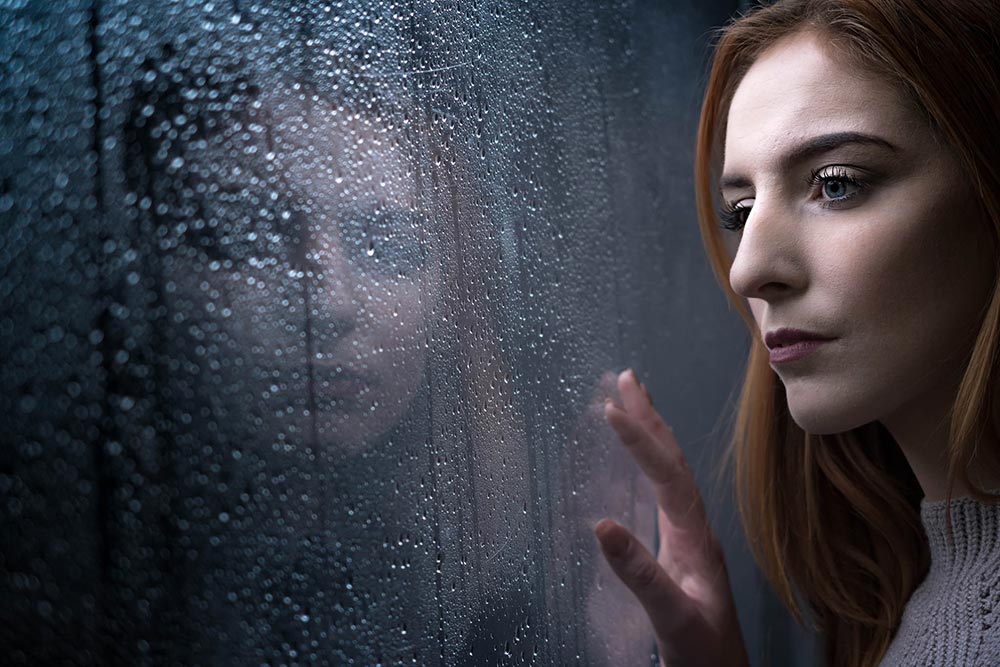
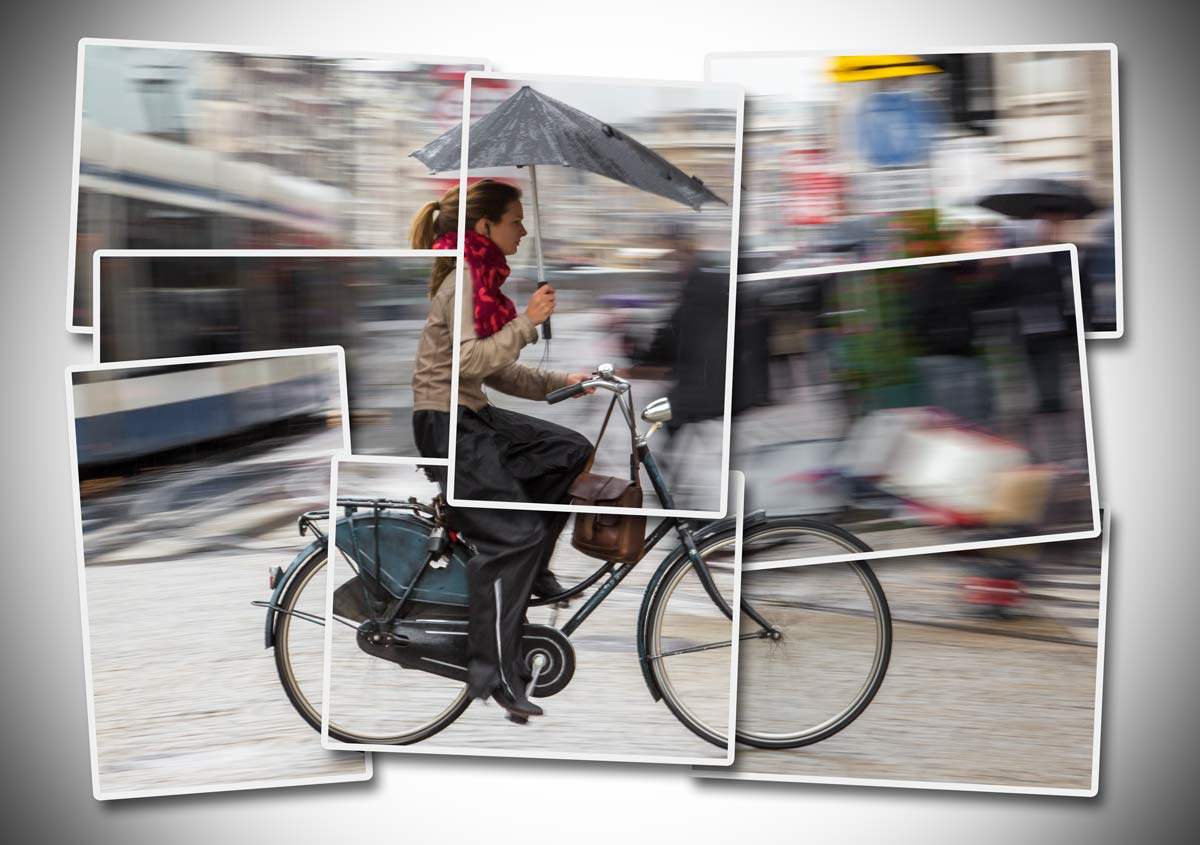
Rainy days aren’t always the easiest days to get great photos for a whole bunch of reasons but with a bit of effort and a lot of luck, you can get amazing photos.

However if getting wet isn’t your thing, it’s surprisingly simple to bring the rainy weather inside and under your control.

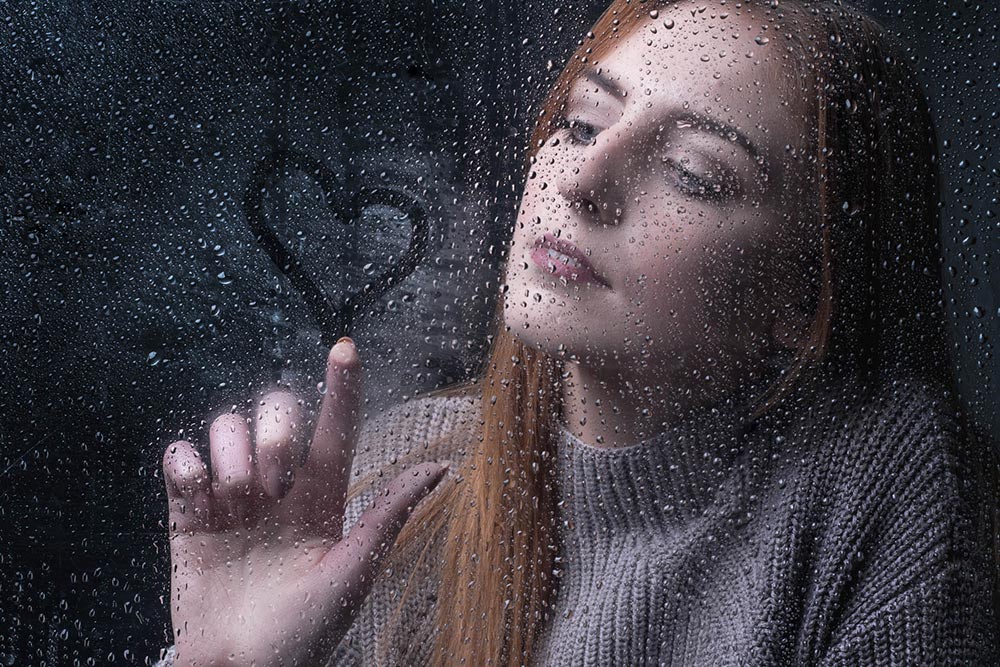
In the video below I’ll show you how you can create a rainy day window portrait using a couple of flashes and some simple props.

[youtube]https://www.youtube.com/watch?v=L4USUxcL49A[/youtube]

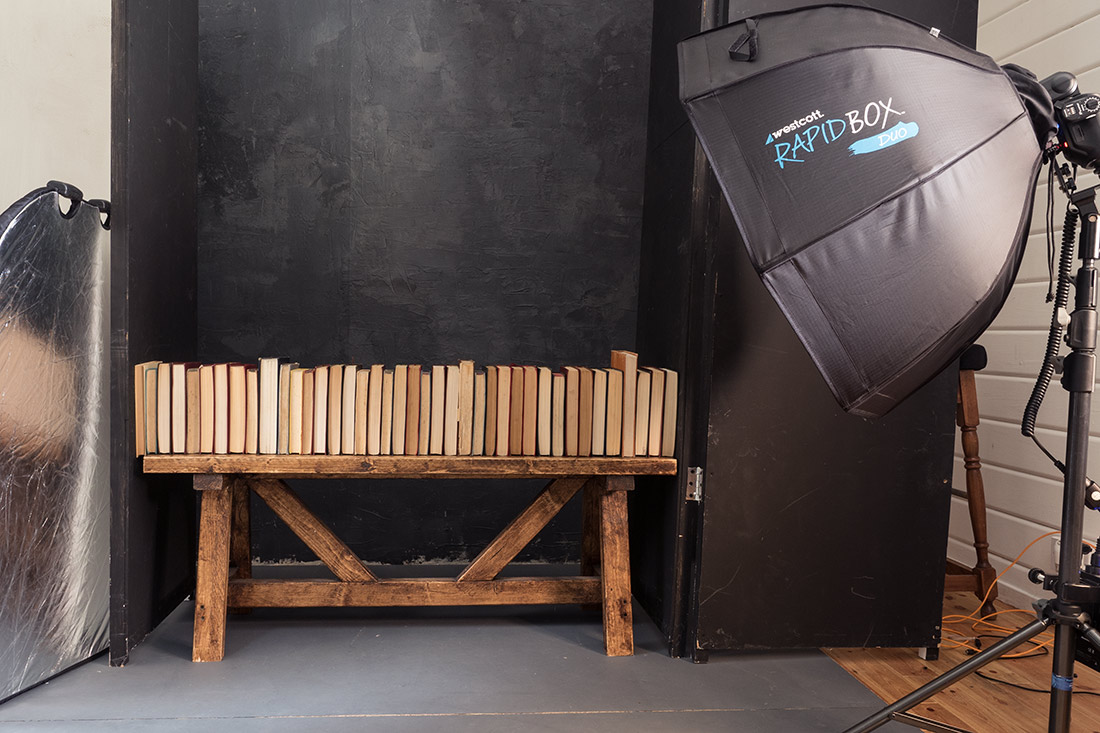
The main thing you’ll need is a “window” and although you could use a real one I opted for a sheet of clear Perspex (also called Plexiglas or clear Acrylic). I’ve had my sheet for many years and it’s very scratched but still serviceable. www.wickes.co.uk/Wickes-Durable-Acrylic-Sheet-90cmx1-8m/p/210002

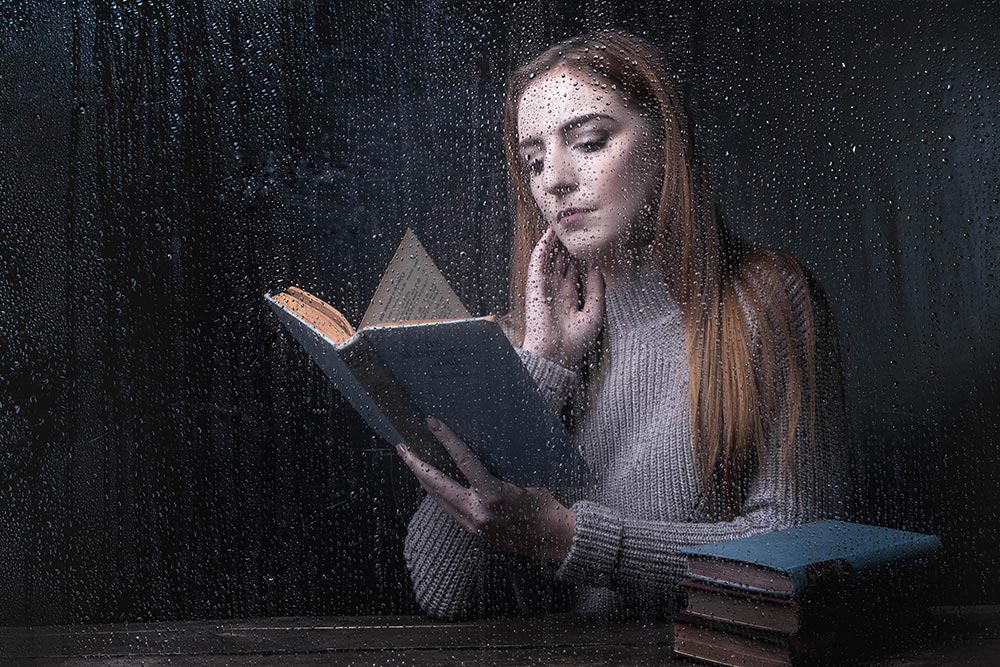
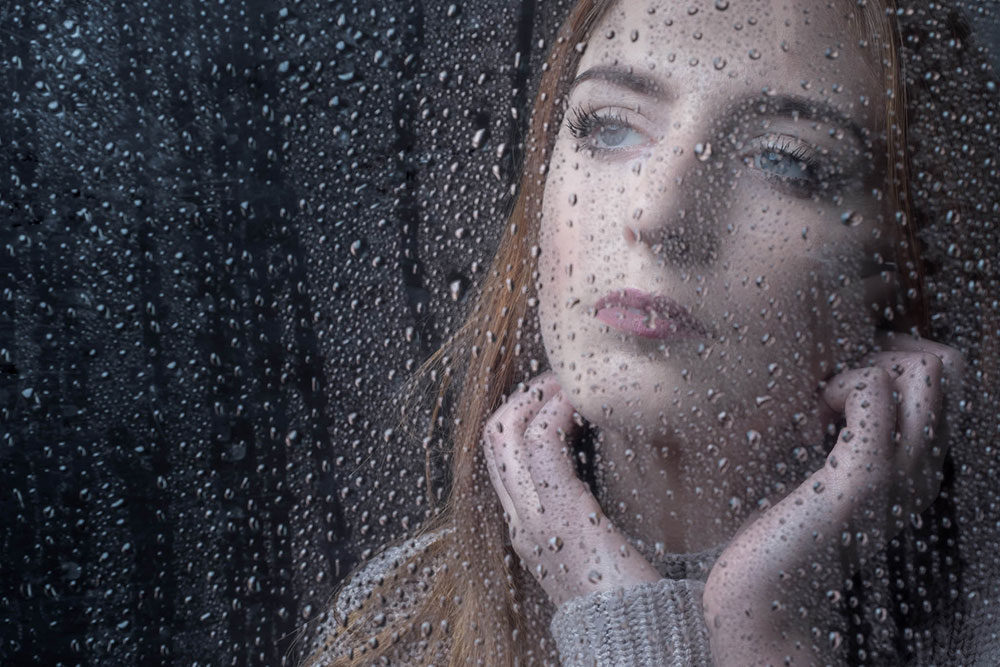
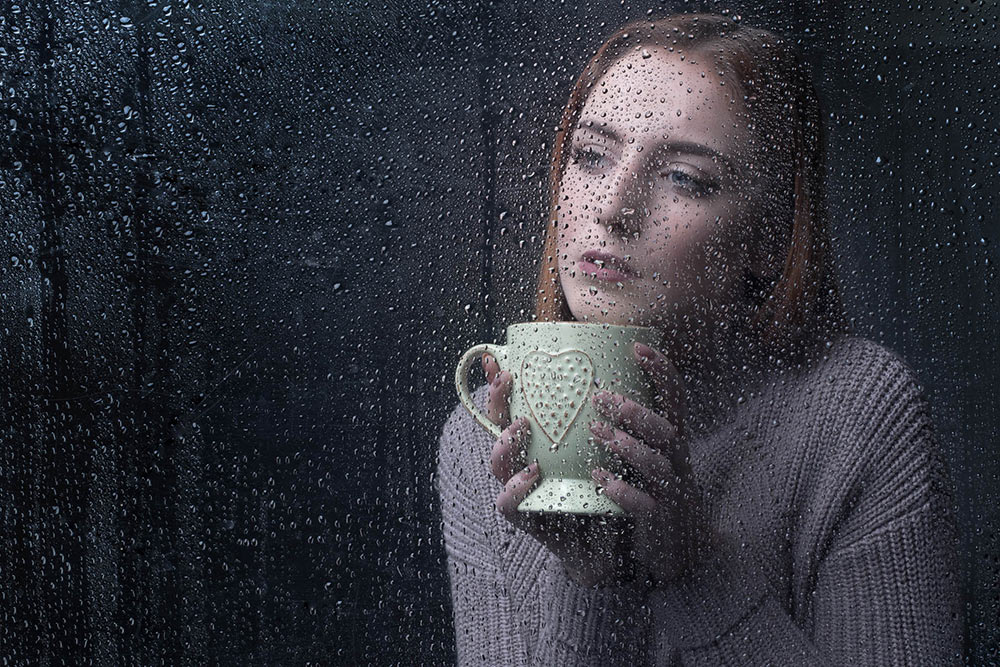
The video has two ways of using the “window”, shooting looking from the outside in and shooting from the inside, out. Both have their own unique feel and if you’re set for one, doing the other is quick and easy.

If you tried the technique yourself, do leave me a comment below and share your photo if it’s online somewhere.

It’s always a pleasure to have Beth Smith model for me. Check out her portfolio at https://purpleport.com/portfolio/bethsmithmodel/

Vintage Bookshelf – Friday Freebie


Recently IBook-Background-GAVTRAIN did a shoot which required a background made up of vintage books (video coming soon) and as luck would have it, I found 40 old books at a local boot sale for a bargain price. The books looked brilliant in the shoot but at the end of it I was left with a box full of slightly damaged Reader Digest books which I no longer needed.

So what do you do with 40 unloved books? Well the answer is obvious. I made them into a Friday Freebie to share on my blog. The more eagle eyed will notice there’s a few more books here than the 40 I started out with. You can thank the, magic of Photoshop for that.

You can download the book background here:
https://drive.google.com/file/d/0B_Mmmm3K1utNeVFyV0s4WUo0aVE/view?usp=sharing

This isn’t a template or a texture, it’s a stock image for you to use as you see fit (subject to the usage rules below).

BTS-Books-FF

As you can see from the behind the scenes shot above, I shot the books on a wooden bench in my studio. I then randomised the book order a couple of times and took some more shots. In Photoshop I did a quick cut and paste job to create the illusion of book case stacked high with books. You’ll also notice that you only see the pages of the book and not the spine. That’s a deliberate choice on my part for a couple of reasons but mostly because the pages are the bit with all the texture.

If you create a photo using the Friday Freebie then let me (and everyone else) know by leaving the link in the comments below.

Usage rules
The image is copyright Gavin Hoey 2016. Use is limited to any personal but non-commercial purposes. Please share the Friday Freebie by linking back to this page. Do not redistribute the original image without my permission.

Download instructions
1. Click on the correct download link below (no sign up is needed)
https://drive.google.com/file/d/0B_Mmmm3K1utNeVFyV0s4WUo0aVE/view?usp=sharing

  1. Click the Download button download_icon
  2. The download should start automatically
  3. No support is provided with the Friday Freebies. If you need help Google or YouTube the question and you’ll almost certainly find the answer

Bokeh Background – Friday Freebie

At this time of year there’s the potential for bokeh shots all over the place. With the right lens, twinkling Christmas lights can make great bokeh photos and that’s exactly what I used to create this Friday Freebie background / texture.

Bokeh-SNOWQUEEN-SAMPLE

Full download instructions are below but you can also
Download the Bokeh Background Here

Once downloaded just open the bokeh image and your photo. Copy and paste the bokeh onto your photo and use Free Transform (CTRL+T) to make the bokeh fill the image. Next you’ll need to blend the two images together. For this shot I changed the Layer Blending Mode from Normal to Screen but as all the blending modes create a different look try them all.

The bokeh will most likely need masking or erasing away to reveal your main subject. Another thing to try is duplicating the bokeh layer to deepen the effect.


Bokeh-SNOWQUEEN-B4

If you create a photo using the Friday Freebie then let me (and everyone else) know by leaving the link in the comments below.

Usage rules
The image is copyright Gavin Hoey 2014. Use is limited to any personal but non-commercial purposes. Please share the Friday Freebie by linking back to this page. Do not redistribute the original image without my permission.

Download instructions
1. Click on the correct download link below (no sign up is needed)
https://drive.google.com/open?id=0B_Mmmm3K1utNZHVCSldJS2REMzQ&authuser=0

2. Click the Download button download_icon

3. The download should start automatically

4. No support is provided with the Friday Freebies. If you need help Google or YouTube the question and you’ll almost certainly find the answer :-)

Home Studio Essentials Episodes 1-10

If you’ve been watching my recent videos over on Adorama TV you’ll have noticed a pattern forming. Over the past months the majority of the videos have focused on shooting with flash in a small, home studio and judging by the feedback it seems to have gone down very well indeed. I think part of the reason for their popularity is the way each video builds on the previous skills learned, at least that was the idea I had when I originally planned them.

HSE-MontageGear is always a big part of photography but none of the videos need a specific brand of equipment to complete. I used my trusty Canon 5D2 and 24-105mm lens. My flash gear is supplied by Adorama and is their amazing Streaklight flashes. If you want to know more then you can read my review.

To save you digging through my blog / YouTube to find them all I’ve added them all here.

Episode1: One bare flash
[youtube]http://youtu.be/hR4DW7dXOsk[/youtube]

Episode 2: One flash with an umbrella
[youtube]https://www.youtube.com/watch?v=ur58XNQwMXA&list=PL821B7D720DEA39FA&index=11[/youtube]
Episode 3:One flash and a softbox
[youtube]https://www.youtube.com/watch?v=z0MTQFYnvQA&list=PL821B7D720DEA39FA&index=10[/youtube] 
Episode 4: One flash and a reflector
[youtube]https://www.youtube.com/watch?v=TYQh9MNC3Is&list=PL821B7D720DEA39FA&index=9[/youtube] 
Episode 5: Adding a second light
[youtube]https://www.youtube.com/watch?v=FcQg0cBncHs&list=PL821B7D720DEA39FA&index=7[/youtube] 
Episode 6: Using honeycomb grids
[youtube]https://www.youtube.com/watch?v=K-C9xgTCLfM&list=PL821B7D720DEA39FA&index=6[/youtube] 
Episode 7: Using coloured gels
[youtube]https://www.youtube.com/watch?v=sR0wu9Sy6GM&list=PL821B7D720DEA39FA&index=5[/youtube] 
Episode 8: Getting a white background
[youtube]https://www.youtube.com/watch?v=RP4IixDOP5M&list=PL821B7D720DEA39FA&index=4[/youtube] 
Episode 9: Softbox as a white background
[youtube]https://www.youtube.com/watch?v=wy0VZEhwtSU&list=PL821B7D720DEA39FA&index=3[/youtube] 
Episode 10: Hair / seperation light
[youtube]https://www.youtube.com/watch?v=PaDUIqdQpPM&list=PL821B7D720DEA39FA&index=2[/youtube] 

Jigsaw Puzzle – Friday Freebie

Going through some old toys the other day I found this giant kids jigsaw puzzle and instantly thought “Friday Freebie”. It’s officially a 28 piece Spot the Dog jigsaw but you can thank my daughter for putting it together upside down, which is trickier to do then you might think.

Full download instructions are below but you can also Click Here To Download Jigsaw Puzzle

JIGSAW-FF-GAVTRAIN-FEATURED
This puzzle effect works best when blended with photos that have plenty of light colours, so that’ll be skies or in this case a light coloured wall. In the photo above I used the Overlay blending mode but you can get great results with many others too. Just try them all and see what works.

After resizing (CTRL+T) your photo to fit as best you can, I’d suggest making a quick and rough rectangular selection of the puzzle and masking or erasing and excess photo away.

As always, if you create a photo using the Friday Freebie then let me (and everyone else) know by leaving the link in the comments below.

Usage rules
The image is copyright Gavin Hoey 2014. Use is limited to any personal but non-commercial purposes. Please share the Friday Freebie by linking back to this page. Do not redistribute the original image without my permission.

Download instructions
Click the link https://www.dropbox.com/s/4rlc9tm6v738n74/JIGSAW-FF-GAVTRAIN.zip to take you to the Dropbox download page (no sign up is needed)

1. Click the Download button

2. Save the template to your hard drive

3. Unzip the file

4. Open in Photoshop or Photoshop Elements

5. Paste on to your photo

6. Resize (CTRL+T) and change the Layer Blending mode as needed.

No support is provided with the Friday Freebies. If you need help Google or YouTube the question and you’ll almost certainly find the answer :-)

Instant Photo Collage Action – Friday Freebie

It’s a case of two for the price of one with this Friday freebie Photoshop action as I’ve recorded a version for portrait (upright) and landscape (wide) format images. This action is an extension of the four part split action I made a few weeks back and generates a collage of small scattered prints from one single photo. There’s also the option at slightly alter the exposure of each print which really adds to the effect.

You can download the action here: photo-collage-gavtrain
FF-Photo-Collage-Final

To use the action, start with the photo you wish to use already open in Photoshop and then play the landscape or portrait version of the action as appropriate. The first thing it does is make a copy of your photo so the original will be untouched and safe. There’s a lot of things for Photoshop to do with this action so it may take a minute or two to run through. DO NOT switch to another image whilst running the action.

Towards the end of the action you’ll be given the option to automatically adjust the exposure of each print, it’s a subtle effect but well worth doing. After the action is run you’ll notice plenty of layers which I’ve left so you can move, alter and tweak to vary the effect to your taste.

As with most actions, the size of your image will effect the final effect small images (less pixels) will get a bigger border and wider shadow although these settings can always be adjusted after the action has completed.

The action will work with Photoshop CC, CS6, CS4, CS4, CS3 and should work with Photoshop Elements 11 and beyond too.

Usage rules
The action is copyright Gavin Hoey 2014. Use is limited to any personal, non-commercial purposes. Please share the Friday Freebie by linking back to this page. Do not redistribute the original action without my permission.

Download instructions
The direct link to download the actions is https://www.gavtrain.com/wp-content/uploads/2014/06/photo-collage-gavtrain.zip

You must UNZIP the action before installing it in Photoshop / PS Elements

No support is provided with the Friday Freebies. If you need help Google or YouTube the question and you’ll almost certainly find the answer 🙂

Four Parts Action

The idea with this Friday Freebie is really simple, take one photo, cut it into four equal parts and give each bit a twist or two. Well that was my plan when I started making this action but I just had to go one step further. So not only do the four parts get a twist but I also added a slight bow and simple shadow to create a feeling of depth. The best part is, all this happens with just one click of the mouse.

You can download the action here: four-parts-gavtrain.zip
Four-Parts---Gavtrain

To use the action, start with the photo you wish to chop up already open in Photoshop and then play the action. The first thing it does is make a copy of your photo so the original will be untouched and safe. There’s a lot of things for Photoshop to do with this action so it may take a minute or two to run through. As with most actions, the size of your image will effect the final effect. The photo above was 3000 pixels on the long edge but you can go bigger or smaller if you wish. The main difference will be the border size, so I’ve left the layer styles open and you can alter the border (Stroke) thickness at the end if you wish.

The action will work with Photoshop CC, CS6, CS4, CS4 and CS3 but WILL NOT work  with any version of Elements, sorry.

Usage rules
The action is copyright Gavin Hoey 2014. Use is limited to any personal, non-commercial purposes. Please share the Friday Freebie by linking back to this page. Do not redistribute the original action without my permission.

Download instructions
The direct link to download the actions is https://www.gavtrain.com/wp-content/uploads/2014/04/four-parts-gavtrain.zip

No support is provided with the Friday Freebies. If you need help Google or YouTube the question and you’ll almost certainly find the answer 🙂

Perfect Photo Suite 8 First Look

maldon-1There’s no shortage of plugins for Photoshop, Lightroom and Elements and many of them can really help get the most from your photos. For years I’ve been really happy with Nik Software and Color Efex Pro 4 has become a standard part of my workflow, I even did some webinars for them. The problem is, since Nik was sold to Google in late 2012 there’s been little news of upgrades, improvements or even minor tweeks and that’s a shame. At the moment it feels like Nik Software is just going to be left to fade away gracefully.

So I’ve been on the hunt for an alternative. Something that does the things I can’t do in Photoshop and makes it quick and easy too. Enter Perfect Photo Suite 8 from onOne software. You can download the free public beta here.

Alternatively if just want to dive in you can Pre-Order Perfect Photo Suite 8 here

I’ve been using the public beta version of Perfect Photo Suite 8 for the past few weeks and my inital reaction has been really positive. It does the things I do with Nik such as enhance detail in a way not possible with Photoshop and it has an excellent black and white conversion section. In fact because it’s a complete suite you could use it as a standalone photo editor or do as I do and use it as an extra add on to my Photoshop work. That does mean I don’t use modules that replicate what I would do in Photoshop but the Perfect Effects and Perfect B&W are getting plenty of use.

maldon-1-JPG-RAW

OnOne Software have just launched a free to try version of Perfect Photo Suite 8 Beta 2 so my advice is to download a copy and give it a spin. Do keep in mind that it is a Beta and that means they’ll be some bugs, not everything will be 100% working and the final version will be better.

I’d recommend jumping in and trying the Effects module first (File – Automate – Perfect Effects). The example above made use of the sunshine effect to add a warm glow to the image but the thing that caught my eye are the clarity style adjustments. Things Like HDR, Dark Contrasts and Dynamic Contrast are already shaping up to me some of my favourite features. There’s even an effect called Grunge… How can I resist that! All the effects come with a bunch of presets which are previewed on adjustable sized thumbnails. You can also take control with the sliders to create your own style and save it for future use.

If you do give it a go I’d be interested in hearing what you thought, especially if like me you’re a user of Nik.

PPS8-1


Distressed Wood Frame

Distressed-Wood-Template-EGThis week’s Friday Freebie is a frame template that has a slightly dark, moody feel. The background is a sample of flooring bought from a DIY store. It has a wonderfully distressed and weathered look to it, making it the perfect compliment to everything from coastal scenes to urban decay. Once photographed and edited in RAW, I gave the final image a light texture effect using OnOne’s Perfect Photo Suite 8 beta, perfect for adding a touch of grunge!

Full download instructions are below but you can also
Click Here To Download the distressed wood frame

To use the Friday freebie download it and open it in Photoshop or Photoshop Elements, then open the photo you wish to add to the frame. Flatten any layers (Layer – Flatten Layers) and then press CTRL+A to select it all, followed by CTRL+C to copy. Jump over to the frame and press CTRL+V to paste the image on to the frame.

You’ll need to resize the image with Free Transform (CTRL+T). Use the corner handles to drag the image into the photo area and when done press Enter. Finally change the layer blending mode from Normal to Hard Light to blend the photo with the template.

If you create a photo using the Friday Freebie then let me (and everyone else) know by leaving the link in the comments below.

Usage rules
The image is copyright Gavin Hoey 2013. Use is limited to any personal, non-commercial purposes. Please share the Friday Freebie by linking back to this page. Do not redistribute the original image without my permission.

Download instructions
Click the link https://drive.google.com/file/d/0B_Mmmm3K1utNSnFEM1UwRjkxa3M/view?usp=sharing
1. Click the Download button download_icon

2. The download should start automatically


Vintage Border and Texture

FILM-EDGE+FINALThis week’s Friday Freebie is a vintage border and texture combined into one. It’s a warm tone texture that combines staining and aging with a custom made distressed black edged border. The texture is actually the inside leaf of a very old and rather battered book that Sam picked up at a boot sale. All the blank pages have this amazing textured appearance and I’ll be sharing more of them as Friday freebies soon.

Full download instructions are below but you can also
Click Here To Download the vintage border & texture

As with all textures it works best with photos that have large areas of bright tones such as this one which has loads of bright sky. All you need to do is paste the texture above your photo and set the blending mode. There are loads of different layer blending modes and they’ll all give a different look but I’d suggest Multiply as the best mode to try first.

This is a fairly dark texture and the Multiply blending mode will also make the image less bright. Once you’ve added the texture I’d suggest adding a Levels adjustment layer to either your photo or at the top of the layer stack and moving the middle levels slider to adjust the overall brightness… if required.

If you create a photo using the Friday Freebie then let me (and everyone else) know by leaving the link in the comments below.

Usage rules
The image is copyright Gavin Hoey 2013. Use is limited to any personal, non-commercial purposes. Please share the Friday Freebie by linking back to this page. Do not redistribute the original image without my permission.

Download instructions
Click the link https://drive.google.com/file/d/0B_Mmmm3K1utNaTlfSUdvSjB1b0U/view?usp=sharing

1. Click the Download button download_icon

2. The download should start automatically