Painted Corner Brushes – Friday Freebie

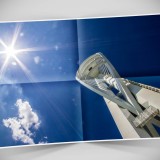
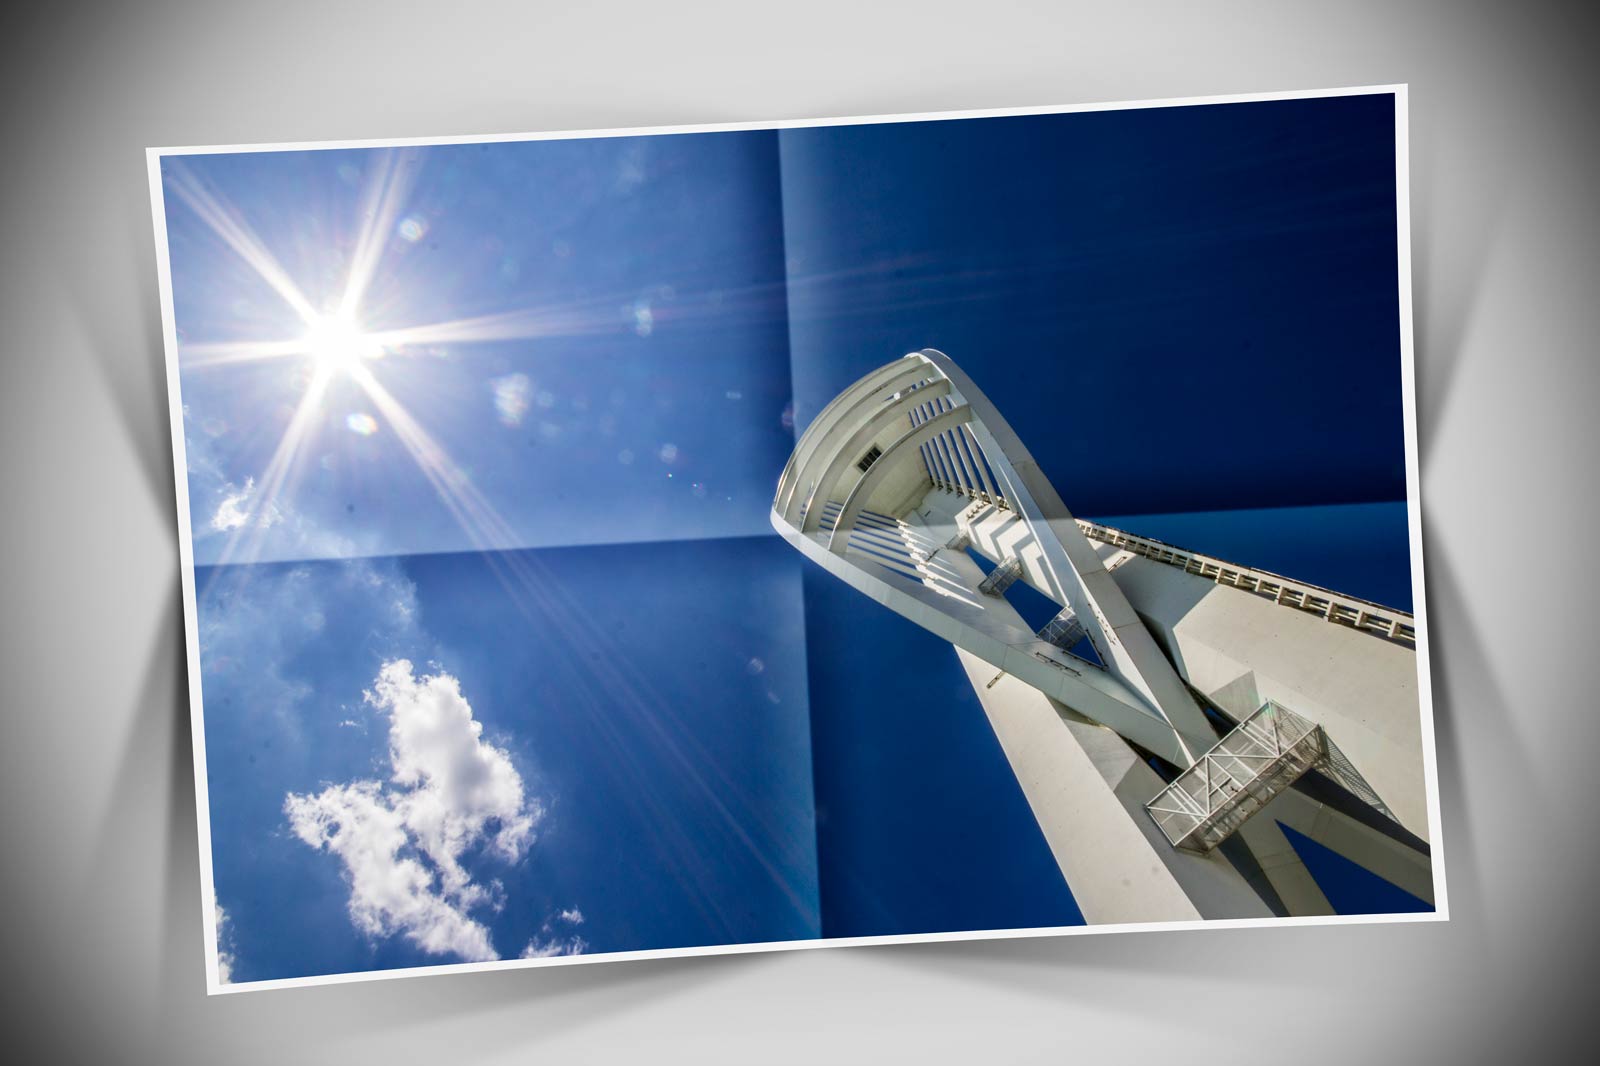
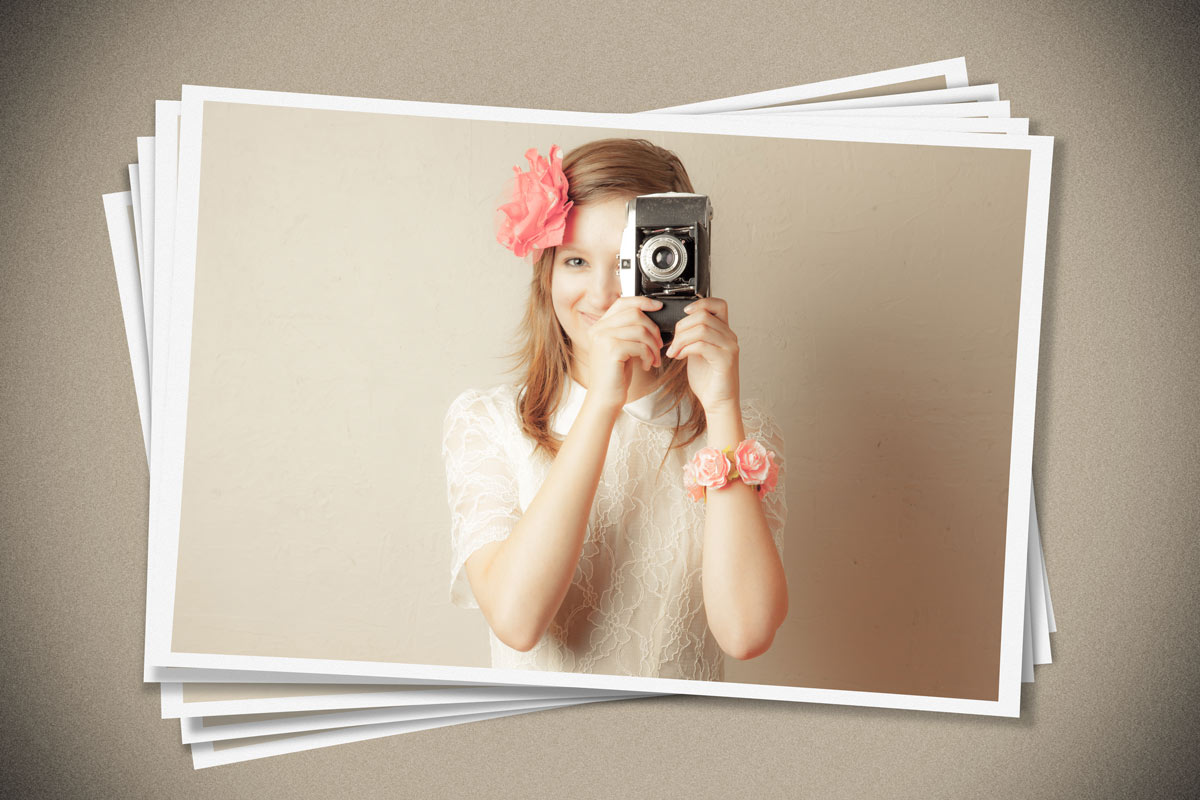
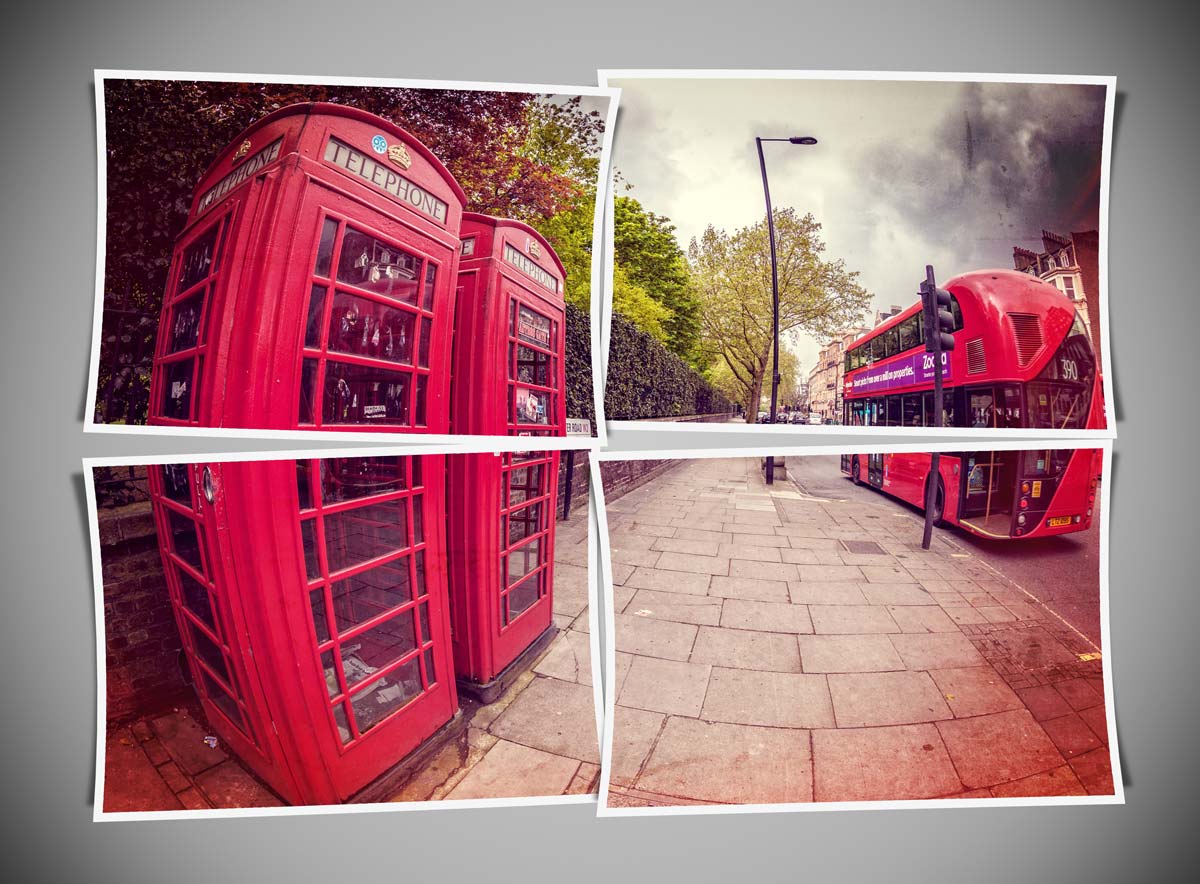
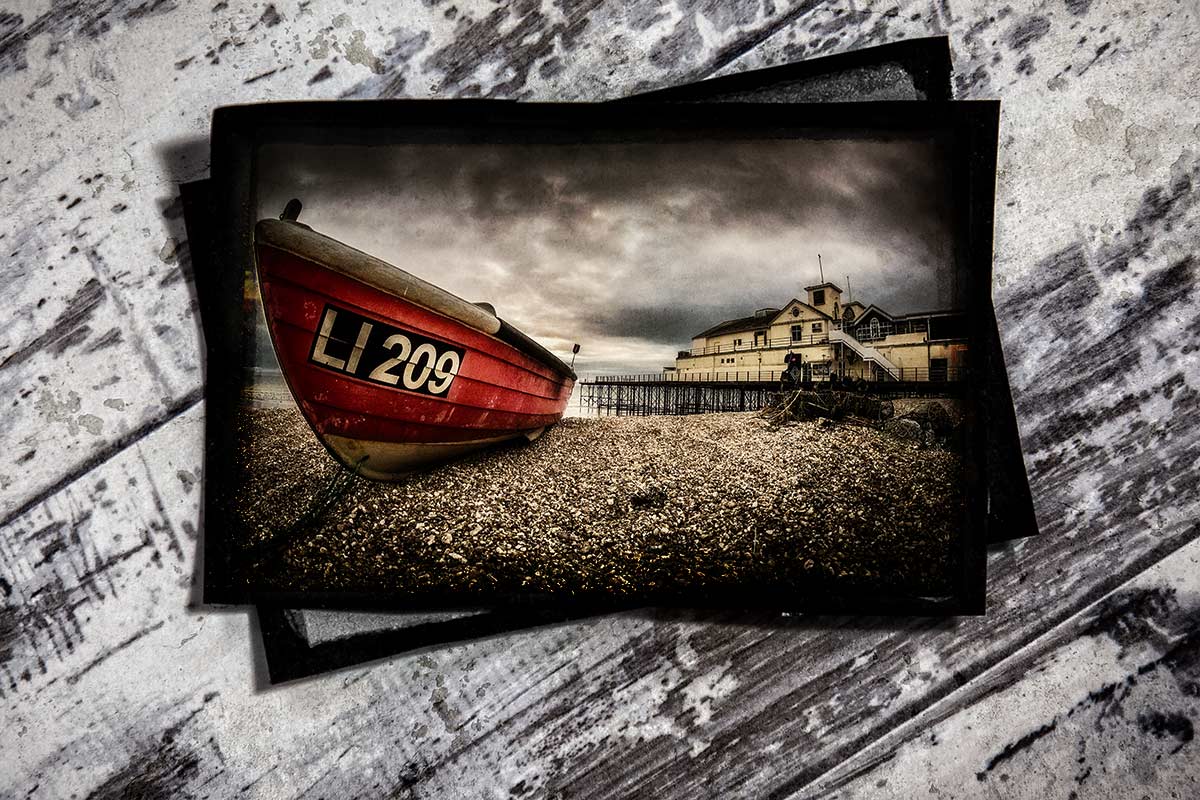
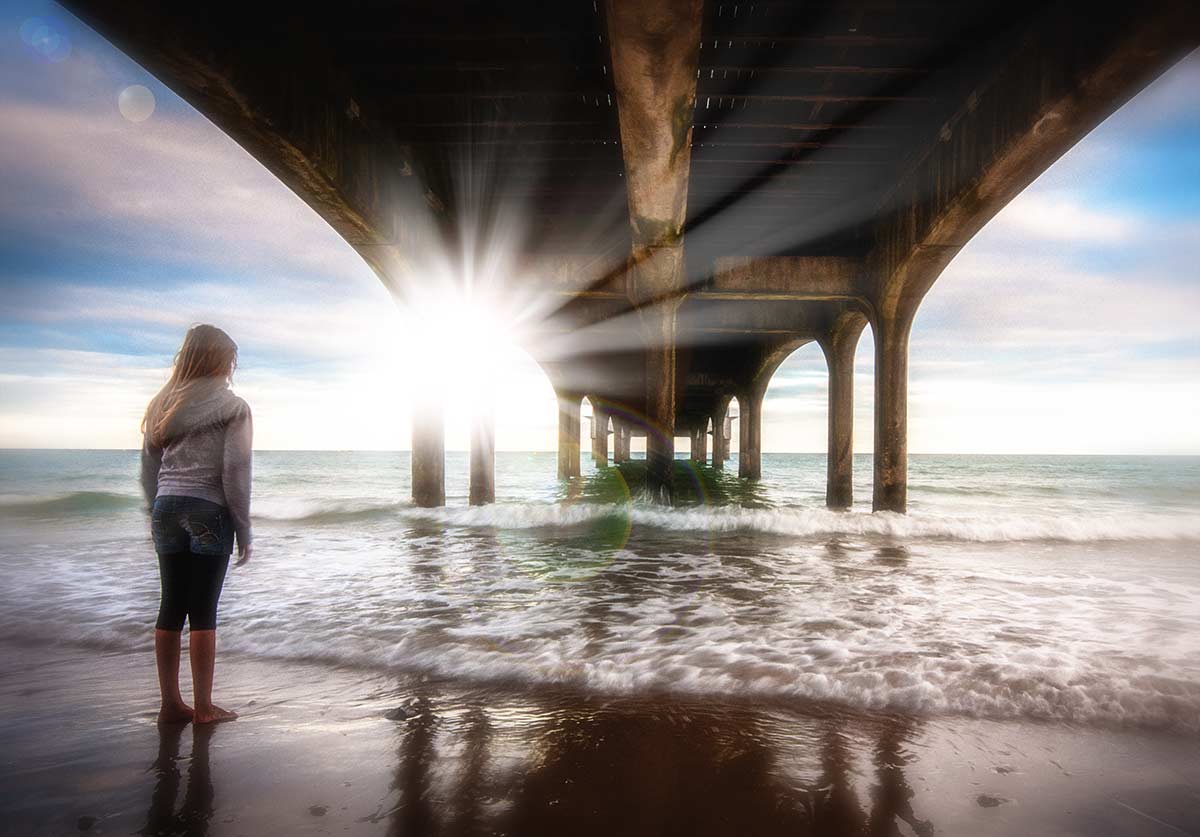
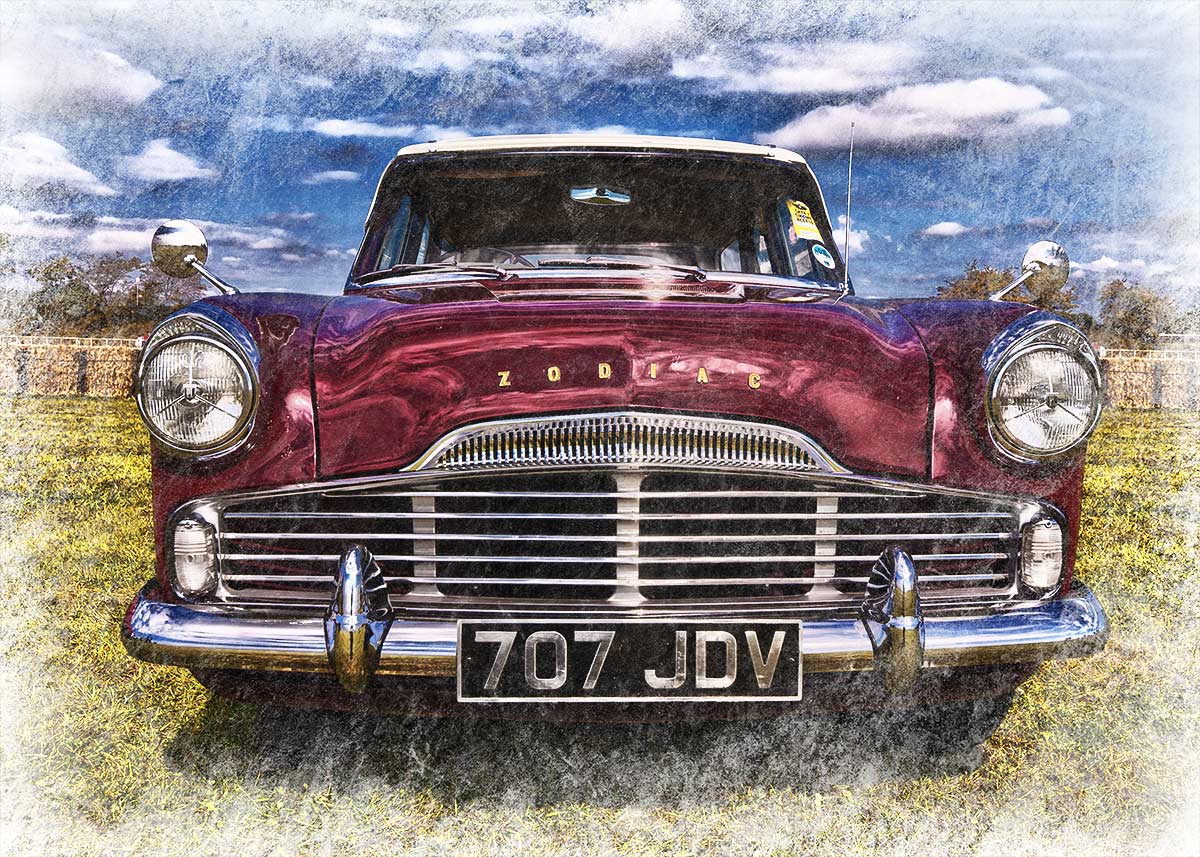
Here’s a painted border effect with a neat twist. First up these are paint brushes rather then a template and that means you can change the colour, opacity and use them with the Brush or Eraser tools. There’s four brushes in this set so you get one for each corners or mix and match to vary the effect.

You can download the brushes here: Painted Corners – GAVTRAIN

Painted-CornersThe brushes will work with all versions of Photoshop and Photoshop Elements however users of Photoshop CS6, CC and beyond will have the advantage of being able to increase the brush size to a maximum of 5000 pixels and getting bigger borders.

I’ve made a short video as a guide to installing the brushes and a few tips on how to use them. I hope it helps.

[youtube]https://www.youtube.com/watch?v=dkr4rmZef9E&feature=youtu.be[/youtube]

Usage rules
The brush set is copyright Gavin Hoey 2014. Use is limited to any personal, non-commercial purposes. Please share the Friday Freebie by linking back to this page. Do not redistribute the original action without my permission.

Download instructions
The direct link to download the actions is https://www.gavtrain.com/wp-content/uploads/2014/08/Painted-Corners-GAVTRAIN.zip

You must UNZIP the action before installing it in Photoshop / PS Elements

No support is provided with the Friday Freebies. If you need help Google or YouTube the question and you’ll almost certainly find the answer 🙂

Creased and Folded Action – Friday Freebie

In the real world folding a photo isn’t a smart move unless it’s heading for the bin. However in the mad cap world of Photoshop you can virtually fold a photo any time you like.

With this Friday Freebie Photoshop action folding and creasing a photo is a simple one click affair. Not only that but you’ll also get a border and some fancy shadow effects to enhance the 3D feel. The action is one of the longer ones I’ve made for a Friday Freebie and may take a minute or two to run but the wait and the effort to make it is worthwhile.

You can download the action here: Creased and folded

Folded-Corner-action

To use the action, start with the photo you wish to use already open in Photoshop and then play the action. The first thing it does is make a copy of your photo so the original will be untouched and safe. There’s a lot of things for Photoshop to do with this action so it may take a minute or two to run through. DO NOT switch to another image whilst running the action.

There are no options or controls for this action but at the end you will be left with several layers, so if you need to make any adjustments to the final effect you can.

As with most actions, the size of your image will effect the final effect. Smaller images with less the 2000 pixels on the longest edge are best avoided. Personally I’d also steer clear of portrait format images, this action works best with wide but not too wide shots.

The action will work with Photoshop CC, CS6, CS4, CS4, CS3 and should work with Photoshop Elements 11 and beyond too.

Usage rules
The action is copyright Gavin Hoey 2014. Use is limited to any personal, non-commercial purposes. Please share the Friday Freebie by linking back to this page. Do not redistribute the original action without my permission.

Download instructions
The direct link to download the actions is https://www.gavtrain.com/wp-content/uploads/2014/08/Creased-and-folded.zip

You must UNZIP the action before installing it in Photoshop / PS Elements

No support is provided with the Friday Freebies. If you need help Google or YouTube the question and you’ll almost certainly find the answer 🙂

Jigsaw Puzzle – Friday Freebie

Going through some old toys the other day I found this giant kids jigsaw puzzle and instantly thought “Friday Freebie”. It’s officially a 28 piece Spot the Dog jigsaw but you can thank my daughter for putting it together upside down, which is trickier to do then you might think.

Full download instructions are below but you can also Click Here To Download Jigsaw Puzzle

JIGSAW-FF-GAVTRAIN-FEATURED
This puzzle effect works best when blended with photos that have plenty of light colours, so that’ll be skies or in this case a light coloured wall. In the photo above I used the Overlay blending mode but you can get great results with many others too. Just try them all and see what works.

After resizing (CTRL+T) your photo to fit as best you can, I’d suggest making a quick and rough rectangular selection of the puzzle and masking or erasing and excess photo away.

As always, if you create a photo using the Friday Freebie then let me (and everyone else) know by leaving the link in the comments below.

Usage rules
The image is copyright Gavin Hoey 2014. Use is limited to any personal but non-commercial purposes. Please share the Friday Freebie by linking back to this page. Do not redistribute the original image without my permission.

Download instructions
Click the link https://www.dropbox.com/s/4rlc9tm6v738n74/JIGSAW-FF-GAVTRAIN.zip to take you to the Dropbox download page (no sign up is needed)

1. Click the Download button

2. Save the template to your hard drive

3. Unzip the file

4. Open in Photoshop or Photoshop Elements

5. Paste on to your photo

6. Resize (CTRL+T) and change the Layer Blending mode as needed.

No support is provided with the Friday Freebies. If you need help Google or YouTube the question and you’ll almost certainly find the answer :-)

Pile of Prints Action – Friday Freebie

Here’s a lovely little Photoshop action which produces a very pleasing effect, all with one click of the mouse. Back in the day I recall the joy and frustration of getting a pile of prints back from the developers and sorting them into a pile of keepers and a big pile of photos fit only for the bin.

You can download the action here: Pile of prints – gavtrain
Pile-Of-Prints-EXAMPLE

To use the action, start with the photo you wish to use already open in Photoshop and then play the action. The first thing it does is make a copy of your photo so the original will be untouched and safe. There’s a lot of things for Photoshop to do with this action so it may take a minute or two to run through. DO NOT switch to another image whilst running the action.

This action works best on landscape format images but will work on upright format photos too. As with most actions, the size of your image will effect the final effect and I’d suggest starting with a photo 3000 pixels (longest edge) or bigger.

The action will work with Photoshop CC, CS6, CS4, CS4, CS3 and should work with Photoshop Elements but I have yet to test that.

Usage rules
The action is copyright Gavin Hoey 2014. Use is limited to any personal, non-commercial purposes. Please share the Friday Freebie by linking back to this page. Do not redistribute the original action without my permission.

Download instructions
The direct link to download the actions is https://www.gavtrain.com/wp-content/uploads/2014/05/Pile-of-prints-gavtrain.zip

No support is provided with the Friday Freebies. If you need help Google or YouTube the question and you’ll almost certainly find the answer 🙂

Four Parts Action

The idea with this Friday Freebie is really simple, take one photo, cut it into four equal parts and give each bit a twist or two. Well that was my plan when I started making this action but I just had to go one step further. So not only do the four parts get a twist but I also added a slight bow and simple shadow to create a feeling of depth. The best part is, all this happens with just one click of the mouse.

You can download the action here: four-parts-gavtrain.zip
Four-Parts---Gavtrain

To use the action, start with the photo you wish to chop up already open in Photoshop and then play the action. The first thing it does is make a copy of your photo so the original will be untouched and safe. There’s a lot of things for Photoshop to do with this action so it may take a minute or two to run through. As with most actions, the size of your image will effect the final effect. The photo above was 3000 pixels on the long edge but you can go bigger or smaller if you wish. The main difference will be the border size, so I’ve left the layer styles open and you can alter the border (Stroke) thickness at the end if you wish.

The action will work with Photoshop CC, CS6, CS4, CS4 and CS3 but WILL NOT work  with any version of Elements, sorry.

Usage rules
The action is copyright Gavin Hoey 2014. Use is limited to any personal, non-commercial purposes. Please share the Friday Freebie by linking back to this page. Do not redistribute the original action without my permission.

Download instructions
The direct link to download the actions is https://www.gavtrain.com/wp-content/uploads/2014/04/four-parts-gavtrain.zip

No support is provided with the Friday Freebies. If you need help Google or YouTube the question and you’ll almost certainly find the answer 🙂

How To Photograph Through Fences

british-wildlife-centre-2Shooting through fences and bars is never the ideal way to take photos but there’s plenty of times when it’s the only choice if you want to keep taking photos. It’s a problem that’s going to be familiar to anyone who’s been to a motor sport shoot or ever tried taking photos at a zoo.

The good news is, with a little bit of camera knowhow, it’s perfectly possible to shoot through fences as if they were never there. You don’t need any fancy equipment, all you need to do is follow the step by step plan I set out in the video.

Once again I’d like to thank the British Wildlife Centre in Surrey for allowing me to film in their amazing venue. I enjoyed it so much I’ve taken out an annual membership so I can explore what it has to offer at my leisure.

[youtube]http://youtu.be/-rlPEl2Yy84[/youtube]

Products used in this video (linked to Adorama)

HOYA 58mm HMC NXT UV Filter

Pro Optic 58mm Rubber Lens Hood

Canon EOS 60D Digital SLR Camera

Canon EF 70-300mm f/4-5.6 IS USM Autofocus Telephoto Zoom Lens

Adobe Photoshop CS6

To give you an idea of just how much looks can be deceiving, here’s a photo of one of the Scottish Wildcats taken at an earlier visit.

british-wildlife-centre-1

Spiral bound template

Spiral-Final-BeachWhy is it that the photos that look easy to shoot actually take the most time? This Friday freebie image is a perfect example. It looks like it should have been a quick thing to do but in reality it took the best part of half a day to shoot, and edit… You see, the things I do for you 🙂

I’m really happy with the end result, which of course makes all the effort worthwhile.

Full download instructions are below but you can also
Click Here To Download the Spiral Bound Template

Using the template is as simple as pasting your own photo over the template and changing the layer blending mode to Multiply. Other layer blending modes may well work too so it’s well worth experimenting. You can also try lowering the layer opacity for the photo layer and skipping through some blending mode, you’ll get a different set of results that way.

One thing to note. The Multiply blending mode will always makes your image darker, so I’d suggest adding a Levels adjustment layer above the photo (top of the layers stack) and tweaking the brightness accordingly, if you want to get an final image that matches the original photo.

Usage rules
The image is copyright Gavin Hoey 2013. Use is limited to any personal but non-commercial purposes. Please share the Friday Freebie by linking back to this page. Do not redistribute the original image without my permission.

Download instructions

Download instructions
Click the link https://drive.google.com/file/d/0B_Mmmm3K1utNLTNKNGhEWXhFTm8/view?usp=sharing
1. Click the Download button download_icon

2. The download should start automatically


Distressed Wood Frame

Distressed-Wood-Template-EGThis week’s Friday Freebie is a frame template that has a slightly dark, moody feel. The background is a sample of flooring bought from a DIY store. It has a wonderfully distressed and weathered look to it, making it the perfect compliment to everything from coastal scenes to urban decay. Once photographed and edited in RAW, I gave the final image a light texture effect using OnOne’s Perfect Photo Suite 8 beta, perfect for adding a touch of grunge!

Full download instructions are below but you can also
Click Here To Download the distressed wood frame

To use the Friday freebie download it and open it in Photoshop or Photoshop Elements, then open the photo you wish to add to the frame. Flatten any layers (Layer – Flatten Layers) and then press CTRL+A to select it all, followed by CTRL+C to copy. Jump over to the frame and press CTRL+V to paste the image on to the frame.

You’ll need to resize the image with Free Transform (CTRL+T). Use the corner handles to drag the image into the photo area and when done press Enter. Finally change the layer blending mode from Normal to Hard Light to blend the photo with the template.

If you create a photo using the Friday Freebie then let me (and everyone else) know by leaving the link in the comments below.

Usage rules
The image is copyright Gavin Hoey 2013. Use is limited to any personal, non-commercial purposes. Please share the Friday Freebie by linking back to this page. Do not redistribute the original image without my permission.

Download instructions
Click the link https://drive.google.com/file/d/0B_Mmmm3K1utNSnFEM1UwRjkxa3M/view?usp=sharing
1. Click the Download button download_icon

2. The download should start automatically


Lens-Flare-(Start)This weeks Friday Freebie is a a high resolution image that adds a light flare to any image. I’ve also added some lens internal artefacts to the
template for that added touch of interest. Best of all it’s unbelievably easy to use and works with any image.

Click Here To download the Light flare template

Once downloaded, the light flare template will need to be unzipped. To apply it to your photo open an image in either Photoshop or Photoshop Elements and then open the lens flare template. Copy and paste the template over the image and change the layer blending mode to Screen. Finally use Free Transform to resize, rotate and reposition the lens flare to suite the image below.

If you create a photo using the Friday Freebie then let me (and everyone else) know by leaving the link in the comments below.

Usage rules
The image is copyright Gavin Hoey 2013. Use is limited to any personal, non-commercial purposes. Please share the Friday Freebie by linking back to this page. Do not redistribute the original image without my permission

Eroded Edge Texture

Erode-textureThis weeks Friday Freebie is an eroded texture which is simple to use and gives amazing results. It’s a black and white texture that has a dark mottled centre, fading to a lighter edge.

Full download instructions are below but you can also
Click Here To Download the Eroded Edge Texture

Unlike most textures, the eroded edge effect works best with photos that have large areas of darker tones. All you need to do is paste the texture over your photo and set the layer blending mode. There are loads of different layer blending modes to choose from and they’ll all give a different look, with this texture Screen blending mode worked well as did Overlay and Soft Light.

If you create a photo using the Friday Freebie then let me (and everyone else) know by leaving the link in the comments below.

Usage rules
The texture image is copyright Gavin Hoey 2013. Use is limited to any personal, non-commercial purposes. Please share the Friday Freebie by linking back to this page. Do not redistribute the original texture without my permission.

Download instructions
Click the link https://drive.google.com/file/d/0B_Mmmm3K1utNc2tESjJKYTNIUUk/view?usp=sharing
1. Click the Download button download_icon

2. The download should start automatically