Cracked Photoshop Brushes

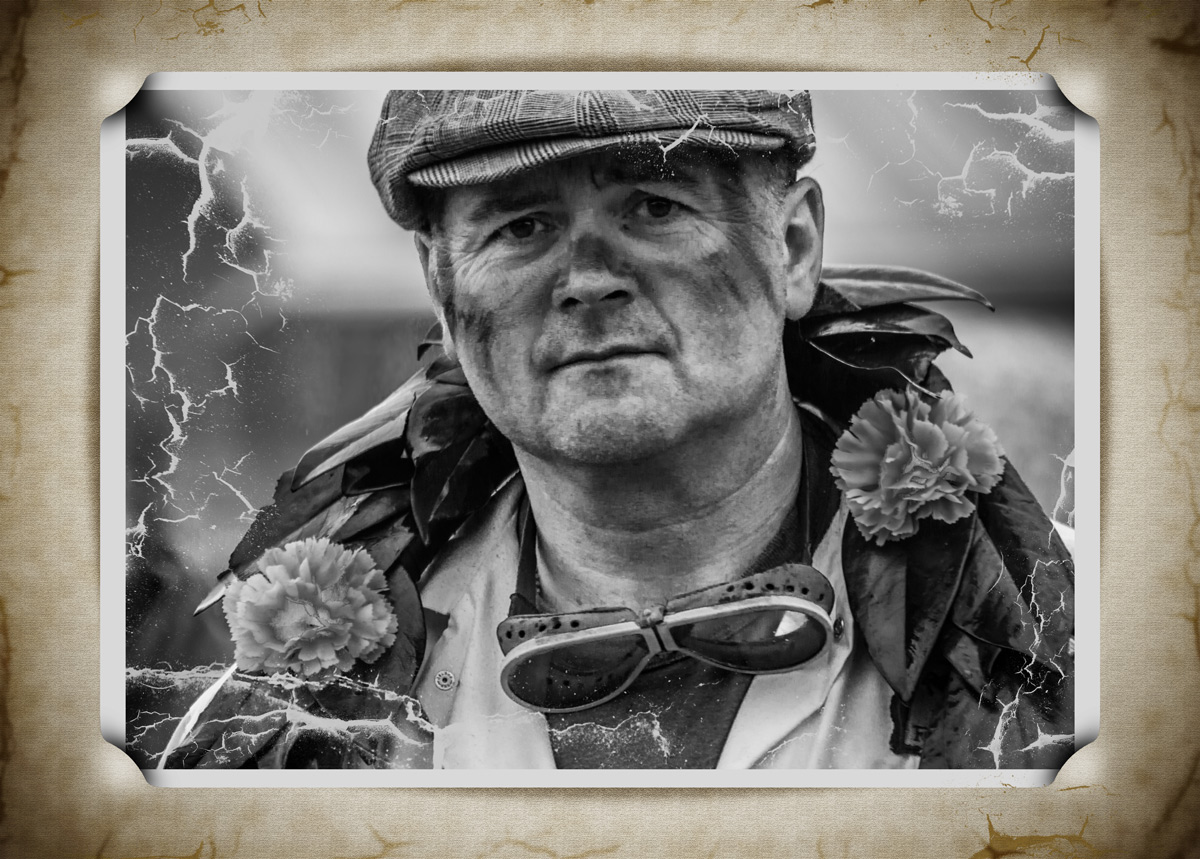
Cracked and pealing paint always draw me in as a photographer so here’s a great Friday freebie which combines a selection of my peeling paint photo and turns them into cracked Photoshop brushes. These brushes are full resolution and can be used to paint, erase or mask to create all sorts of effects.

Full download instructions are below or Click Here to DOWNLOAD THE CRACKED BRUSH SET
Cracked-Brushes-Final
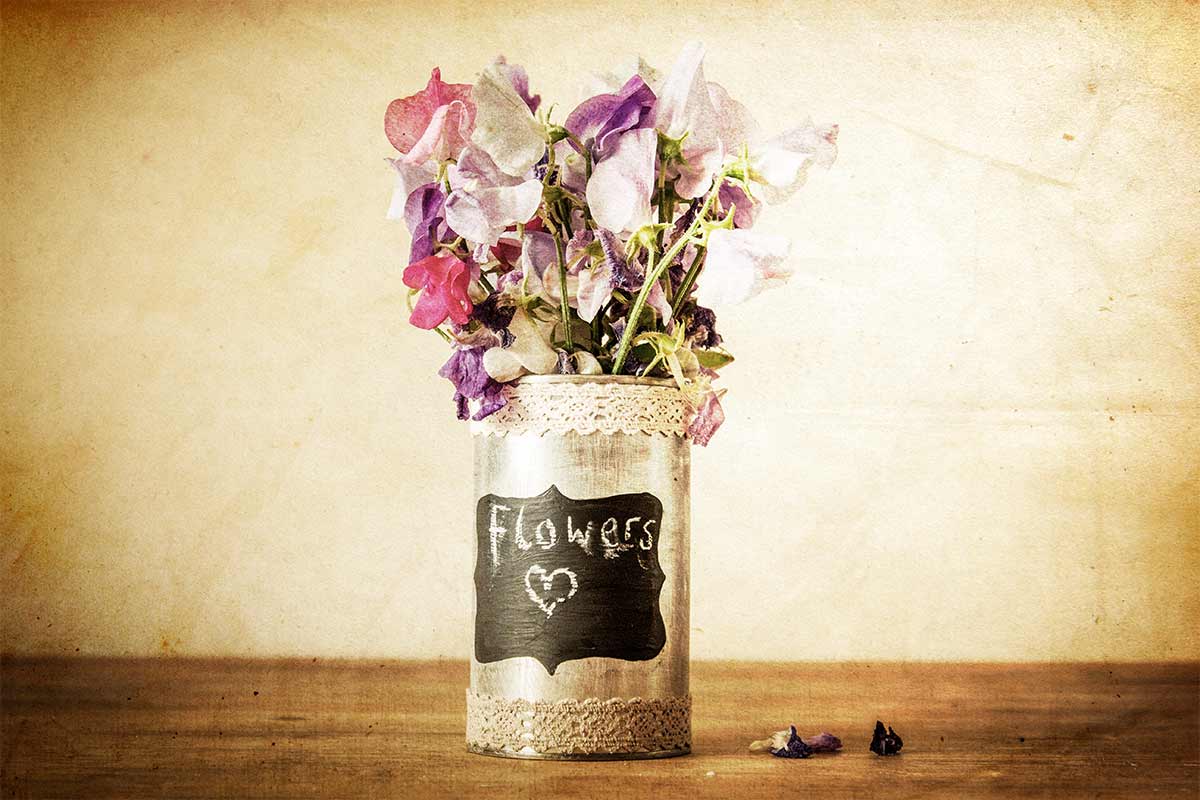
If you like your graphic design then those photo real cracked paint brushes will have plenty of uses and Photographers will find them handy to. For example the photo above was given an aged and distressed look by applying the brushes on a layer set to Overlay blending mode. The cut corner border is a previous Friday Freebie Photoshop action which has also been aged with the cracked brushes and Lighten layer blending mode.

Cracked-Brushes-Sample

These Brushes will work in any version of Photoshop and they’re fully compatible with Photoshop Elements too!

As always, if you create a photo using the Friday Freebie then let me (and everyone else) know by leaving the link in the comments below.

Usage rules
The brushes are copyright Gavin Hoey 2014. Use is limited to any personal but non-commercial purposes. Please share the Friday Freebie by linking back to this page. Do not redistribute the original image without my permission.

Download instructions
1. Click the link https://www.gavtrain.com/wp-content/uploads/2014/08/Cracked-Brushes.zip to download

2. Save the brushes to your desktop

3. Unzip the file

4. Open in Photoshop or Photoshop Elements

5. Install the brushes (This link will help if you don’t know how)

6. Enjoy!

No support is provided with the Friday Freebies. If you need help Google or YouTube the question and you’ll almost certainly find the answer :-)

Jigsaw Puzzle – Friday Freebie

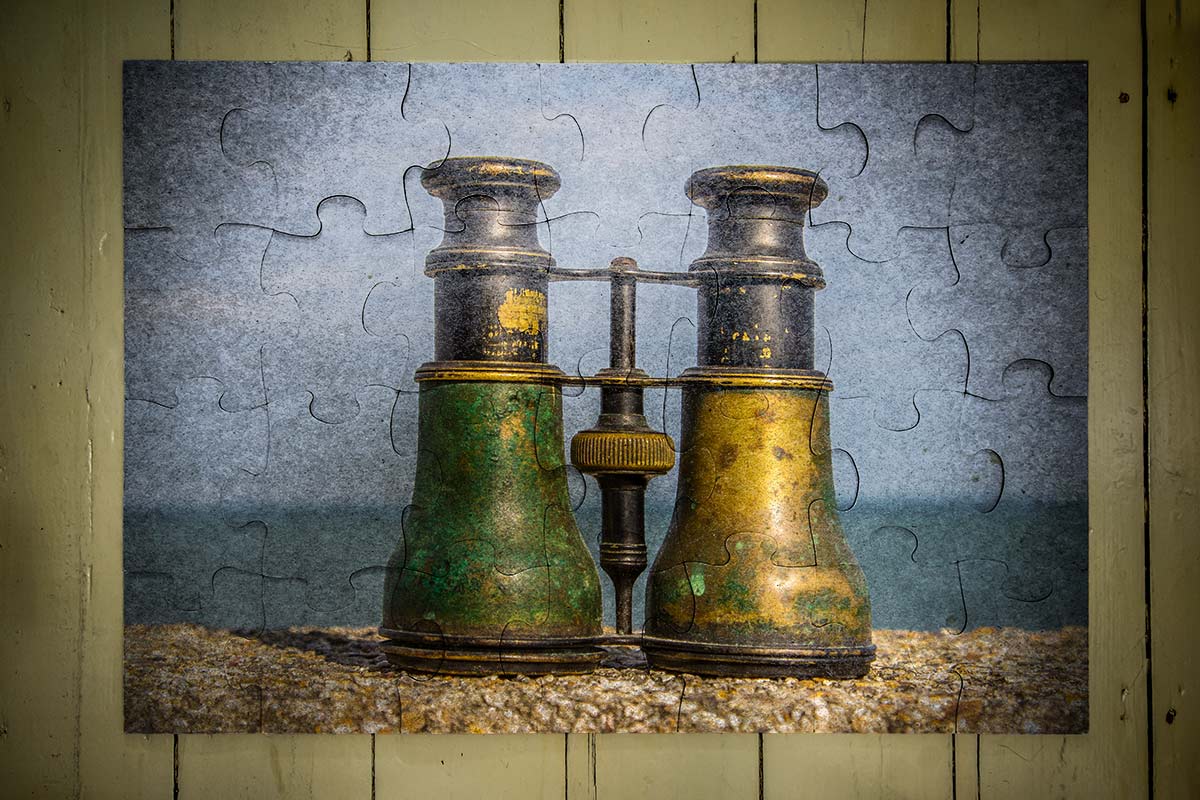
Going through some old toys the other day I found this giant kids jigsaw puzzle and instantly thought “Friday Freebie”. It’s officially a 28 piece Spot the Dog jigsaw but you can thank my daughter for putting it together upside down, which is trickier to do then you might think.

Full download instructions are below but you can also Click Here To Download Jigsaw Puzzle

JIGSAW-FF-GAVTRAIN-FEATURED
This puzzle effect works best when blended with photos that have plenty of light colours, so that’ll be skies or in this case a light coloured wall. In the photo above I used the Overlay blending mode but you can get great results with many others too. Just try them all and see what works.

After resizing (CTRL+T) your photo to fit as best you can, I’d suggest making a quick and rough rectangular selection of the puzzle and masking or erasing and excess photo away.

As always, if you create a photo using the Friday Freebie then let me (and everyone else) know by leaving the link in the comments below.

Usage rules
The image is copyright Gavin Hoey 2014. Use is limited to any personal but non-commercial purposes. Please share the Friday Freebie by linking back to this page. Do not redistribute the original image without my permission.

Download instructions
Click the link https://www.dropbox.com/s/4rlc9tm6v738n74/JIGSAW-FF-GAVTRAIN.zip to take you to the Dropbox download page (no sign up is needed)

1. Click the Download button

2. Save the template to your hard drive

3. Unzip the file

4. Open in Photoshop or Photoshop Elements

5. Paste on to your photo

6. Resize (CTRL+T) and change the Layer Blending mode as needed.

No support is provided with the Friday Freebies. If you need help Google or YouTube the question and you’ll almost certainly find the answer :-)
Paper Texture – Friday Freebie

We have a small collection of old books in our house which is slowly growing. Each one has aged differently and most have some wonderful textures hidden inside, which means I’m never short of photo inspiration. This weeks Friday freebie is a combination of two pages which gives a brilliant vintage feel when added to a photo.

Full download instructions are below but you can also Click Here To Download the Paper Texture

FF-Book-Texture-Overlay
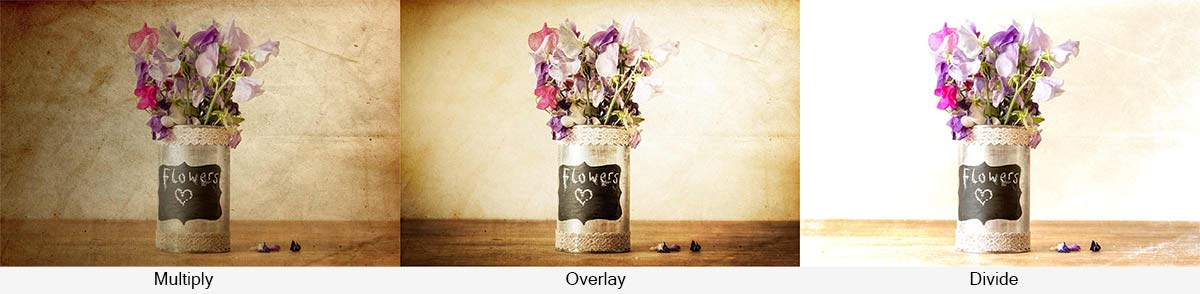
This texture works best when blended with photos that have plenty of light colours, so that’ll be skies or in this case a light coloured wall. In the photo above I used the Overlay blending mode but you can get great results with multiply and even Divide mode too. Just try them all and see what works.

FF-Book-Texture-Samples

As always, if you create a photo using the Friday Freebie then let me (and everyone else) know by leaving the link in the comments below.

Usage rules
The image is copyright Gavin Hoey 2014. Use is limited to any personal but non-commercial purposes. Please share the Friday Freebie by linking back to this page. Do not redistribute the original image without my permission.

Download instructions
Click the link https://www.dropbox.com/s/9vozzrhjv99xuzo/FF-Book-Texture.zip to take you to the Dropbox download page (no sign up is needed)

1. Click the Download button

2. Save the template to your hard drive

3. Unzip the file

4. Open in Photoshop or Photoshop Elements

5. Paste on to your photo

6. Resize (CTRL+T) and change the Layer Blending mode as needed.

No support is provided with the Friday Freebies. If you need help Google or YouTube the question and you’ll almost certainly find the answer :-)
Home Studio Essentials – Episode 2

Speedlites and flash units are great but after a while the hard light they produce can become a bit limiting. In part 1 of my home studio essential skills I used a bare flash but now it’s time to add an umbrella. It’s almost certainly the first light modifier you’ll buy and for good reason.  They’re very versatile, quick to set up and fold down nice and small which makes them perfect for mobile and small home studio set ups.

Umbrellas come in two basic types, ones you bounce light into (reflective) and translucent umbrellas that you shoot light through. Whichever you use they soften the light by increasing the size of the light relative to the size of the subject. In other words, the bigger the umbrella the softer the light and the closer you get it to your subject the softer the light.

In this video I use a shoot through umbrella to create two very different looks. The first is a moody low key shot but it’s the second, more evenly lit shot that I love and it took lots of balls to make… about 50 colourful plastic balls to be precise!

[youtube]https://www.youtube.com/watch?v=ur58XNQwMXA&list=UU8Pksdbj37CdE00kmE7Z1dw[/youtube]

For this series of videos I want you to do more then just watch it, I’m hoping you’ll get your camera and take a photo based on the ideas you see in the video. That might be the lighting set up, the models pose or the Photoshop post processing. If you do (and you’re on Facebook) then please add them to Adorama’s Facebook page. I’ll be checking it regularly and giving constructive feedback on as many as possible

Joel-Joel-Joel-Joel-Joel

Gear used in this video (Links back to Adorama)

Flashpoint StreakLight 360 Ws Creative Collection (Includes flash, battery, trigger, boom etc)

Canon 5D Mark 2 

Canon 24-105L 

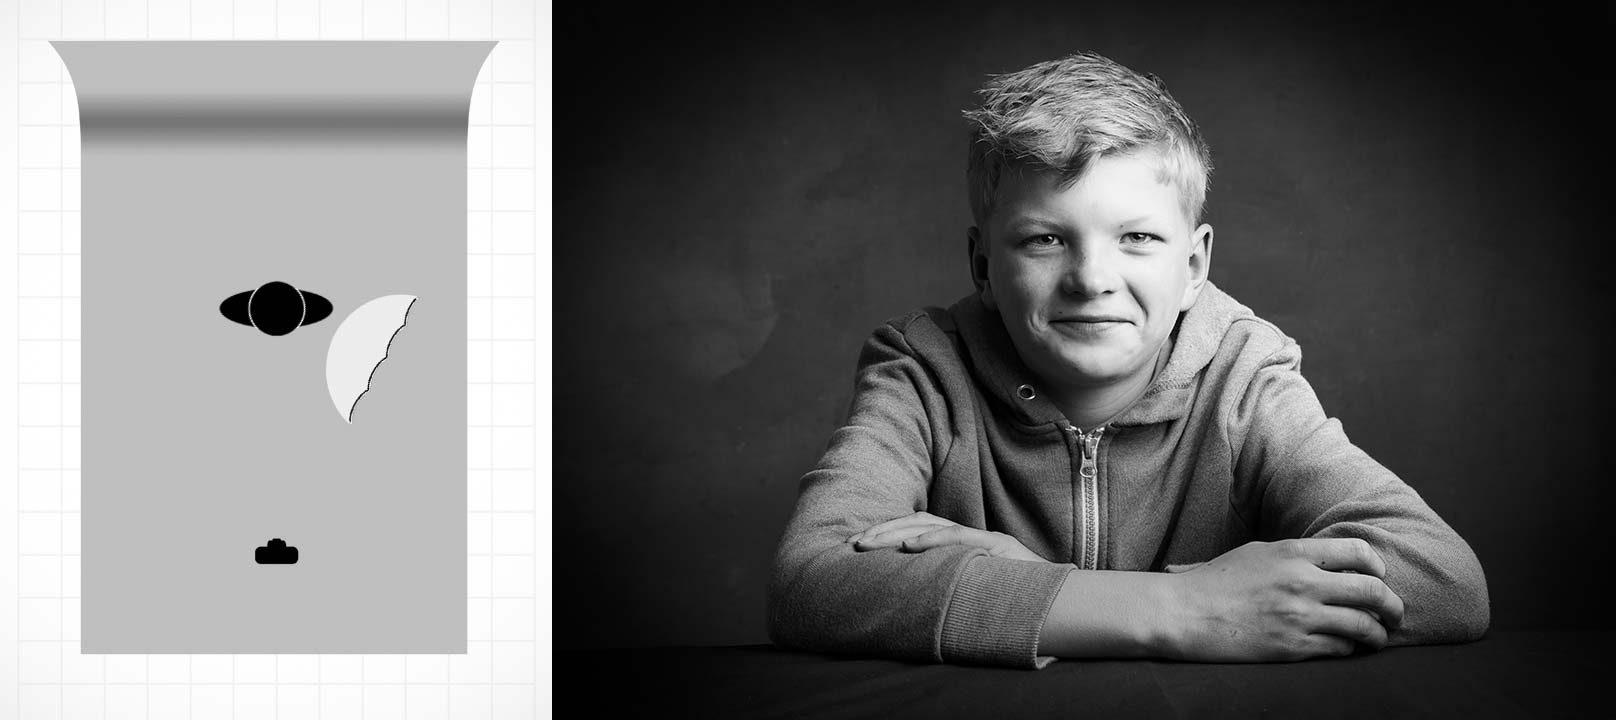
If like me you like to keep a visual record of you’re lighting set ups then this image should come in very handy.

Joel-Lighting-Diagram

My Studio Texture

If you caught my post yesterday then you’ll know that I recently built a textured background in my studio. Well it seems there are quite a few people out there that would love to do the same but don’t have the space, time or need for a similar permanent structure. So for today’s Friday freebie I’m giving away my studio background… OK so I’m not giving away the real thing but I am sharing a photo of it

Full download instructions are below but you can also
Click Here To download my studio background.
FF-Studio-BG1
There are a couple of ways you could use it. You could do exactly what it’s designed for and use it as a background for your studio shots. All you’d need to do is shoot on a clean background (light grey works best) and then simply extract the model and paste them in. I made an in depth video tutorial with Mark Wallace on how that’s done last year. If you missed it take a look here.

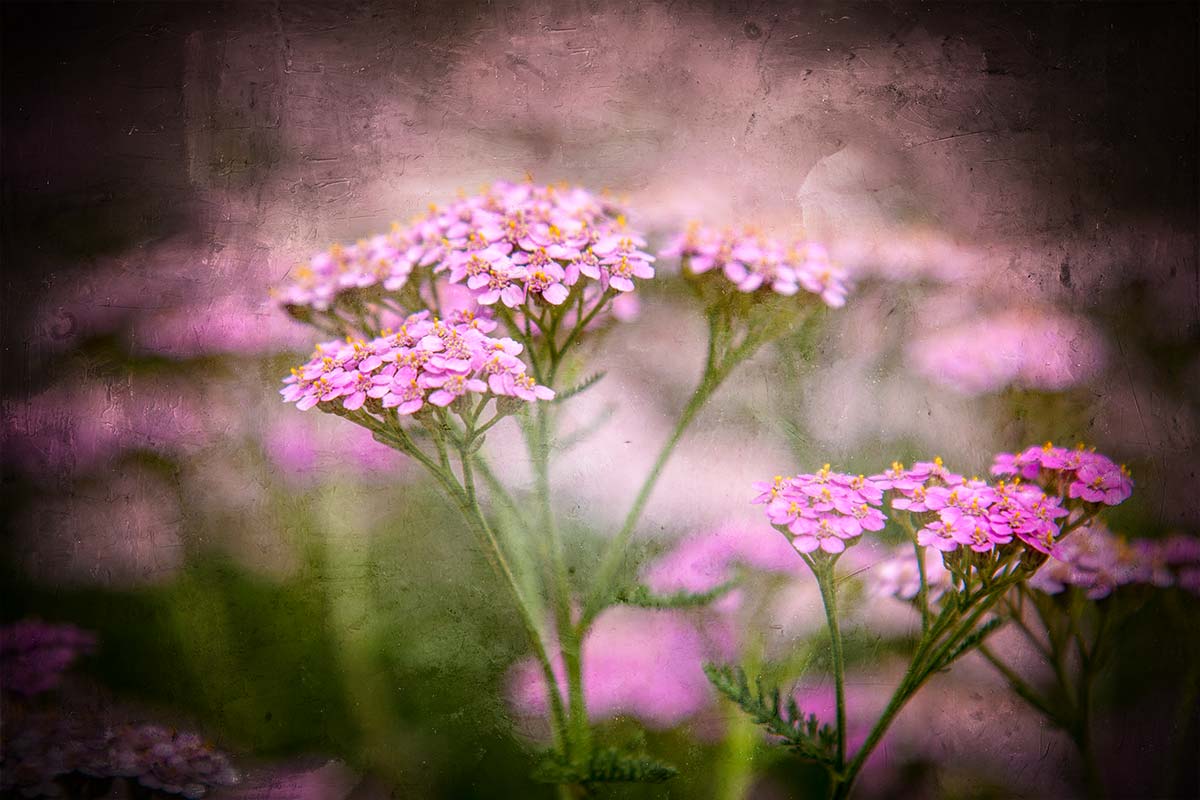
FF-Studio-BG2-Hard-LightOf course you can also use the texture as… well, a texture! Simply paste it over your photo, use a spot of Free Transofrm to make it fit and change the layer blending mode. Multiply, Overlay and Hard Light (as used here) are three to try but don’t stop there.

As always, if you create a photo using the Friday Freebie then let me (and everyone else) know by leaving the link in the comments below.

Usage rules
The image is copyright Gavin Hoey 2014. Use is limited to any personal but non-commercial purposes. Please share the Friday Freebie by linking back to this page. Do not redistribute the original image without my permission.

Download instructions
Click the link https://drive.google.com/file/d/0B_Mmmm3K1utNYW53T3RUbDk0LVE/view?usp=sharing
1. Click the Download button download_icon

2. The download should start automatically

Building a DIY studio background

For a long time I’ve fancied the idea of adding a grungy textured background to my studio but due to the limited space available I’ve stuck to using a white vinyl and black fabric backdrops. Now these have worked really well for me over the years but there comes a time when you want to break free and recently I got a great excuse to do just that.

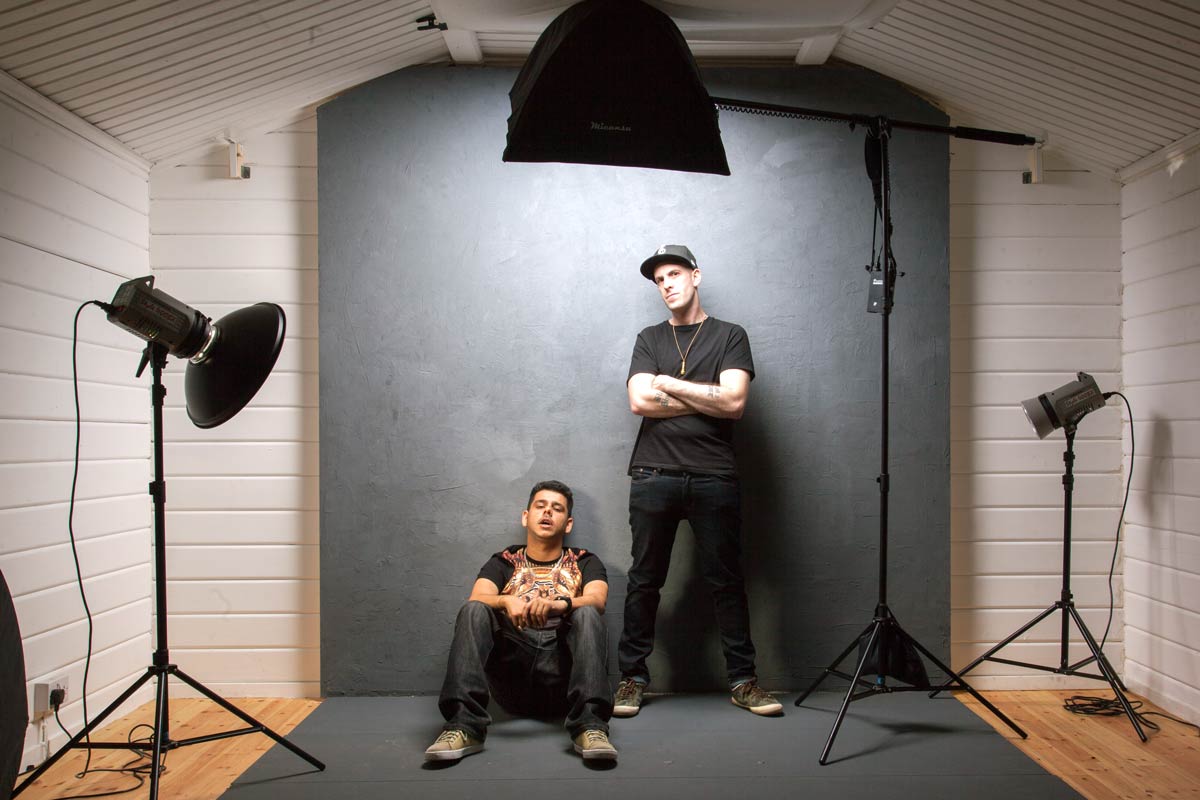
I’m currently in the middle of filming a mini-series of videos for Adorama TV all about shooting portraits in a small studio, something I know a lot about. You’ve probably seen my log cabin studio in various videos before so in order for this series to look and feel different I bit the bullet and built my dream textured backgroundKings-of-Sussex-5

The Plan
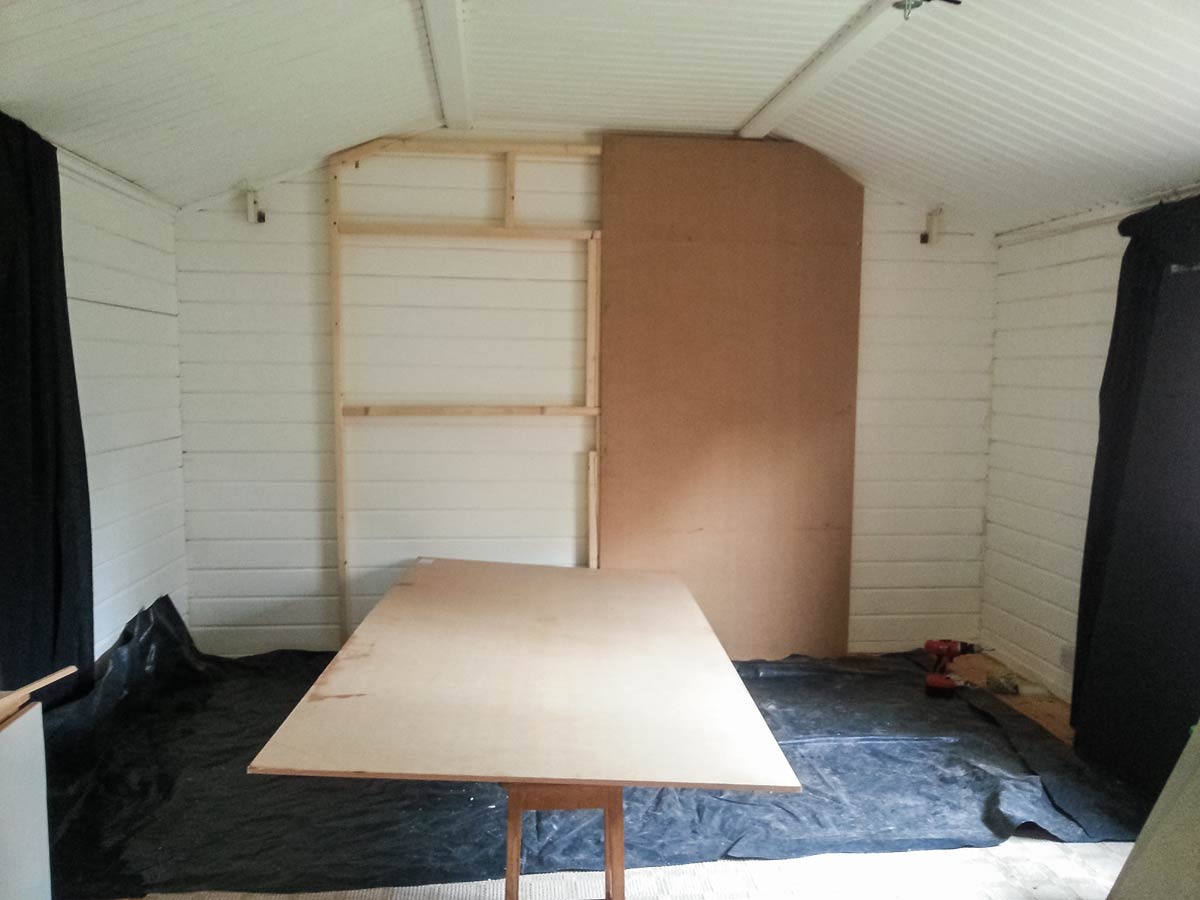
I’m a reluctant DIY guy, so if you’re looking for plans, specifications and a fool proof guide to building a background this ISN’T it. After clearing out my old background and removing anything breakable from the area I went online and ordered a bunch of stud work timber, two 2400mmx1200mmx12mm sheets of MDF and three 2400mmx800mmx18mm T&G chipboard sheets for the floor. I ordered them from a well known DIY store chain, paid a whopping £25 for next day delivery and got them four days later… but that’s another story.

DIY-Background-2

The Build
The idea was to make the background 8 feet (2.4 meters) square but my studio roof height made that impossible, so the frame work “evolved” to fit my needs. One thing I know all too well is log cabins move, even heavy duty ones like mine. So my background is almost free floating rather than permanently attached to the wall.

The MDF panels needed the corners cut too (wearing a mask to avoid inhaling the dust) and screwed to the frame.  I then primed the MDF with a coat of PVA glue and water mixed together and left it to dry overnight.

The Texture
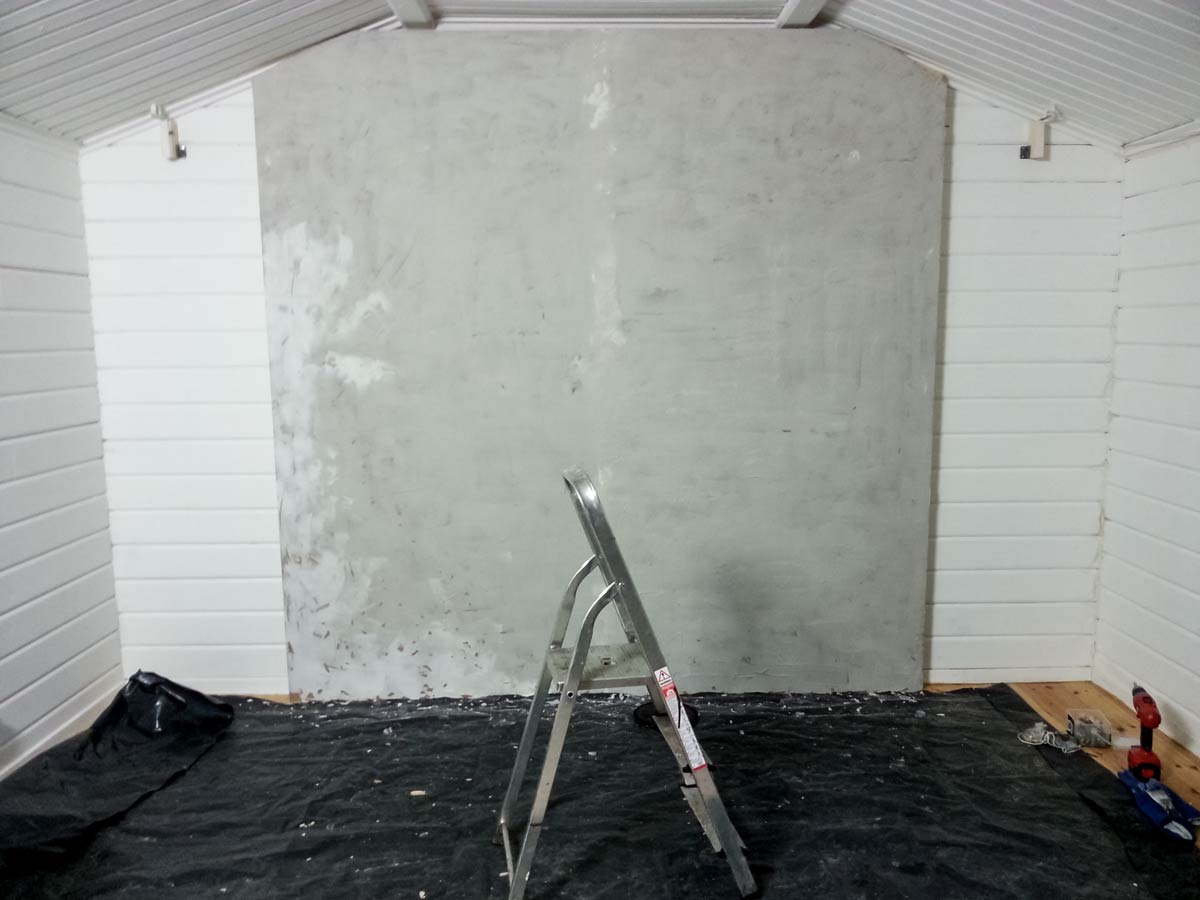
The texture I was going for was a grainy concrete feel. Choosing what material to use was tough. I had no idea of what might work best but I knew it would need to stick to vertical surfaces and be flexible enough to withstand a few knocks without cracking too much or bits falling off.

I settled on a flexible tile adhesive from Dunlop. It did everything I needed and best of all it was pretty cheap.  All I had to do was slap it on the MDF and try not to get it too smooth or too rough, not as easy as you might think. Too smooth and the effect would be lost, too rough and it could do some damage to a model or their clothes.

DIY-Background-3

Finishing Touches
Once dry the last job was to give it a coat or two of Matt Grey paint which was randomly added to with a lighter colour for a mottled effect. The mid grey colour is perfect in a small studio as I can add or restrict light to make it appear black or white. I can even add gels to my lights for a splash of funky colour if required.

All in the cost was around £100 for materials and about three days’ work.

In Use
The end results is perfect for my needs. With hindsight I’m not sure MDF was a great choice of wood but it’s working for me.

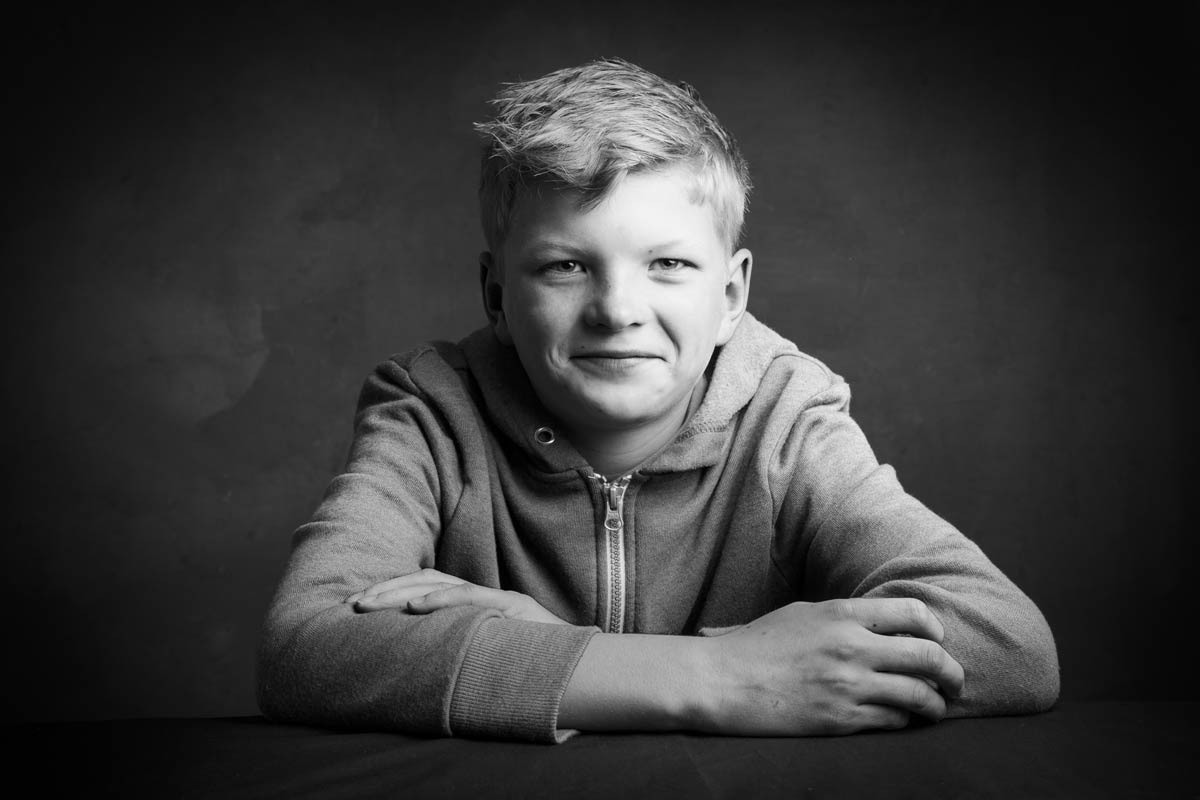
Here’s a few photos of the background in use!

Kings-of-Sussex-3
Joel-1


IF-E-1

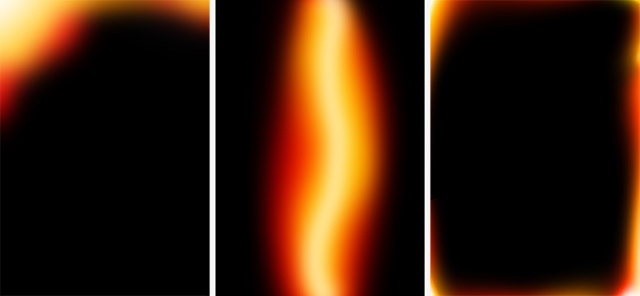
Three Light Leaks

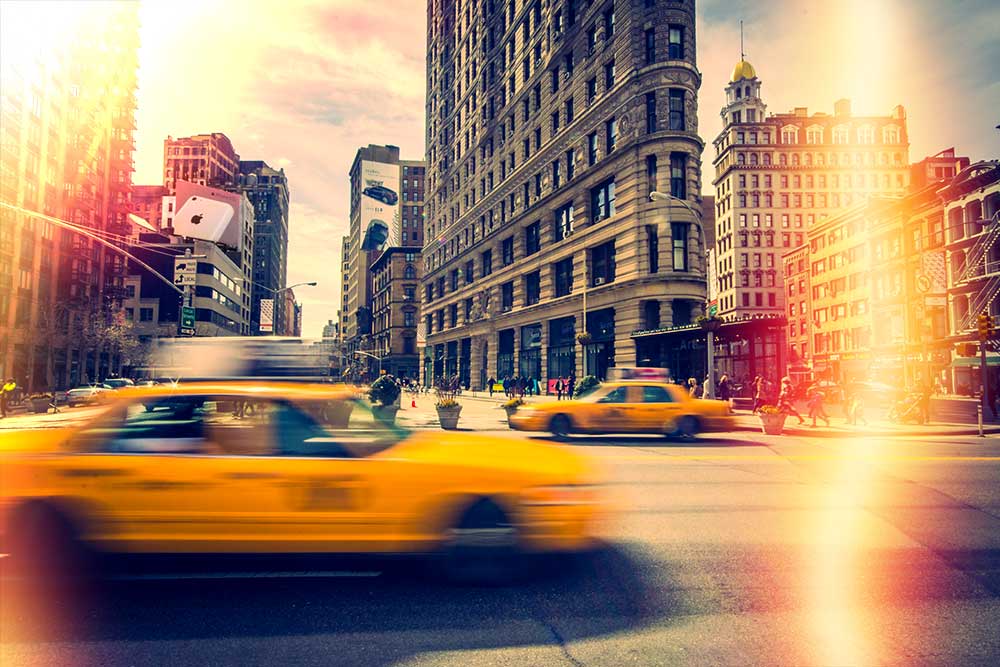
Light-Leak-Samples-NYCHere’s a Friday Freebie for those that love the vintage style photos. Light leaks were always a potential hazard for me back in the days of film photography, especially with my very first Praktica camera. Fortunately it rarely happened but now it’s very in.

Click Here To Download three light leaks

This Friday Freebie is not one, not two but three light leak images that are all ready to be pasted to your images. They’ll work with pretty much any photo but they really look good on vintage style images with a retro or timeless feel. In this case it’s a photo I snapped on a recent trip to New York

To use the light leaks first download them and unzip the file. Open the light leaks into Photoshop or Photoshop Elements and simply copy and paste them on to your image. Use Free Transform to rotate and resize them as much as you need. To blend them in simply change the Layer Blending Mode from Normal to Screen. If you want more light leaks, just paste them in!

Light-Leak-Samples

If you create a photo using the Friday Freebie then let me (and everyone else) know by leaving the link in the comments below.

Usage rules
The template is copyright Gavin Hoey 2014. Use is limited to any personal, non-commercial purposes. Please share the Friday Freebie by linking back to this page. Do not redistribute the original image without my permission

A Splash of Lemon

Winter round these parts usually means short days, long nights and inclement weather which makes for a tough time for us photographers. So here’s a photo project that you can take at any time and whatever the weather.

Lemon-Splash

The technique makes use of a single flash to freeze the moment a slice of lemon splashes into a glass of water. No flash? Well you might be able to do this with a super bright light but to hit the really fast shutter speeds needed to freeze the action you’ll need to bump up your ISO and open up the aperture. Flash really is the way to go as you’ll get sharper shots with a bigger depth of field and be able to use a nice low ISO.

I’m using glass “ice cubes” real ones are fine but they will float. So either pack them in tight or use a bigger, heavier piece of lemon (other fruit slices can be used too). Alternatively lose the ice and use fizzy water, the idea is simply to put some texture in the glass and how you do that is up to you.
[youtube]http://youtu.be/9GxRwBxc8-8[/youtube]

Equipment used in this video (Links to Adorama)

Adobe Photoshop Lightroom V5 Software, Windows and Mac OS

Canon EOS 60D Digital SLR Camera

Canon EF 24-105mm f/4L IS USM AutoFocus Wide Angle Telephoto Zoom Lens

Enlight photo Frio Universal Locking Cold Shoe V2

Canon RS-60 E3 Remote Switch (2′) for Canon Sub-Mini (E3)

Flashpoint Universal Swivel Holder -Umbrella holder

Vanguard Alta Pro 284 Carbon Tripod with SBH-100 Ball Head

Flashpoint 6.5′ Black Lightstand, 5/8″ Top Stud

Flashpoint 40×60″ Collapsible Disc Background

Spiral bound template

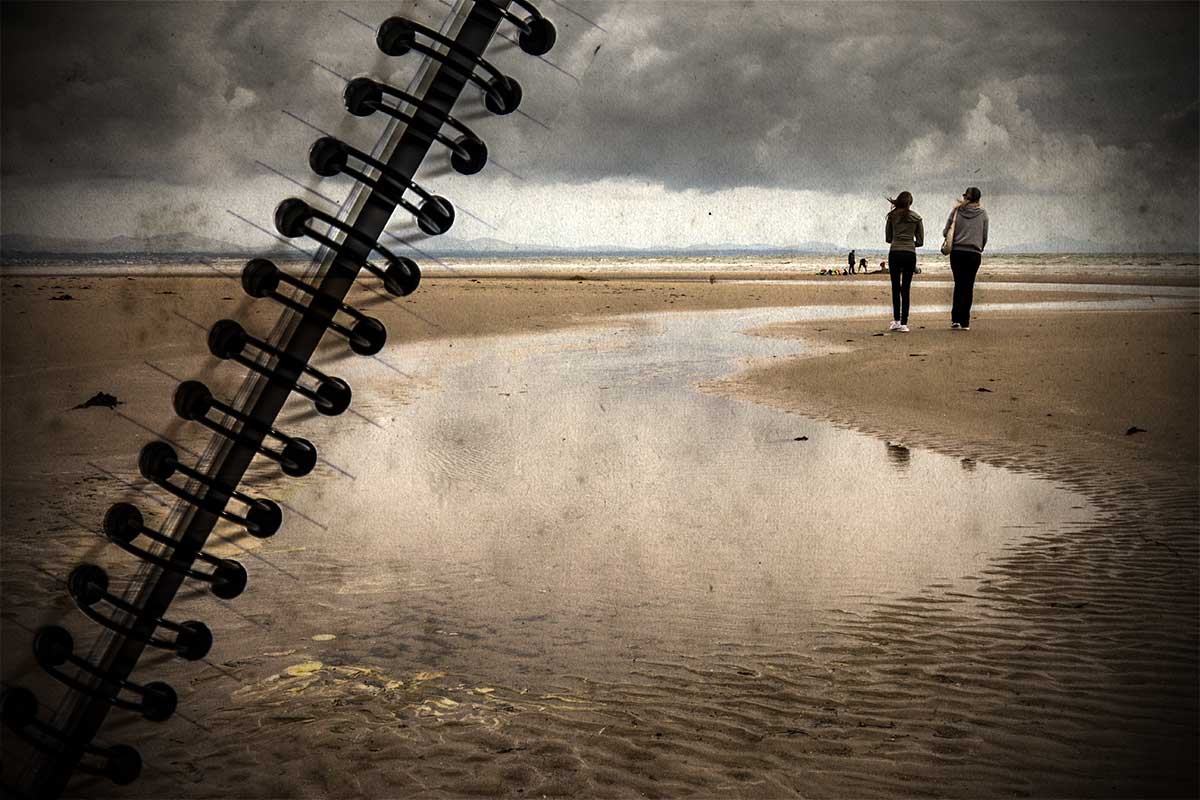
Spiral-Final-BeachWhy is it that the photos that look easy to shoot actually take the most time? This Friday freebie image is a perfect example. It looks like it should have been a quick thing to do but in reality it took the best part of half a day to shoot, and edit… You see, the things I do for you 🙂

I’m really happy with the end result, which of course makes all the effort worthwhile.

Full download instructions are below but you can also
Click Here To Download the Spiral Bound Template

Using the template is as simple as pasting your own photo over the template and changing the layer blending mode to Multiply. Other layer blending modes may well work too so it’s well worth experimenting. You can also try lowering the layer opacity for the photo layer and skipping through some blending mode, you’ll get a different set of results that way.

One thing to note. The Multiply blending mode will always makes your image darker, so I’d suggest adding a Levels adjustment layer above the photo (top of the layers stack) and tweaking the brightness accordingly, if you want to get an final image that matches the original photo.

Usage rules
The image is copyright Gavin Hoey 2013. Use is limited to any personal but non-commercial purposes. Please share the Friday Freebie by linking back to this page. Do not redistribute the original image without my permission.

Download instructions

Download instructions
Click the link https://drive.google.com/file/d/0B_Mmmm3K1utNLTNKNGhEWXhFTm8/view?usp=sharing
1. Click the Download button download_icon

2. The download should start automatically


Heavy Painted Border

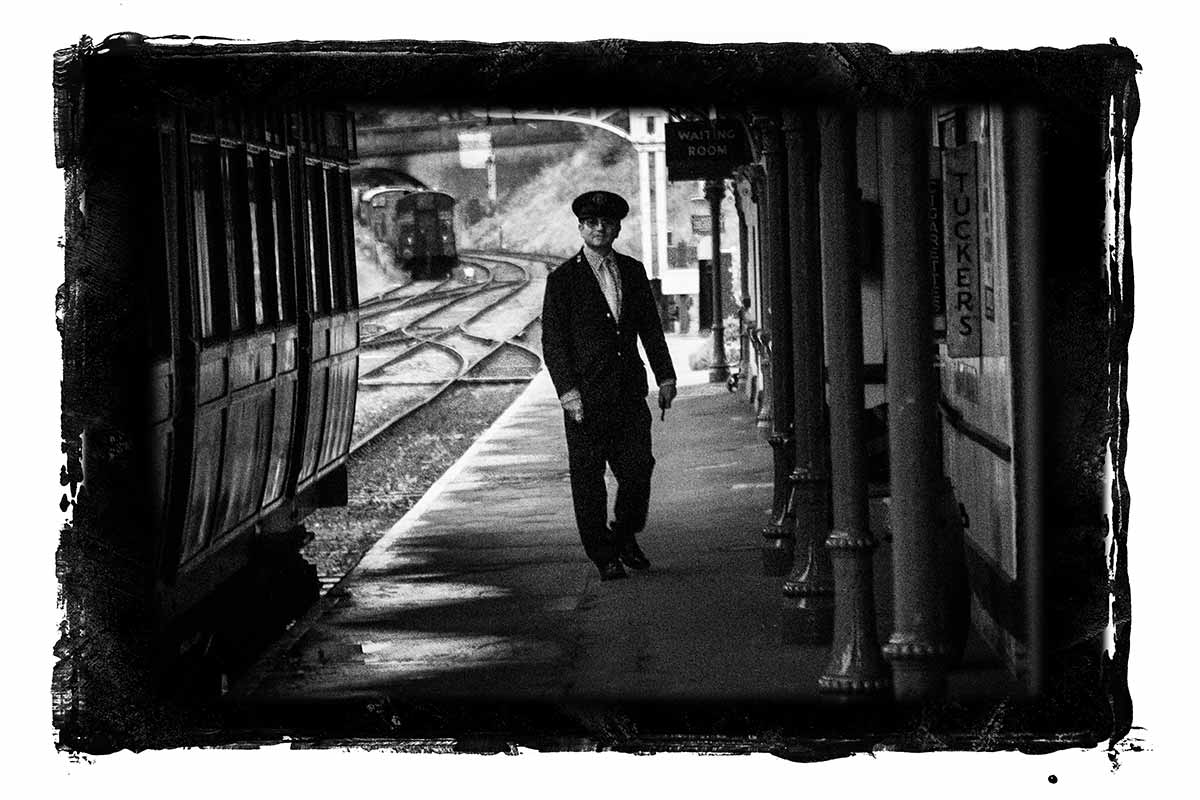
Steam-Train-Border-FFHere’s another amazing border from my recent painting session. This time I’ve gone for a border that surrounds your photo with a wide painted edge.

Full download instructions are below but you can also
Click Here To Download the Heavy Painted Border

I’ve designed this border so it can be used in two ways and it all depends on if you add your photo above or below the border.

Once you’ve downloaded it you’ll find I’ve removed the centre of the border image but left it transparent. S0 to make the image / border combo you see here all you do is drag your photo below the border layer in Photoshop. The centre area has a short fade so it blends in nicely with the photo.

The second option is to place your photo above the border layer. Doing that will give you a hard edge and you can decide how much of the border is seen.

You’ll need to resize your image or the border with Free Transform (CTRL+T). Use the corner handles to drag the image to the size you want and when done press Enter. The border will work with any photo although it’s especially good with black and white images.

If you create a photo using the Friday Freebie then let me (and everyone else) know by leaving the link in the comments below.

Usage rules
The image is copyright Gavin Hoey 2013. Use is limited to any personal but non-commercial purposes. Please share the Friday Freebie by linking back to this page. Do not redistribute the original image without my permission.

Download instructions

Click the link https://drive.google.com/file/d/0B_Mmmm3K1utNa19JQmtESDNVZjQ/view?usp=sharing
1. Click the Download button download_icon

2. The download should start automatically