Composite with Mark Wallace

Mark-Gav-1200A few weeks back I had the absolute privilege of spending a few hours with photographer and fellow Adorama TV presenter Mark Wallace. He was on a European vaccation and we met up in London for a chat over a cup of tea.

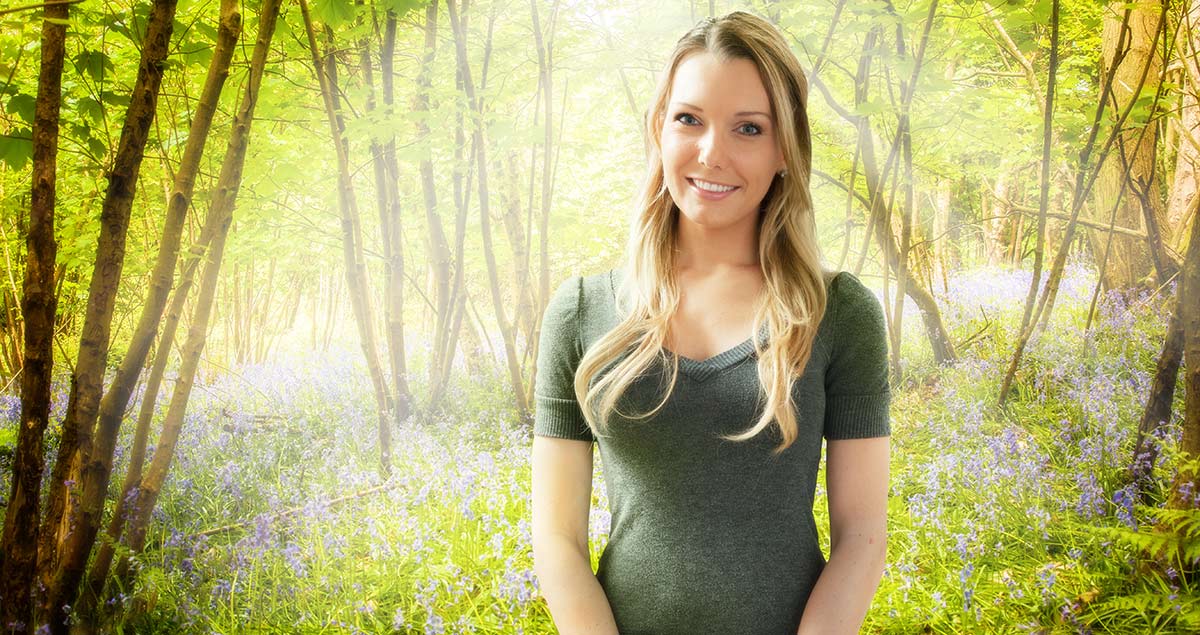
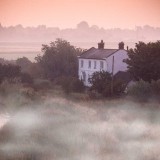
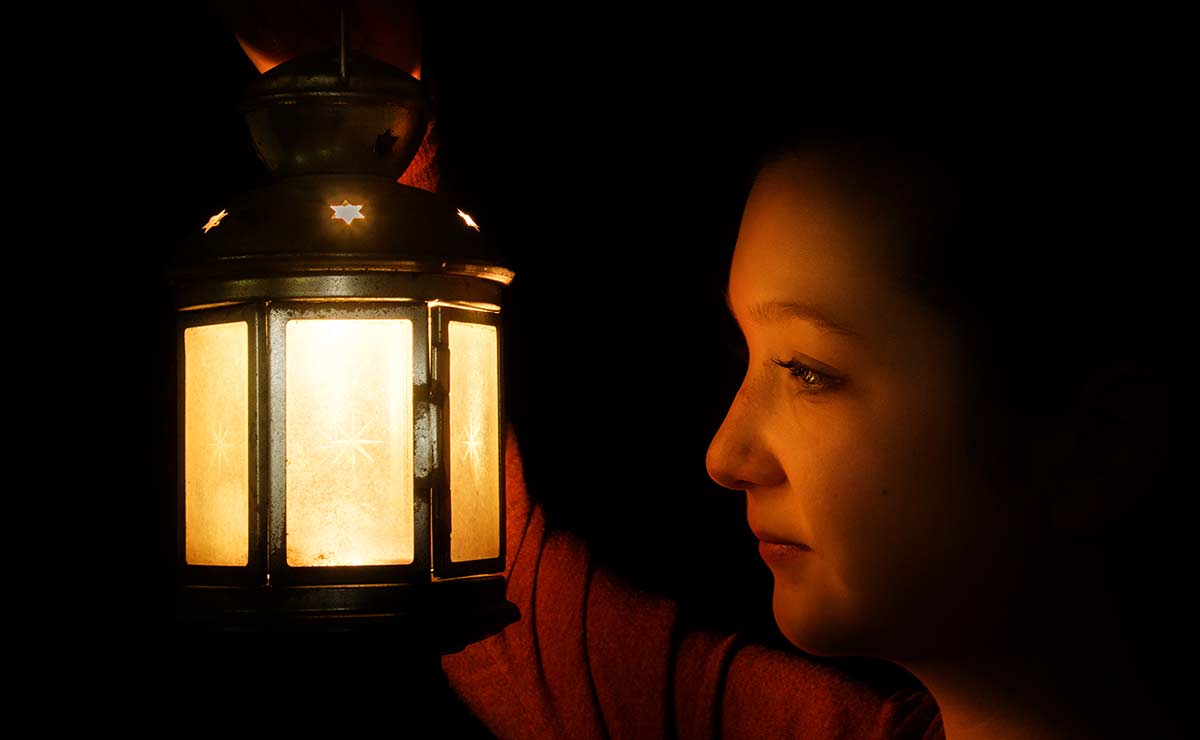
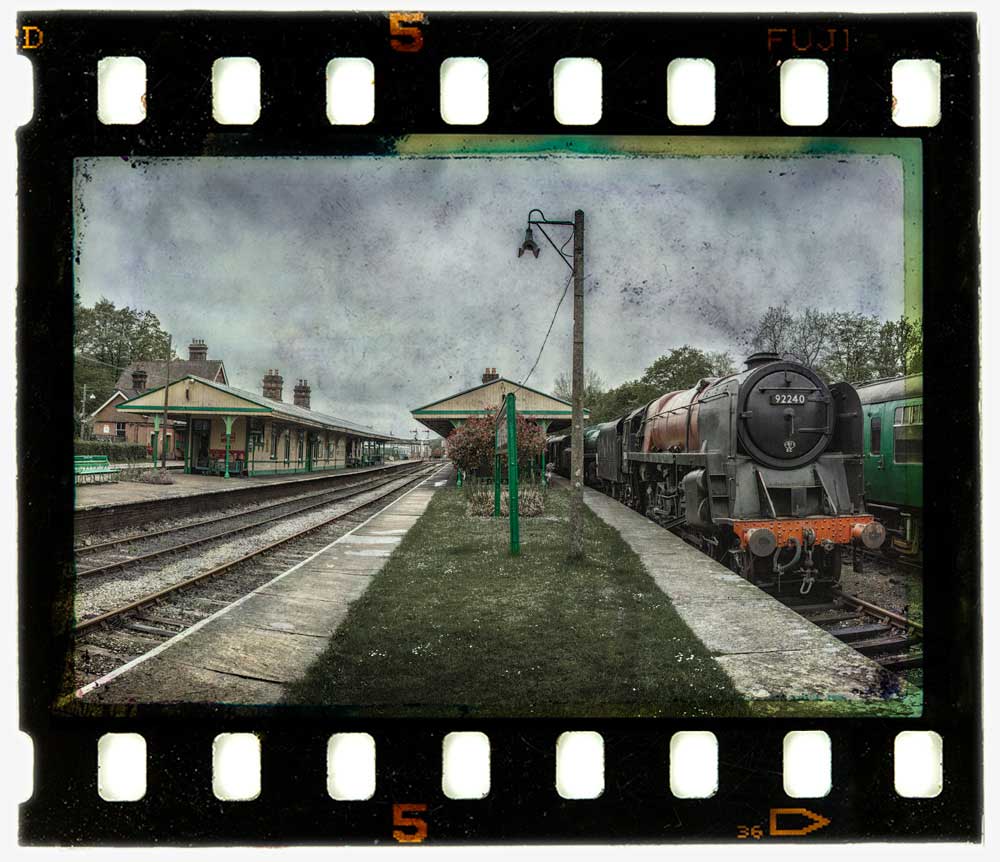
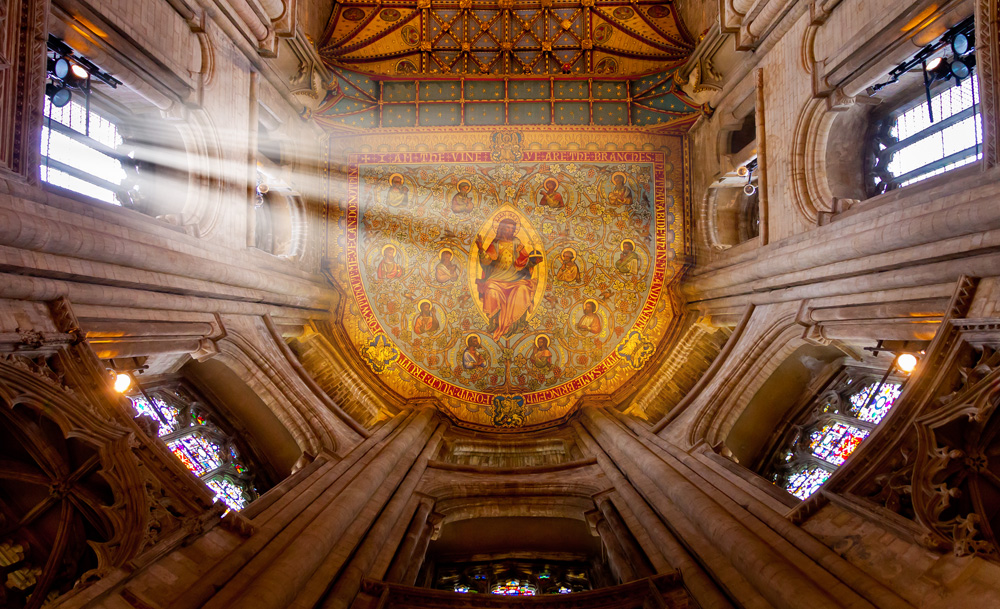
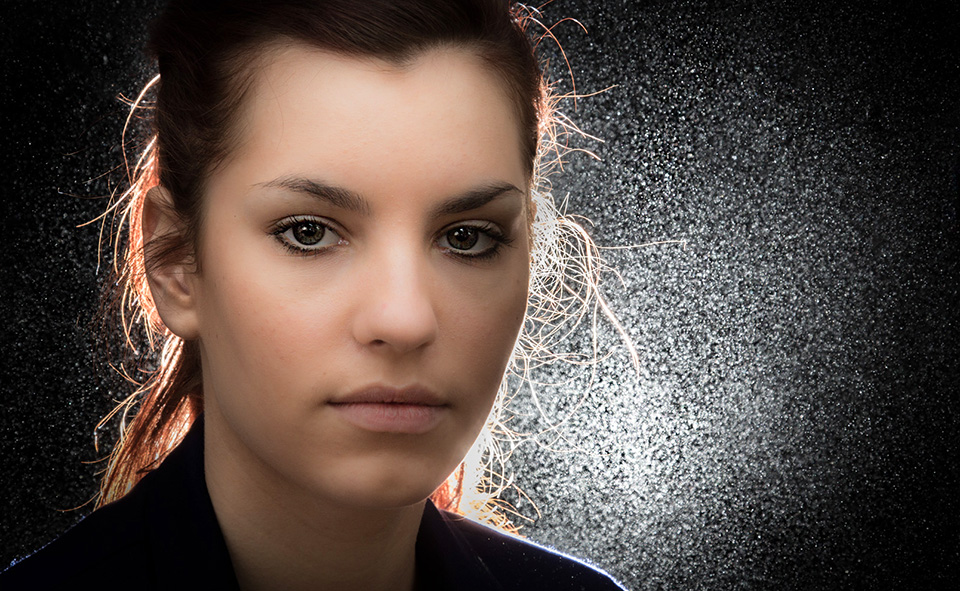
Dispite Mark being on his holiday and neither of us planning to shoot a video we decided the oportunity was too good to miss. The plan was for Mark to shoot a portrait in his studio in Phoenix, Arizona and I’d shoot a background in the UK and composite the two photos together.

So here’s part one which starts in the UK before moving on to the USA.

[youtube]http://youtu.be/Eh1-IaDmUnc[/youtube]

Part two is where I get to shoot a new background and composite the two photos together. I’ll be using Photoshop Elements 11 to do this which features the same ability to make amazing selections of hair that’s found in Photoshop CS5. In otherwords the technique I use in Elements is the same in Photoshop CS5, CS6 and Photoshop CC.

[youtube]http://youtu.be/uAPtbWLc_J0[/youtube]

We had a real laugh shooting this video and who knows, may be one day we can organise a bigger, better shoot or two. Mark made a BONUS outtakes video which you can see here and may be the best video of the three 🙂 http://youtu.be/gJf6vJ5_WXc

Equipment used in the video:

Adobe Photoshop Elements 11
http://www.adorama.com/ABPSE11WM.html?KBID=67338

Canon 5D Mark II
http://www.adorama.com/ICA5DM2.html?KBID=67338

Canon 24-105L f/4 IS
http://www.adorama.com/CA24105AFU.html?KBID=67338

Vanguard ABEO Plus 283CT Tripod
http://www.adorama.com/VGABEO283CT.html?KBID=67338

Vanguard GH-200 head
http://www.adorama.com/VGGH200.html?KBID=67338


Mist & Fog Brushes

Fog-Final-1This weeks Friday Freebie is a set of Photoshop Brushes that add beautiful mist and fog in just one click.

Full download instructions are below but you can also
Download the brushes for
Photoshop CS6 and beyond

Download the brushes for
Photoshop CS5 and earlier
(Also works with Elements)

Fog-Final-1cIf you’re wondering why there are two versions, maximum brush sizes in Photoshop CS6 (and in Photoshop CC) are twice as big as CS5 and earlier. To take advantage of this I’ve created two sizes of brush… be sure and download the correct one.

Once you’ve downloaded and unzipped the brushes they’ll need to be installed. The easiest way to do that is by opening the Brush panel and clicking the flyout menu in the top right corner. Click Load Brushes… and navigate to the light ray brushes that you downloaded and unzipped. Click here see a copy of the menu and information on where to click

To get the best from these brushes make a blank layer above your photo and set your foreground colour to white. Choose which brush you’d like to use and click once. You can then adjust the layer opacity and use free transform to resize and reposition the fog as you see fit. I found that using two or even all three mist brushes on separate layers often gave more realistic results the just using one but it all depends on the photo you’re using and the look you’re after.

If you create a photo using the Friday Freebie then let me (and everyone else) know by leaving the link in the comments below.

Usage rules
The brushes are copyright Gavin Hoey 2013. Use is limited to any personal, non-commercial purposes. Please share the Friday Freebie by linking back to this page. Do not redistribute the original image without my permission.

Download instructions
Click on the correct download link 
Download the brushes for Photoshop CS6, CC, CC2014 and beyond

Download the brushes for  Photoshop CS5 and earlier  (Also works with Elements)

1. On the download page, click the Download button download_icon

2. The download should start automatically

3. Unzip the file and install into Photoshop

No support is provided with the Friday Freebies. If you need help Google or YouTube the question and you’ll almost certainly find the answer :-)

Candlelight From A Speedlite

Sophie-FinalCandle light is one of the toughest types of light to work with for several reasons. There’s the obvious health and safety issues with naked flames and when your studios ‘made of wood (like mine is) that’s a big concern. That aside, candle light is also incredibly dim which is why film and TV directors fake candle light… and so do I.

In this video tutorial I’ll show you how to turn a speedlight in to realistic candle light which is safe, predictable and bright enough to keep your ISO at sensible levels.

I’m using a modified lantern as my virtual light source. If you want to get the same lamp then pop along to your nearest Ikea where you can pick one of the Rotera Lanterns up for around £2.00 (see link below) all you need to is leave it exposed to the elements for a few years and it’ll look just like mine 🙂

[youtube]http://youtu.be/Z_7kQorCwkU[/youtube]
Can’t view the video? Try this link http://youtu.be/Z_7kQorCwkU

Equipment used in the video:

Adobe Photoshop CS6
http://www.adorama.com/searchsite/default.aspx?searchinfo=photoshop+cs6&category=4294967278+11&KBID=67338

Canon 60D
http://www.adorama.com/ICA60D.html?KBID=67338

Canon 24-105L f/4 IS
http://www.adorama.com/CA24105AFU.html?KBID=67338

Ikea Lantern
http://www.ikea.com/gb/en/catalog/products/26472200/

35mm Film Template

35mm-film-finalI found this weeks Friday Freebie whilst sorting through a pile of old slides I had gathering dust in my office. I’d used this one during the ’90’s in what was known at the time as a “slide sandwich” and was simply two slides pressed together to create a new third image when projected.

Full download instructions are below but you can also
Click Here To Download the 35mm film template

Although the days of the slide sandwich are far behind me, the technique of combining two (or more) images together is alive and well in Photoshop in the form of layers. To make life a little easier I’ve created a template from the 35mm film complete with a note of where your own photo should be added, a blending mode that should work with most photos and a grungy layer mask for if you need to reduce the texture from the centre of the film. Of course you can also change everything if you want.

At 5000 pixels on the longest edge and with lots of fine textured detail, this weeks Friday Freebie PSD template comes in at around 70mb. If you’re not on a fast internet connection if might take a few minutes to download.

As always, if you create a photo using the Friday Freebie then let me (and everyone else) know by leaving the link in the comments below.

Usage rules
The image/template is copyright Gavin Hoey 2013. Use is limited to any personal, non-commercial purposes. Please share the Friday Freebie by linking back to this page. Do not redistribute the original image/template without my permission.

Download instructions
Click the link https://drive.google.com/file/d/0B_Mmmm3K1utNNXpONGJGTk9WUkU/view?usp=sharing

1. Click the Download button download_icon

2. The download should start automatically

3. Save the template to your hard drive

4. Open in Photoshop or Photoshop Elements

5. Paste your photo BELOW the 35mm layer

5 Questions about Photoshop CC

PS_cc

I very much doubt you missed the recent announcement from Adobe about the new version of Photoshop coming in June. To recap the next version will be called Photoshop CC and comes with some nice new features.

Adobe has also changed the way we purchase Photoshop (along lots of its other software titles) to a subscription only system that it calls Creative Cloud. This seems to be sending shockwaves rippling around the internet and as is so often the case not everything you read is true.

As someone who’s used Creative Cloud for the past year I’m well placed to give my impressions of the experience, so here are my answers the top 5 questions (in particular order) I keep hearing.

Please take a deep breath and read the whole post before commenting as I will be actively moderating them.

I’m happy with current version of Photoshop. Will that keep working once Photoshop CC comes out?
If you’re happy with your current version of Photoshop and either don’t want or need the new features of Photoshop CC then absolutely nothing will change for you. In fact I’d suggest you stop reading this now and get back to the more enjoyable things in life.

I’ve been told I must be online in order for Photoshop CC to work.
My PC is permanently online but my laptop is rarely online. Photoshop is installed on both machines and both work in exactly the same way. In fact unless I told you I was a Creative Cloud user, you’d never know the difference.  Photoshop needs to running whilst you’re online once every 90 days otherwise it might stop.

I don’t like the idea of all my files being in the cloud.
Neither do I and neither do Adobe. The cloud bit of “Creative Cloud” is where you download the software from and where you can choose to save work too. I keep all my photo, files, videos etc firmly on my PC. However I do use my Creative Cloud space to share things with clients, friends and with you. Check out my Friday Freebies to see that in action.

At the end of my subscription I’ll be left with nothing
I suppose that’s true. If you stop subscribing you’ll be left with whatever you used before you started using Photoshop CC. I look at it like this. Every year I pay a small fortune for insurance on my photo gear and at the end of the year I get nothing in return… assuming I haven’t made a claim. At least with Photoshop you get something back whilst you’re subscribed.

If  I stop subscribing will I loose access to my files?
If they’re on your hard drive then they’re not going anywhere. If you’ve used a new feature of Photoshop CC such as Camera Raw as a smart object layer then it will not be editable in older versions of Photoshop but it’ll still be there and your file will still open. You can also open PSD files in Photoshop Elements and a dozen other software packages from companies other then Adobe.

Photoshop CC won’t be everyone’s cup of tea and that’s fine. If you want the latest and greatest offering from Adobe or like me you need Photoshop and Premiere Pro the Creative Cloud is the perfect fit.

One more thing. If it wasn’t for Adobe’s Creative Cloud then there would have been a lot less Friday Freebies on gavtrain over the past year… just saying 😉

Light Ray Brushes

FF-Light-FinalThis weeks Friday Freebie is a set of Photoshop Brushes that create amazing beams of light at the click of a mouse.

Full download instructions are below but you can also
Download the brushes for
Photoshop CS6 and Photoshop CC

Download the brushes for
Photoshop CS5 and earlier 
(Also works with Elements)

If you’re wondering why there are two versions, maximum brush sizes in Photoshop CS6 (and in Photoshop CC) are twice as big as CS5 and earlier. To take advantage of this I’ve created two sizes of brush… be sure and download the correct one.

Once you’ve downloaded and unzipped the brushes they’ll need to be installed. The easiest way to do that is by opening the Brush panel and clicking the flyout menu in the top right corner. Click Load Brushes… and navigate to the light ray brushes that you downloaded and unzipped. Click here see a copy of the menu and information on where to click

FF-Light-Thumbs

If you create a photo using the Friday Freebie then let me (and everyone else) know by leaving the link in the comments below.

Usage rules
The brushes are copyright Gavin Hoey 2013. Use is limited to any personal, non-commercial purposes. Please share the Friday Freebie by linking back to this page. Do not redistribute the original image without my permission.

Download instructions
Click on the correct download link below to take you to the download page (no sign up is needed)
Download the brushes for
Photoshop CS6 and Photoshop CC

Download the brushes for
Photoshop CS5 and earlier

1. Click the link above

NOTE: You may see a message saying “There was a problem with the Network” Just ignore it

2. Click the Download button

3. Save the zip file to your hard drive

Weave Template

weave-KeylineThis weeks Friday Freebie is a weave effect image that adds a amazing 3D pattern to your photos, as you can see here.

Full download instructions are below but you can also
Click Here To Download the weave template

The weave template is a simple JPG image. I’ve made it in a square shape but it’s also very large at 5000 pixels on each side, so it’s easily adapted to both portrait and ladscape format images… as well as square ones of course 🙂

Once you’ve downloaded the template all you need to do is paste it over your image and resize it with Free Transform (CTRL+T) if required. Change the layer blending mode from Normal to Overlay and you’ll achieve a result like this. Howver this template works with loads of blending modes and I urge you to experiment, you’ll be amazed just how many variations there are!

If you create a photo using the Friday Freebie then let me (and everyone else) know by leaving the link in the comments below.

Usage rules
The image is copyright Gavin Hoey 2013. Use is limited to any personal, non-commercial purposes. Please share the Friday Freebie by linking back to this page. Do not redistribute the original image without my permission.

Download instructions
Click the link https://drive.google.com/file/d/0B_Mmmm3K1utNVDNhZWlNWmw3dlU/view?usp=sharing

1. Click the Download button download_icon

2. The download should start automatically

Smoke video clip

Smoke-SG1This weeks Friday Freebie is in two parts as I’m giving away a 30 second video clip of smoke and a tutorial on how to use the clip to create a simple animated text effect in Photoshop CS6

Full download instructions are below but you can also
Click Here To Download the smoke video clip

You can preview the video clip by clicking here

One of the headline new features of Photoshop CS6 is its ability to edit video clips with exactly the same skills you’d need to edit photos. Unlike Photoshop CS5 the video editing is available to all version of Photoshop CS6 not just the extended version.

Now I know most photographers are yet to embrace video and it’s certainly a very different discipline to learn but if you fancy trying your hand at video then this weeks Friday Freebie is for you.

Usage rules
The video clip is copyright Gavin Hoey 2013. Use is limited to any personal, non-commercial purposes. Please share the Friday Freebie by linking back to this page. Do not redistribute the original video clip without my permission.

Download instructions
Click the link https://drive.google.com/file/d/0B_Mmmm3K1utNbzNDc0E3ZWhNc28/view?usp=sharing

1. Click the Download button download_icon

2. The download should start automatically

Once you’ve got the video you’ll need something to do with it. There’s plenty of ways you can use the clip but to get you started here’s a quick and simple text animation effect.

[youtube]http://youtu.be/sfQfPoTs64U[/youtube]

Three reasons why you need a card reader

Lexar-25in1If you’re still plugging your camera into your computer every time you want to get at your photos, you’re not alone. I meet loads of photographers who don’t own a card reader and even some who have never removed the card from their camera.

Card readers are cheap, convenient and utterly essential in my book. Still not convinced? Here are three great reasons to use one.

Speed
If you want to access your photos fast then a modern USB3 card reader can’t be beaten as long as you have a spare USB3 socket to hand (it’s usually blue coloured, if it helps identify it).

Even the more pedestrian USB2 readers will often out perform download speeds from many camera when pluging them directly in to your computer.

Convenience
Do you know where you put the little cable to hook up your camera to the PC? If the answer is yes then well done you. Like most people I have a habit of loosing cables on a regular basis espeically if it’s a really, EALLY important one. Generally speaking a card reader remains attached to your computer or can even be built in, which makes it much tougher to loose!

Power
Using you camera as a card reader will mean turning it on, which is fine as long as your batteries are charged. Murphy’s Law dictates that the day when you absolutely must get those photos off your camera the batteries are going to be flat and the charger  is no where to be found. No such problems exist with card readers as they draw thier power through the USB cable.

There are 100’s of different USB readers on the market. I’ve used the Lexar brand for many years and can highly recomend them. A word to the wise, if your buying one for a modern SD card make sure it’s compatble with your SDHC or SDXC format if that’s what you have.

Backlit portrait with just one light

Final-ChristinaI’m a huge fan of using speedlights, or flash guns as I grew up calling them and I know a lot of photographers own at least one. For me the humble speedlight is a powerful tool capable of producing amazing portraits.

In this video I try to break the laws of physics by using one speedlight to light both the back and front of a model with just one light. The secret is reflecting the light off of a silver reflector which in effect makes one light become two.

As a final touch I’ll create a sparkling background by adding a little bit of flour into the air behind my model Kristina but in front of the flash.
[youtube]http://youtu.be/p3xCN7geBI0[/youtube]

Equipment used in the video: 

Adobe Photoshop CS6

http://www.adorama.com/searchsite/default.aspx?searchinfo=photoshop+cs6&category=4294967278+11&KBID=67338

Canon 60D

http://www.adorama.com/ICA60D.html?KBID=67338

Canon 24-105L f/4 IS
http://www.adorama.com/CA24105AFU.html?KBID=67338

5 in 1 reflector
http://www.adorama.com/WE5I1R20.html?KBID=67338