Smoke Machine Background

One of the draw backs of working in any studio is the finite nature of the backgrounds you can work with during a shoot. Of course if you’re handy at a bit of DIY you can build your own sets and create some amazing backgrounds but that takes time and besides, carpentry isn’t one of my strongest skills as you’ll see when I made my current studio background.

So what can you do to quickly change the background? Well I have a bunch of different fabrics which work really well but as you’ll see in this video, nothing beats the smoke machine for effect and downright fun!

[youtube]https://www.youtube.com/watch?v=LvLjiahVBrs[/youtube]

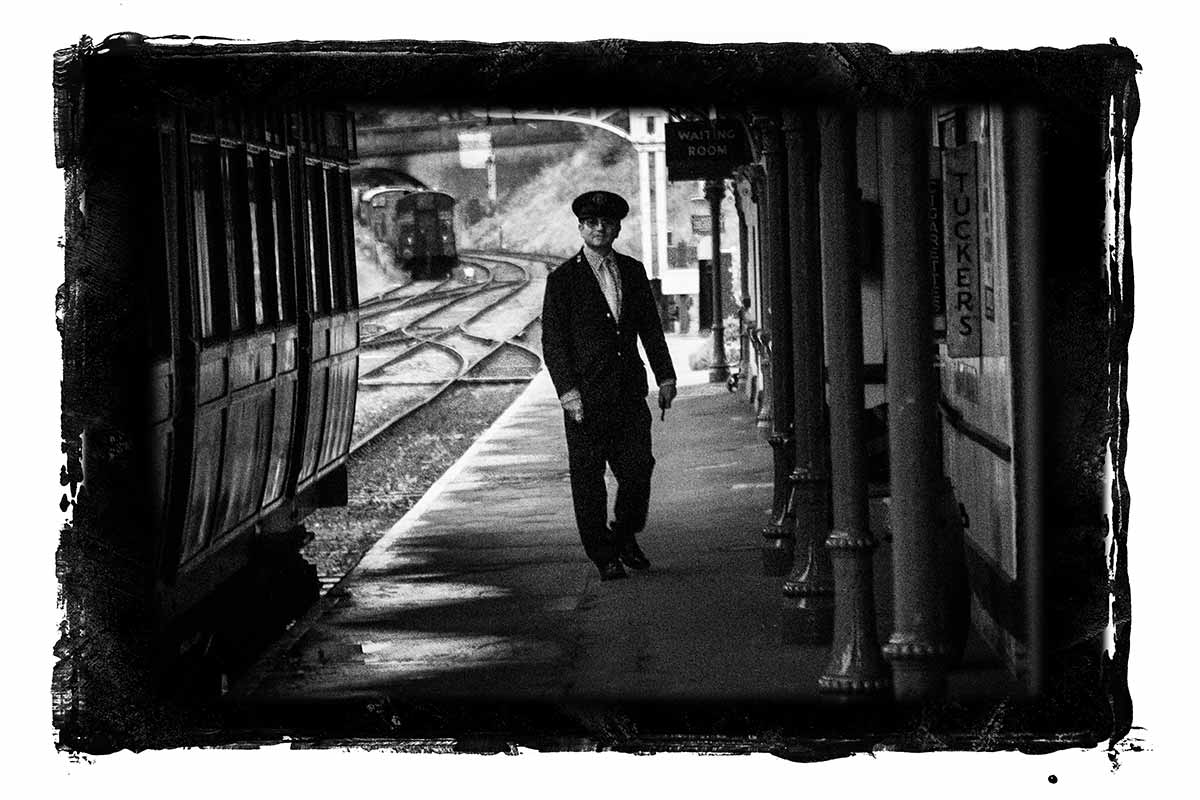
That shoot was part of a series I shot with a Fortune Teller theme and the smoke machine was perfect for the background, as the smoke builds up, the effect changes from a slight haze to thick fog.

Kerry-Smoke-1

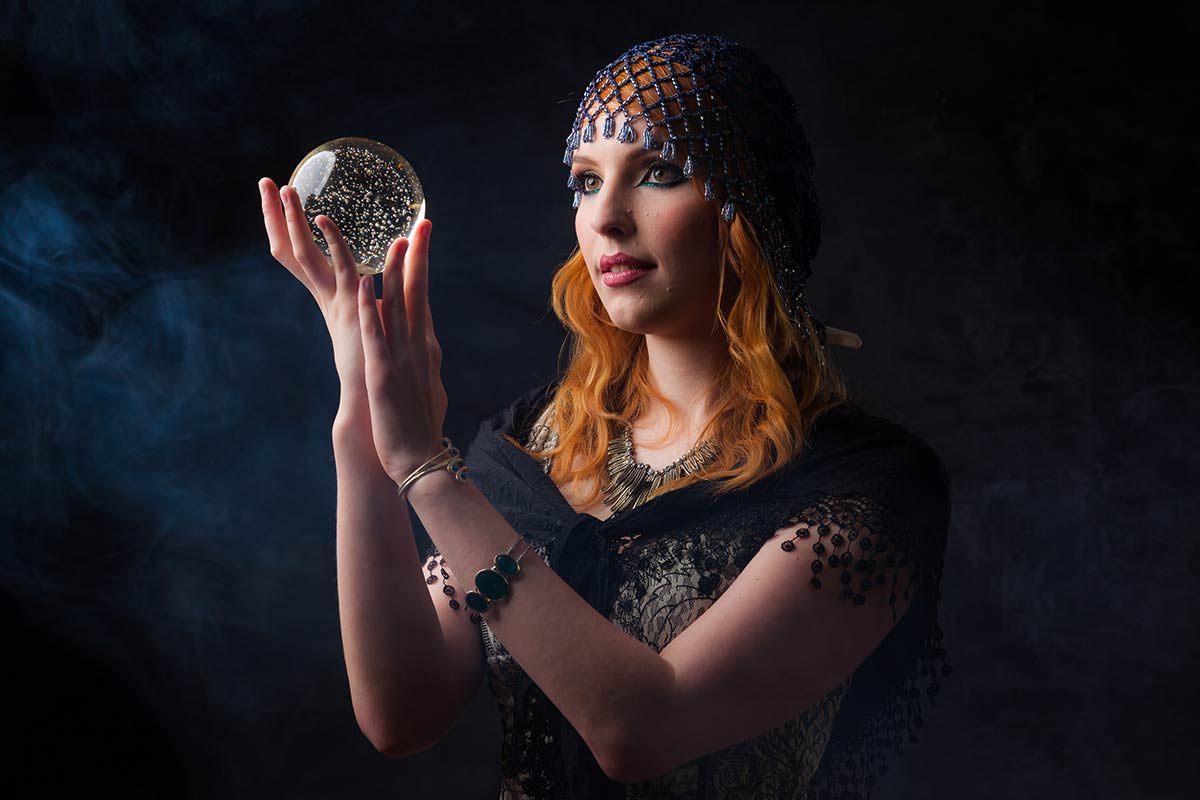
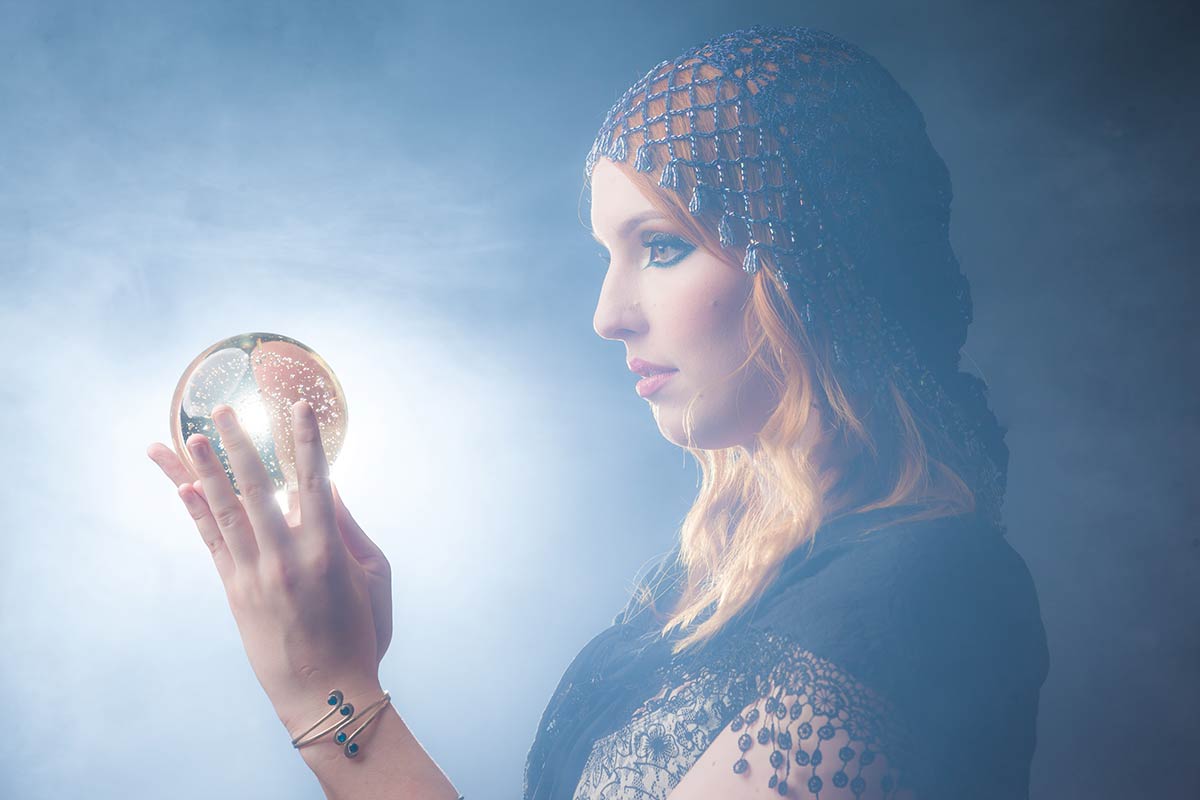
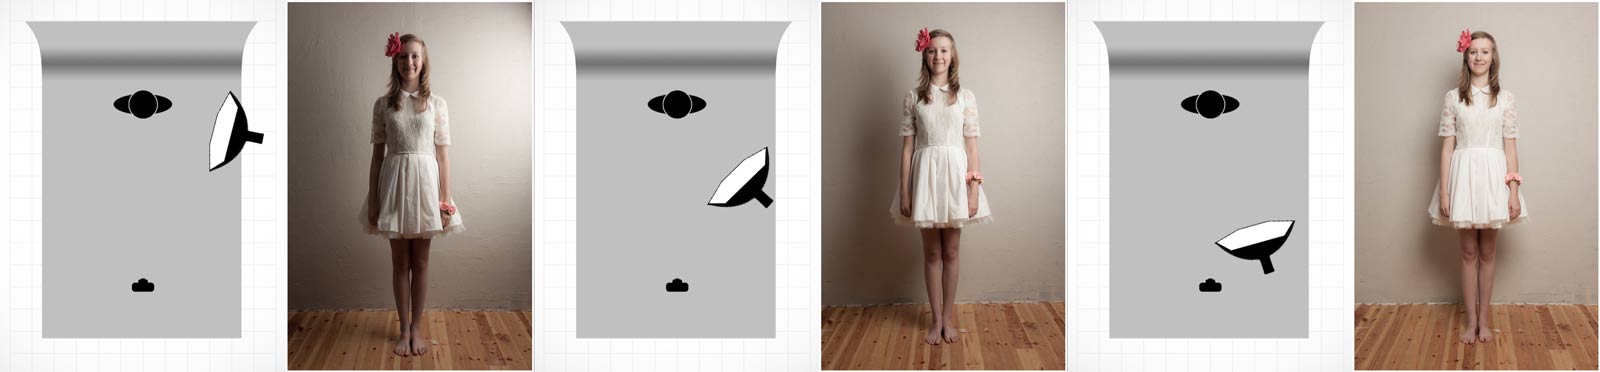
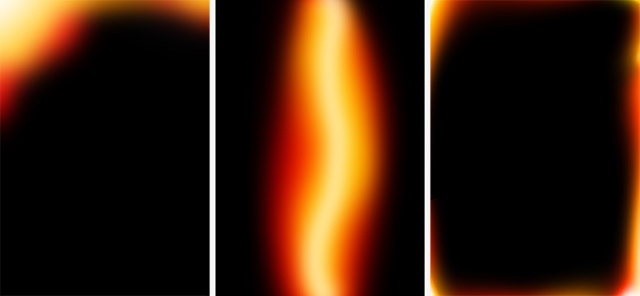
The smoke is a whitish/blueish colour so to get the full effect of the smoke you’ll need a dark background and ideally a light to illuminate the smoke from either the side or back.

Kerry-Smoke-2

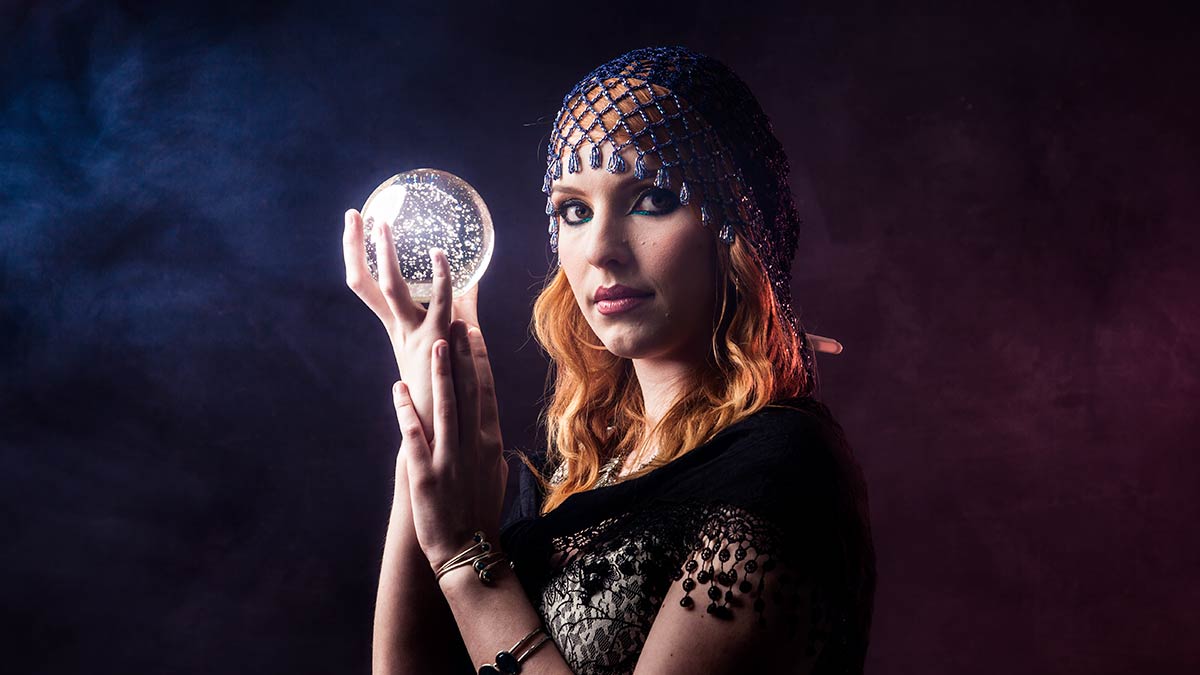
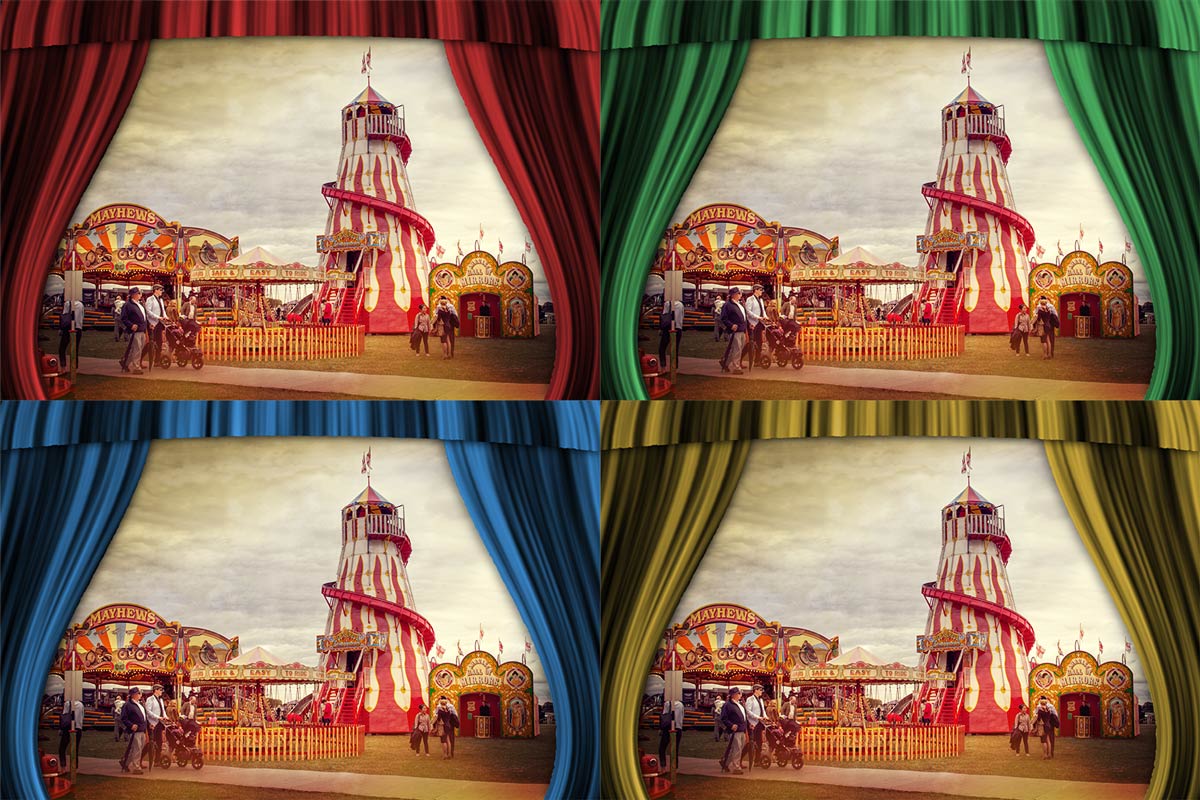
Adding a splash of colour to the fog is as easy as popping a coloured gel on the flash that illuminating the fog. In this case I added a red gel to the flash on the right and increased the saturation of the natural blue colour of the fog in Photoshop.

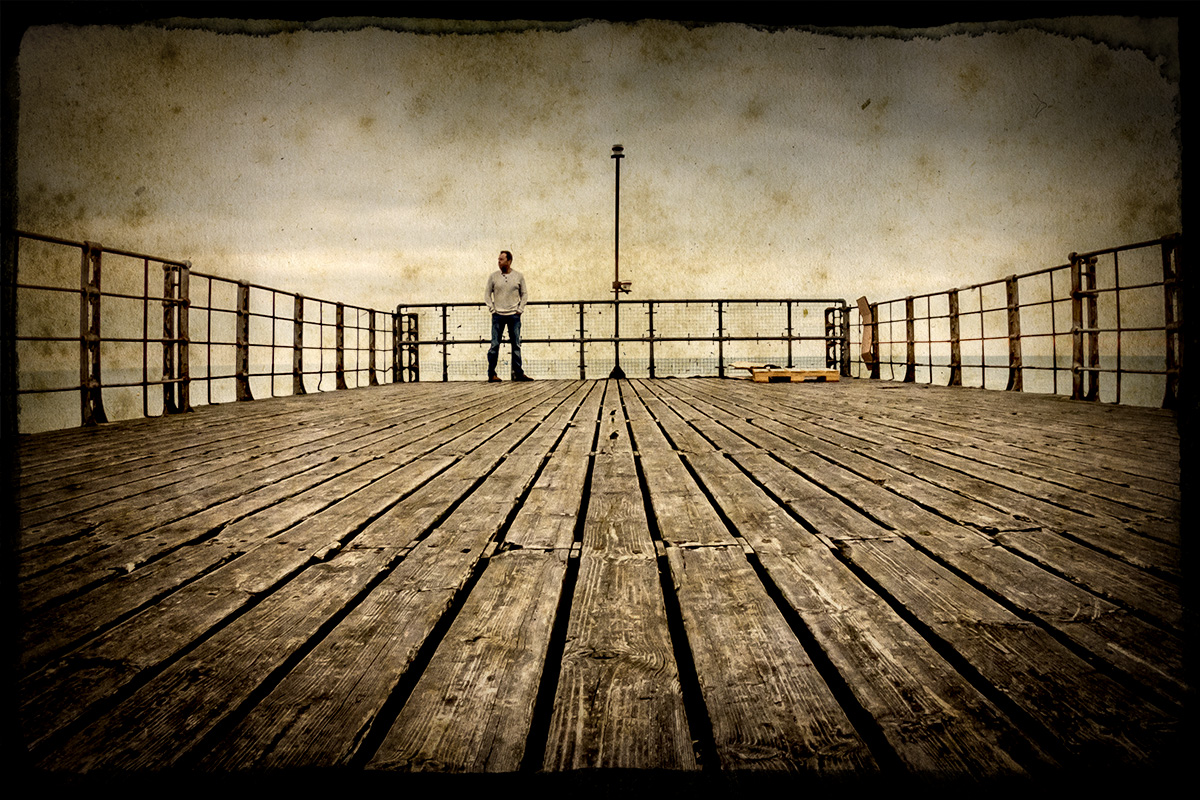
Too much smoke can ruin the shot by reducing contrast, especially if you light it from the front. For that reason I keep any smoke shots until the end of the shoot.

Kerry-Smoke-3

Finally it’s worth checking that the smoke “juice” is water based to avoid leaving a residue all over your studio and is non toxic… pretty obviously. The smoke builds up pretty quickly so also keep a check on the model and anyone else in the studio. At the first sign of problems get some fresh air.

Model: Kerry Allingham
Make-Up: Anna Matos

Gear used in this video

Canon 5D Mark III www.adorama.com/ICA5DM3.html?KBID=67338

Canon 50mm f/1.8 II www.adorama.com/CA5018AFU.html?KBID=67338

Flashpoint Light Stand www.adorama.com/FPLS9.html?KBID=67338

Black Rapid RS-7 Strap www.adorama.com/BRRS7.html?KBID=67338

Flashpoint StreakLight 360 Ws Creative Collection www.adorama.com/FPLFSL360K2.html?KBID=67338

Sekonic L-308S Flashmate www.adorama.com/SKL308S.html?KBID=67338


Curtain Action – Friday Freebie

It’s been a while since I’ve done a Friday freebie so lets put that right with a Photoshop action.

This Action creates a set of beautiful curtains in a theatrical style with a single click of your mouse. There’s four colours to choose from and it’s a brilliant way to frame your vintage style images. The curtains are created from scratch using standard Photoshop filters and effects and to add an extra touch of realism they have a ragged edge and a gentle bow.

Full download instructions are below but you can also Download the Curtain Action

Basic-Curtains

Once downloaded just unzip and install the action into Photoshop. Unfortunately this action is unsuitable for  Photoshop Elements

To use the action, start with the photo you wish to use already open in Photoshop and then play one of the four actions in this set. The first thing it does is make a copy of your photo so the original will be untouched and safe. There’s a lot of things for Photoshop to do with this action so it may take a minute or two to run through.
DO NOT switch to another image whilst running the action.

There are no options or controls for this action but at the end you may need to use Free Transform (CTRL+T) to re-size and re-positing your photo under the curtains

The action will work with Photoshop CC2014, CC, CS6, CS5 and CS4

If you create a photo using the Friday Freebie then let me (and everyone else) know by leaving the link in the comments below.

all-curtains

Usage rules
The action is copyright Gavin Hoey 2015. Use is limited to any personal but non-commercial purposes. Please share the Friday Freebie by linking back to this page. Do not redistribute the original image without my permission.

Download instructions

he direct link to download the actions is https://www.gavtrain.com/wp-content/uploads/2015/05/Cutains-Gavtrain.zip

You must UNZIP the action before installing it in Photoshop

No support is provided with the Friday Freebies. If you need help Google or YouTube the question and you’ll almost certainly find the answer :-)

Cracked Photoshop Brushes

Cracked and pealing paint always draw me in as a photographer so here’s a great Friday freebie which combines a selection of my peeling paint photo and turns them into cracked Photoshop brushes. These brushes are full resolution and can be used to paint, erase or mask to create all sorts of effects.

Full download instructions are below or Click Here to DOWNLOAD THE CRACKED BRUSH SET

Cracked-Brushes-Final
If you like your graphic design then those photo real cracked paint brushes will have plenty of uses and Photographers will find them handy to. For example the photo above was given an aged and distressed look by applying the brushes on a layer set to Overlay blending mode. The cut corner border is a previous Friday Freebie Photoshop action which has also been aged with the cracked brushes and Lighten layer blending mode.

Cracked-Brushes-Sample

These Brushes will work in any version of Photoshop and they’re fully compatible with Photoshop Elements too!

As always, if you create a photo using the Friday Freebie then let me (and everyone else) know by leaving the link in the comments below.

Usage rules
The brushes are copyright Gavin Hoey 2014. Use is limited to any personal but non-commercial purposes. Please share the Friday Freebie by linking back to this page. Do not redistribute the original image without my permission.

Download instructions
1. Click the link https://www.gavtrain.com/wp-content/uploads/2014/08/Cracked-Brushes.zip to download

2. Save the brushes to your desktop

3. Unzip the file

4. Open in Photoshop or Photoshop Elements

5. Install the brushes (This link will help if you don’t know how)

6. Enjoy!

No support is provided with the Friday Freebies. If you need help Google or YouTube the question and you’ll almost certainly find the answer :-)

Paper Texture – Friday Freebie

We have a small collection of old books in our house which is slowly growing. Each one has aged differently and most have some wonderful textures hidden inside, which means I’m never short of photo inspiration. This weeks Friday freebie is a combination of two pages which gives a brilliant vintage feel when added to a photo.

Full download instructions are below but you can also Click Here To Download the Paper Texture

FF-Book-Texture-Overlay
This texture works best when blended with photos that have plenty of light colours, so that’ll be skies or in this case a light coloured wall. In the photo above I used the Overlay blending mode but you can get great results with multiply and even Divide mode too. Just try them all and see what works.

FF-Book-Texture-Samples

As always, if you create a photo using the Friday Freebie then let me (and everyone else) know by leaving the link in the comments below.

Usage rules
The image is copyright Gavin Hoey 2014. Use is limited to any personal but non-commercial purposes. Please share the Friday Freebie by linking back to this page. Do not redistribute the original image without my permission.

Download instructions
Click the link https://www.dropbox.com/s/9vozzrhjv99xuzo/FF-Book-Texture.zip to take you to the Dropbox download page (no sign up is needed)

1. Click the Download button

2. Save the template to your hard drive

3. Unzip the file

4. Open in Photoshop or Photoshop Elements

5. Paste on to your photo

6. Resize (CTRL+T) and change the Layer Blending mode as needed.

No support is provided with the Friday Freebies. If you need help Google or YouTube the question and you’ll almost certainly find the answer :-)

The Softbox – Home Studio Essentials – Episode 3

There’s a reason why the softbox is my “go to” light modifier in my small home studio and it’s all to do with one of the biggest challenges photographers face when shooting in small spaces. With lots of wall close to the light source small studios can become one big reflector with light bouncing all over the place. Whilst that can be great for evenly lit shots it’s a disaster if you want moody lighting or even just basic control of the light direction. Softboxes like the Westcott Apollo Orb I’m using for this shoot, focus the light forward and cut out light spilling behind and to the sides. The upshot is beautiful soft light that has direction even in a small studio.

In this video I use 1 meter wide round softbox to give just the right amount of light on the model to achieve the effect I want. Of course in the real world of studio portraits getting the light right never happens first time so run through a couple of different light positions to see what works as well as cover the Photoshop processing to enhance the vintage feel.

[youtube]http://www.youtube.com/watch?v=z0MTQFYnvQA&list=UU8Pksdbj37CdE00kmE7Z1dw[/youtube]

For this series of videos I want you to do more then just watch it, I’m hoping you’ll get your camera and take a photo based on the ideas you see in the video. That might be the lighting set up, the models pose or the Photoshop post processing. If you do (and you’re on Facebook) then please add them to Adorama’s Facebook page. I’ll be checking it regularly and giving constructive feedback on as many as possible

Softbox-demo-retro

Gear used in this video (Links back to Adorama)

Flashpoint StreakLight 360 Ws Creative Collection (Includes flash, battery, trigger, boom etc)

Westcott Apollo Orb Softbox

Canon 5D Mark 2 

Canon 24-105L 

If like me you like to keep a visual record of you’re lighting set ups then this image should come in very handy.

Softbox-lighting-diagram-onelight

Cut Corners Action

You know how some ideas sound easy until you try and make them happen, well this Friday Freebie Photoshop action really ticks that box. All I wanted to do was make a photo look like it was slotted into the corners of a vintage photo album page. My first test worked really well but recreating a similar result within the confines of a Photoshop action took a lot of working out and many, many hours of trial and error (mostly error). However I think you’ll agree that the end result was worth the effort!

You can download the action here: Cut Corners – Gavtrain
Cut-Corner-Border

To use the action, start with the photo you wish to use already open in Photoshop and then play the action. The first thing it does is make a copy of your photo so the original will be untouched and safe. There’s a lot of things for Photoshop to do with this action so it may take a minute or two to run through. As with most actions, the size of your image will effect the final effect and I’d suggest starting with a photo 3000 pixels (longest edge) or bigger.

The action will work with Photoshop CC, CS6, CS4, CS4 and CS3 but because it uses “Warp Transform” it WILL NOT work  with any version of Elements, sorry.

Usage rules
The action is copyright Gavin Hoey 2014. Use is limited to any personal, non-commercial purposes. Please share the Friday Freebie by linking back to this page. Do not redistribute the original action without my permission.

Download instructions
The direct link to download the actions is https://www.gavtrain.com/wp-content/uploads/2014/05/Cut-Corners-Gavtrain.zip

No support is provided with the Friday Freebies. If you need help Google or YouTube the question and you’ll almost certainly find the answer 🙂

Three Light Leaks

Light-Leak-Samples-NYCHere’s a Friday Freebie for those that love the vintage style photos. Light leaks were always a potential hazard for me back in the days of film photography, especially with my very first Praktica camera. Fortunately it rarely happened but now it’s very in.

Click Here To Download three light leaks

This Friday Freebie is not one, not two but three light leak images that are all ready to be pasted to your images. They’ll work with pretty much any photo but they really look good on vintage style images with a retro or timeless feel. In this case it’s a photo I snapped on a recent trip to New York

To use the light leaks first download them and unzip the file. Open the light leaks into Photoshop or Photoshop Elements and simply copy and paste them on to your image. Use Free Transform to rotate and resize them as much as you need. To blend them in simply change the Layer Blending Mode from Normal to Screen. If you want more light leaks, just paste them in!

Light-Leak-Samples

If you create a photo using the Friday Freebie then let me (and everyone else) know by leaving the link in the comments below.

Usage rules
The template is copyright Gavin Hoey 2014. Use is limited to any personal, non-commercial purposes. Please share the Friday Freebie by linking back to this page. Do not redistribute the original image without my permission

Heavy Painted Border

Steam-Train-Border-FFHere’s another amazing border from my recent painting session. This time I’ve gone for a border that surrounds your photo with a wide painted edge.

Full download instructions are below but you can also
Click Here To Download the Heavy Painted Border

I’ve designed this border so it can be used in two ways and it all depends on if you add your photo above or below the border.

Once you’ve downloaded it you’ll find I’ve removed the centre of the border image but left it transparent. S0 to make the image / border combo you see here all you do is drag your photo below the border layer in Photoshop. The centre area has a short fade so it blends in nicely with the photo.

The second option is to place your photo above the border layer. Doing that will give you a hard edge and you can decide how much of the border is seen.

You’ll need to resize your image or the border with Free Transform (CTRL+T). Use the corner handles to drag the image to the size you want and when done press Enter. The border will work with any photo although it’s especially good with black and white images.

If you create a photo using the Friday Freebie then let me (and everyone else) know by leaving the link in the comments below.

Usage rules
The image is copyright Gavin Hoey 2013. Use is limited to any personal but non-commercial purposes. Please share the Friday Freebie by linking back to this page. Do not redistribute the original image without my permission.

Download instructions

Click the link https://drive.google.com/file/d/0B_Mmmm3K1utNa19JQmtESDNVZjQ/view?usp=sharing
1. Click the Download button download_icon

2. The download should start automatically


Vintage Border and Texture

FILM-EDGE+FINALThis week’s Friday Freebie is a vintage border and texture combined into one. It’s a warm tone texture that combines staining and aging with a custom made distressed black edged border. The texture is actually the inside leaf of a very old and rather battered book that Sam picked up at a boot sale. All the blank pages have this amazing textured appearance and I’ll be sharing more of them as Friday freebies soon.

Full download instructions are below but you can also
Click Here To Download the vintage border & texture

As with all textures it works best with photos that have large areas of bright tones such as this one which has loads of bright sky. All you need to do is paste the texture above your photo and set the blending mode. There are loads of different layer blending modes and they’ll all give a different look but I’d suggest Multiply as the best mode to try first.

This is a fairly dark texture and the Multiply blending mode will also make the image less bright. Once you’ve added the texture I’d suggest adding a Levels adjustment layer to either your photo or at the top of the layer stack and moving the middle levels slider to adjust the overall brightness… if required.

If you create a photo using the Friday Freebie then let me (and everyone else) know by leaving the link in the comments below.

Usage rules
The image is copyright Gavin Hoey 2013. Use is limited to any personal, non-commercial purposes. Please share the Friday Freebie by linking back to this page. Do not redistribute the original image without my permission.

Download instructions
Click the link https://drive.google.com/file/d/0B_Mmmm3K1utNaTlfSUdvSjB1b0U/view?usp=sharing

1. Click the Download button download_icon

2. The download should start automatically


Vintage Camera Effect – Creative Lightroom Episode 10

CL-final-10In this weeks episode of Creative Lightroom I take at one of my favourite ways to give my images a retro look in Lightroom. Now I could probably do another 10 videos on all the different styles of vintage style post processing you can do in Lightroom ranging from the very subtle to the over the top effects. This one falls towards the middle of that list.

For me there are a few essential things that make a vintage camera style image. First it need a cross processed colour scheme, in other words the colour need to be just the right side of wrong. Next it needs to lack contrast and finally a spot of vignetting is a nice touch. This technique has all that and more.

As always it’s worth mentioning that if you’re a Photoshop user rather then Lightroom user, EVERYTHING I show in the video is the same as Adobe Camera RAW in Photoshop CC, CS6, CS5 and CS4.

[youtube]http://www.youtube.com/watch?v=oGAOqby364k[/youtube]

Can’t see the video? Click here: http://youtu.be/oGAOqby364k