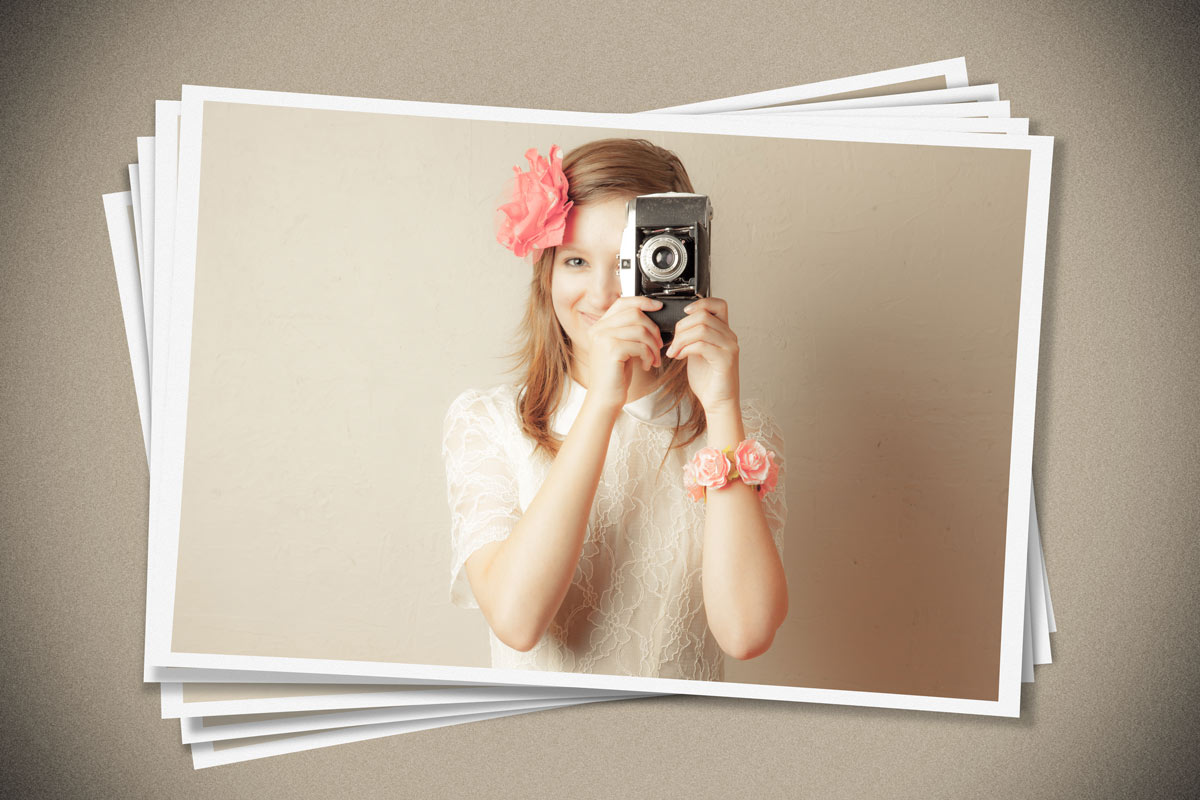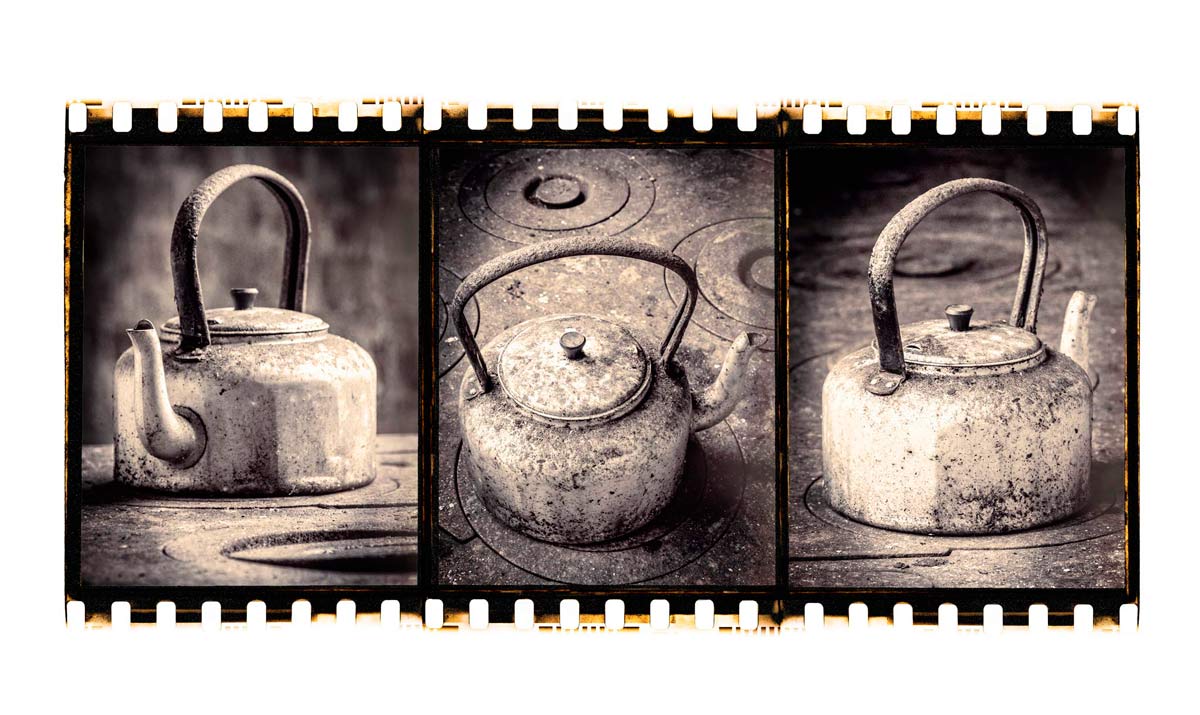
Creased and Folded Action – Friday Freebie

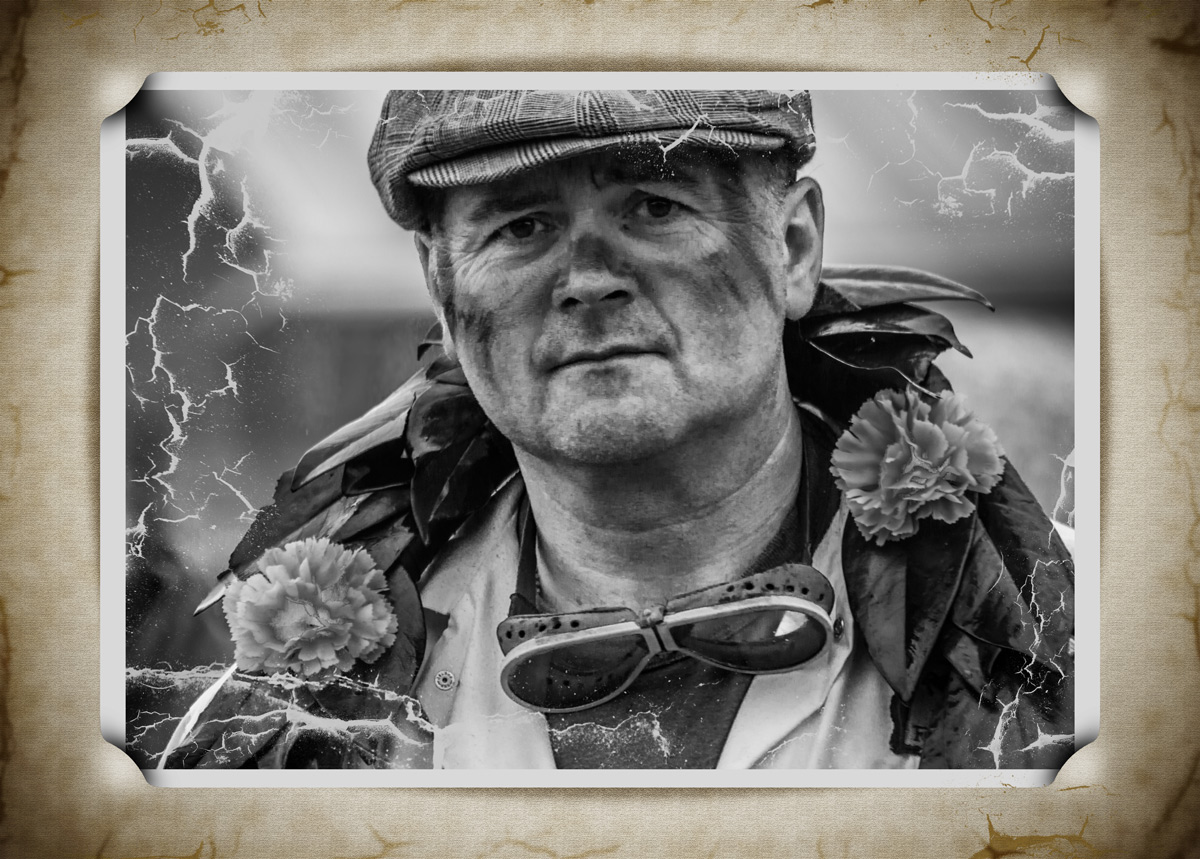
In the real world folding a photo isn’t a smart move unless it’s heading for the bin. However in the mad cap world of Photoshop you can virtually fold a photo any time you like.

With this Friday Freebie Photoshop action folding and creasing a photo is a simple one click affair. Not only that but you’ll also get a border and some fancy shadow effects to enhance the 3D feel. The action is one of the longer ones I’ve made for a Friday Freebie and may take a minute or two to run but the wait and the effort to make it is worthwhile.

You can download the action here: Creased and folded
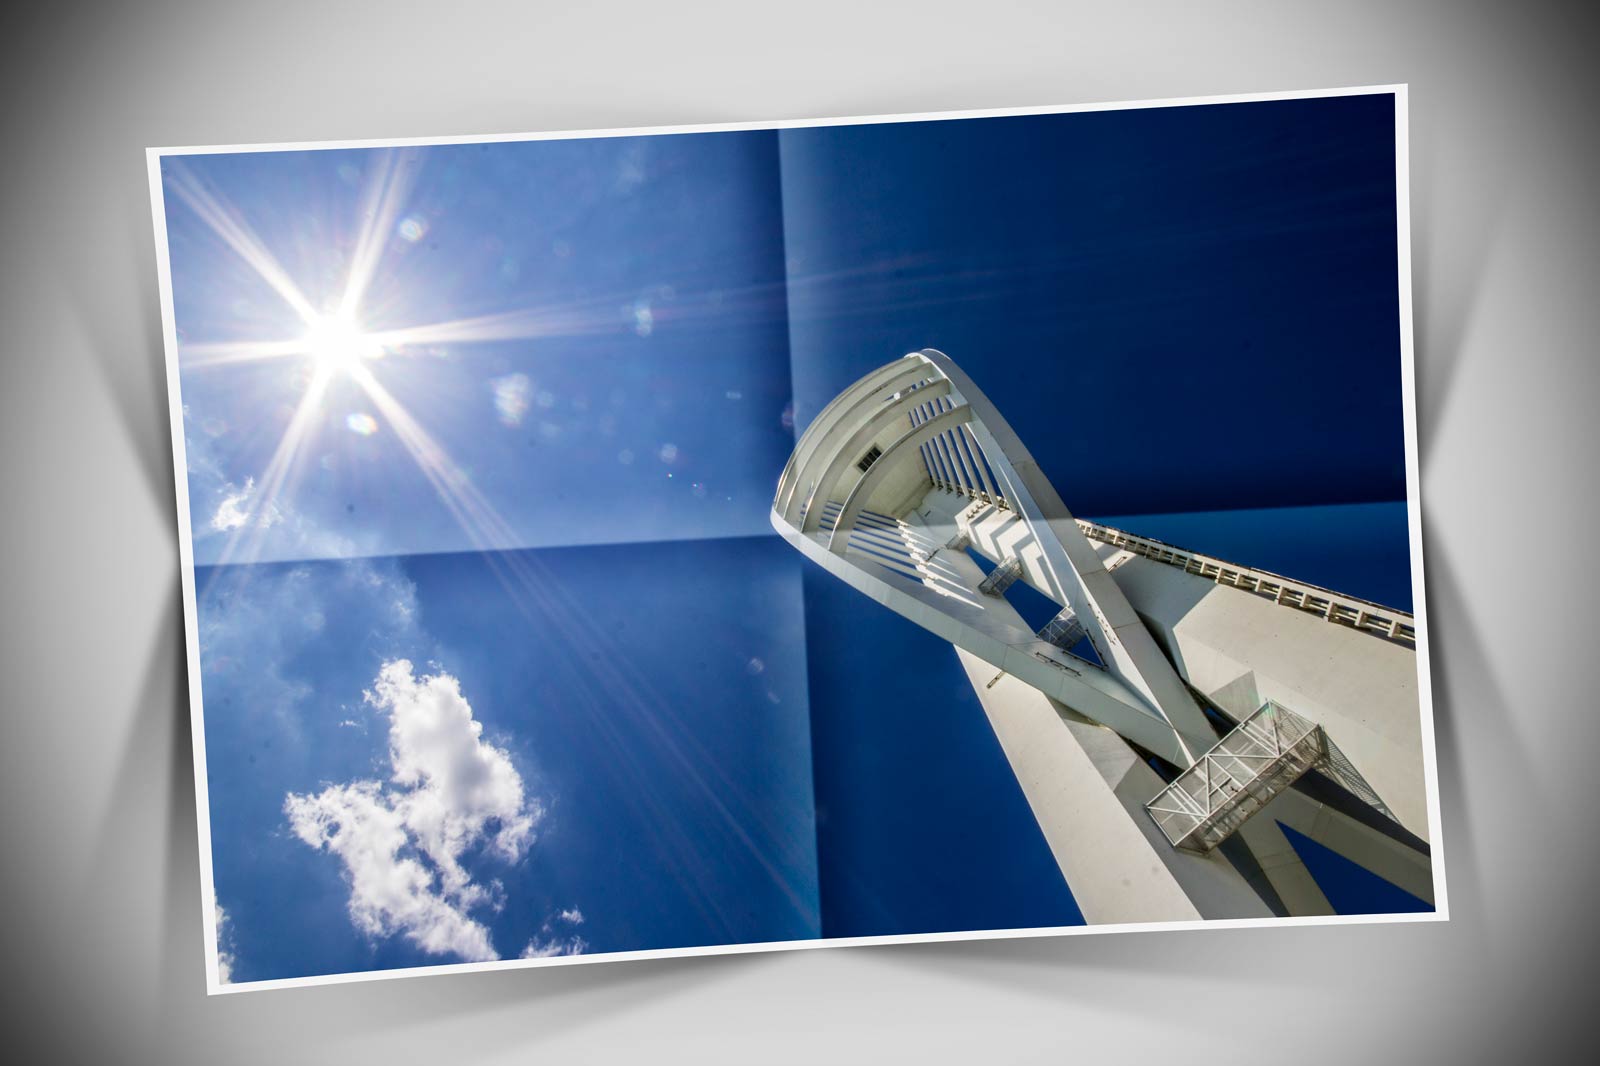
Folded-Corner-action

To use the action, start with the photo you wish to use already open in Photoshop and then play the action. The first thing it does is make a copy of your photo so the original will be untouched and safe. There’s a lot of things for Photoshop to do with this action so it may take a minute or two to run through. DO NOT switch to another image whilst running the action.

There are no options or controls for this action but at the end you will be left with several layers, so if you need to make any adjustments to the final effect you can.

As with most actions, the size of your image will effect the final effect. Smaller images with less the 2000 pixels on the longest edge are best avoided. Personally I’d also steer clear of portrait format images, this action works best with wide but not too wide shots.

The action will work with Photoshop CC, CS6, CS4, CS4, CS3 and should work with Photoshop Elements 11 and beyond too.

Usage rules
The action is copyright Gavin Hoey 2014. Use is limited to any personal, non-commercial purposes. Please share the Friday Freebie by linking back to this page. Do not redistribute the original action without my permission.

Download instructions
The direct link to download the actions is https://www.gavtrain.com/wp-content/uploads/2014/08/Creased-and-folded.zip

You must UNZIP the action before installing it in Photoshop / PS Elements

No support is provided with the Friday Freebies. If you need help Google or YouTube the question and you’ll almost certainly find the answer 🙂
5 in 1 Reflector – Home Studio Essentials – Episode 4

HSE-EP4-FinalThere’s 1000’s of photographic gadgets, gizmos and accessories that you can spend your hard earned money on and whilst many are utterly useless, there are a few that are indispensable. Towards the top of my list of “must have” accessories is the 5 in 1 reflector.

A five in one reflector is so called because it has five surfaces. There’s the white and silver surfaces for bouncing light, a gold side for adding adding warm light (and usually best avoided), a black surface to block light and a translucent surface to diffuse light. Best of all it’s one of the least expensive bits of kit you can buy.

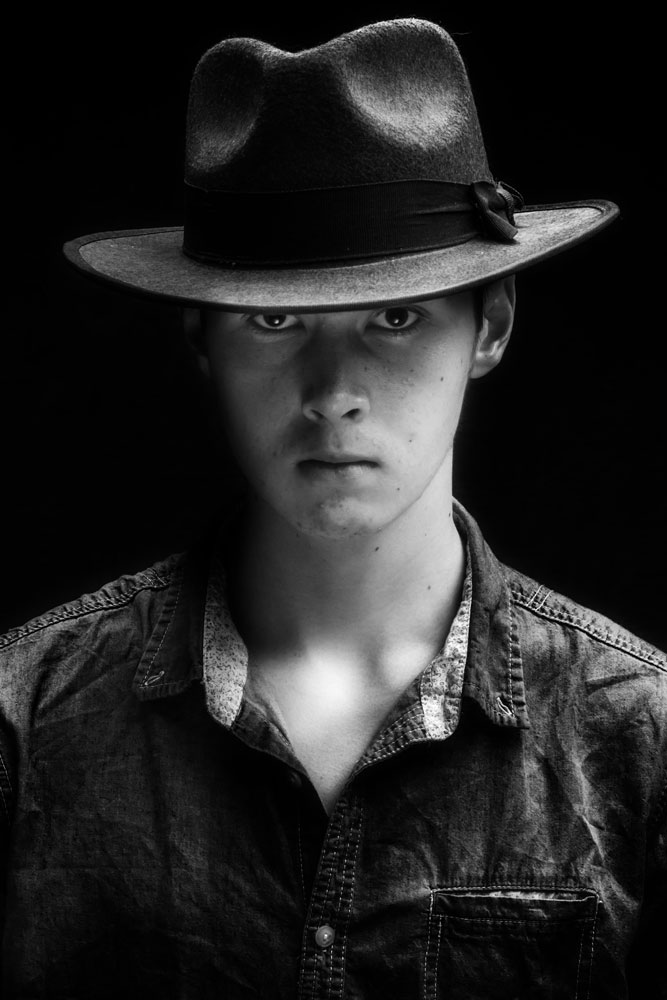
In this video I use the silver surface to bounce light and fill in troublesome shadows. In this case the shadows are caused by a wide brimmed hat. One way would be to add a second light but if that’s not available a reflector can fill in very nicely… and yes, that pun was intended!

[youtube]https://www.youtube.com/watch?v=TYQh9MNC3Is&list=PL821B7D720DEA39FA[/youtube]

Gear used in this video (Links back to Adorama)

Flashpoint StreakLight 360 Ws Creative Collection (Includes flash, battery, trigger, boom etc)

Westcott Apollo Orb Softbox

Westcott Basics 5 in 1 reflector

Canon 5D Mark 2 

Canon 24-105L 

If like me you like to keep a visual record of you’re lighting set ups then this image should come in very handy.

Reflector-Lighting-Diagram

Cracked Photoshop Brushes

Cracked and pealing paint always draw me in as a photographer so here’s a great Friday freebie which combines a selection of my peeling paint photo and turns them into cracked Photoshop brushes. These brushes are full resolution and can be used to paint, erase or mask to create all sorts of effects.

Full download instructions are below or Click Here to DOWNLOAD THE CRACKED BRUSH SET

Cracked-Brushes-Final
If you like your graphic design then those photo real cracked paint brushes will have plenty of uses and Photographers will find them handy to. For example the photo above was given an aged and distressed look by applying the brushes on a layer set to Overlay blending mode. The cut corner border is a previous Friday Freebie Photoshop action which has also been aged with the cracked brushes and Lighten layer blending mode.

Cracked-Brushes-Sample

These Brushes will work in any version of Photoshop and they’re fully compatible with Photoshop Elements too!

As always, if you create a photo using the Friday Freebie then let me (and everyone else) know by leaving the link in the comments below.

Usage rules
The brushes are copyright Gavin Hoey 2014. Use is limited to any personal but non-commercial purposes. Please share the Friday Freebie by linking back to this page. Do not redistribute the original image without my permission.

Download instructions
1. Click the link https://www.gavtrain.com/wp-content/uploads/2014/08/Cracked-Brushes.zip to download

2. Save the brushes to your desktop

3. Unzip the file

4. Open in Photoshop or Photoshop Elements

5. Install the brushes (This link will help if you don’t know how)

6. Enjoy!

No support is provided with the Friday Freebies. If you need help Google or YouTube the question and you’ll almost certainly find the answer :-)

Jigsaw Puzzle – Friday Freebie

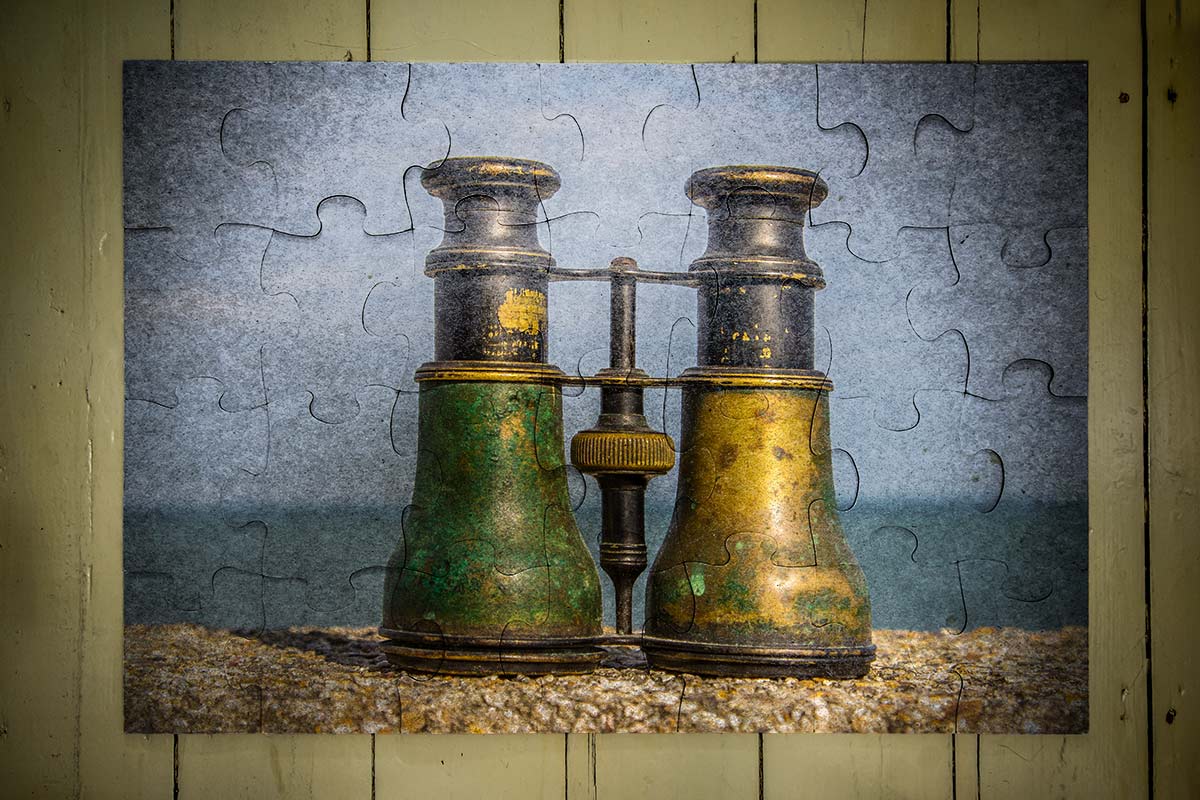
Going through some old toys the other day I found this giant kids jigsaw puzzle and instantly thought “Friday Freebie”. It’s officially a 28 piece Spot the Dog jigsaw but you can thank my daughter for putting it together upside down, which is trickier to do then you might think.

Full download instructions are below but you can also Click Here To Download Jigsaw Puzzle

JIGSAW-FF-GAVTRAIN-FEATURED
This puzzle effect works best when blended with photos that have plenty of light colours, so that’ll be skies or in this case a light coloured wall. In the photo above I used the Overlay blending mode but you can get great results with many others too. Just try them all and see what works.

After resizing (CTRL+T) your photo to fit as best you can, I’d suggest making a quick and rough rectangular selection of the puzzle and masking or erasing and excess photo away.

As always, if you create a photo using the Friday Freebie then let me (and everyone else) know by leaving the link in the comments below.

Usage rules
The image is copyright Gavin Hoey 2014. Use is limited to any personal but non-commercial purposes. Please share the Friday Freebie by linking back to this page. Do not redistribute the original image without my permission.

Download instructions
Click the link https://www.dropbox.com/s/4rlc9tm6v738n74/JIGSAW-FF-GAVTRAIN.zip to take you to the Dropbox download page (no sign up is needed)

1. Click the Download button

2. Save the template to your hard drive

3. Unzip the file

4. Open in Photoshop or Photoshop Elements

5. Paste on to your photo

6. Resize (CTRL+T) and change the Layer Blending mode as needed.

No support is provided with the Friday Freebies. If you need help Google or YouTube the question and you’ll almost certainly find the answer :-)

Paper Texture – Friday Freebie

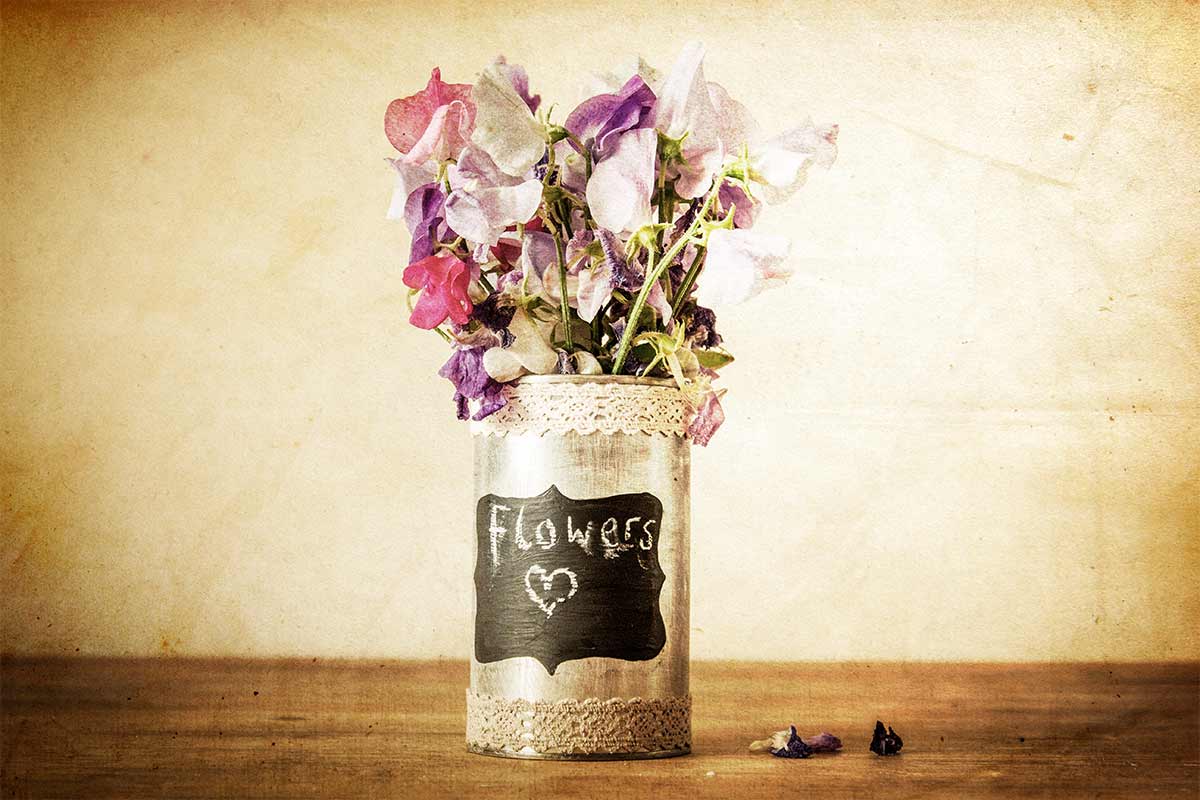
We have a small collection of old books in our house which is slowly growing. Each one has aged differently and most have some wonderful textures hidden inside, which means I’m never short of photo inspiration. This weeks Friday freebie is a combination of two pages which gives a brilliant vintage feel when added to a photo.

Full download instructions are below but you can also Click Here To Download the Paper Texture

FF-Book-Texture-Overlay
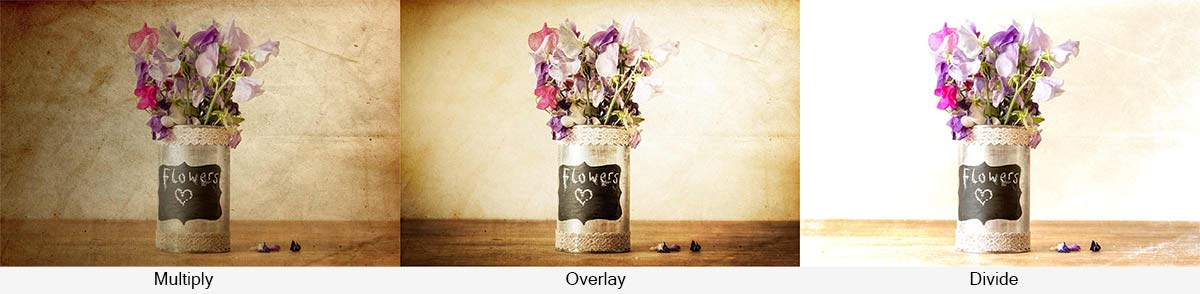
This texture works best when blended with photos that have plenty of light colours, so that’ll be skies or in this case a light coloured wall. In the photo above I used the Overlay blending mode but you can get great results with multiply and even Divide mode too. Just try them all and see what works.

FF-Book-Texture-Samples

As always, if you create a photo using the Friday Freebie then let me (and everyone else) know by leaving the link in the comments below.

Usage rules
The image is copyright Gavin Hoey 2014. Use is limited to any personal but non-commercial purposes. Please share the Friday Freebie by linking back to this page. Do not redistribute the original image without my permission.

Download instructions
Click the link https://www.dropbox.com/s/9vozzrhjv99xuzo/FF-Book-Texture.zip to take you to the Dropbox download page (no sign up is needed)

1. Click the Download button

2. Save the template to your hard drive

3. Unzip the file

4. Open in Photoshop or Photoshop Elements

5. Paste on to your photo

6. Resize (CTRL+T) and change the Layer Blending mode as needed.

No support is provided with the Friday Freebies. If you need help Google or YouTube the question and you’ll almost certainly find the answer :-)

The Softbox – Home Studio Essentials – Episode 3

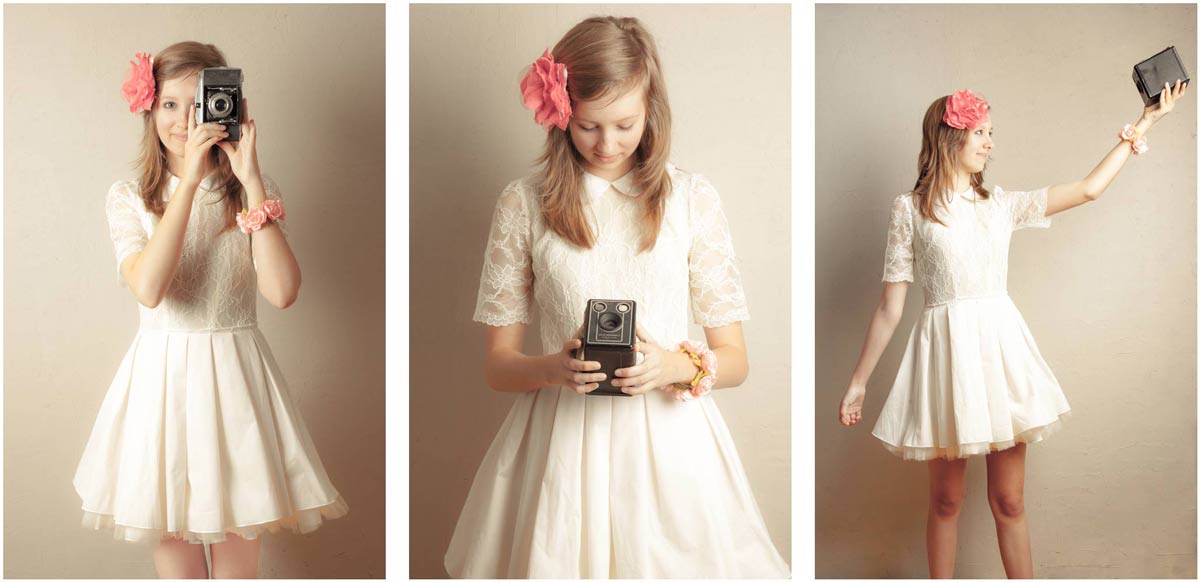
There’s a reason why the softbox is my “go to” light modifier in my small home studio and it’s all to do with one of the biggest challenges photographers face when shooting in small spaces. With lots of wall close to the light source small studios can become one big reflector with light bouncing all over the place. Whilst that can be great for evenly lit shots it’s a disaster if you want moody lighting or even just basic control of the light direction. Softboxes like the Westcott Apollo Orb I’m using for this shoot, focus the light forward and cut out light spilling behind and to the sides. The upshot is beautiful soft light that has direction even in a small studio.

In this video I use 1 meter wide round softbox to give just the right amount of light on the model to achieve the effect I want. Of course in the real world of studio portraits getting the light right never happens first time so run through a couple of different light positions to see what works as well as cover the Photoshop processing to enhance the vintage feel.

[youtube]http://www.youtube.com/watch?v=z0MTQFYnvQA&list=UU8Pksdbj37CdE00kmE7Z1dw[/youtube]

For this series of videos I want you to do more then just watch it, I’m hoping you’ll get your camera and take a photo based on the ideas you see in the video. That might be the lighting set up, the models pose or the Photoshop post processing. If you do (and you’re on Facebook) then please add them to Adorama’s Facebook page. I’ll be checking it regularly and giving constructive feedback on as many as possible

Softbox-demo-retro

Gear used in this video (Links back to Adorama)

Flashpoint StreakLight 360 Ws Creative Collection (Includes flash, battery, trigger, boom etc)

Westcott Apollo Orb Softbox

Canon 5D Mark 2 

Canon 24-105L 

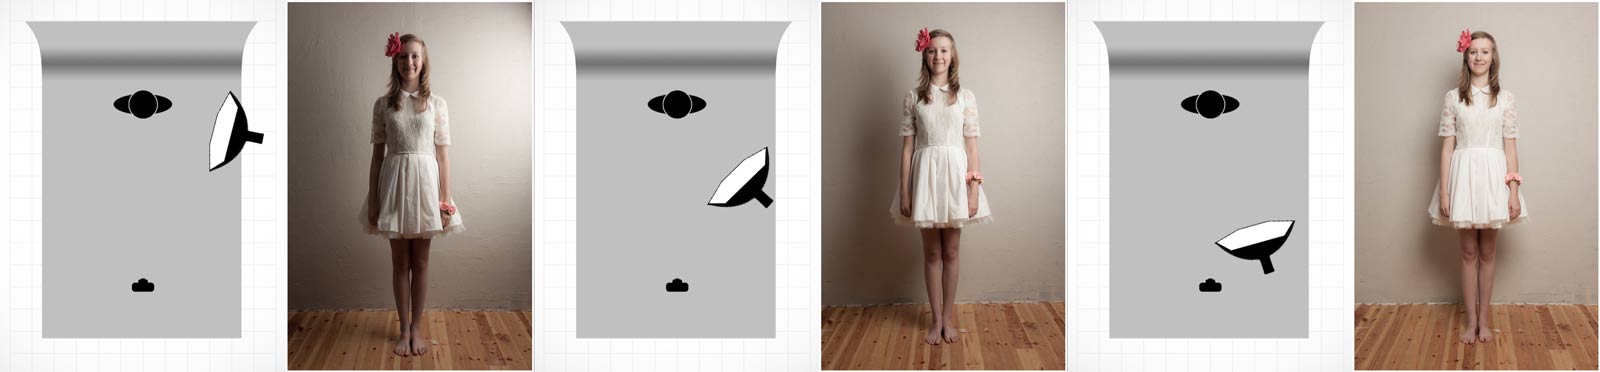
If like me you like to keep a visual record of you’re lighting set ups then this image should come in very handy.

Softbox-lighting-diagram-onelight

Instant Photo Collage Action – Friday Freebie

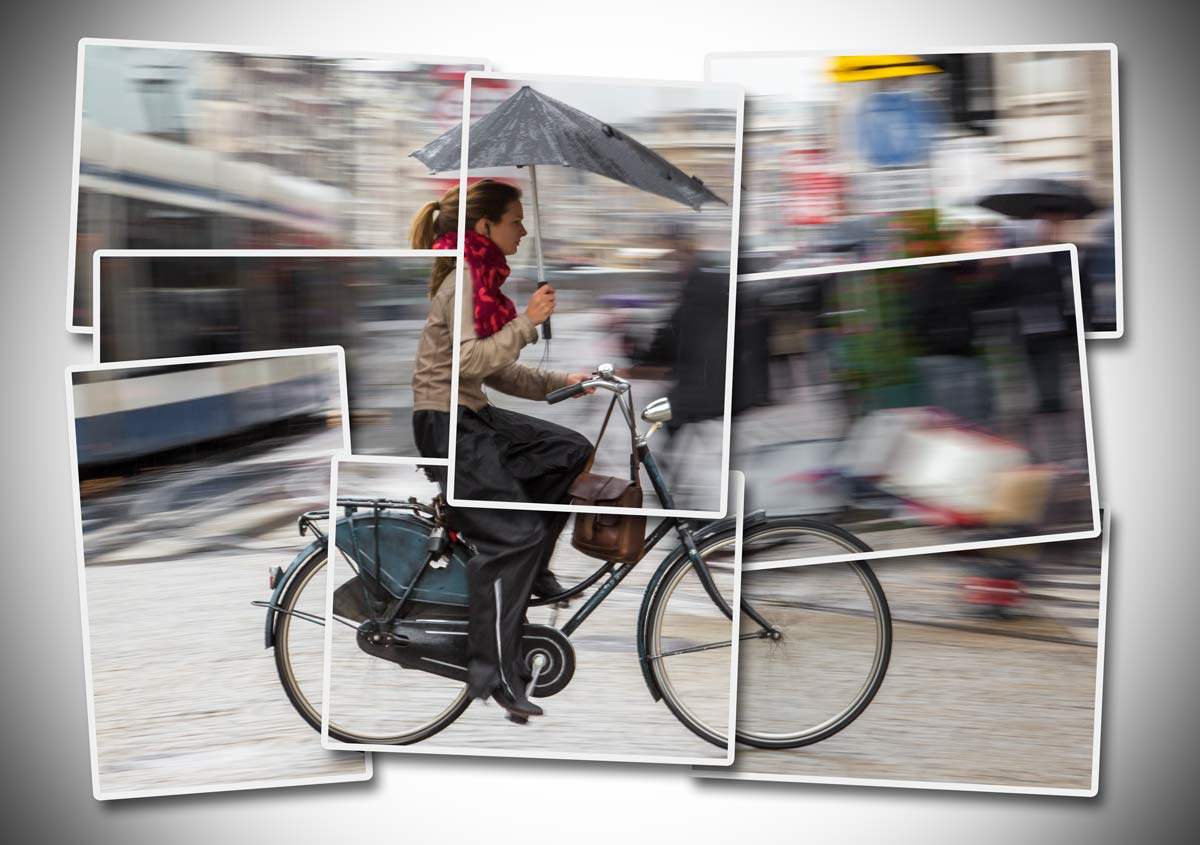
It’s a case of two for the price of one with this Friday freebie Photoshop action as I’ve recorded a version for portrait (upright) and landscape (wide) format images. This action is an extension of the four part split action I made a few weeks back and generates a collage of small scattered prints from one single photo. There’s also the option at slightly alter the exposure of each print which really adds to the effect.

You can download the action here: photo-collage-gavtrain
FF-Photo-Collage-Final

To use the action, start with the photo you wish to use already open in Photoshop and then play the landscape or portrait version of the action as appropriate. The first thing it does is make a copy of your photo so the original will be untouched and safe. There’s a lot of things for Photoshop to do with this action so it may take a minute or two to run through. DO NOT switch to another image whilst running the action.

Towards the end of the action you’ll be given the option to automatically adjust the exposure of each print, it’s a subtle effect but well worth doing. After the action is run you’ll notice plenty of layers which I’ve left so you can move, alter and tweak to vary the effect to your taste.

As with most actions, the size of your image will effect the final effect small images (less pixels) will get a bigger border and wider shadow although these settings can always be adjusted after the action has completed.

The action will work with Photoshop CC, CS6, CS4, CS4, CS3 and should work with Photoshop Elements 11 and beyond too.

Usage rules
The action is copyright Gavin Hoey 2014. Use is limited to any personal, non-commercial purposes. Please share the Friday Freebie by linking back to this page. Do not redistribute the original action without my permission.

Download instructions
The direct link to download the actions is https://www.gavtrain.com/wp-content/uploads/2014/06/photo-collage-gavtrain.zip

You must UNZIP the action before installing it in Photoshop / PS Elements

No support is provided with the Friday Freebies. If you need help Google or YouTube the question and you’ll almost certainly find the answer 🙂

Home Studio Essentials – Episode 2

Speedlites and flash units are great but after a while the hard light they produce can become a bit limiting. In part 1 of my home studio essential skills I used a bare flash but now it’s time to add an umbrella. It’s almost certainly the first light modifier you’ll buy and for good reason.  They’re very versatile, quick to set up and fold down nice and small which makes them perfect for mobile and small home studio set ups.

Umbrellas come in two basic types, ones you bounce light into (reflective) and translucent umbrellas that you shoot light through. Whichever you use they soften the light by increasing the size of the light relative to the size of the subject. In other words, the bigger the umbrella the softer the light and the closer you get it to your subject the softer the light.

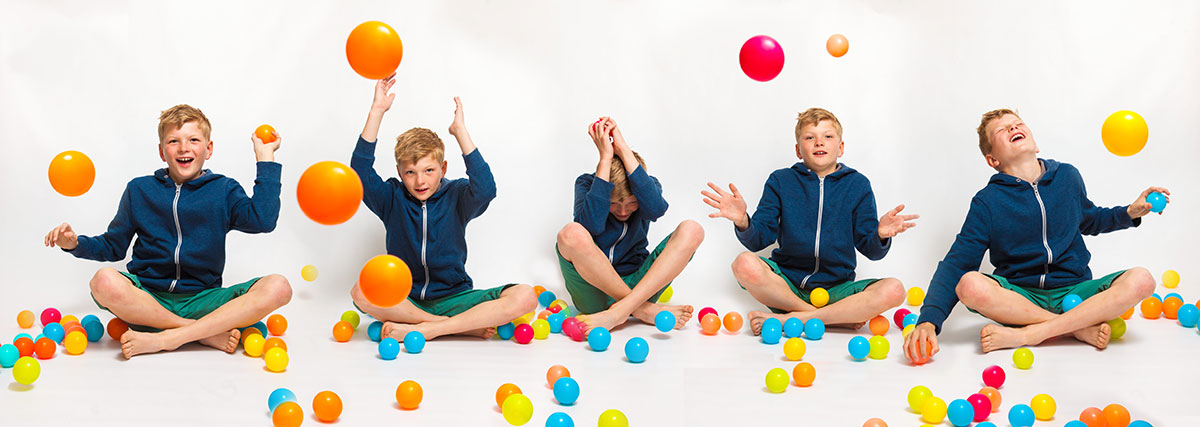
In this video I use a shoot through umbrella to create two very different looks. The first is a moody low key shot but it’s the second, more evenly lit shot that I love and it took lots of balls to make… about 50 colourful plastic balls to be precise!

[youtube]https://www.youtube.com/watch?v=ur58XNQwMXA&list=UU8Pksdbj37CdE00kmE7Z1dw[/youtube]

For this series of videos I want you to do more then just watch it, I’m hoping you’ll get your camera and take a photo based on the ideas you see in the video. That might be the lighting set up, the models pose or the Photoshop post processing. If you do (and you’re on Facebook) then please add them to Adorama’s Facebook page. I’ll be checking it regularly and giving constructive feedback on as many as possible

Joel-Joel-Joel-Joel-Joel

Gear used in this video (Links back to Adorama)

Flashpoint StreakLight 360 Ws Creative Collection (Includes flash, battery, trigger, boom etc)

Canon 5D Mark 2 

Canon 24-105L 

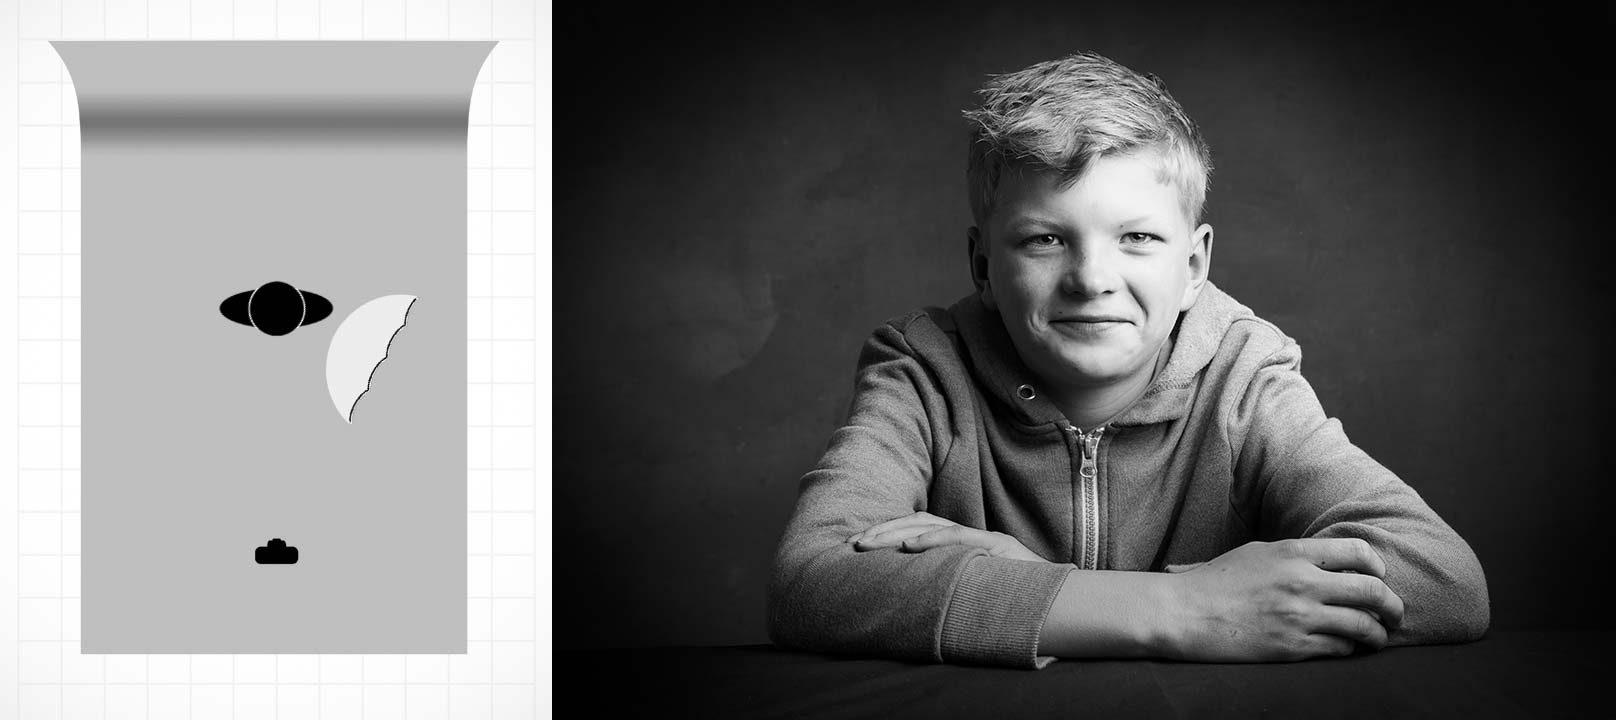
If like me you like to keep a visual record of you’re lighting set ups then this image should come in very handy.

Joel-Lighting-Diagram

The Focal Length vs Shutter Speed Rule

During a recent webinar I briefly touched on a rule of thumb that I’ve used for years. It connects the focal length of a lens and the shutter speed of the camera with the sharpness of a photo. It generated a few questions so let’s get some answers.

Camera shake vs motion blur
Camera shake is where the camera moves, motion blur is were the subject moves and they’re two very different things. In this post I’m focusing just on camera shake, in other words where you photograph a static subject such as a landscape or seated portrait with a handheld camera. Getting sharp shots of speeding cars is another skill all together.

The rule of thumb
When I started in photography the rule of thumb was really simple. When hand holding your camera the shutter speed should match or exceed the lens focal length. In other words if you wanted a sharp, shake free shot with a 50mm lens your shutter speed would be 1/50th sec or faster.

Whilst that was fine in its day the world has moved on and so has my rule. Modern lenses and cameras are capable of recording very fine detail and as we all love to zoom in close we view our images with a more critical eye. Add to the mix all the different sensor sizes that will alter the effective zoom of the lens and you’ll understand why the old rule needs updating.
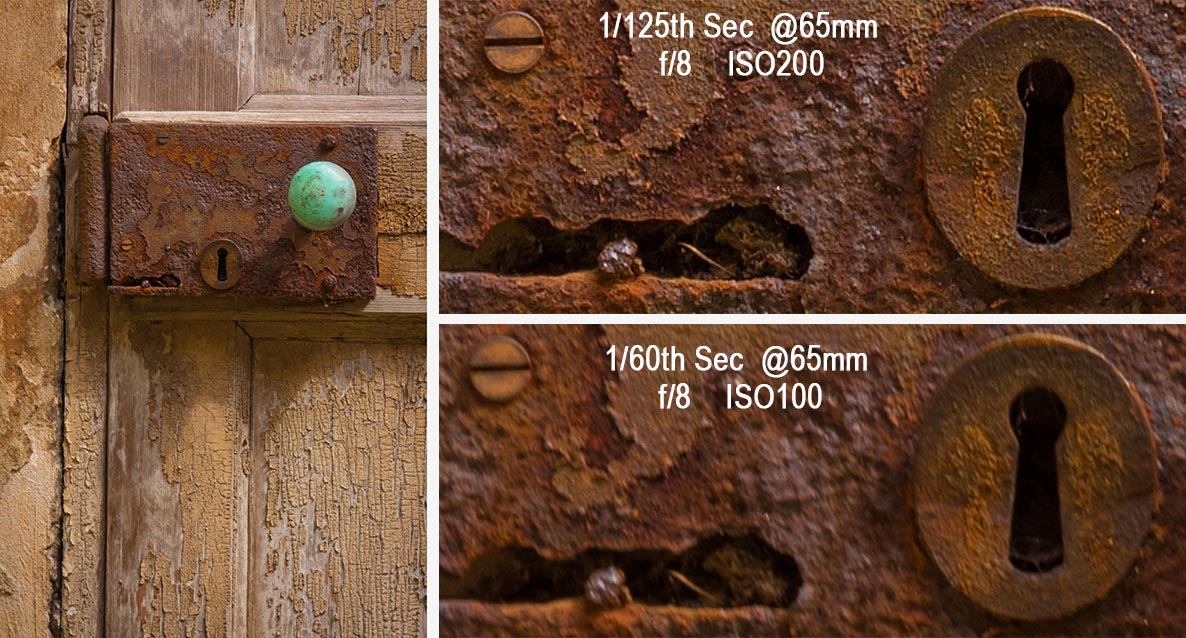
focal-length-vs-shutter-speed-1

The new rule of thumb
Today I use the rule of thumb that the shutter speed should be double (or more) then the lens focal length. In other words if you were using a 50mm lens your shutter speed would be 1/100th sec or faster.

To put that into the language of real world photography, if I’m using my 10mm fisheye I’m happy to shoot all the way down at at 1/20th second shutter speed but if I was shooting with a 400mm lens I’d want a whopping 1/800th second shutter speed. Which might be tricky and brings me onto my final point.

Bend the rule
Some rules are set in stone but others can be bent or broken, my rule of thumb is the later.

Does your lens have an image stabiliser (shake reduction) system, are you really good at holding your camera and is your camera a full frame sensor or bigger? If so then you can bend this rule a little, to a lot. If you use a tripod then you can totally break this rule as long as nothing is moving in your scene of course.

Pile of Prints Action – Friday Freebie

Here’s a lovely little Photoshop action which produces a very pleasing effect, all with one click of the mouse. Back in the day I recall the joy and frustration of getting a pile of prints back from the developers and sorting them into a pile of keepers and a big pile of photos fit only for the bin.

You can download the action here: Pile of prints – gavtrain
Pile-Of-Prints-EXAMPLE

To use the action, start with the photo you wish to use already open in Photoshop and then play the action. The first thing it does is make a copy of your photo so the original will be untouched and safe. There’s a lot of things for Photoshop to do with this action so it may take a minute or two to run through. DO NOT switch to another image whilst running the action.

This action works best on landscape format images but will work on upright format photos too. As with most actions, the size of your image will effect the final effect and I’d suggest starting with a photo 3000 pixels (longest edge) or bigger.

The action will work with Photoshop CC, CS6, CS4, CS4, CS3 and should work with Photoshop Elements but I have yet to test that.

Usage rules
The action is copyright Gavin Hoey 2014. Use is limited to any personal, non-commercial purposes. Please share the Friday Freebie by linking back to this page. Do not redistribute the original action without my permission.

Download instructions
The direct link to download the actions is https://www.gavtrain.com/wp-content/uploads/2014/05/Pile-of-prints-gavtrain.zip

No support is provided with the Friday Freebies. If you need help Google or YouTube the question and you’ll almost certainly find the answer 🙂