Industrial Template

Red-Bolts-FF-Final
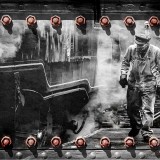
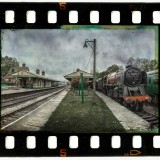
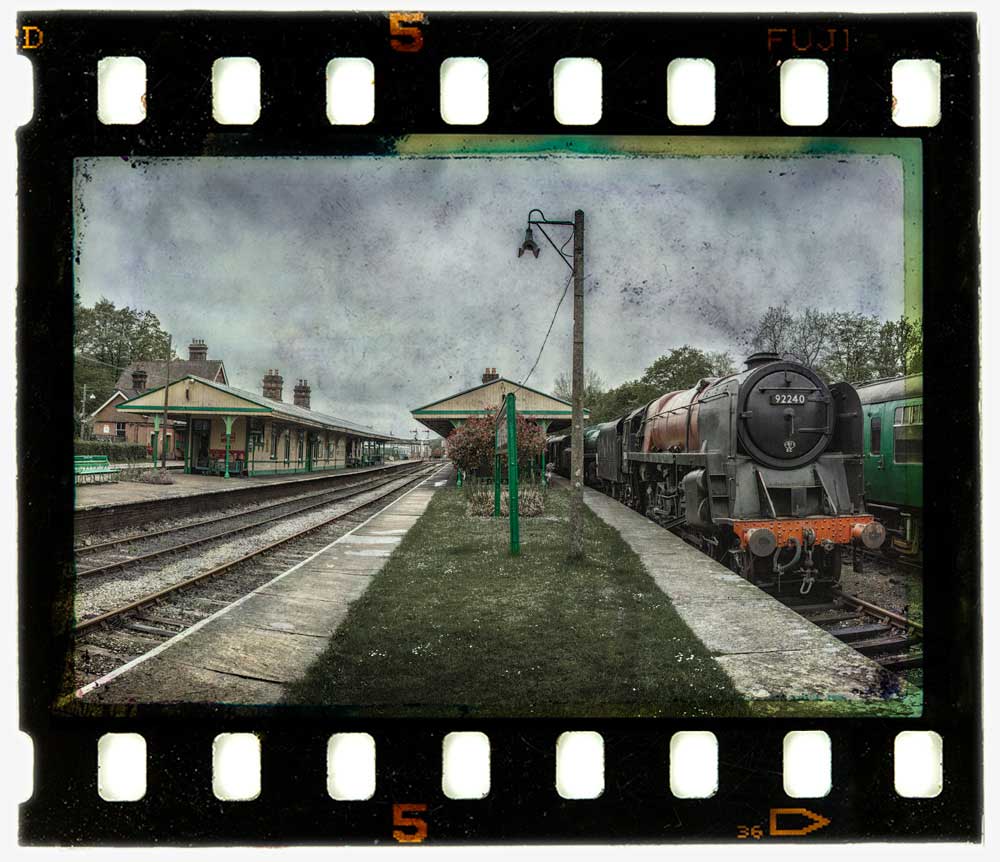
This weeks Friday Freebie is an industrial style border and texture which has a wonderful 3D feel. The standout feature must be the rectangle of red bolts. There’s no Photoshop here’s that’s exactly as I found them.

Click Here To Download the industrial template

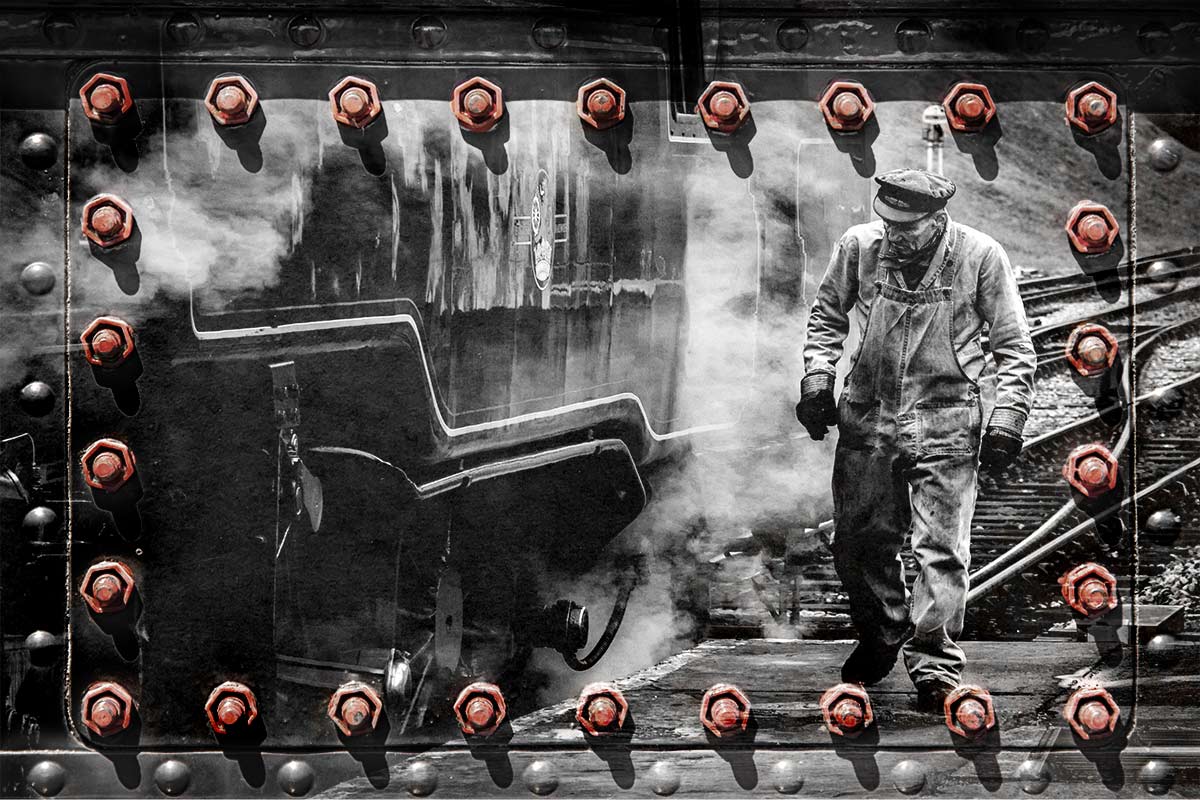
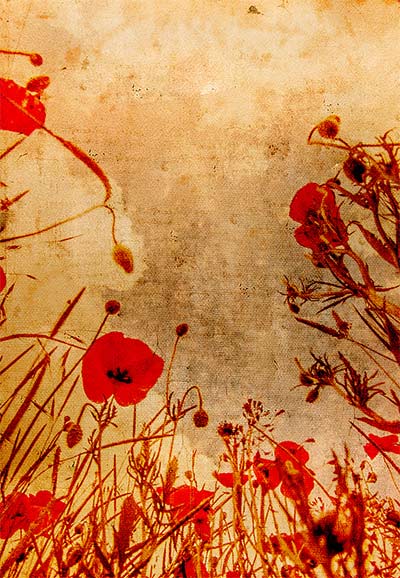
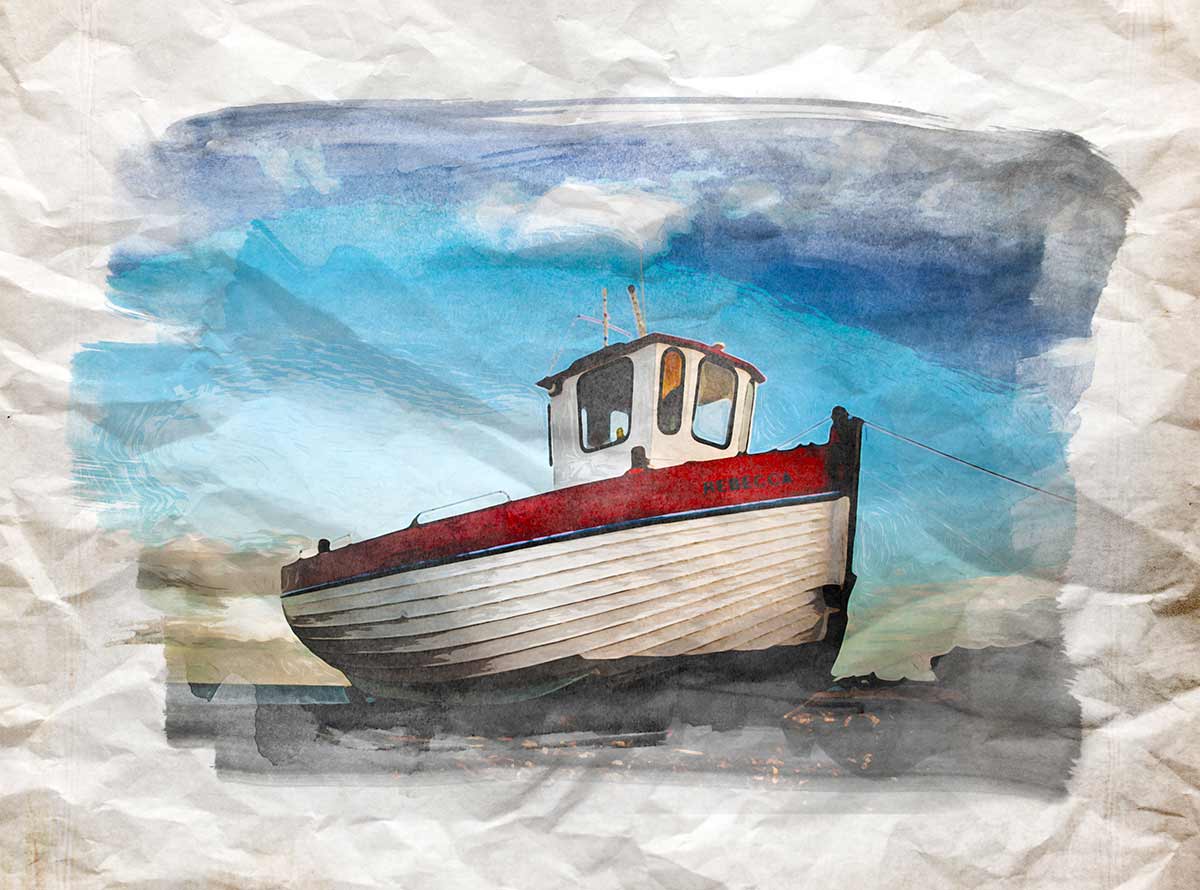
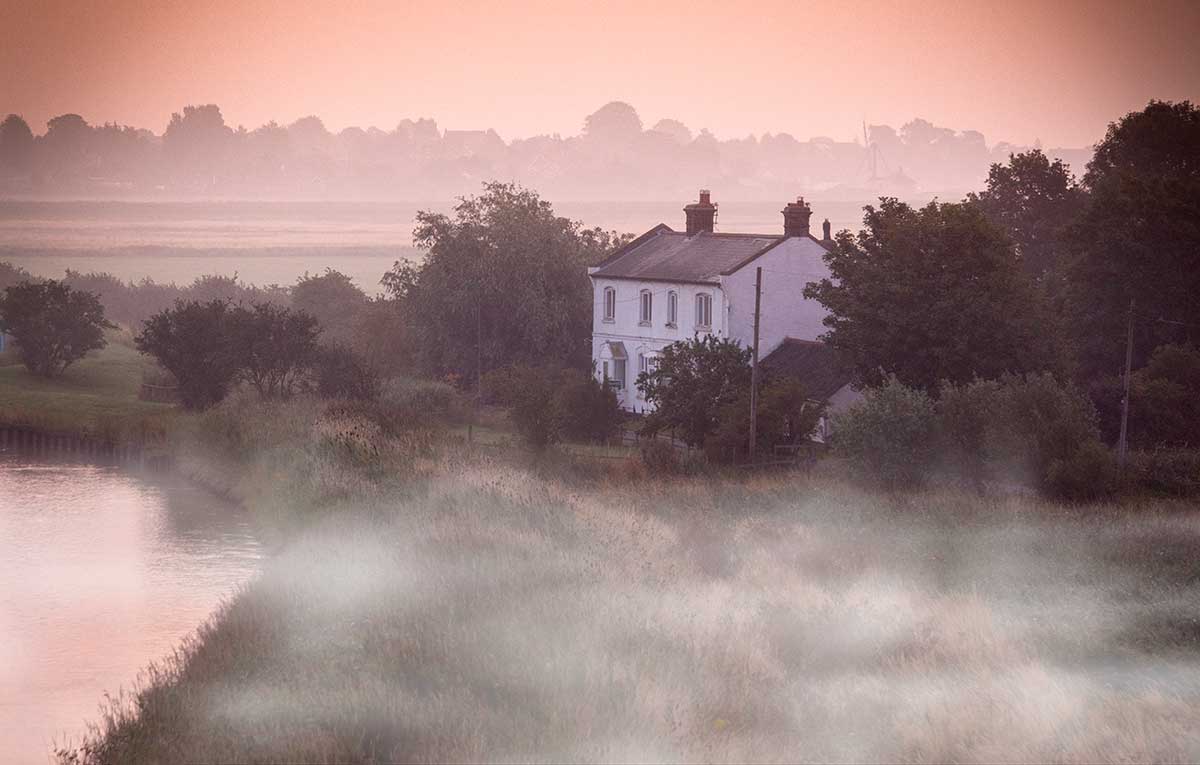
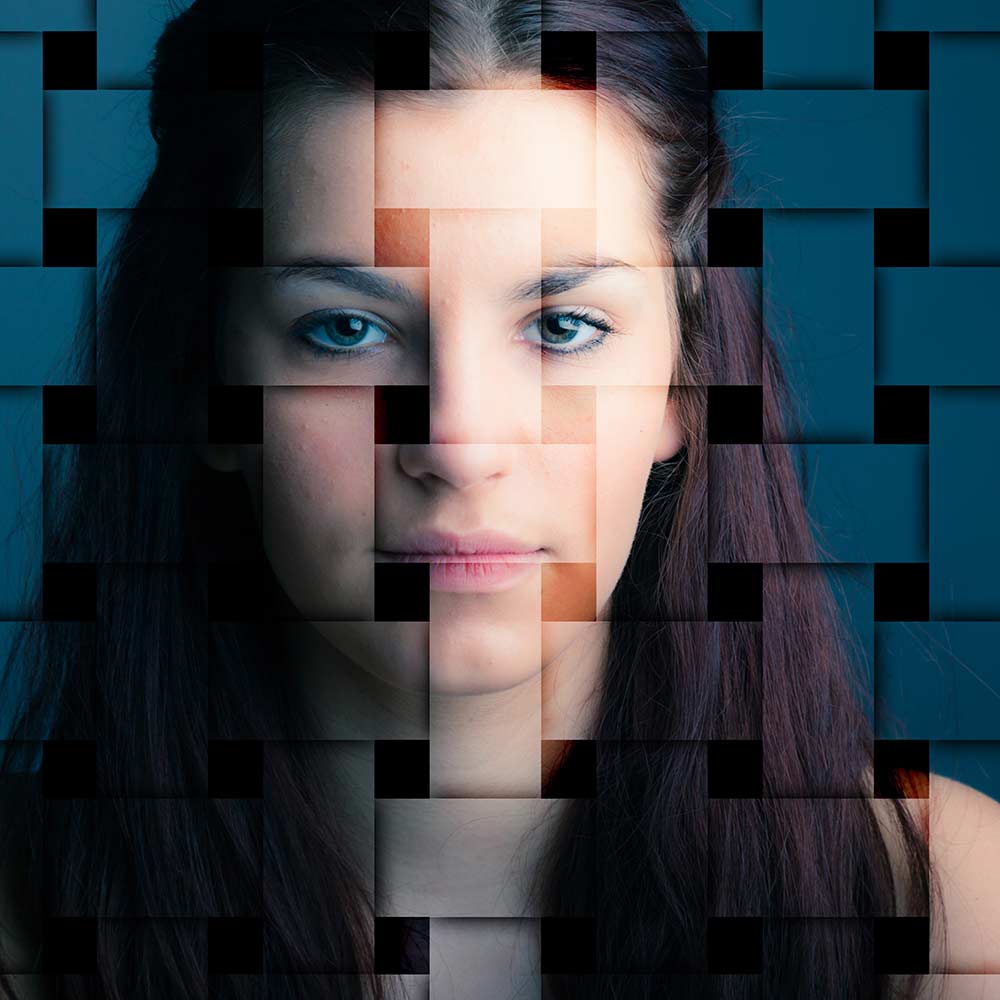
With those bright red bolts and the metal texture the sort of photo that’s likely to work best is something with an industrial feel. I found mono images worked well but don’t let that limit your imagination. If the red bolts are a bit too bright then reduce the templates saturation value to suit your taste.

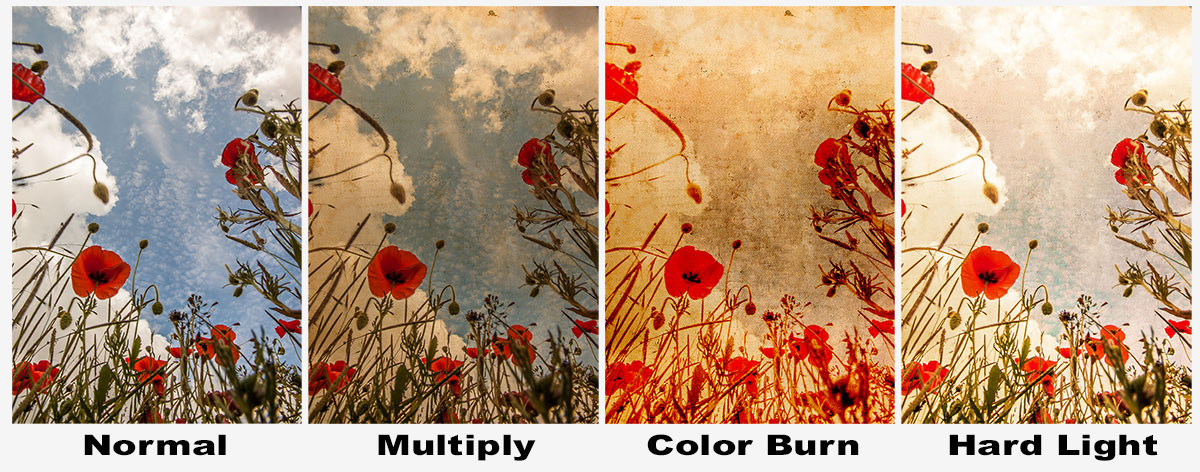
The sample image here was simply placed above the template, resized to fit and the layer blending mode was changed to Overlay. Other blending modes will also work so experiment away.

If you create a photo using the Friday Freebie then let me (and everyone else) know by leaving the link in the comments below.

Usage rules
The template is copyright Gavin Hoey 2013. Use is limited to any personal, non-commercial purposes. Please share the Friday Freebie by linking back to this page. Do not redistribute the original image without my permission

Instant Extra Confetti

Instant-Confetti
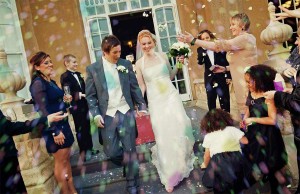
This weeks Friday Freebie is perfect for wedding photographers who are looking to enhance thier conffeti photos with a burst of extra confetti.

You can download the action here: Instant Confetti

The confetti shot at a wedding is a one off event, get it right and it can be a fanstatic photo but the combination of over eager wedding guests and restrictions on confetti throwing some venues impose can make it a challenging photo too.

The action makes three layers of coloured confetti with just one click. You can then dive in to the layers and change the colour saturation, the size of the confetti and erase any stay flakes that are in the wrong place for your photo.

The action will work with Photoshop CC, CS6, CS4, CS4, CS3.

If you create a great photo with my action then feel free to link to it by leaving a comment below.

Usage rules
The action is copyright Gavin Hoey 2013. Use is limited to any personal, non-commercial purposes. Please share the Friday Freebie by linking back to this page. Do not redistribute the original action without my permission.

Download instructions
The direct link to download the actions is https://www.gavtrain.com/free/instant-confetti-gavtrain.zip

No support is provided with the Friday Freebies. If you need help Google or YouTube the question and you’ll almost certainly find the answer 🙂

Vintage Texture

FF-vintagesThis weeks Friday Freebie is a vintage texture which is simple to use and gives amazing results. It’s a warm tone texture that combines patchy tones, a light weave texture and a hint of writing.

Full download instructions are below but you can also
Click Here To Download the vintage texture

As with all textures it works best with photos that have large areas of bright tones such as this one which has loads of bright sky. All you need to do is paste your photo above the texture and set the blending mode. There are loads of different layer blending modes and they’ll all give a different look, some you’ll like and others less so but experimentation is the key to success.

Jump down to the end of this post to see three different looks for the same image.

If you create a photo using the Friday Freebie then let me (and everyone else) know by leaving the link in the comments below.

Usage rules
The image is copyright Gavin Hoey 2013. Use is limited to any personal, non-commercial purposes. Please share the Friday Freebie by linking back to this page. Do not redistribute the original image without my permission.

Download instructions
Click the link https://drive.google.com/file/d/0B_Mmmm3K1utNRHZqZzdYMmFrODg/view?usp=sharing

1. Click the Download button download_icon

2. The download should start automatically


FF-vintage-modes


Instant Triptych Action

Basic - Landscape

This weeks Friday Freebie is a Triptych Photoshop action.  If you’re new to the art of the triptych, it’s simply three images in one picture and this action will make one with a single click.

You can download the action here: Triptych Sample

The action I’m sharing today takes an open photo in Photoshop and makes the basic triptych effect.

The action will split your photo into three panels and add a wide border. You’ll need a landscape format (wide) image to get the best from the action. I’ve left all three panels as layers at the end of the action, which means you’re free to alter, adjust and tweak the effect to your hearts content.

The action will work with Photoshop CC, CS6, CS4, CS4, CS3 but sadly not with Elements.

If you create a great photo with my action then feel free to link to it by leaving a comment below.

Usage rules
The action is copyright Gavin Hoey 2013. Use is limited to any personal, non-commercial purposes. Please share the Friday Freebie by linking back to this page. Do not redistribute the original action without my permission.

Download instructions
The direct link to download the actions is www.gavtrain.com/free/triptych-sample-gavtrain.zip

No support is provided with the Friday Freebies. If you need help Google or YouTube the question and you’ll almost certainly find the answer 🙂

Watercolour PSD template

Watercolour-Friday-FreebieThis weeks Friday Freebie is a spin off from an article I wrote for Digital Photo Magazine a while back in which I created a bunch of images which, when combined together, create a great watercolour effect. Well I’ve made things easy by creating one of my templates in PSD format and sharing it with everyone for free.

Full download instructions are below but you can also
Click Here To Watercolour PSD template

If you’re wondering what a Photoshop PSD template is, then the answer is simple. It’s a Photoshop file with all the layers intact allowing you to tweak the end result as you see fit. There’s even a layer called “Your photo here” which is where your photo needs to be added.

With several layers and lots of fine textured detail, this weeks Friday Freebie PSD template comes in at around 81mb. If you’re not on a fast internet connection if might take a few minutes to download.

As always, if you create a photo using the Friday Freebie then let me (and everyone else) know by leaving the link in the comments below.

Usage rules
The template is copyright Gavin Hoey 2013. Use is limited to any personal, non-commercial purposes. Please share the Friday Freebie by linking back to this page. Do not redistribute the original image/template without my permission.

Download instructions
Click the link https://drive.google.com/file/d/0B_Mmmm3K1utNMnJoVEtKeUxMVDA/view?usp=sharing

1. Click the Download button download_icon

2. The download should start automatically

3. Save the template to your hard drive

4. Open in Photoshop or Photoshop Elements

5. Paste your photo BELOW the “Your Photo Here” layer

6. Hide or delete the the “Your Photo Here” layer

7. Use Free Transform (CTRL+T) to adjust the size of your photo

8. Adjust the Levels (CTRL+L)of the “paint” layer to change the look.


Mist & Fog Brushes

Fog-Final-1This weeks Friday Freebie is a set of Photoshop Brushes that add beautiful mist and fog in just one click.

Full download instructions are below but you can also
Download the brushes for
Photoshop CS6 and beyond

Download the brushes for
Photoshop CS5 and earlier
(Also works with Elements)

Fog-Final-1cIf you’re wondering why there are two versions, maximum brush sizes in Photoshop CS6 (and in Photoshop CC) are twice as big as CS5 and earlier. To take advantage of this I’ve created two sizes of brush… be sure and download the correct one.

Once you’ve downloaded and unzipped the brushes they’ll need to be installed. The easiest way to do that is by opening the Brush panel and clicking the flyout menu in the top right corner. Click Load Brushes… and navigate to the light ray brushes that you downloaded and unzipped. Click here see a copy of the menu and information on where to click

To get the best from these brushes make a blank layer above your photo and set your foreground colour to white. Choose which brush you’d like to use and click once. You can then adjust the layer opacity and use free transform to resize and reposition the fog as you see fit. I found that using two or even all three mist brushes on separate layers often gave more realistic results the just using one but it all depends on the photo you’re using and the look you’re after.

If you create a photo using the Friday Freebie then let me (and everyone else) know by leaving the link in the comments below.

Usage rules
The brushes are copyright Gavin Hoey 2013. Use is limited to any personal, non-commercial purposes. Please share the Friday Freebie by linking back to this page. Do not redistribute the original image without my permission.

Download instructions
Click on the correct download link 
Download the brushes for Photoshop CS6, CC, CC2014 and beyond

Download the brushes for  Photoshop CS5 and earlier  (Also works with Elements)

1. On the download page, click the Download button download_icon

2. The download should start automatically

3. Unzip the file and install into Photoshop

No support is provided with the Friday Freebies. If you need help Google or YouTube the question and you’ll almost certainly find the answer :-)

35mm Film Template

35mm-film-finalI found this weeks Friday Freebie whilst sorting through a pile of old slides I had gathering dust in my office. I’d used this one during the ’90’s in what was known at the time as a “slide sandwich” and was simply two slides pressed together to create a new third image when projected.

Full download instructions are below but you can also
Click Here To Download the 35mm film template

Although the days of the slide sandwich are far behind me, the technique of combining two (or more) images together is alive and well in Photoshop in the form of layers. To make life a little easier I’ve created a template from the 35mm film complete with a note of where your own photo should be added, a blending mode that should work with most photos and a grungy layer mask for if you need to reduce the texture from the centre of the film. Of course you can also change everything if you want.

At 5000 pixels on the longest edge and with lots of fine textured detail, this weeks Friday Freebie PSD template comes in at around 70mb. If you’re not on a fast internet connection if might take a few minutes to download.

As always, if you create a photo using the Friday Freebie then let me (and everyone else) know by leaving the link in the comments below.

Usage rules
The image/template is copyright Gavin Hoey 2013. Use is limited to any personal, non-commercial purposes. Please share the Friday Freebie by linking back to this page. Do not redistribute the original image/template without my permission.

Download instructions
Click the link https://drive.google.com/file/d/0B_Mmmm3K1utNNXpONGJGTk9WUkU/view?usp=sharing

1. Click the Download button download_icon

2. The download should start automatically

3. Save the template to your hard drive

4. Open in Photoshop or Photoshop Elements

5. Paste your photo BELOW the 35mm layer

Light Ray Brushes

FF-Light-FinalThis weeks Friday Freebie is a set of Photoshop Brushes that create amazing beams of light at the click of a mouse.

Full download instructions are below but you can also
Download the brushes for
Photoshop CS6 and Photoshop CC

Download the brushes for
Photoshop CS5 and earlier 
(Also works with Elements)

If you’re wondering why there are two versions, maximum brush sizes in Photoshop CS6 (and in Photoshop CC) are twice as big as CS5 and earlier. To take advantage of this I’ve created two sizes of brush… be sure and download the correct one.

Once you’ve downloaded and unzipped the brushes they’ll need to be installed. The easiest way to do that is by opening the Brush panel and clicking the flyout menu in the top right corner. Click Load Brushes… and navigate to the light ray brushes that you downloaded and unzipped. Click here see a copy of the menu and information on where to click

FF-Light-Thumbs

If you create a photo using the Friday Freebie then let me (and everyone else) know by leaving the link in the comments below.

Usage rules
The brushes are copyright Gavin Hoey 2013. Use is limited to any personal, non-commercial purposes. Please share the Friday Freebie by linking back to this page. Do not redistribute the original image without my permission.

Download instructions
Click on the correct download link below to take you to the download page (no sign up is needed)
Download the brushes for
Photoshop CS6 and Photoshop CC

Download the brushes for
Photoshop CS5 and earlier

1. Click the link above

NOTE: You may see a message saying “There was a problem with the Network” Just ignore it

2. Click the Download button

3. Save the zip file to your hard drive

Weave Template

weave-KeylineThis weeks Friday Freebie is a weave effect image that adds a amazing 3D pattern to your photos, as you can see here.

Full download instructions are below but you can also
Click Here To Download the weave template

The weave template is a simple JPG image. I’ve made it in a square shape but it’s also very large at 5000 pixels on each side, so it’s easily adapted to both portrait and ladscape format images… as well as square ones of course 🙂

Once you’ve downloaded the template all you need to do is paste it over your image and resize it with Free Transform (CTRL+T) if required. Change the layer blending mode from Normal to Overlay and you’ll achieve a result like this. Howver this template works with loads of blending modes and I urge you to experiment, you’ll be amazed just how many variations there are!

If you create a photo using the Friday Freebie then let me (and everyone else) know by leaving the link in the comments below.

Usage rules
The image is copyright Gavin Hoey 2013. Use is limited to any personal, non-commercial purposes. Please share the Friday Freebie by linking back to this page. Do not redistribute the original image without my permission.

Download instructions
Click the link https://drive.google.com/file/d/0B_Mmmm3K1utNVDNhZWlNWmw3dlU/view?usp=sharing

1. Click the Download button download_icon

2. The download should start automatically

Smoke video clip

Smoke-SG1This weeks Friday Freebie is in two parts as I’m giving away a 30 second video clip of smoke and a tutorial on how to use the clip to create a simple animated text effect in Photoshop CS6

Full download instructions are below but you can also
Click Here To Download the smoke video clip

You can preview the video clip by clicking here

One of the headline new features of Photoshop CS6 is its ability to edit video clips with exactly the same skills you’d need to edit photos. Unlike Photoshop CS5 the video editing is available to all version of Photoshop CS6 not just the extended version.

Now I know most photographers are yet to embrace video and it’s certainly a very different discipline to learn but if you fancy trying your hand at video then this weeks Friday Freebie is for you.

Usage rules
The video clip is copyright Gavin Hoey 2013. Use is limited to any personal, non-commercial purposes. Please share the Friday Freebie by linking back to this page. Do not redistribute the original video clip without my permission.

Download instructions
Click the link https://drive.google.com/file/d/0B_Mmmm3K1utNbzNDc0E3ZWhNc28/view?usp=sharing

1. Click the Download button download_icon

2. The download should start automatically

Once you’ve got the video you’ll need something to do with it. There’s plenty of ways you can use the clip but to get you started here’s a quick and simple text animation effect.

[youtube]http://youtu.be/sfQfPoTs64U[/youtube]