Infrared Mono – Creative Lightroom Episode 9

CL-final-9
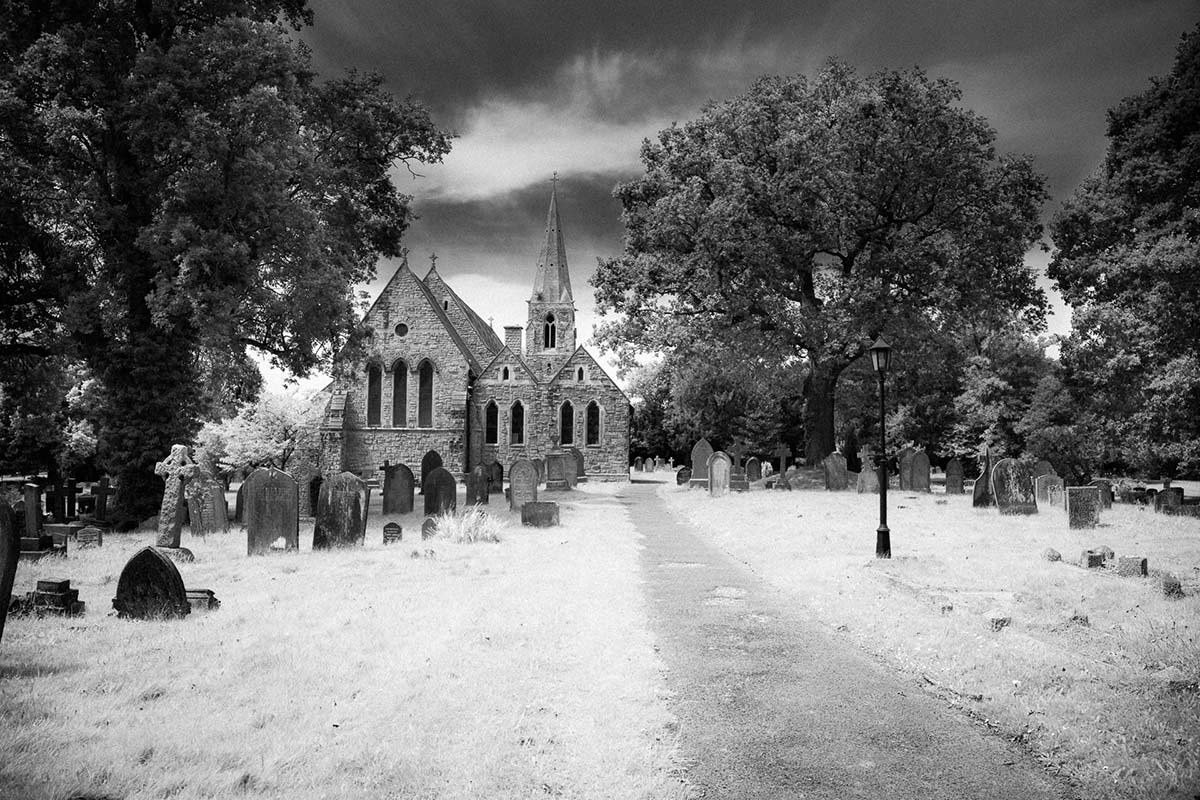
In this weeks episode of Creative Lightroom I take a deep dive into creating stylish infrared style images in Lightroom. I first made mono infrared images way back in my film days, back then it was a tricky business requiring the film to be loaded in complete darkness. Today things are a lot easier, espeically if you’ve had your camera converted to capture near IR.

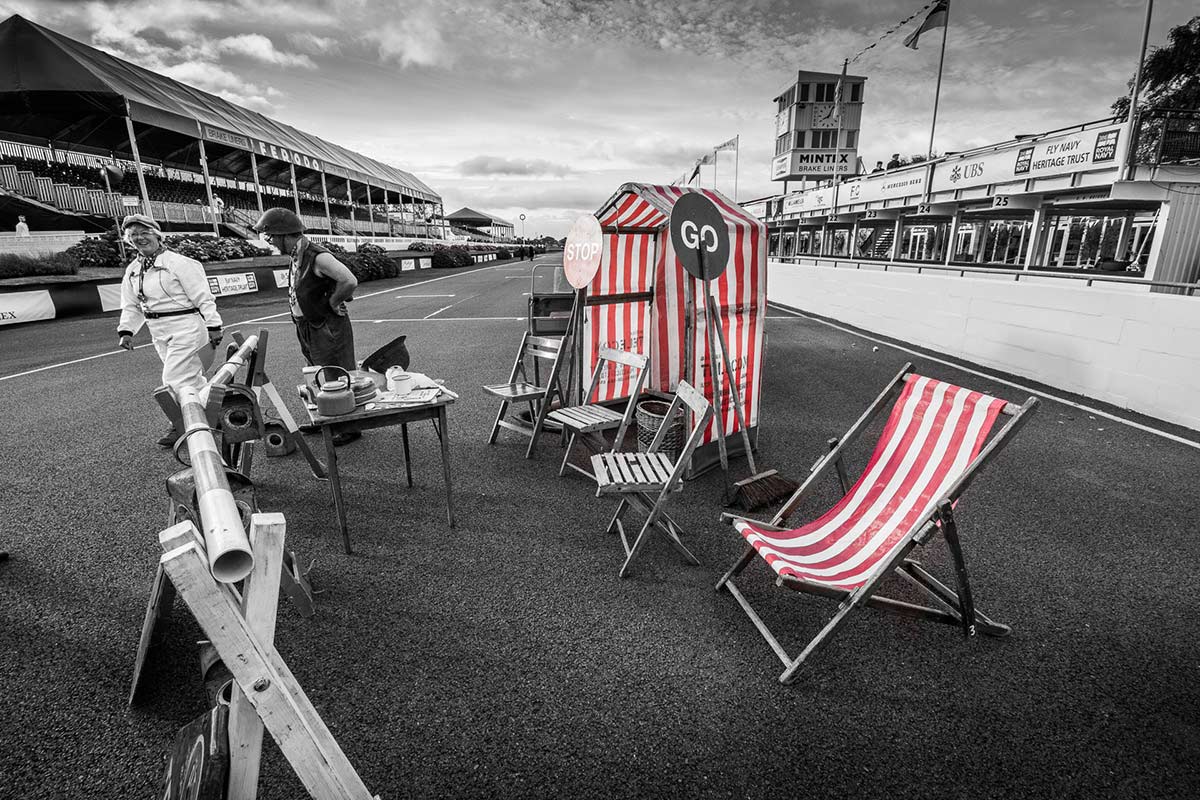
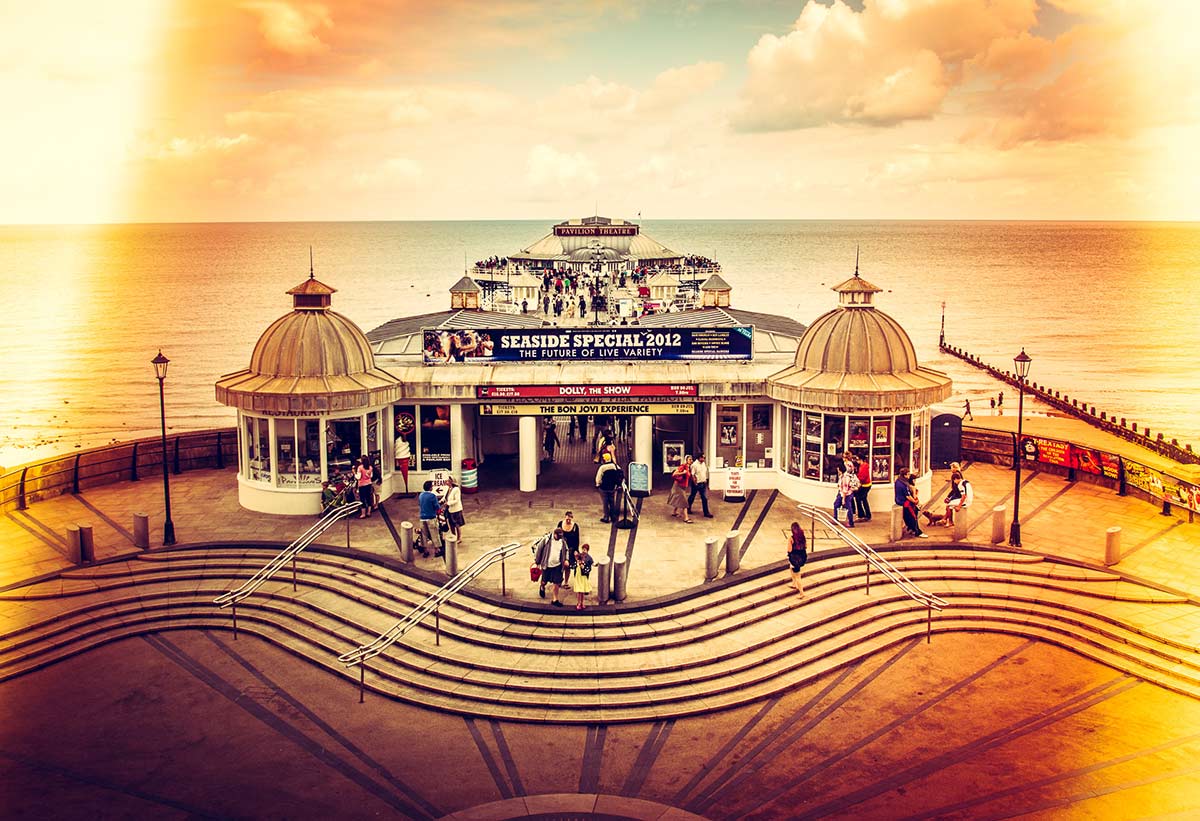
This technique forms the basis of my favourite way to process ordinary colour photos into stylish mono. It also adds a touch of the classic IR film feel with a slight glow and a touch of grain.

As always it’s worth mentioning that if you’re a Photoshop user rather then Lightroom user, EVERYTHING I show in the video is the same as Adobe Camera RAW in Photoshop CC, CS6, CS5 and CS4.

[youtube]http://www.youtube.com/watch?v=c6_8AQaNhzs&feature=youtu.be[/youtube]

Can’t see the video? Click here: http://youtu.be/c6_8AQaNhzs

Two Curves Tricks – Creative Lightroom Episode 4

CL-final-4-1000In the fourth episode of Creative Lightroom, I have not one but two creative techniques and both of them involve using Curves.

You can still catch the first three episodes here
episode 1, Light leak effect
episode 2, Painted border
episode 3, Selective colour

The two effects couldn’t be more different even though the same tool is used to make them. The first technique is a very gritty posterization effect which looks amazing on the right image. The second effect is perfect for anyone who scans or copies old negatives and wants to make them back into a positive.

As always it’s worth mentioning that if you’re a Photoshop user rather then Lightroom user then remember EVERYTHING I show in the video is the same as Adobe Camera RAW in Photoshop CS3, CS4, Cs5, CS6 and Photoshop CC.

[youtube]http://www.youtube.com/watch?v=IsDg8EV-Byw[/youtube]

Can’t see the video? Click here: http://youtu.be/IsDg8EV-Byw

UPDATE
Lots of you have been guessing which of the men in the old photo is my Grandad. The answer is he’s the tallest one, in the middle holding his trademark pipe. As for the question of why the guy on thr right is without trousers, I’m not 100% sure. It’s probably a combination of the heat (they were in South Africa) and being taken in 1943, there was a war on!

Coffee Stain Photoshop Brushes

FF-Coffee-brush-1This weeks Friday Freebie is a set of four high resolution Photoshop brushes. What they do is probably pretty obvious but if you can’t see the photo then the words coffee cup rings should explain everything.

 Click Here To Download the Coffee ring brushes

These brushes were hand crafted in my studio using only the finest tea stains (I’m not a coffee drinker) which I photographed and turned into very high resolution brushes. They are the perfect compliment to your grungy images and add some instant aging to your retro images. They work brilliantly with the ageing texture that I ran as the Friday Freebie a few weeks back. It’s also the same texture I used on the photo opposite.

Once downloaded, the brushes will need to be unzipped before they are installed. The brush set is  compatible with all versions of Photoshop and Photoshop Elements. If you need help installing them then remember to search on Google and YouTube for the answers.

If you create a photo using the Friday Freebie then let me (and everyone else) know by leaving the link in the comments below.

FF-Coffee-brush-2

Usage rules
The brushes are copyright Gavin Hoey 2013. Use is limited to any personal, non-commercial purposes. Please share the Friday Freebie by linking back to this page. Do not redistribute the original image without my permission

Just one colour – Creative Lightroom Episode 3

CL-final-3-1200pxIn the third episode of Creative Lightroom, I have a very quick trick for reducing the number of colour tone ranges in your image to just one.

This is a really quick and simple technique that works with all versions of Lightroom including the latest and greatest version, Lightroom 5.

In the video I show you how to remove almost all the colour and leave just the reds in an image but you can just as easily leave blues, yellows or greens. I then go on to show you how to quickly tidy up any stray colour areas with the adjustment brush.

It’s worth mentioning that if you’re a Photoshop user rather then Lightroom user then remember EVERYTHING I show in the video is the same as Adobe Camera RAW in Photoshop CS3, CS4, Cs5, CS6 and Photoshop CC.

[youtube]http://www.youtube.com/watch?v=wr6fSZY57R0&feature=youtu.be[/youtube]

Can’t see the video? Click here: http://youtu.be/wr6fSZY57R0

Light Leak Effect – Creative Lightroom Episode 1

CL-final001In the first episode of Creative Lightroom, my new 10 week series, I have a great light leak technique which looks amazing on vintage and retro styled images.

Light leaks were origianlly a problem that affected film cameras and often resulted in a ruined photo. On the rare occasion a light leak would occur which actually enhanced the photo. Using Lightroom it’s very easy to choose which photos would benefit from a light leak and how big it needs to be. On the right photo light leaks will look amazing.

It’s worth mentioning that if you’re a Photoshop user rather then Lightroom user then remember EVERYTHING I show in the video is the same as Adobe Camera RAW in Photoshop CS6 and Photoshop CC.

[youtube]http://www.youtube.com/watch?v=YQzIgb9G6Bs[/youtube]

Vintage Texture

FF-vintagesThis weeks Friday Freebie is a vintage texture which is simple to use and gives amazing results. It’s a warm tone texture that combines patchy tones, a light weave texture and a hint of writing.

Full download instructions are below but you can also
Click Here To Download the vintage texture

As with all textures it works best with photos that have large areas of bright tones such as this one which has loads of bright sky. All you need to do is paste your photo above the texture and set the blending mode. There are loads of different layer blending modes and they’ll all give a different look, some you’ll like and others less so but experimentation is the key to success.

Jump down to the end of this post to see three different looks for the same image.

If you create a photo using the Friday Freebie then let me (and everyone else) know by leaving the link in the comments below.

Usage rules
The image is copyright Gavin Hoey 2013. Use is limited to any personal, non-commercial purposes. Please share the Friday Freebie by linking back to this page. Do not redistribute the original image without my permission.

Download instructions
Click the link https://drive.google.com/file/d/0B_Mmmm3K1utNRHZqZzdYMmFrODg/view?usp=sharing

1. Click the Download button download_icon

2. The download should start automatically


FF-vintage-modes