Two Curves Tricks – Creative Lightroom Episode 4

CL-final-4-1000In the fourth episode of Creative Lightroom, I have not one but two creative techniques and both of them involve using Curves.

You can still catch the first three episodes here
episode 1, Light leak effect
episode 2, Painted border
episode 3, Selective colour

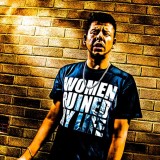
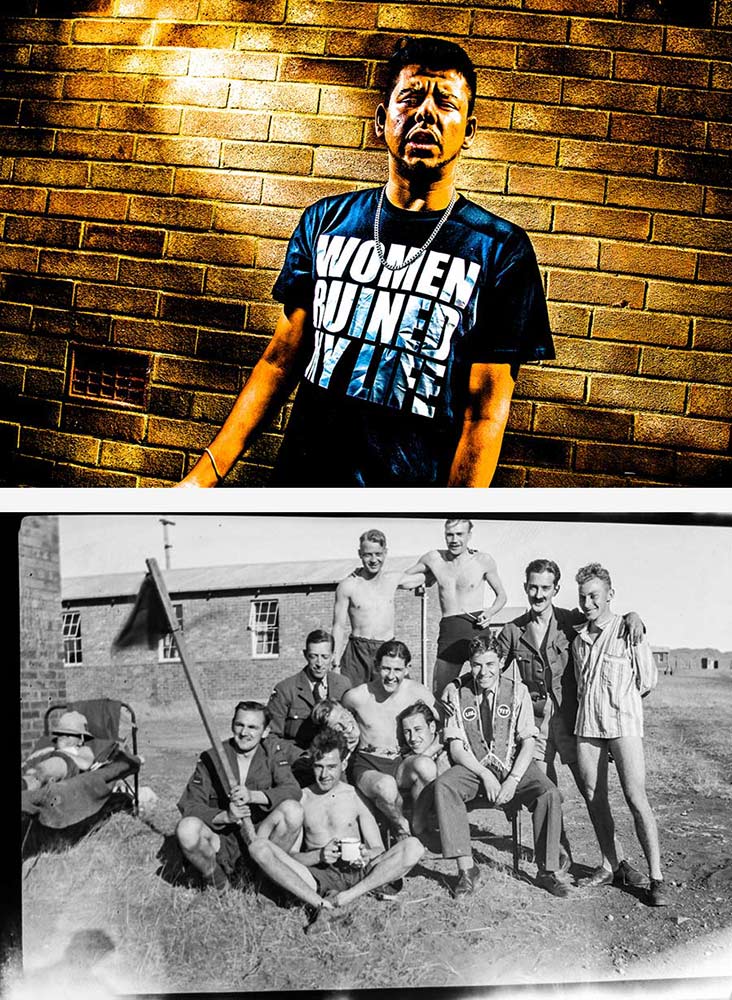
The two effects couldn’t be more different even though the same tool is used to make them. The first technique is a very gritty posterization effect which looks amazing on the right image. The second effect is perfect for anyone who scans or copies old negatives and wants to make them back into a positive.

As always it’s worth mentioning that if you’re a Photoshop user rather then Lightroom user then remember EVERYTHING I show in the video is the same as Adobe Camera RAW in Photoshop CS3, CS4, Cs5, CS6 and Photoshop CC.

[youtube]http://www.youtube.com/watch?v=IsDg8EV-Byw[/youtube]

Can’t see the video? Click here: http://youtu.be/IsDg8EV-Byw

UPDATE
Lots of you have been guessing which of the men in the old photo is my Grandad. The answer is he’s the tallest one, in the middle holding his trademark pipe. As for the question of why the guy on thr right is without trousers, I’m not 100% sure. It’s probably a combination of the heat (they were in South Africa) and being taken in 1943, there was a war on!

Backlit portrait with just one light

Final-ChristinaI’m a huge fan of using speedlights, or flash guns as I grew up calling them and I know a lot of photographers own at least one. For me the humble speedlight is a powerful tool capable of producing amazing portraits.

In this video I try to break the laws of physics by using one speedlight to light both the back and front of a model with just one light. The secret is reflecting the light off of a silver reflector which in effect makes one light become two.

As a final touch I’ll create a sparkling background by adding a little bit of flour into the air behind my model Kristina but in front of the flash.
[youtube]http://youtu.be/p3xCN7geBI0[/youtube]

Equipment used in the video: 

Adobe Photoshop CS6

http://www.adorama.com/searchsite/default.aspx?searchinfo=photoshop+cs6&category=4294967278+11&KBID=67338

Canon 60D

http://www.adorama.com/ICA60D.html?KBID=67338

Canon 24-105L f/4 IS
http://www.adorama.com/CA24105AFU.html?KBID=67338

5 in 1 reflector
http://www.adorama.com/WE5I1R20.html?KBID=67338

2 Self-Portraits with 1 light

Self-portrait-1When I first started to learn about lighting I focused all attention on the complexities of flashes first and foremost. Of course whilst lighting is the cornerstone of great portraits, so is an ability to get the best from your model and trust me on this, that can be a lot harder to master.

One way to practice portraiture is shooting a self-portrait project. It’s a great way to practice and perfect various lighting arrangements without the need of a model, subject or assistant. 

In this video I’ll show you how to shoot two very different self portraits but remarkably, the lighting will be identical for both. The only thing that will change is the background. 

Why change the background, you may ask. Well, the first shot has a black, low key background and the second set of photos has a grey background, which is much simpler to remove and replace with a new background in Photoshop, as you’ll see in the video.
[youtube]http://youtu.be/C2b61bZ-J44[/youtube]
If you can’t see the video Click Here

Self-portrait-2

Gear used in this video 

Interfit Collapsible Double Sided Background, Black / White

 Canon 60D

Canon 24-105mm L f/4 IS

Vanguard Alta Pro 263AT Tripod

Vanguard GH-100 Grip Head

Adobe Photoshop CS6

Canon 580 EX II Flash

Flash bracket

Interfit air cushioned light stand

Silver reflective umbrella

(All links go to Adorama, who sponsor all my videos)