5 Top Tether Tips (into Lightroom)

There’s plenty of reasons why tethering your camera to your computer is a really great idea, I do it all the time for my live demos and workshops. Having your photos appear on a large screen is a great way to show them off to a group or simply to check the sharpness and colour on a screen that’s bigger and better than the one on your camera. You don’t even have to be a studio photographer to find tethering useful for example, I hook up to a 10” Windows tablet during my location workshops.

So here are my top five tips for tethering into Lightroom.

1 Already supported
Ever since Lightroom 3 there’s been a built in way to tether a camera and Lightroom. It’s quick, simple and reliable. You’ll find it under File-Tethered Capture-Start Tethered Capture. Fill in the setting boxes and away you go.Tether-1
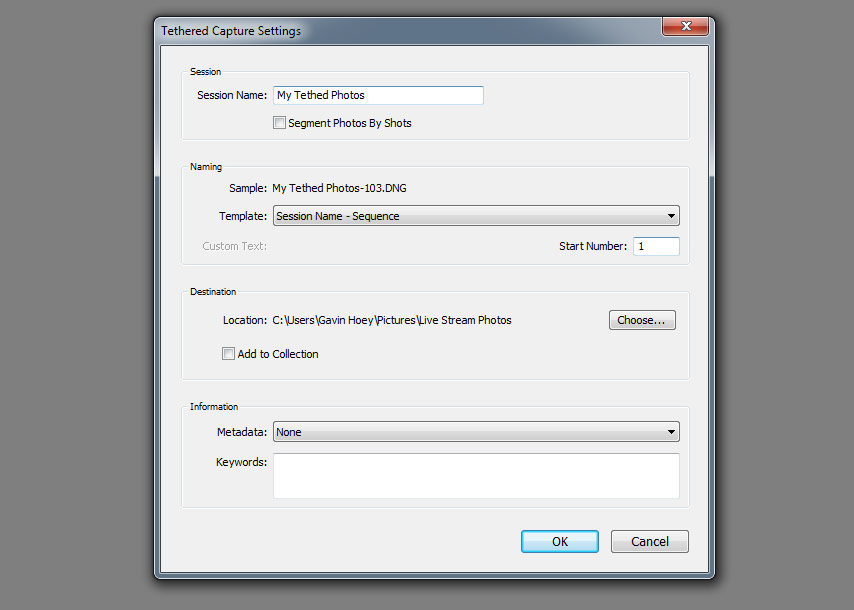
The bad news is it only works for a selected number of cameras from Canon, Nikon and Leica. You can see the full list here https://helpx.adobe.com/lightroom/kb/tethered-camera-support.html

Basically if you’re camera body isn’t supported you can’t use it but all is not lost. Jump down to section 5 for help.

2 Right Cable
OK so you have a camera that’s supported by your version of Lightroom, it’s all hooked up and the camera’s USB setting are correct. But for some reason Lightroom just won’t recognise it and insists that “No Camera Detected”Tether-2

What USB cable are you using? Is it the one that camera with your camera or a cable you found stuffed away in a drawer? The problem is not all USB cables are the same, despite how they may appear and Lightroom (or rather your computer) is fussy.

Some USB cables are charging cables, some are data cables, some are both and all of them look the same. If Lightroom won’t talk to your camera it may well be the cable that’s faulty or simply doesn’t support data. Swap the cable for a known good one and try again.

3 Go long
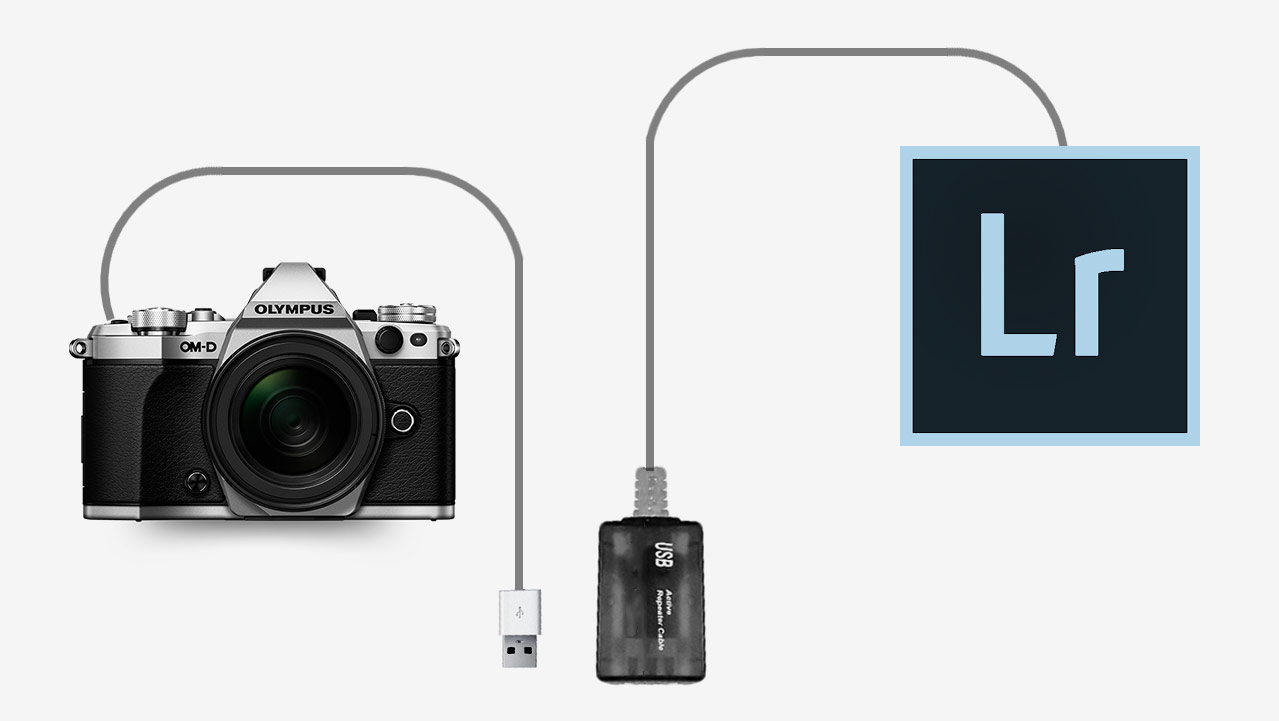
Unless you intend to shoot with your computer less than a metre from your camera (and some photographers do) you’ll want a USB extension cable. The longer the cable the less likely I am to trip over it and the more mobile I can work. However there’s a problem. If your total cable length goes beyond about 5 meters the USB signal will be intermittent or just plain stop.

The solution is to buy something called an Active USB Extension also known as a USB Repeater Cable. It’ll have either a thicker connection at the female end or a little bump in the cable which houses a signal booster and that’s what gets you past the 5 metre limit.Tether-3
4 Shrink the bar
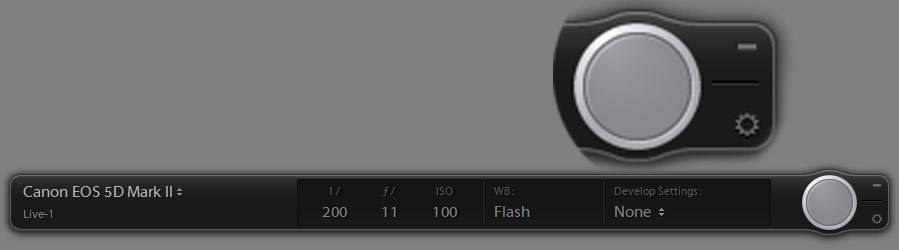
Once everything is set up, Lightroom will auto import you images whenever you press the camera shutter button, plus it has some basic camera controls such as remote firing the shutter and… well, actually that’s it but it will show you a bunch of useful camera information like ISO and aperture.

Of course you may not need to see all that extra info, so to hide it hold the ALT key and click on the – icon in the Tether tools bar’s top right corner. You’ll be left with a single button which you can drag out of the way.Tether-4
5 Not supported, not a problem
Moving from Canon to Olympus caused me a few headaches when it came to tethering into Lightroom. Like most cameras manufactures, Olympus makes its own software for tethering and gives it away for free but it lacks things I need (like full screen reviews or any sort of image editing).  What it does do is auto import photos to a chosen folder on my hard drive which I can then set as a watched folder in Lightoom. Here’s how it works.

With the camera software importing to a preselected folder (how this is done varies from brand to brand) I then go to Lightroom and click File-Auto Import-Auto Import Settings and put a tick in the Enable Auto Import box. Set the watched Folder to be the same folder on my hard drive that I selected in the camera manufacturers software and do the same with the destination folder.Tether-5
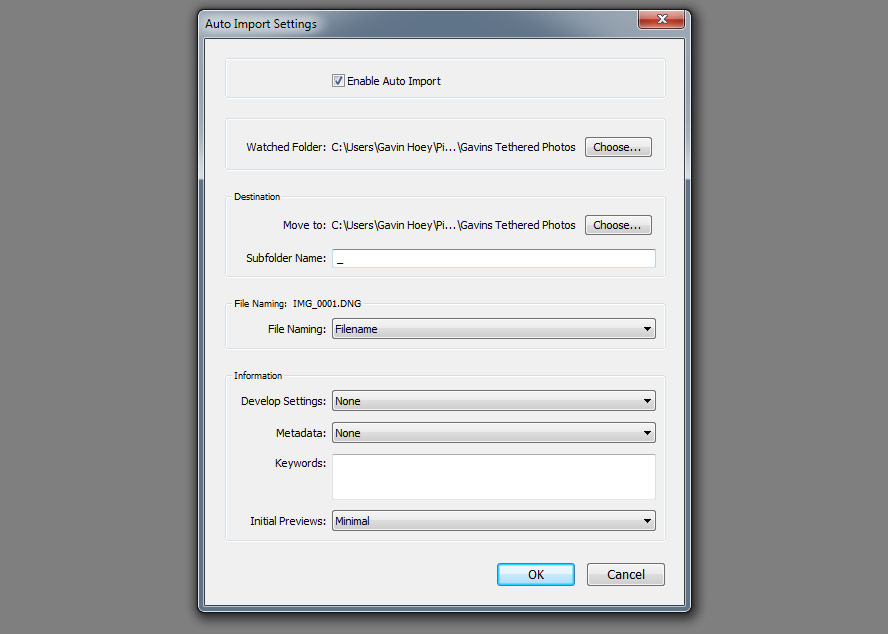
And that’s it, Lightroom will auto import any images that land in the watched folder and they appear on screen about five seconds after I take the shot. Best of all Lightroom remembers these settings, so it’s a “set and forget” process too!
Fearless Flash For Speedlights

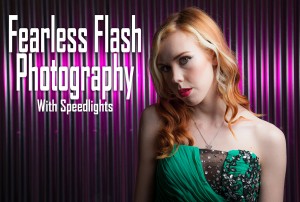
I love shooting portraits with small flashes and judging by the number of questions I get about the subject, I’m not alone. I’ve run many workshops on the subject, I use speedlights during my live talks to camera groups and yes, I really do use them in my day to day work. But I’ve never made a complete video series on how to get the most from them… until now.

I’ve been working on the Fearless Flash Photograghy video series for the past few months and I’m really thrilled it’s finally completed.
More info here…


If you’re looking to get big results from small speedlights, this course is for you and I’ll walk you through everything you need to know to get up and running with speedlight photography.

Fearless-Flash-Cover-GavtrainIn this video series you’ll learn more than just what gear you need, you’ll discover the craft of working with speedlights as I put theory into practice on some simple but stunning shoots. Working with three great models, I’ll share my favourite one flash setups and double light setups that can be quickly reproduced in any studio big or small, permanent or portable.

The course is packed with great information but you don’t need a specific camera or flash brand to follow along. It includes plenty of lighting diagrams and a BONUS video with my quick tips for post processing the images shot during the making of this series.

You choose to either rent the videos and watch online for a month or buy the series and download or watch online at anytime.
More info here…

Fearless-Diagram-2

5 Questions about flash meters

One of the very first lighting accessories I brought was a flash meter, in fact the same meter gets used and abused almost every time I use manual flash. I’ve used my handheld flash meter with speedlights and studio flashes of all makes, I use it in the studio and on location. Honestly, I couldn’t work without it.

If you’re thinking of getting your own flash meter or already own one but are not sure how to get the best from it the video below should help answer some of the most common quesions.

[youtube]https://www.youtube.com/watch?v=UG4P-Odutr8[/youtube]

Not a video viewer? No problem, try this instead.

1 Can’t I just use my camera meter?
Nope, you’re camera meter is designed to work with continuous light and can’t react fast enough to meter flash. However you can use your cameras LCD to review the photos and adjust the flash power based on what you see. This trial and error approach is OK but does have its drawbacks… see the video for more on this.

2 Do all meters work the same?
Well, they all meter the light so at a basic level they’re all the same. In my case I simply set the meter to match my camera’s ISO and shutter speed and when the flash fires I can read off the aperture.

Of course there’s plenty of advanced flash meters around that have features that might make life a lot easier for you. Some meters can measure the amount of ambient contamination in your shot, others can figure out lighting ratios and there’s even some which have pocket wizard radio triggers built into the meter itself.

3 How do I fire the flash?
That largely depends on the flash meter. On my Sekonic L-308s I prime the meter by pressing a button on the side and then fire the flash by pressing the “test” button on either the flash or radio trigger.

Other firing options include attaching a PC Sync cable from the flash to the meter or as I previously mentioned, finding a meter that has a built in radio system (such as Pocket Wizard)

4 Where do I point the meter?
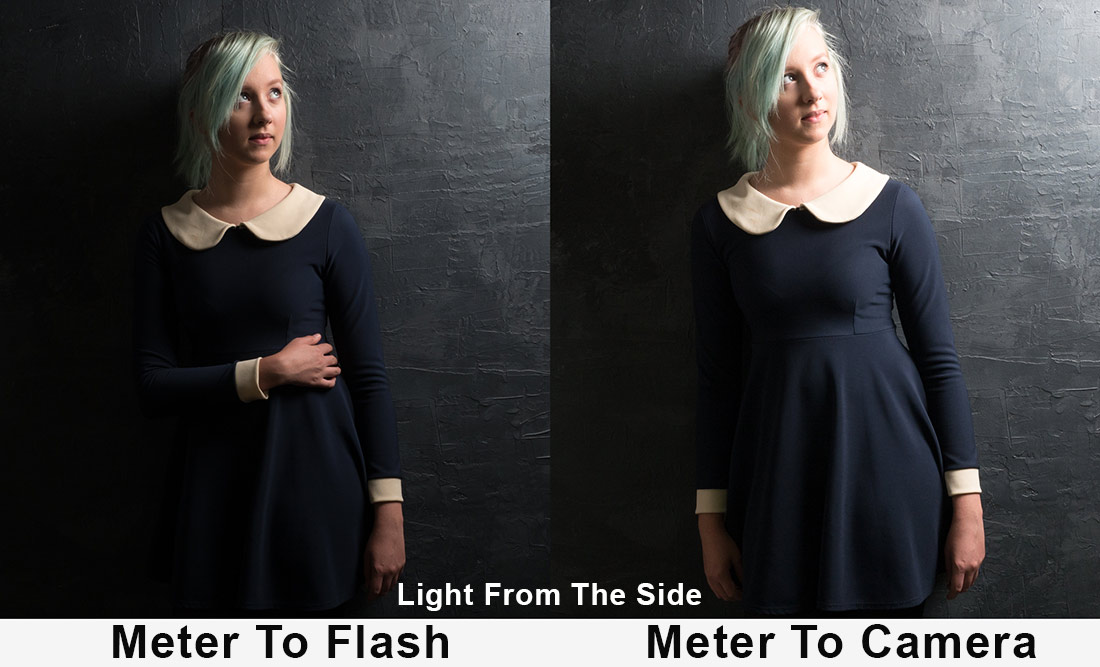
This is the question that usually sets off much debate among photographers. For me it’s always… Point the meter at the light, however as you’ll see in the video, if the light is mostly coming from the camera position, the same exposure is recorded by pointing the meter at either the flash or the camera.

Meter-Before-After

One mistake a lot of photographers make is to place the meter in the shadow cast by the chin or by the models hair etc. It’s easy done, so if the meter is telling you something that feels wrong, move the meter and try again.

5 Do I really need one?
No, you can do the trial and error way of working and get very good exposures. However if you move or modify the light you’ll need to do the same work all over again.

A flash meter saves time on a shoot and gives you extra confidence in nailing the correct exposure. However it’s always worth remembering that correct exposure isn’t the same as perfect exposure so it’s a good idea to ignore the meter from time to time and get a little experimental with your shots.

Lastly there’s one more reason for using a flash meter and it has nothing to do with how it works… Just like shooting with a big camera, the untrained eye can equate using a flash meter to knowing what you’re doing. Now, whether that’s a good or bad thing I’ll leave up to you.

Making The Most of Motivated Lighting

Motivated light is a term that’s more normally used in the world of the movies but there’s no reason for us stills photographers not to be aware of it and use it to create some great effects.

So what is motivated light? Put simply if you can see (or think you can see) the source of the light that’s illuminating the scene, you’re looking at a motivated light. But there’s a bit more to it than that.

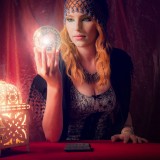
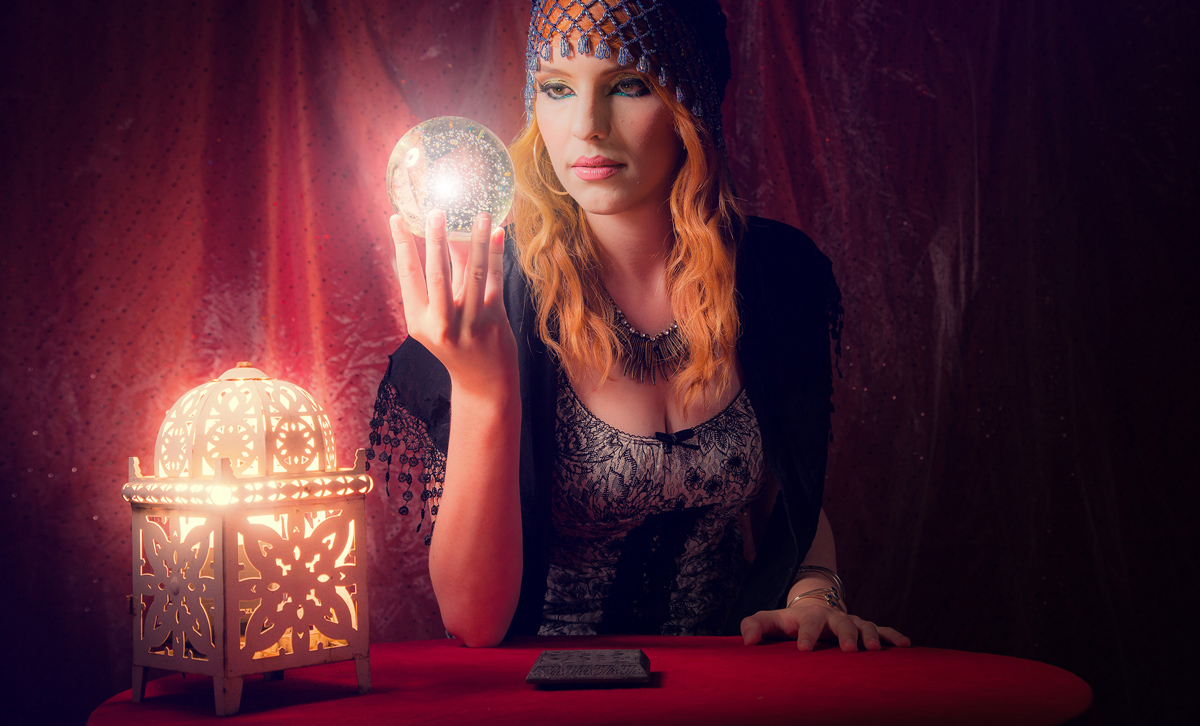
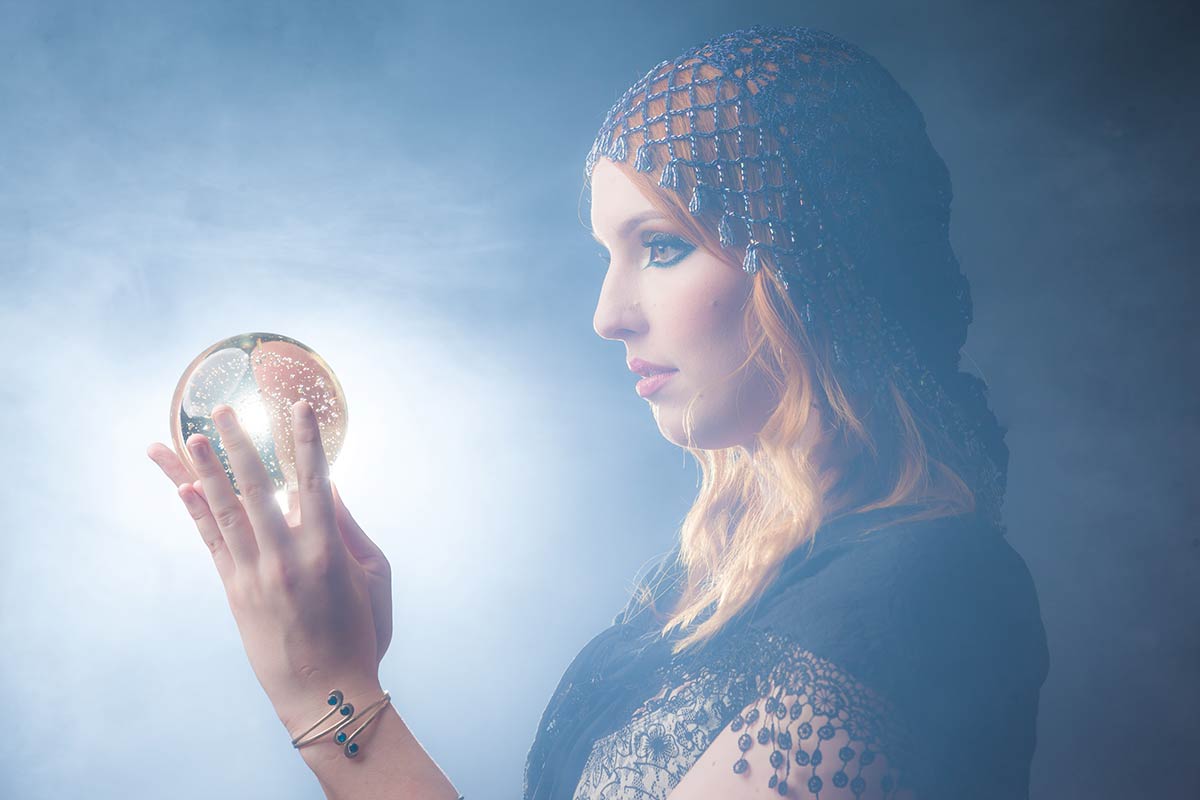
Kerry-Fortune-Teller-(2)

Usually I go to great lengths to avoid seeing my lights in the shot, especially if the light is directed towards the camera lens. Even a tiny edge of light in the frame can play havoc with contrast and flare. If I have to see a light I can minimise flare by turning the power right down but then it doesn’t produce the light needed to get the exposure right. So how can I have the motivated light source in the scene and keep control of the exposure?

The answer is… I cheat!

In the video below I’ll look at two ways to create motivated light. The first way is in camera by teaming a low powered flash with a high powered flash that’s out of shot but in the same direction. The second way is by creating the effect in Photoshop.

[youtube]https://www.youtube.com/watch?v=U6sZlhhe3h4[/youtube]

Of course motivated light doesn’t have to be done like this and by definition motivated light can be something as simple as a window or room light that’s in the shot. So the chances are you have used motivated light in the past without even knowing it.

Model: Kerry Allingham
Make-Up: Anna Matos

Gear used in this video

Canon 5D Mark III www.adorama.com/ICA5DM3.html?KBID=67338

Canon EF 24-105mm f/4L IS USM Lens www.adorama.com/CA24105AFUC.html?KBID=67338

Flashpoint Light Stand www.adorama.com/FPLS9.html?KBID=67338

Black Rapid RS-7 Strap www.adorama.com/BRRS7.html?KBID=67338

Flashpoint StreakLight 360 Ws Creative Collection www.adorama.com/FPLFSL360K2.html?KBID=67338

Sekonic L-308S Flashmate www.adorama.com/SKL308S.html?KBID=67338

Flashpoint Zoom Li-on Manual On-Camera Flash http://www.adorama.com/FPLFSMZL.html?KBID=67338

Smoke Machine Background

One of the draw backs of working in any studio is the finite nature of the backgrounds you can work with during a shoot. Of course if you’re handy at a bit of DIY you can build your own sets and create some amazing backgrounds but that takes time and besides, carpentry isn’t one of my strongest skills as you’ll see when I made my current studio background.

So what can you do to quickly change the background? Well I have a bunch of different fabrics which work really well but as you’ll see in this video, nothing beats the smoke machine for effect and downright fun!

[youtube]https://www.youtube.com/watch?v=LvLjiahVBrs[/youtube]

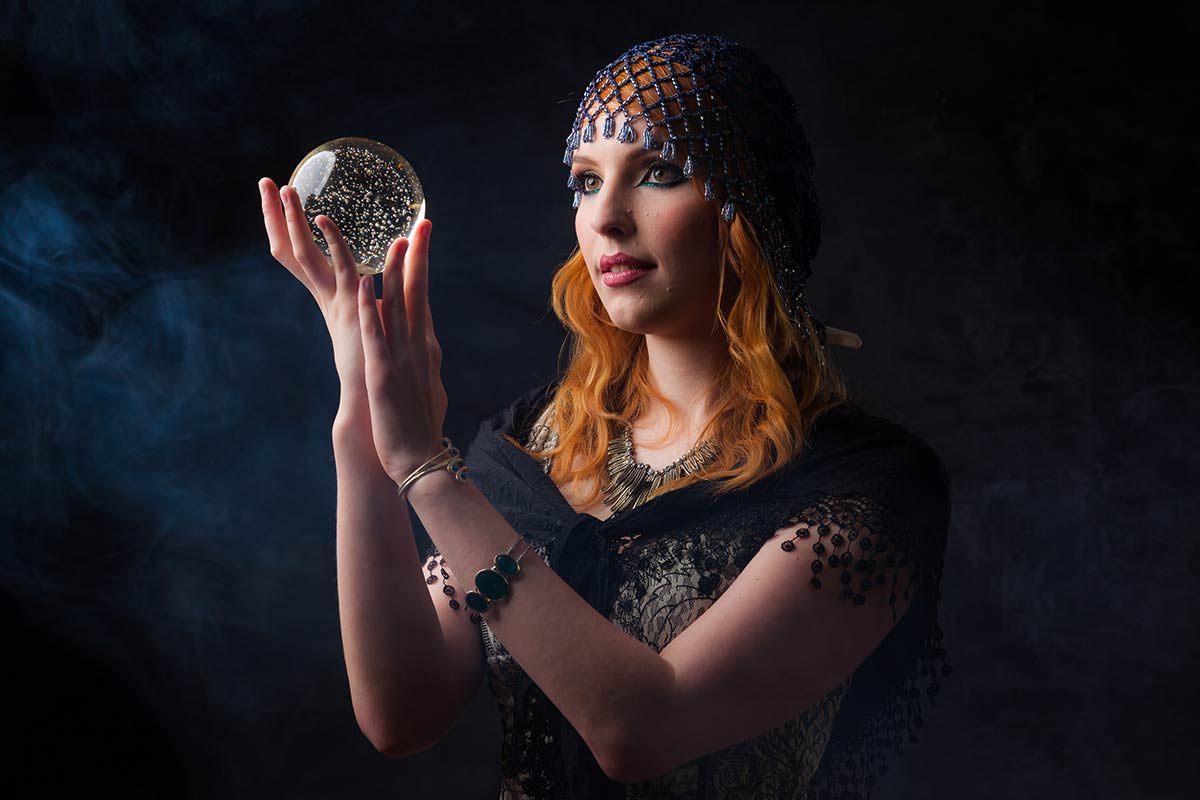
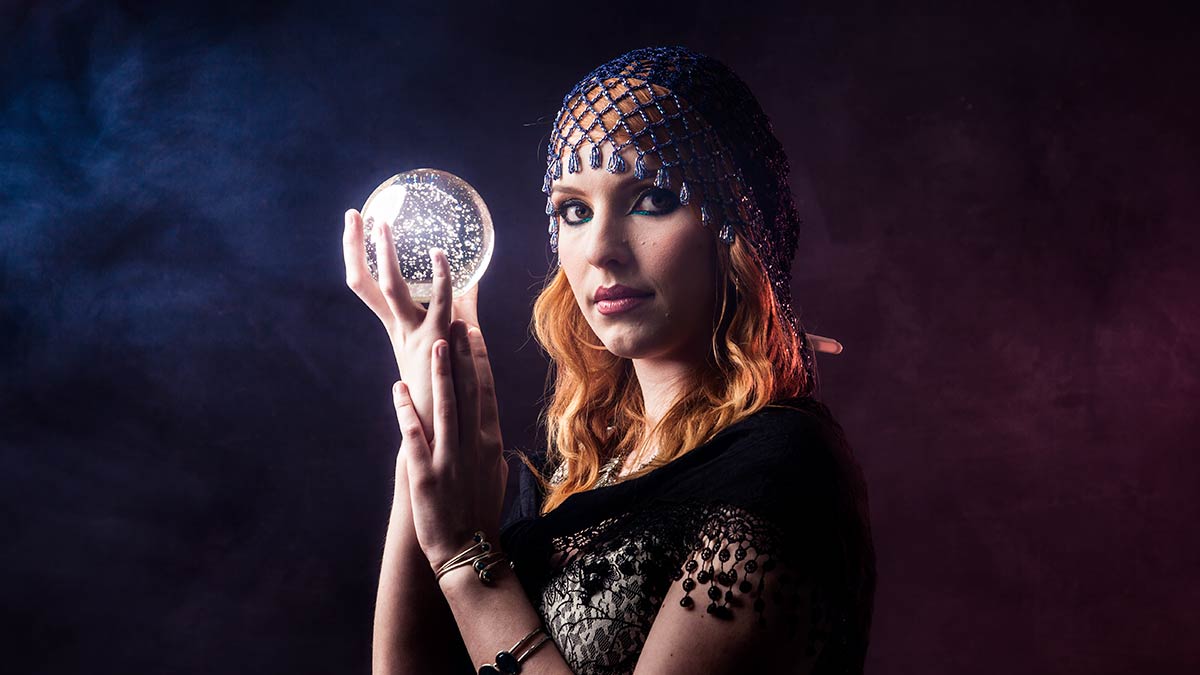
That shoot was part of a series I shot with a Fortune Teller theme and the smoke machine was perfect for the background, as the smoke builds up, the effect changes from a slight haze to thick fog.

Kerry-Smoke-1

The smoke is a whitish/blueish colour so to get the full effect of the smoke you’ll need a dark background and ideally a light to illuminate the smoke from either the side or back.

Kerry-Smoke-2

Adding a splash of colour to the fog is as easy as popping a coloured gel on the flash that illuminating the fog. In this case I added a red gel to the flash on the right and increased the saturation of the natural blue colour of the fog in Photoshop.

Too much smoke can ruin the shot by reducing contrast, especially if you light it from the front. For that reason I keep any smoke shots until the end of the shoot.

Kerry-Smoke-3

Finally it’s worth checking that the smoke “juice” is water based to avoid leaving a residue all over your studio and is non toxic… pretty obviously. The smoke builds up pretty quickly so also keep a check on the model and anyone else in the studio. At the first sign of problems get some fresh air.

Model: Kerry Allingham
Make-Up: Anna Matos

Gear used in this video

Canon 5D Mark III www.adorama.com/ICA5DM3.html?KBID=67338

Canon 50mm f/1.8 II www.adorama.com/CA5018AFU.html?KBID=67338

Flashpoint Light Stand www.adorama.com/FPLS9.html?KBID=67338

Black Rapid RS-7 Strap www.adorama.com/BRRS7.html?KBID=67338

Flashpoint StreakLight 360 Ws Creative Collection www.adorama.com/FPLFSL360K2.html?KBID=67338

Sekonic L-308S Flashmate www.adorama.com/SKL308S.html?KBID=67338


Controlling reflections in glasses

So you’ve got the lights, you have your model and you’re ready to shoot. Then you take a test photo and all you see is huge white reflections. It’s a problem that happens all too often but fortunately there are a couple of solutions that are quick, easy and effective.

Let’s start with the simplest solution. Get your subject to remove their glasses. It sounds obvious but it’s surprising how many photographers don’t have the nerve to ask. Whilst this can work wonders with occasional spec wearers, anyone who wears glasses full time will look most weird without their specs on. It’s also not going to work with the cool crowd who wear sunglasses all year round.

If you’re using flash or continuous light the chances are the reflections are likely to be from your lights and where you position the lights will affect the reflections you see in the photo.

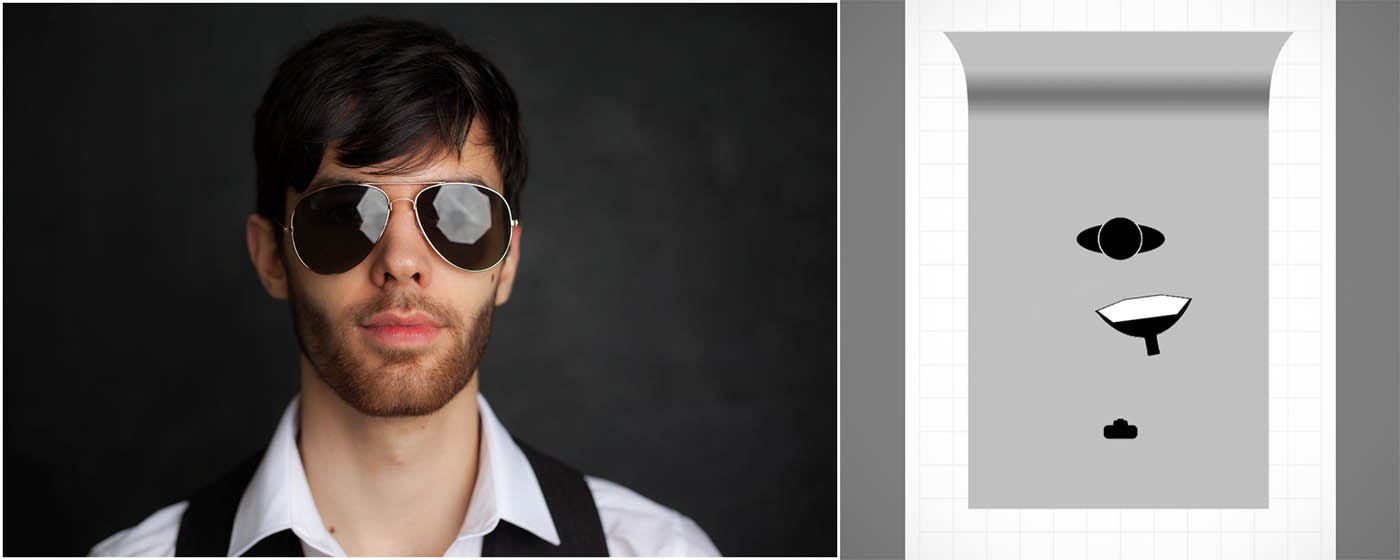
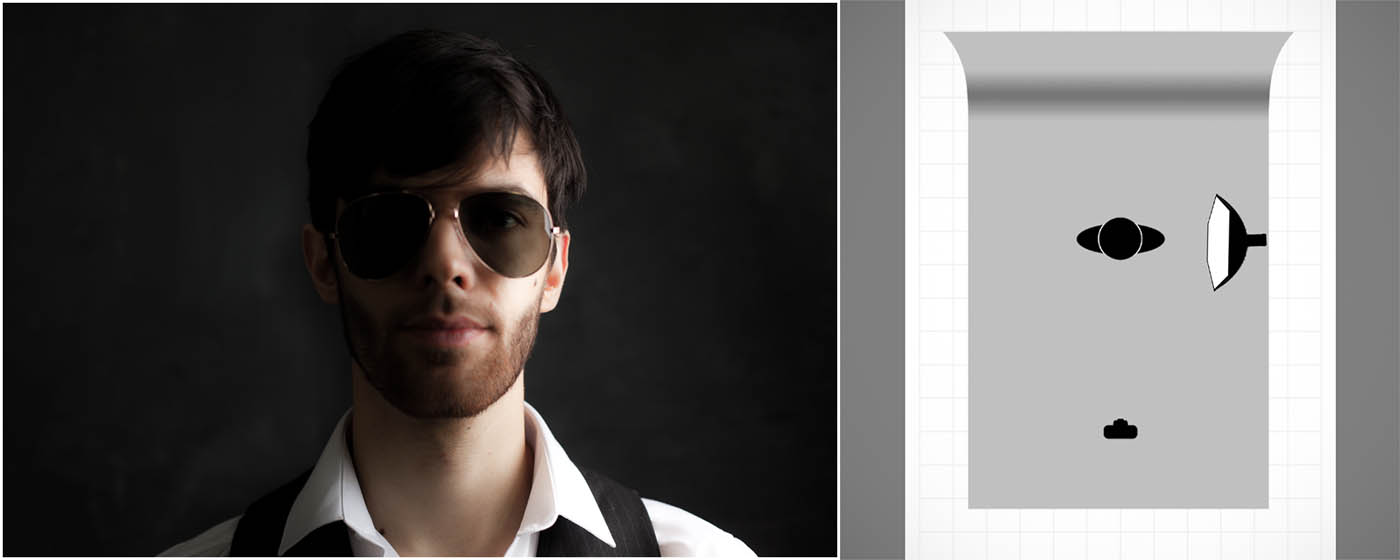
photo-1Light from the front (including on camera flash) will produce the biggest, brightest and least attractive reflections. Because light travels in straight lines it’s going to hit the front of the spectacle lenses and bounce right back in to the camera. This really is one lighting position to avoid.

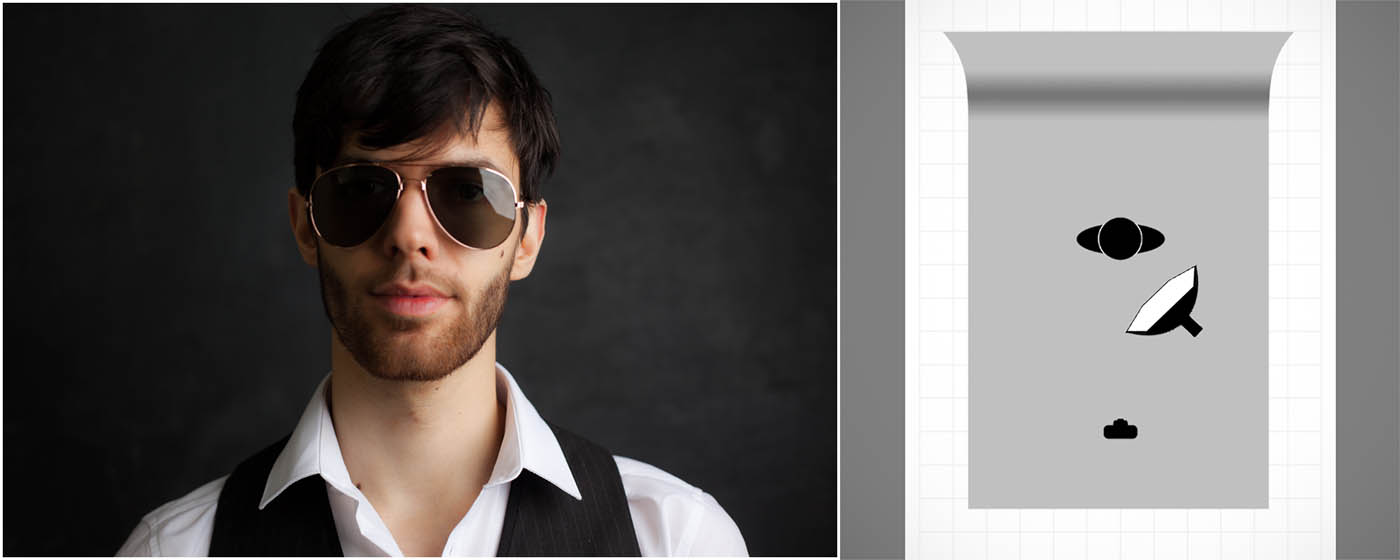
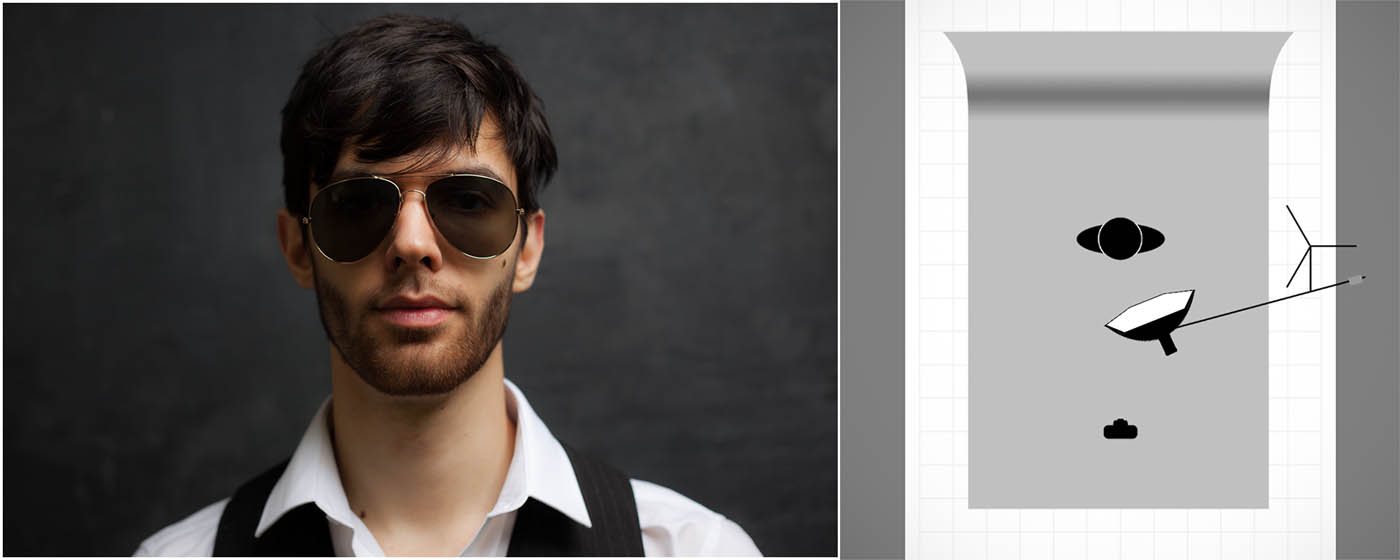
photo-2Knowing that light travels in straight lines means that moving the light source to the side will move reflection. Here the light is at about 45 degrees and the result is a reflection that’s much reduced in size.

photo-3Taking the idea a bit further, if the light is fully 90 degrees to the glasses results in a tiny reflection but also produces a split light effect which might not be the look you’re after. If you look really close you’ll still see a slight reflection. Why? Well the surface of glasses isn’t flat like a window, it’s curved so you’re never at a 90 degree angle across the whole surface of the lens.

photo-5To minimise and remove reflections the best position for the light is up high. By elevating the light the reflections will disappear and the lighting pattern remains flattering too. Asking the model to drop their chin or slightly angle the glasses down can have a similar effect.

In the video below I go through all of the tips in this post in more detail and even give you some tips on how to add a reflection of your own choosing.

[youtube]http://youtu.be/kOzPWkkmZPE[/youtube]

Gear used in this video

Canon 5D Mark III www.adorama.com/ICA5DM3.html?KBID=67338

Canon 50mm f/1.8 II www.adorama.com/CA5018AFU.html?KBID=67338

Flashpoint Light Stand www.adorama.com/FPLS9.html?KBID=67338

Black Rapid RS-7 Strap www.adorama.com/BRRS7.html?KBID=67338

Flashpoint StreakLight 360 Ws Creative Collection www.adorama.com/FPLFSL360K2.html?KBID=67338

Sekonic L-308S Flashmate www.adorama.com/SKL308S.html?KBID=67338

Westcott Rapid Box 26″ Octa Softbox www.adorama.com/WERB26OM.html?KBID=67338

Softbox Size vs Soft Light

One of the primary uses of a softbox is to give soft lighting, but with so many sizes available, which one should you use?

The answer in part comes from the classic rule with soft lighting which is this. The bigger the light source (relative to the subject) the softer the light produced. In other words bigger softboxes give softer light and as long as your softbox is close to your subject that holds true. To test it out I got my 28″ Parapop softbox from Adorama, a medium sized softbox and borrowed a giant 7′ Westcott umbrella softbox.

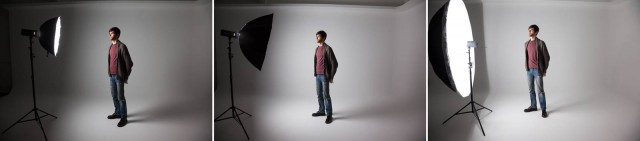
soft-1

You can see this in action in the three photos above. In each shot the distance from light to the model was 1 meter and the light was metered at f/8. Notice how the shadows blend in with the highlights as the softbox size increases and that’s soft light in action.

Now remember I said the softness of light is also relative to the subject size. Well here’s what happens if you zoom out and shoot a larger, full length portrait. Once again the distance and settings are the same in all shots.soft-2

Look at the shadow behind the model. With the small and medium sized softboxes you’ll see a sharper, harder edge to the shadow then the big softbox. You’ll also see that the smaller softbox gives a smaller spread of light compared to the more even illumination of the large softbox.

So if you want to shoot full length portraits with soft light then an oversized softbox is one answer but it has another use to. Unless you want to spend time in Photoshop cloning out the light you’ll need to back it up. Moving the light away from the subject makes it that much smaller and therefore harder. Oversized softboxes allow you to get soft light without the source being in the scene.

Take a look at this video where I cover all of this and more.
[youtube]https://www.youtube.com/watch?v=a-rAnxVX9kE[/youtube]
Of course there are a few downsizes to large softboxes, one of which is the lack of directional control. In the video above I add some control using Photoshop but in the next video I’ll add it to the light.

Gear used in this video

Flashpoint RoveLight 600 http://www.adorama.com/FPLFRL600.html?KBID=67338
Glow ParaPop 28″ R Softbox http://www.adorama.com/GLSBSM28PPFP.html?KBID=67338
Westcott 7′ Silver Parabolic Umbrella http://www.adorama.com/WEUSLP7.html?KBID=67338
Westcott diffusing cover for 7′ Umbrella http://www.adorama.com/WE4631D.html?KBID=67338
Canon 5D Mark 2 http://www.adorama.com/ICA5DM3.html?KBID=67338
Canon 24-105L http://www.adorama.com/CA24105AFU.html?KBID=67338
Black rapid RS-7 Strap http://www.adorama.com/BRRS7.html?KBID=67338
Sekonic L-308S Flashmate http://www.adorama.com/SKL308S.html?KBID=67338

Home Studio Essentials Episodes 1-10

If you’ve been watching my recent videos over on Adorama TV you’ll have noticed a pattern forming. Over the past months the majority of the videos have focused on shooting with flash in a small, home studio and judging by the feedback it seems to have gone down very well indeed. I think part of the reason for their popularity is the way each video builds on the previous skills learned, at least that was the idea I had when I originally planned them.

HSE-MontageGear is always a big part of photography but none of the videos need a specific brand of equipment to complete. I used my trusty Canon 5D2 and 24-105mm lens. My flash gear is supplied by Adorama and is their amazing Streaklight flashes. If you want to know more then you can read my review.

To save you digging through my blog / YouTube to find them all I’ve added them all here.

Episode1: One bare flash
[youtube]http://youtu.be/hR4DW7dXOsk[/youtube]

Episode 2: One flash with an umbrella
[youtube]https://www.youtube.com/watch?v=ur58XNQwMXA&list=PL821B7D720DEA39FA&index=11[/youtube]
Episode 3:One flash and a softbox
[youtube]https://www.youtube.com/watch?v=z0MTQFYnvQA&list=PL821B7D720DEA39FA&index=10[/youtube] 
Episode 4: One flash and a reflector
[youtube]https://www.youtube.com/watch?v=TYQh9MNC3Is&list=PL821B7D720DEA39FA&index=9[/youtube] 
Episode 5: Adding a second light
[youtube]https://www.youtube.com/watch?v=FcQg0cBncHs&list=PL821B7D720DEA39FA&index=7[/youtube] 
Episode 6: Using honeycomb grids
[youtube]https://www.youtube.com/watch?v=K-C9xgTCLfM&list=PL821B7D720DEA39FA&index=6[/youtube] 
Episode 7: Using coloured gels
[youtube]https://www.youtube.com/watch?v=sR0wu9Sy6GM&list=PL821B7D720DEA39FA&index=5[/youtube] 
Episode 8: Getting a white background
[youtube]https://www.youtube.com/watch?v=RP4IixDOP5M&list=PL821B7D720DEA39FA&index=4[/youtube] 
Episode 9: Softbox as a white background
[youtube]https://www.youtube.com/watch?v=wy0VZEhwtSU&list=PL821B7D720DEA39FA&index=3[/youtube] 
Episode 10: Hair / seperation light
[youtube]https://www.youtube.com/watch?v=PaDUIqdQpPM&list=PL821B7D720DEA39FA&index=2[/youtube] 

Using two lights – Home Studio Essentials – Part 5

There are many ways you can use a single flash to take great portraits but sooner or later the limitations of a single flash will be reached. Adding a second flash can be a great way to open up new and creative photo opportunities.

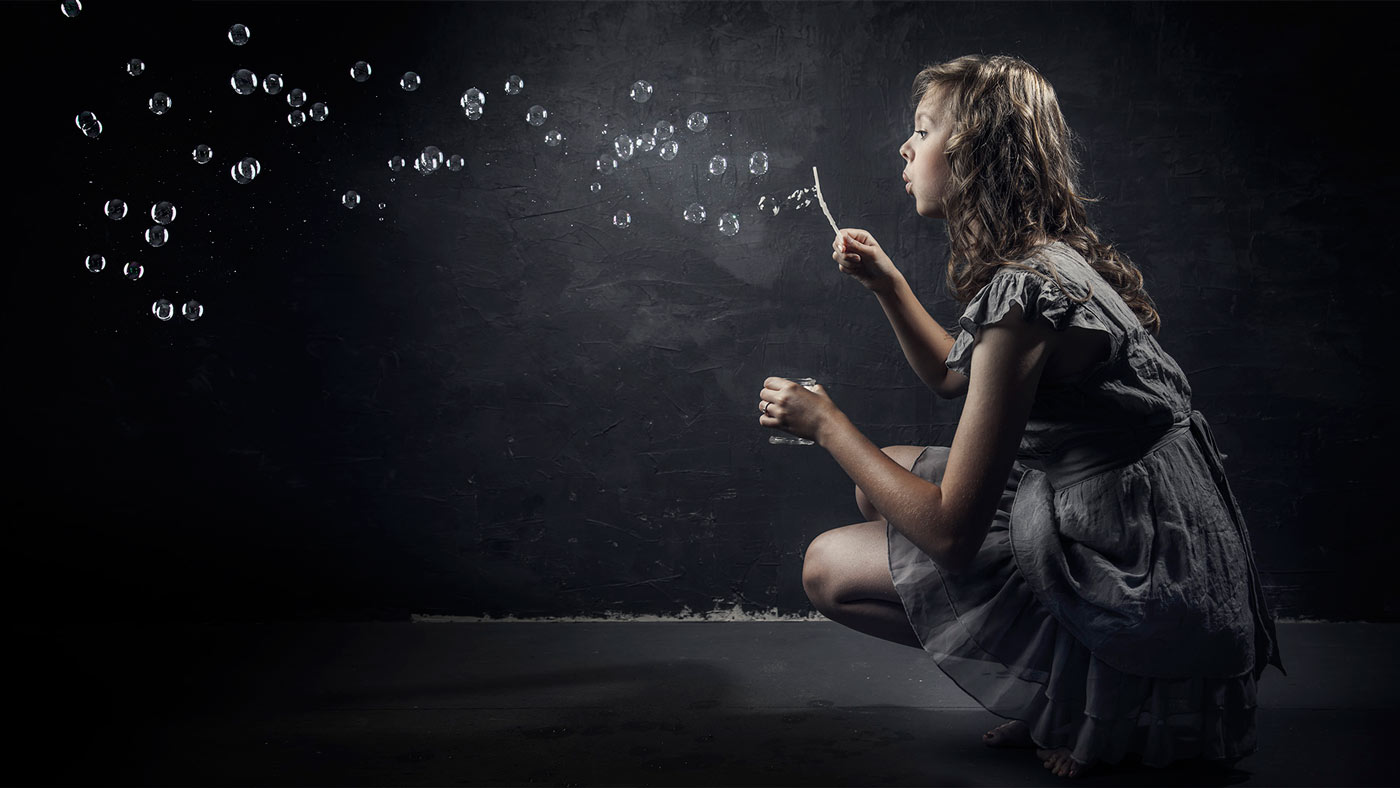
In this video I fire up a second light to act as a hair light and separate the model from a dark background. Then in the final shoot I add a few bubbles to create something a bit special.

[youtube]https://www.youtube.com/watch?v=FcQg0cBncHs&list=UU8Pksdbj37CdE00kmE7Z1dw[/youtube]

More lights means more complexity but my advice is to treat each light separately and meter accordingly. Turning them both on and trying to balance them at the same time sounds easier but trust me it’s not!

Bubbles-Studio

Gear used in this video (Links back to Adorama)

Flashpoint StreakLight 360 Ws Creative Collection (Includes flash, battery, trigger, boom etc)

Flashpoint Streaklight 180 WS

Westcott Apollo Orb Softbox

Canon 5D Mark 2 

Canon 24-105L 

Building a DIY studio background

For a long time I’ve fancied the idea of adding a grungy textured background to my studio but due to the limited space available I’ve stuck to using a white vinyl and black fabric backdrops. Now these have worked really well for me over the years but there comes a time when you want to break free and recently I got a great excuse to do just that.

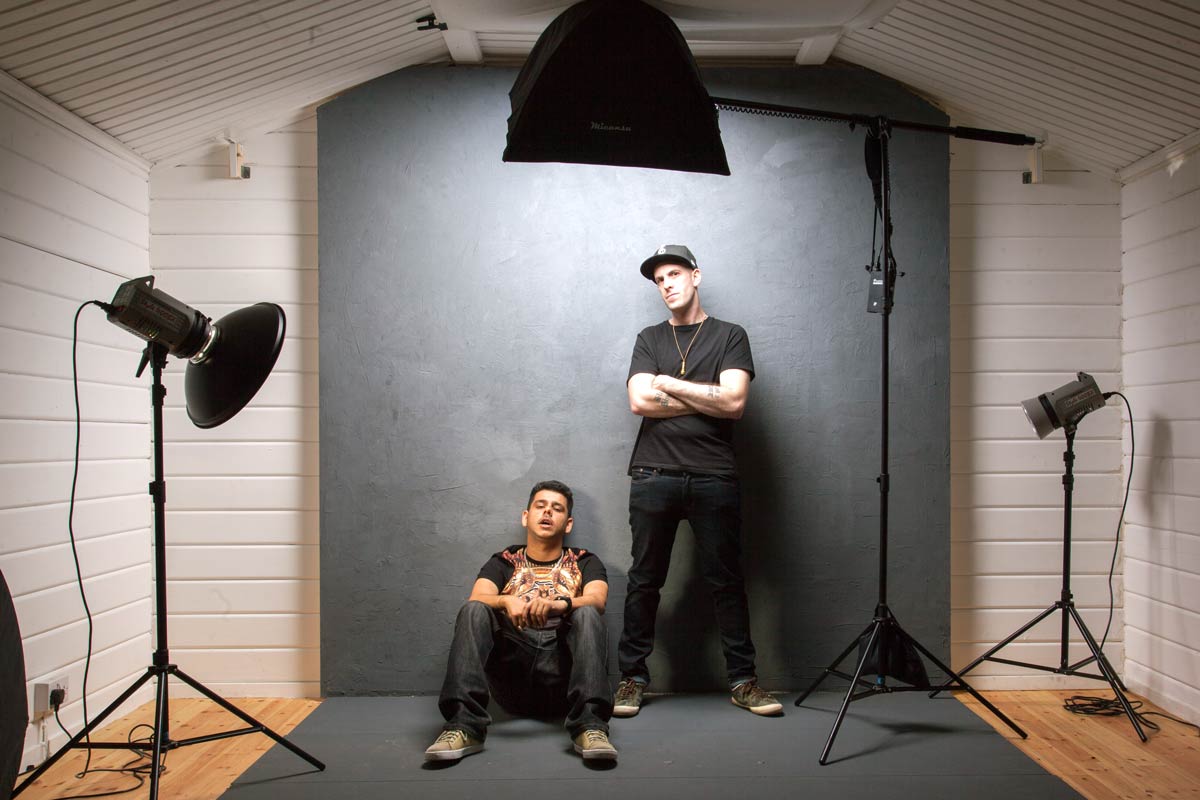
I’m currently in the middle of filming a mini-series of videos for Adorama TV all about shooting portraits in a small studio, something I know a lot about. You’ve probably seen my log cabin studio in various videos before so in order for this series to look and feel different I bit the bullet and built my dream textured backgroundKings-of-Sussex-5

The Plan
I’m a reluctant DIY guy, so if you’re looking for plans, specifications and a fool proof guide to building a background this ISN’T it. After clearing out my old background and removing anything breakable from the area I went online and ordered a bunch of stud work timber, two 2400mmx1200mmx12mm sheets of MDF and three 2400mmx800mmx18mm T&G chipboard sheets for the floor. I ordered them from a well known DIY store chain, paid a whopping £25 for next day delivery and got them four days later… but that’s another story.

DIY-Background-2

The Build
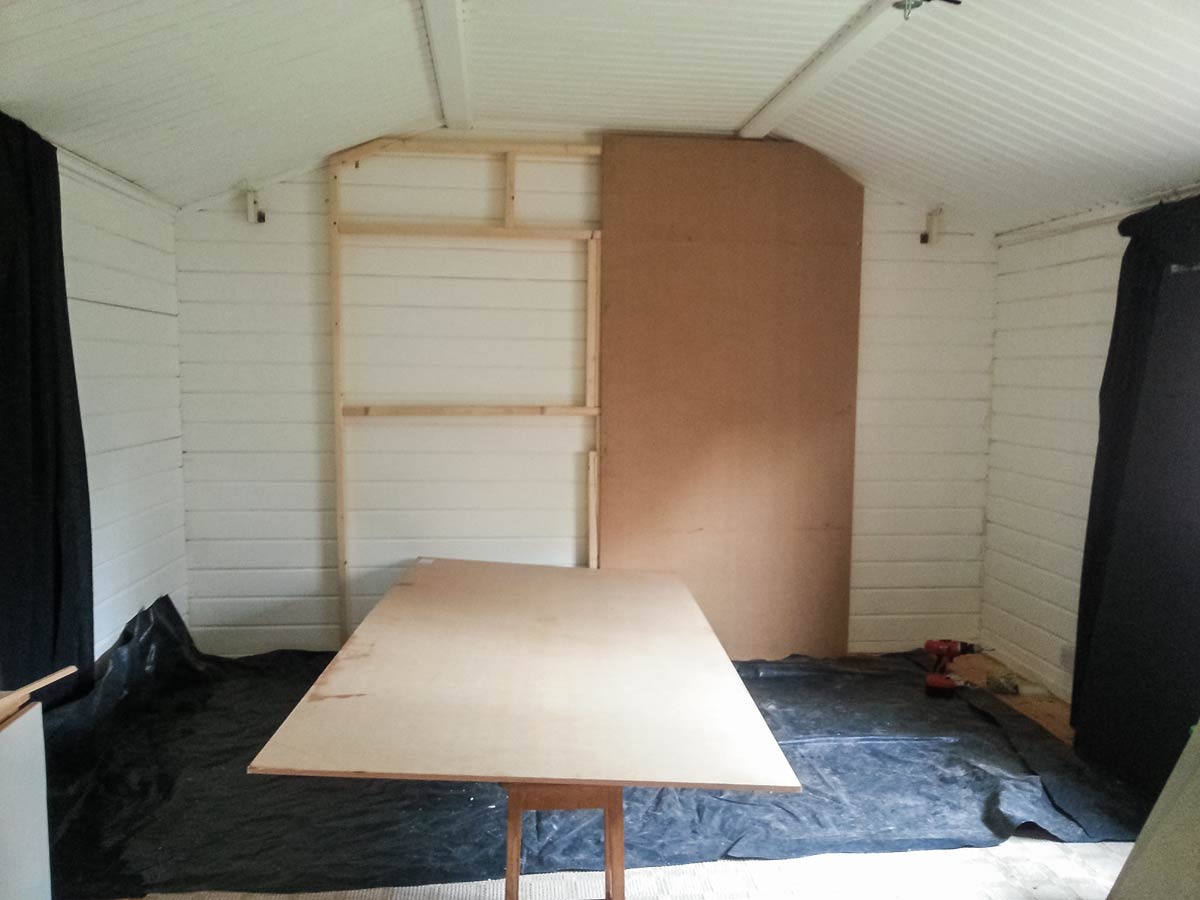
The idea was to make the background 8 feet (2.4 meters) square but my studio roof height made that impossible, so the frame work “evolved” to fit my needs. One thing I know all too well is log cabins move, even heavy duty ones like mine. So my background is almost free floating rather than permanently attached to the wall.

The MDF panels needed the corners cut too (wearing a mask to avoid inhaling the dust) and screwed to the frame.  I then primed the MDF with a coat of PVA glue and water mixed together and left it to dry overnight.

The Texture
The texture I was going for was a grainy concrete feel. Choosing what material to use was tough. I had no idea of what might work best but I knew it would need to stick to vertical surfaces and be flexible enough to withstand a few knocks without cracking too much or bits falling off.

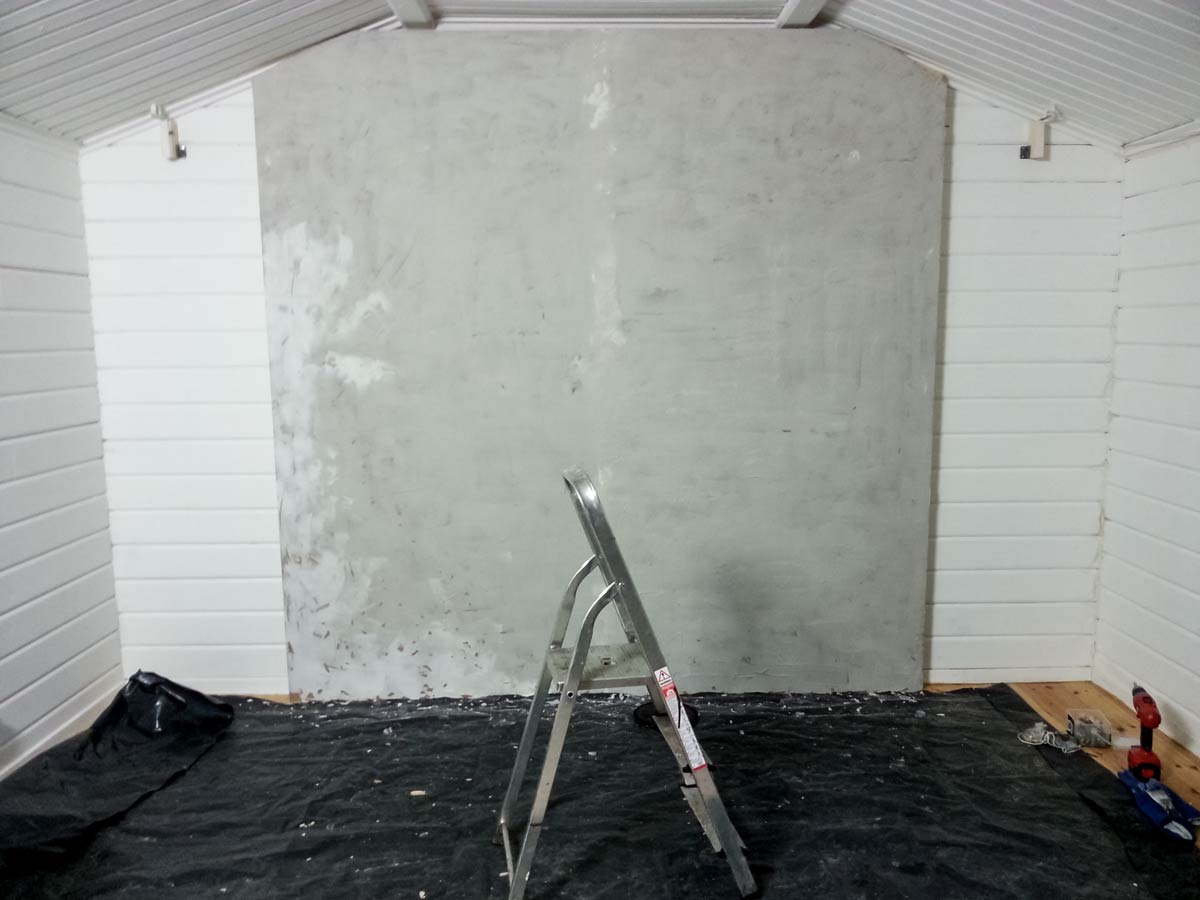
I settled on a flexible tile adhesive from Dunlop. It did everything I needed and best of all it was pretty cheap.  All I had to do was slap it on the MDF and try not to get it too smooth or too rough, not as easy as you might think. Too smooth and the effect would be lost, too rough and it could do some damage to a model or their clothes.

DIY-Background-3

Finishing Touches
Once dry the last job was to give it a coat or two of Matt Grey paint which was randomly added to with a lighter colour for a mottled effect. The mid grey colour is perfect in a small studio as I can add or restrict light to make it appear black or white. I can even add gels to my lights for a splash of funky colour if required.

All in the cost was around £100 for materials and about three days’ work.

In Use
The end results is perfect for my needs. With hindsight I’m not sure MDF was a great choice of wood but it’s working for me.

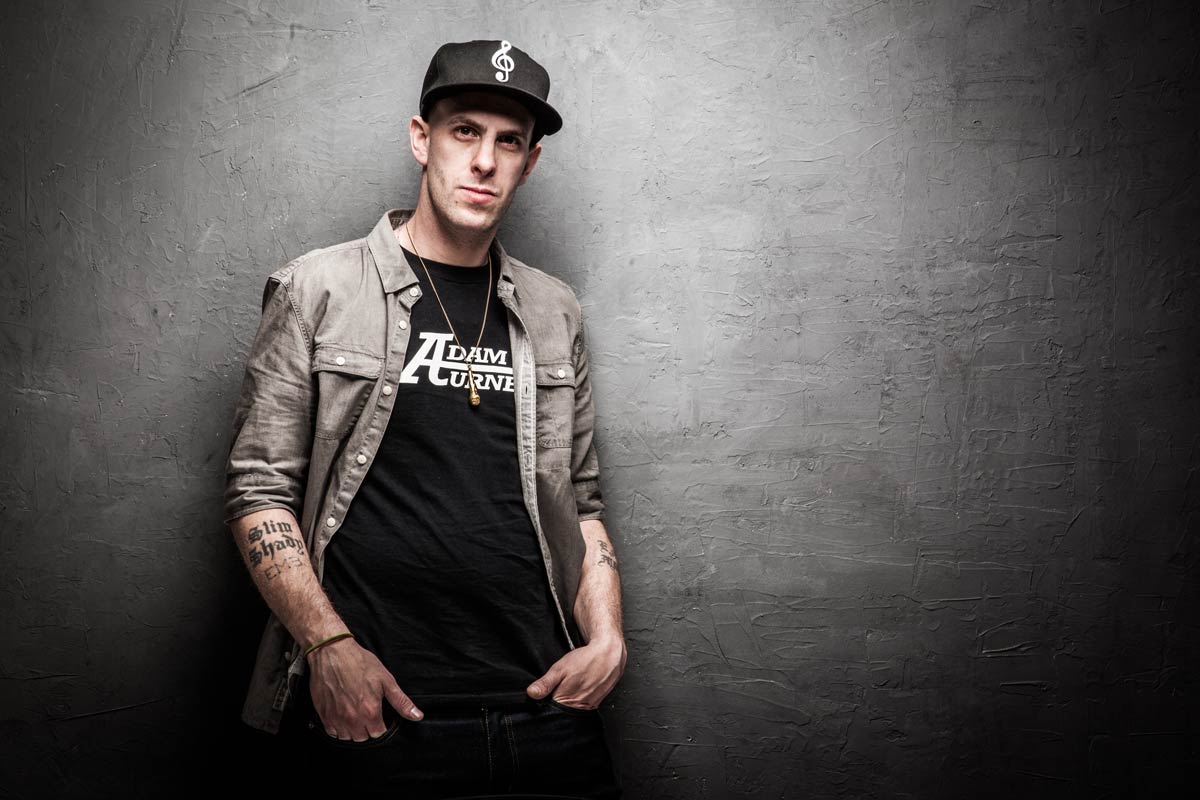
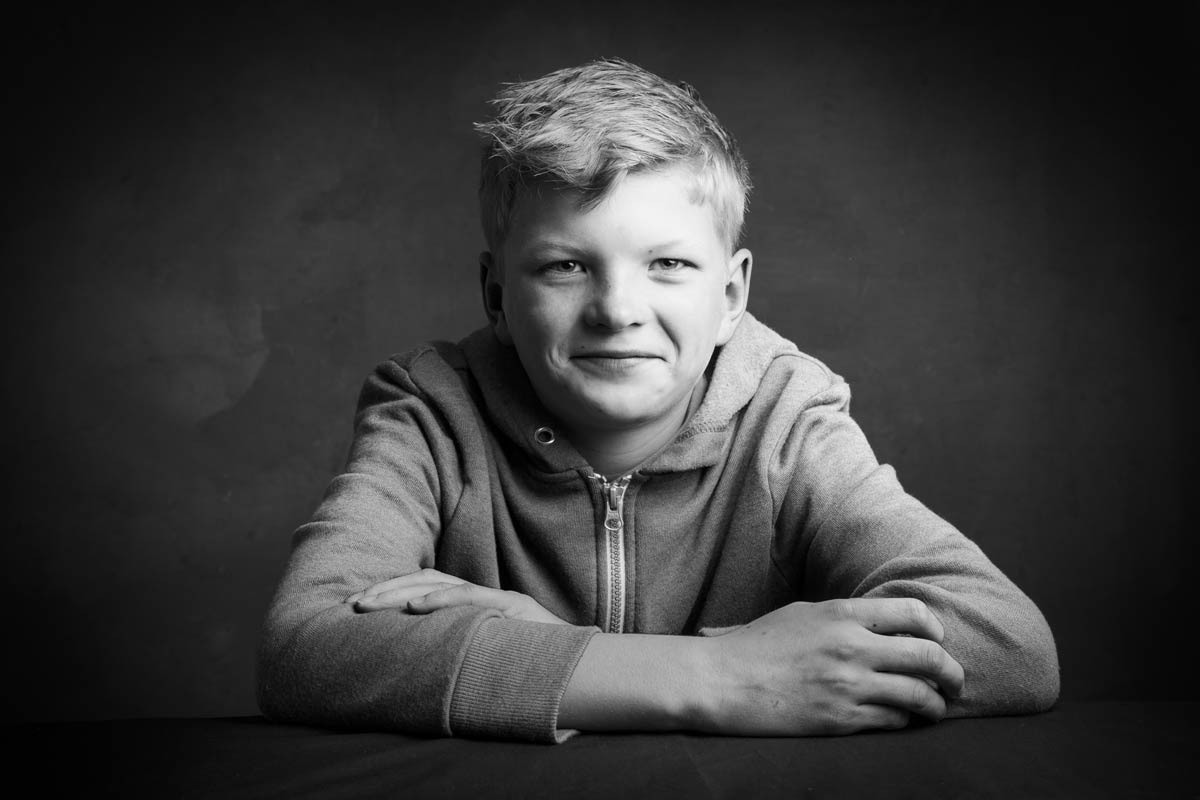
Here’s a few photos of the background in use!

Kings-of-Sussex-3
Joel-1


IF-E-1