Squared edged border action

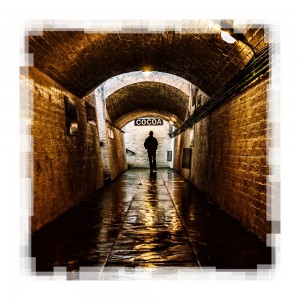
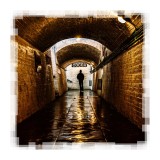
Square-Edge-LargeThis weeks Friday Freebie is a work in progress from my next action set. The new set won’t be ready just yet but once completed it will be the successor to my hugely popular Amazing Borders Set 1.  A good border can really set off a photo but making an action that adds a reasonably border to pretty much any photo you can find is tougher then you might image!

You can download the action here:
Squared edged border action

This action makes a eroded edge border that has a blocky, square edge feel. Personally I blame Minecraft for making blocks fashionable once again 😉 The Action makes a copy of your photo so the original will be untouched. It also flattens the photo at the end, so if you wish to modify the border press CTRL+Z to undo that step.

The action will work with Photoshop CC, CS6, CS4, CS4, CS3, CS2 etc and will work with Elements11 and older versions, if you can jump through the hoops that older Elements put in place to add actions.

If you create a great photo with my action then feel free to link to it by leaving a comment below.

Usage rules
The action is copyright Gavin Hoey 2013. Use is limited to any personal, non-commercial purposes. Please share the Friday Freebie by linking back to this page. Do not redistribute the original action without my permission.

Download instructions
The direct link to download the actions is https://www.gavtrain.com/free/square-border-gavtrain.zip

No support is provided with the Friday Freebies. If you need help Google or YouTube the question and you’ll almost certainly find the answer 🙂
Pseudo HDR – Creative Lightroom Episode 5

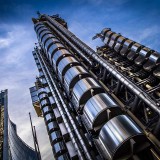
CL-final-5Creative Lightroom has new reached episode 5, the half way point. In this weeks episode I’ve got a quick Lightroom trick which gives your photos a little bit of HDR magic.

When I say HDR don’t think for a second that this is a replacement to the traditional HDR technique of taking multiple images and merging the exposure together in Photoshop, Photomatix or Nik HDR Pro. No what it does is to pull the maximum detail from the shadows and highlights from a single image.

By far the best photos to play with are RAW files that are correctly exposed or a bit underexposed.

To fully pull off this effect you’ll need Lightroom 5 or Lightroom 4.

As always it’s worth mentioning that if you’re a Photoshop user rather then Lightroom user, EVERYTHING I show in the video is the same as Adobe Camera RAW in Photoshop CS6 and Photoshop CC. It’s also possible to pull off the same trick with Elements 11 (but not the vignette in RAW)

[youtube]http://www.youtube.com/watch?v=NJvQWenordQ[/youtube]

Can’t see the video? Click here: http://youtu.be/NJvQWenordQ

Coffee Stain Photoshop Brushes

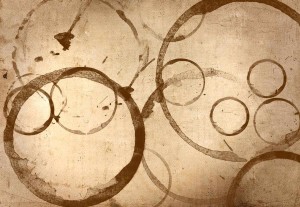
FF-Coffee-brush-1This weeks Friday Freebie is a set of four high resolution Photoshop brushes. What they do is probably pretty obvious but if you can’t see the photo then the words coffee cup rings should explain everything.

 Click Here To Download the Coffee ring brushes

These brushes were hand crafted in my studio using only the finest tea stains (I’m not a coffee drinker) which I photographed and turned into very high resolution brushes. They are the perfect compliment to your grungy images and add some instant aging to your retro images. They work brilliantly with the ageing texture that I ran as the Friday Freebie a few weeks back. It’s also the same texture I used on the photo opposite.

Once downloaded, the brushes will need to be unzipped before they are installed. The brush set is  compatible with all versions of Photoshop and Photoshop Elements. If you need help installing them then remember to search on Google and YouTube for the answers.

If you create a photo using the Friday Freebie then let me (and everyone else) know by leaving the link in the comments below.

FF-Coffee-brush-2

Usage rules
The brushes are copyright Gavin Hoey 2013. Use is limited to any personal, non-commercial purposes. Please share the Friday Freebie by linking back to this page. Do not redistribute the original image without my permission

Composite with Mark Wallace

Mark-Gav-1200A few weeks back I had the absolute privilege of spending a few hours with photographer and fellow Adorama TV presenter Mark Wallace. He was on a European vaccation and we met up in London for a chat over a cup of tea.

Dispite Mark being on his holiday and neither of us planning to shoot a video we decided the oportunity was too good to miss. The plan was for Mark to shoot a portrait in his studio in Phoenix, Arizona and I’d shoot a background in the UK and composite the two photos together.

So here’s part one which starts in the UK before moving on to the USA.

[youtube]http://youtu.be/Eh1-IaDmUnc[/youtube]

Part two is where I get to shoot a new background and composite the two photos together. I’ll be using Photoshop Elements 11 to do this which features the same ability to make amazing selections of hair that’s found in Photoshop CS5. In otherwords the technique I use in Elements is the same in Photoshop CS5, CS6 and Photoshop CC.

[youtube]http://youtu.be/uAPtbWLc_J0[/youtube]

We had a real laugh shooting this video and who knows, may be one day we can organise a bigger, better shoot or two. Mark made a BONUS outtakes video which you can see here and may be the best video of the three 🙂 http://youtu.be/gJf6vJ5_WXc

Equipment used in the video:

Adobe Photoshop Elements 11
http://www.adorama.com/ABPSE11WM.html?KBID=67338

Canon 5D Mark II
http://www.adorama.com/ICA5DM2.html?KBID=67338

Canon 24-105L f/4 IS
http://www.adorama.com/CA24105AFU.html?KBID=67338

Vanguard ABEO Plus 283CT Tripod
http://www.adorama.com/VGABEO283CT.html?KBID=67338

Vanguard GH-200 head
http://www.adorama.com/VGGH200.html?KBID=67338


35mm Film Template

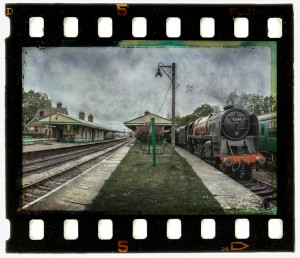
35mm-film-finalI found this weeks Friday Freebie whilst sorting through a pile of old slides I had gathering dust in my office. I’d used this one during the ’90’s in what was known at the time as a “slide sandwich” and was simply two slides pressed together to create a new third image when projected.

Full download instructions are below but you can also
Click Here To Download the 35mm film template

Although the days of the slide sandwich are far behind me, the technique of combining two (or more) images together is alive and well in Photoshop in the form of layers. To make life a little easier I’ve created a template from the 35mm film complete with a note of where your own photo should be added, a blending mode that should work with most photos and a grungy layer mask for if you need to reduce the texture from the centre of the film. Of course you can also change everything if you want.

At 5000 pixels on the longest edge and with lots of fine textured detail, this weeks Friday Freebie PSD template comes in at around 70mb. If you’re not on a fast internet connection if might take a few minutes to download.

As always, if you create a photo using the Friday Freebie then let me (and everyone else) know by leaving the link in the comments below.

Usage rules
The image/template is copyright Gavin Hoey 2013. Use is limited to any personal, non-commercial purposes. Please share the Friday Freebie by linking back to this page. Do not redistribute the original image/template without my permission.

Download instructions
Click the link https://drive.google.com/file/d/0B_Mmmm3K1utNNXpONGJGTk9WUkU/view?usp=sharing

1. Click the Download button download_icon

2. The download should start automatically

3. Save the template to your hard drive

4. Open in Photoshop or Photoshop Elements

5. Paste your photo BELOW the 35mm layer