Wall of sound background

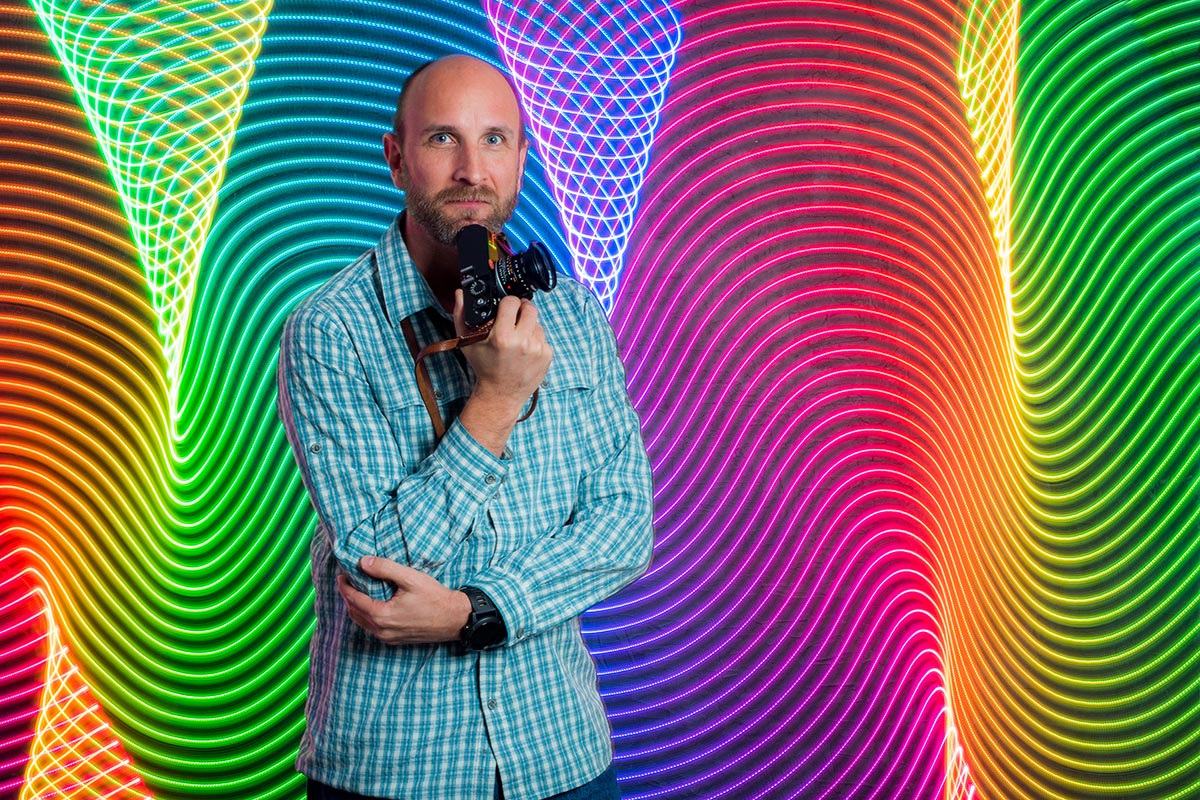
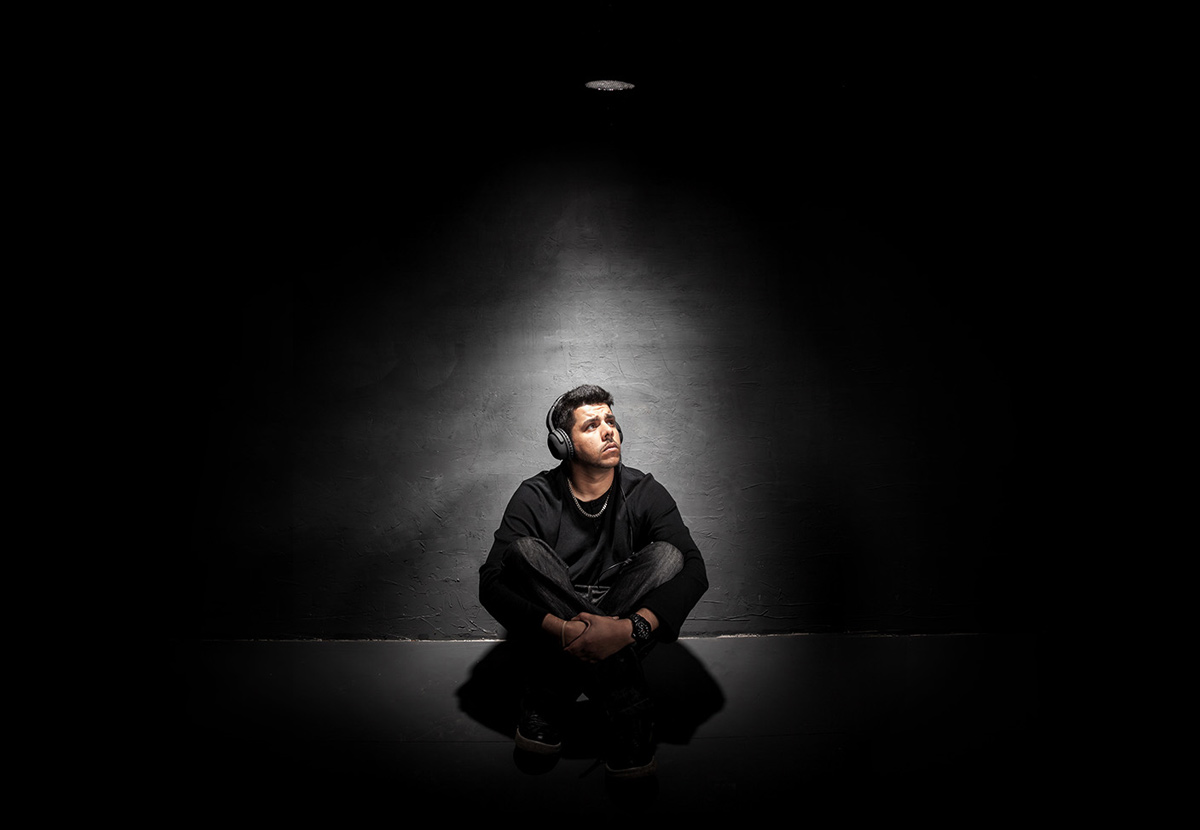
Recently I needed a wall of speakers in my studio to make an amazing background for an upcoming music shoot. But after a bit of thought I realised there were three major problems with the idea. First, my studio space is a lot smaller then my imagination. Second, I don’t have easy access to the 25 – 30 speakers I would need for a person sized wall and third, what would I do with all those speakers after the shoot? However I do own one small PA amp (I use it during my camera club talks) and of course I have Photoshop.

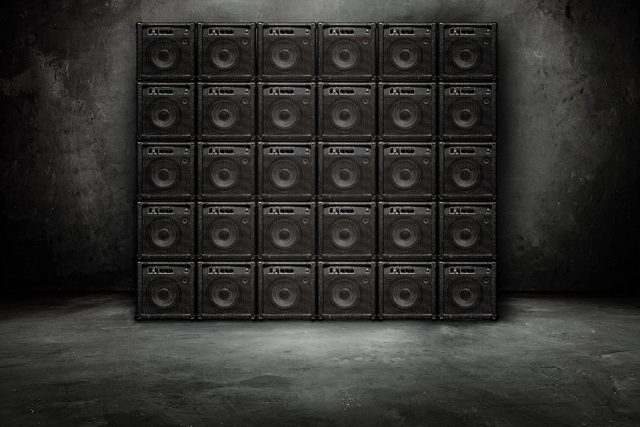
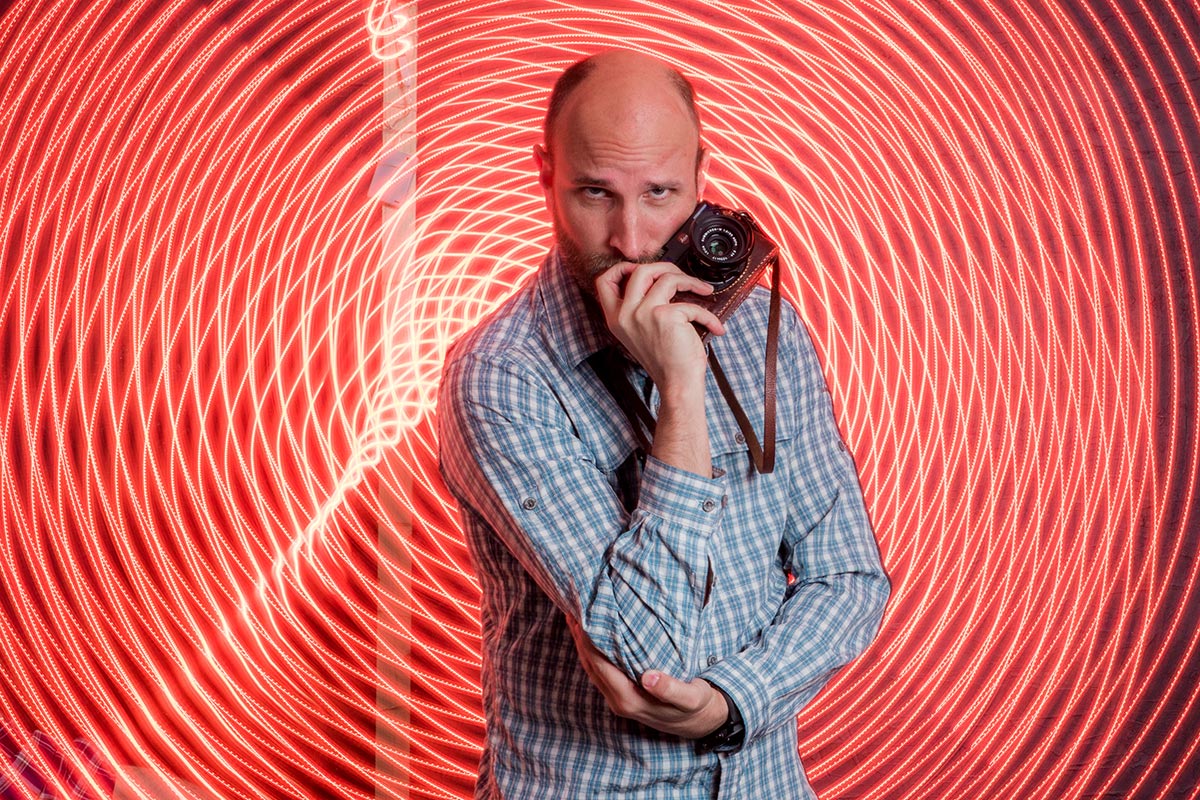
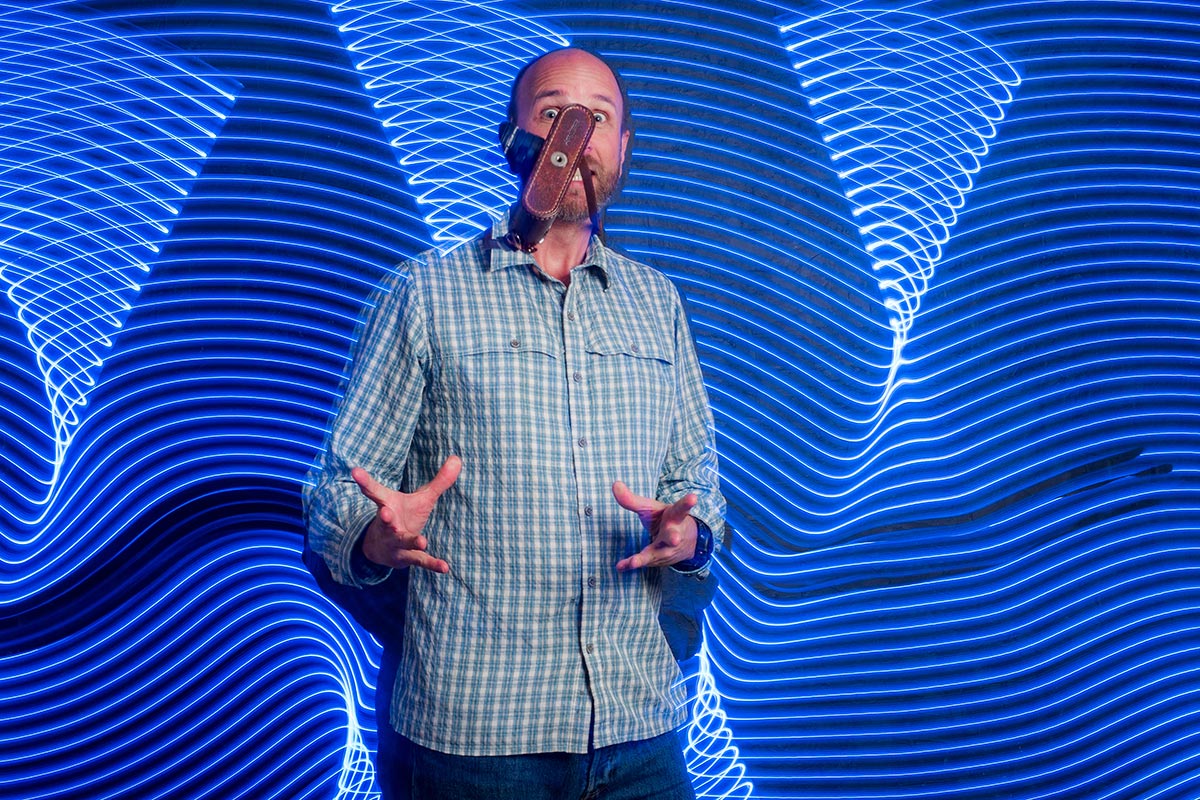
So here it is, a wall of sound in my studio and all it took was a couple of photos plus an hour or two in Photoshop. The only thing missing is a musician but I’ll get to that in a later post. In the meantime, I’m sharing this background as a Friday Freebie.

If you create a photo using the Friday Freebie then let me (and everyone else) know by leaving the link in the comments below.

Usage rules
The images are copyright Gavin Hoey 2018. Use is limited to any personal but non-commercial purposes. Please share the Friday Freebie by linking back to this page. Do not redistribute the original images without my permission.

Download instructions
       1. Click on the correct download link below (no sign up is needed)
          https://adobe.ly/2AUg8td

  1. Click the Download button download_icon
  2. The download should start automatically
  3. No support is provided with the Friday Freebies. If you need help Google or YouTube the question and you’ll almost certainly find the answer

My 2017 UK Photography Show Schedule

There’s just one week to go until The Photography Show opens its doors at the N.E.C. in Birmingham and this year my free demos are back and better then ever. Running from the 18th – 21st March, it’s the UK’s biggest and busiest photography show around 30,000 amateur and professional photographers attending. It’s packed with a great mix of stands from the major photographic suppliers to the small independent retailers.

TPS2016

But this isn’t just another trade show, there’s also loads of things to see and do. There’s a constant stream of free demos and talks on various live stages and that’s on top of all the smaller demos on many of the booths dotted around the show.

I’ll be there for the whole four days giving various talks and demos on Photoshop, portrait lighting and photography. I’ll be dashing from demo to demo (see below) but if you’re coming along it would be great to meet you.

Saturday

10.30 am PiXAPRO E91 Creative portrait lighting (Demo)
12.30 pm Adobe Theatre Photoshop CC For Photographers (Demo)
1.30 pm Olympus D91 Action Stations (Talk)
2.30pm PiXAPRO E91 Creative portrait lighting (Demo)

Sunday

10.30 am PiXAPRO E91 Creative portrait lighting (Demo)
12.30 pm Adobe Theatre Photoshop CC For Photographers (Demo)
1.30 pm PiXAPRO E91 Creative portrait lighting (Demo)
3.00 pm Olympus D91 Action Stations (Talk)
4.00 pm TPS Live Stage Lighten Up (Demo)

 Monday

10.30 am PiXAPRO E91 Creative portrait lighting (Demo)
12.30 pm Adobe Theatre Photoshop CC For Photographers (Demo)
2.30 pm PiXAPRO E91 Creative portrait lighting (Demo)

 Tuesday

10.30 am PiXAPRO E91 Creative portrait lighting (Demo)
12.30 pm Adobe Theatre Photoshop CC For Photographers (Demo)
2.00 pm PiXAPRO E91 Creative portrait lighting (Demo)

All my demos are free and available on a first come first served basis. There’s no need to book but as the Adobe theatre in particular has limited seating I’d recommend getting there early!

Show tickets are free for professional photographers and the trade (if booked in advance) and £13.95 for enthusiasts (£18.00 on the door)

Vintage Bookshelf – Friday Freebie


Recently IBook-Background-GAVTRAIN did a shoot which required a background made up of vintage books (video coming soon) and as luck would have it, I found 40 old books at a local boot sale for a bargain price. The books looked brilliant in the shoot but at the end of it I was left with a box full of slightly damaged Reader Digest books which I no longer needed.

So what do you do with 40 unloved books? Well the answer is obvious. I made them into a Friday Freebie to share on my blog. The more eagle eyed will notice there’s a few more books here than the 40 I started out with. You can thank the, magic of Photoshop for that.

You can download the book background here:
https://drive.google.com/file/d/0B_Mmmm3K1utNeVFyV0s4WUo0aVE/view?usp=sharing

This isn’t a template or a texture, it’s a stock image for you to use as you see fit (subject to the usage rules below).

BTS-Books-FF

As you can see from the behind the scenes shot above, I shot the books on a wooden bench in my studio. I then randomised the book order a couple of times and took some more shots. In Photoshop I did a quick cut and paste job to create the illusion of book case stacked high with books. You’ll also notice that you only see the pages of the book and not the spine. That’s a deliberate choice on my part for a couple of reasons but mostly because the pages are the bit with all the texture.

If you create a photo using the Friday Freebie then let me (and everyone else) know by leaving the link in the comments below.

Usage rules
The image is copyright Gavin Hoey 2016. Use is limited to any personal but non-commercial purposes. Please share the Friday Freebie by linking back to this page. Do not redistribute the original image without my permission.

Download instructions
1. Click on the correct download link below (no sign up is needed)
https://drive.google.com/file/d/0B_Mmmm3K1utNeVFyV0s4WUo0aVE/view?usp=sharing

  1. Click the Download button download_icon
  2. The download should start automatically
  3. No support is provided with the Friday Freebies. If you need help Google or YouTube the question and you’ll almost certainly find the answer

Low Key Lighting

If you have a small or portable studio set up then low key portraits should be high on your list of “must have” lighting skills. Why? Apart from looking amazing, great low key lighting can be achieved with simple equipment against any dark background.

[youtube]https://www.youtube.com/watch?v=Ba1Hiq3w3kc&feature=youtu.be[/youtube]

As the video above demonstrates, black backgrounds are the obvious choice for low key shots but grey backgrounds work too. So what makes a shot low key?

An underexposed image is not the same as a low key image. Whilst a true low key shot will have the majority of it’s tones on the dark side it will also have a few areas of highlights too. Contrast is key and that needs lighting but how you get there is all part of the creative process.

Creating shadows with D.I.Y. Gobos

Placing an object in front of a light source will usually cast a shadow of some sort. In the studio, if the object is solid it’s known as a flag but if it’s full of gaps (or semi translucent) it’s called a GoBo and can be incredibly useful. The shadow cast by a GoBo is often used to add texture or shapes to an otherwise plain background but there’s more to GoBo’s then that.

GoBo’s can cast shadows directly on to your subject for dramatic effects or they can be used to give reflections of the light source a little more style. And you don’t need a fancy GoBo projector to do it. Fabric, glassware, twigs or even tinfoil with random holes in are just a few things you can find around the house.

[youtube]https://www.youtube.com/watch?v=_sBK4xFmF3Q&feature=youtu.be[/youtube]

One last thought. Many photographers will tell you that GoBo is short for Go Between because it’s something that goes between the light and the subject. Well, if that’s true why aren’t they called GoBe’s?

Make a simple LED Background

All sorts of random things can be turned into an amazing  portrait background but last year I was shown something called the Pixel Stick which looked amazing. It was a Kickstarter backed project that combined LED’s and long exposures in a way I’ve never seen before. Although the pixelstick was out of my budget the basic idea wasn’t.

My low tech LED stick took just a few minutes to make and worked amazingly. Take a look at the Adorama TV video I made with the spectacular Mark Wallace to see for yourself.

I’ve had loads questions all asking the same thing… How do you make my LED stick?

eBay proved to be the perfect place to start my search. There are loads of low cost LED’s on the market and I found a 2 meter roll of multi-coloured LED’s complete with battery box and controller for about £17.00.LED-Setup

Each LED is actually several coloured LED’s clustered together which turn on or adjust their brightness to change the colour. The controller is very basic but allows you to set the colour, brightness and any effects such as flashing or fading through the spectrum.

LED-Setup-2

The LED strip is very flexible and sealed inside clear silicone (or something like it), so I found a spare bit of 1.8m timber and attached the LED strip to that. There’s adhesive on the back of the strip but I just used a few rubber bands to hold it place. Just make sure the bands don’t cover the LED’s!

LED-Setup-3

Then it’s just a matter of attaching the batteries and choosing a mode. Some colours worked better then others as did some modes. The key as always is to experiment and have some fun!

Gavin vs Mark Portrait Challenge

A few weeks back I was honored to have Mark Wallace, my friend and fellow Adorama TV host, stop off at my studio for a couple of days. Mark has been travelling the world for the past 18 months or so and this was the first time in a long time that he’s been shooting in a studio.

Now you probably already know I love a photo challenge, so when Mark suggested a studio challenge I jumped at the chance.

The rules were simple. We’d both use the same studio, same single flash and photograph the same model. We set a 20 minute time limit to include planning and filming and would see each other’s shoot until the end.

Mark went first and you can see his video below.
[youtube]https://www.youtube.com/watch?v=L2aEN6UUDYA[/youtube]

I love what Mark did with the simple lighting and subtle editing. I was also blown away by the quality for the Leica especially as Mark had been telling me it’s probably not a camera that you’d choose for studio portraits

Once Mark was through, I got my turn.
[youtube]https://www.youtube.com/watch?v=FzQr3GTUrwg[/youtube]

It was great to try out an idea I had been thinking about for a while and as you can see, my image is totally different to Marks in almost every way. I went with a contrasty light, aggressive pose and bags of drama.

The “home advantage” really can’t be underplayed. Remember I was using my gear, a model I’ve worked with before and I had the props hanging around in my studio. Even so I think it says a lot about how the photographer adds to the image when two of us can come away with such different emotions from the same subject using the same light.

Most of all it was a huge amount of fun and that’s what photography should always be about!


Bokeh Background – Friday Freebie

At this time of year there’s the potential for bokeh shots all over the place. With the right lens, twinkling Christmas lights can make great bokeh photos and that’s exactly what I used to create this Friday Freebie background / texture.

Bokeh-SNOWQUEEN-SAMPLE

Full download instructions are below but you can also
Download the Bokeh Background Here

Once downloaded just open the bokeh image and your photo. Copy and paste the bokeh onto your photo and use Free Transform (CTRL+T) to make the bokeh fill the image. Next you’ll need to blend the two images together. For this shot I changed the Layer Blending Mode from Normal to Screen but as all the blending modes create a different look try them all.

The bokeh will most likely need masking or erasing away to reveal your main subject. Another thing to try is duplicating the bokeh layer to deepen the effect.


Bokeh-SNOWQUEEN-B4

If you create a photo using the Friday Freebie then let me (and everyone else) know by leaving the link in the comments below.

Usage rules
The image is copyright Gavin Hoey 2014. Use is limited to any personal but non-commercial purposes. Please share the Friday Freebie by linking back to this page. Do not redistribute the original image without my permission.

Download instructions
1. Click on the correct download link below (no sign up is needed)
https://drive.google.com/open?id=0B_Mmmm3K1utNZHVCSldJS2REMzQ&authuser=0

2. Click the Download button download_icon

3. The download should start automatically

4. No support is provided with the Friday Freebies. If you need help Google or YouTube the question and you’ll almost certainly find the answer :-)

Drama With Grids – Home Studio Essentials – PT 6

For almost all of my studio works, soft light is what I want but every now and then it’s great to break that mold and do something with a bit more edge with grids or snoots. Fortunately my Adorama Streaklights have  purpose designed tools to do the job.

In the studio grids are an essential tool, they help me light small areas with maximum precision and control. Usually I use grids in combination with a softbox as the key light but occasionally I’ll just use the grids for some dramatic effects.

[youtube]https://www.youtube.com/watch?v=K-C9xgTCLfM&list=PL821B7D720DEA39FA[/youtube]

One of the downsides of a small studio is just how easy it is to accidentally bounce light off a wall or ceiling, ruining the effect you hope to achieve. With their tighter beam of light, grids and snoots might just be the answer you’re looking for if you want to get moody lighting in your small home studio space. HSE-EP6-Final
Gear used in this video (Links back to Adorama)
Flashpoint StreakLight 360 Ws Flash (Includes flash and battery)
Flashpoint Streaklight 180 WS Streaklight
Grid/Gel Set
Streaklight Beauty Dish/Grid Set
Canon 5D Mark 2 
Canon 24-105L 

Jigsaw Puzzle – Friday Freebie

Going through some old toys the other day I found this giant kids jigsaw puzzle and instantly thought “Friday Freebie”. It’s officially a 28 piece Spot the Dog jigsaw but you can thank my daughter for putting it together upside down, which is trickier to do then you might think.

Full download instructions are below but you can also Click Here To Download Jigsaw Puzzle

JIGSAW-FF-GAVTRAIN-FEATURED
This puzzle effect works best when blended with photos that have plenty of light colours, so that’ll be skies or in this case a light coloured wall. In the photo above I used the Overlay blending mode but you can get great results with many others too. Just try them all and see what works.

After resizing (CTRL+T) your photo to fit as best you can, I’d suggest making a quick and rough rectangular selection of the puzzle and masking or erasing and excess photo away.

As always, if you create a photo using the Friday Freebie then let me (and everyone else) know by leaving the link in the comments below.

Usage rules
The image is copyright Gavin Hoey 2014. Use is limited to any personal but non-commercial purposes. Please share the Friday Freebie by linking back to this page. Do not redistribute the original image without my permission.

Download instructions
Click the link https://www.dropbox.com/s/4rlc9tm6v738n74/JIGSAW-FF-GAVTRAIN.zip to take you to the Dropbox download page (no sign up is needed)

1. Click the Download button

2. Save the template to your hard drive

3. Unzip the file

4. Open in Photoshop or Photoshop Elements

5. Paste on to your photo

6. Resize (CTRL+T) and change the Layer Blending mode as needed.

No support is provided with the Friday Freebies. If you need help Google or YouTube the question and you’ll almost certainly find the answer :-)