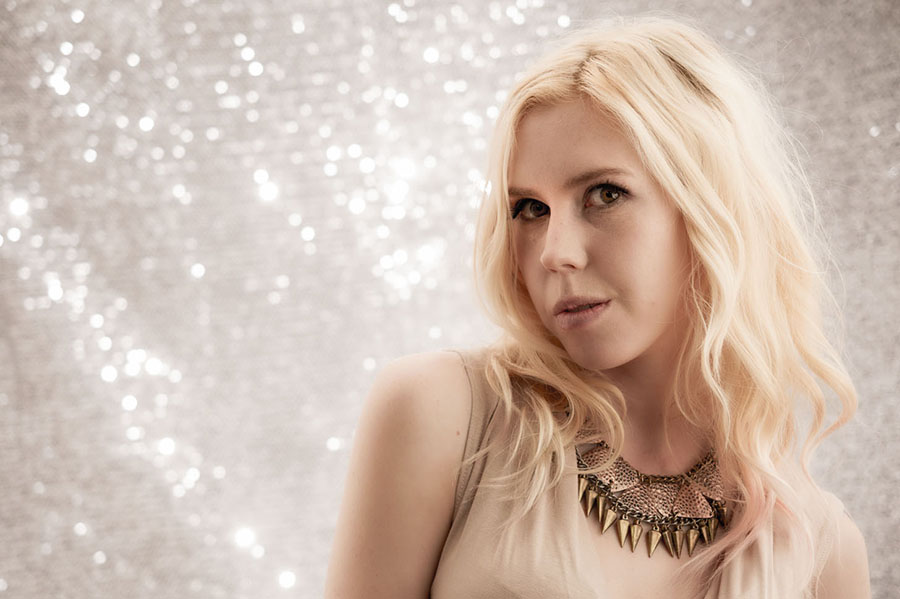
With the colder, darker weather very much with us here in the UK it’s not surprising that I’m finding the studio a much nicer place to work in then being on location. However the four walls of my small home studio can start to feel very limiting after a while so to avoid cabin fever setting in I have a selection of props to liven up my shoots.
The video below covers my three main types of prop and a few ideas on how I like to use them.
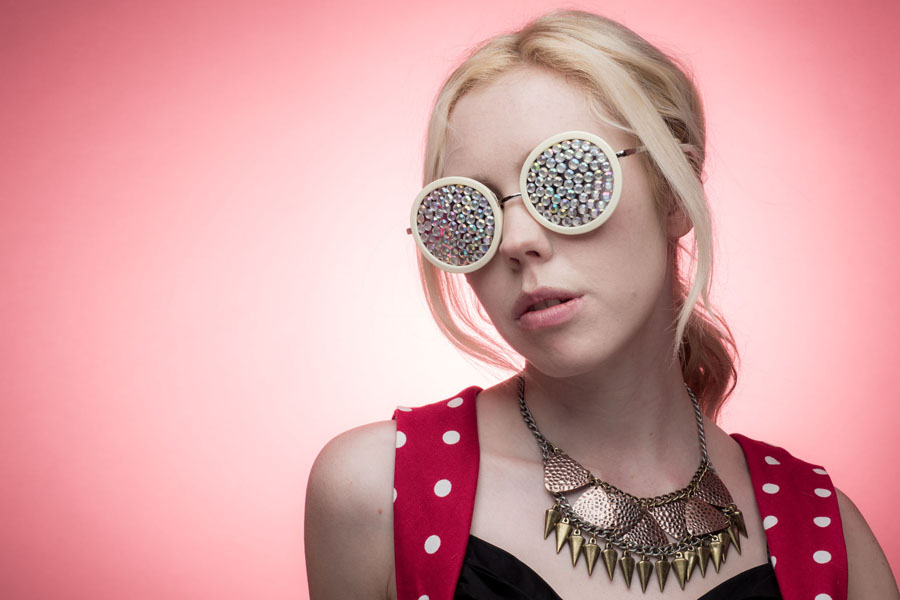
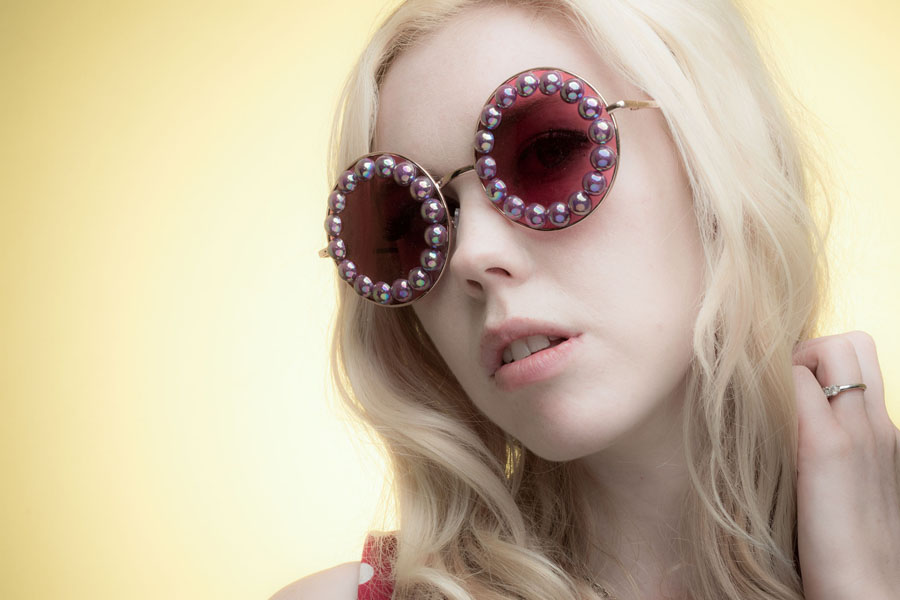
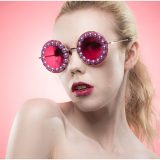
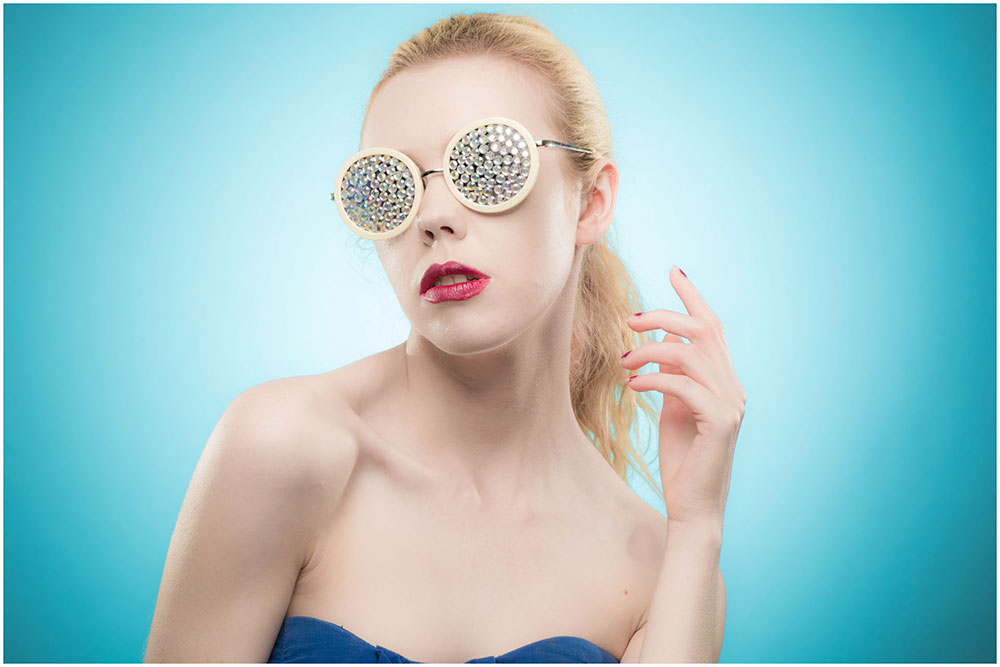
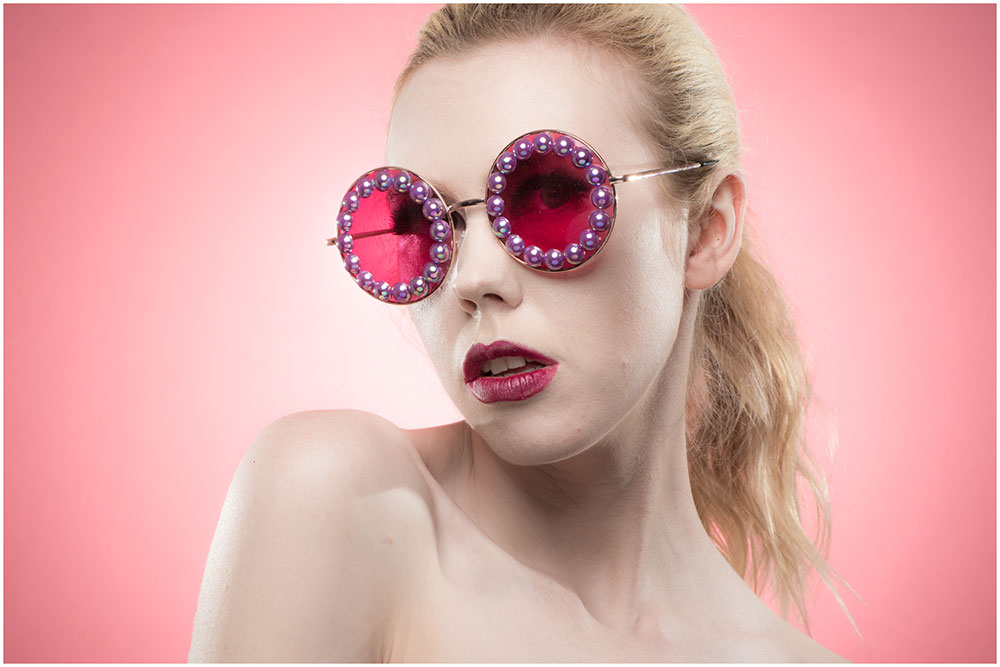
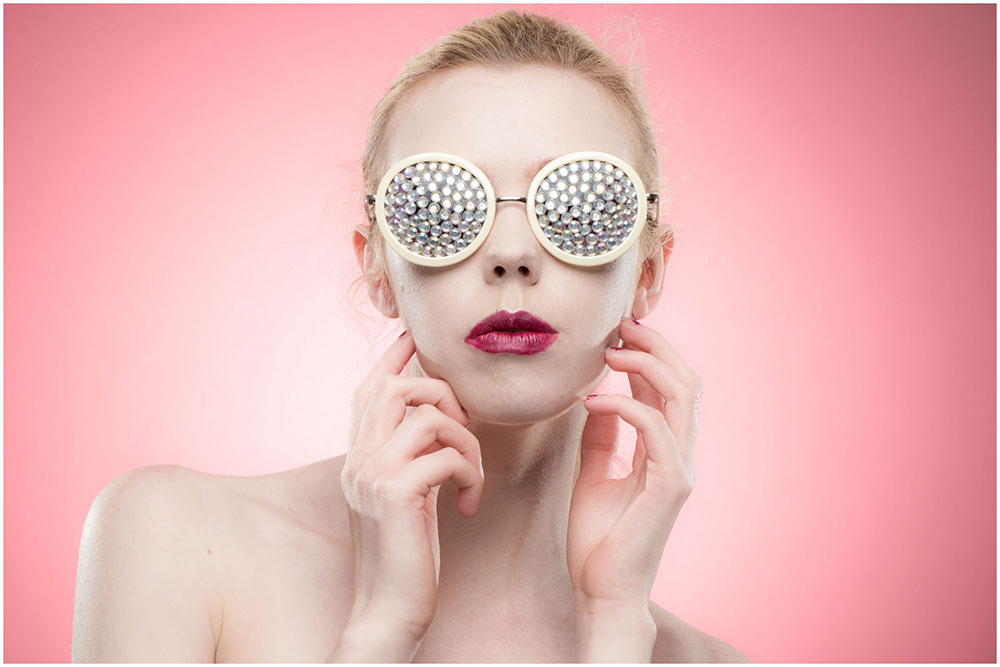
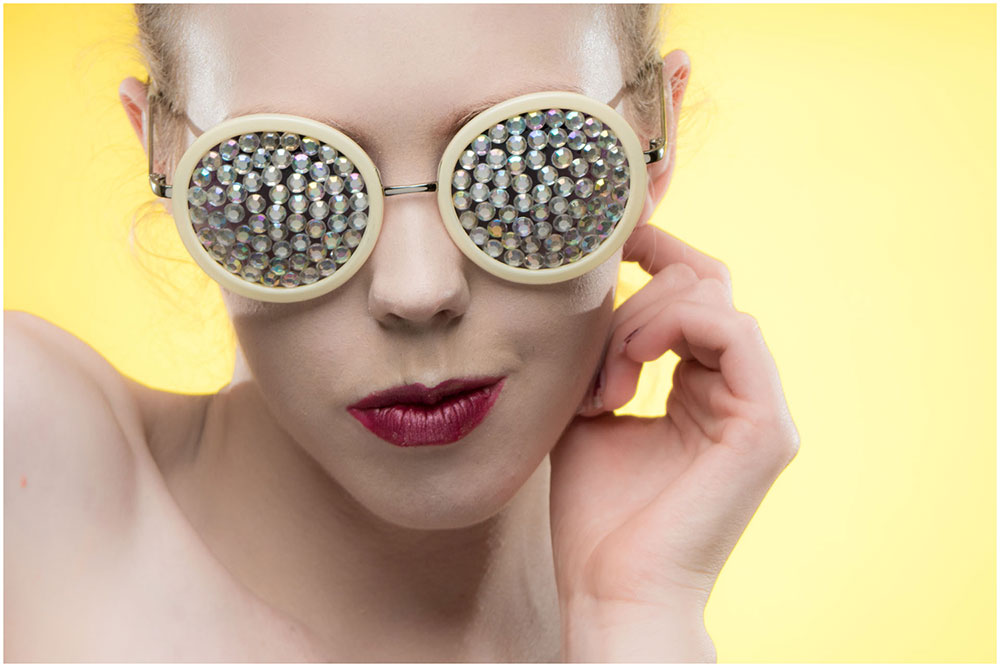
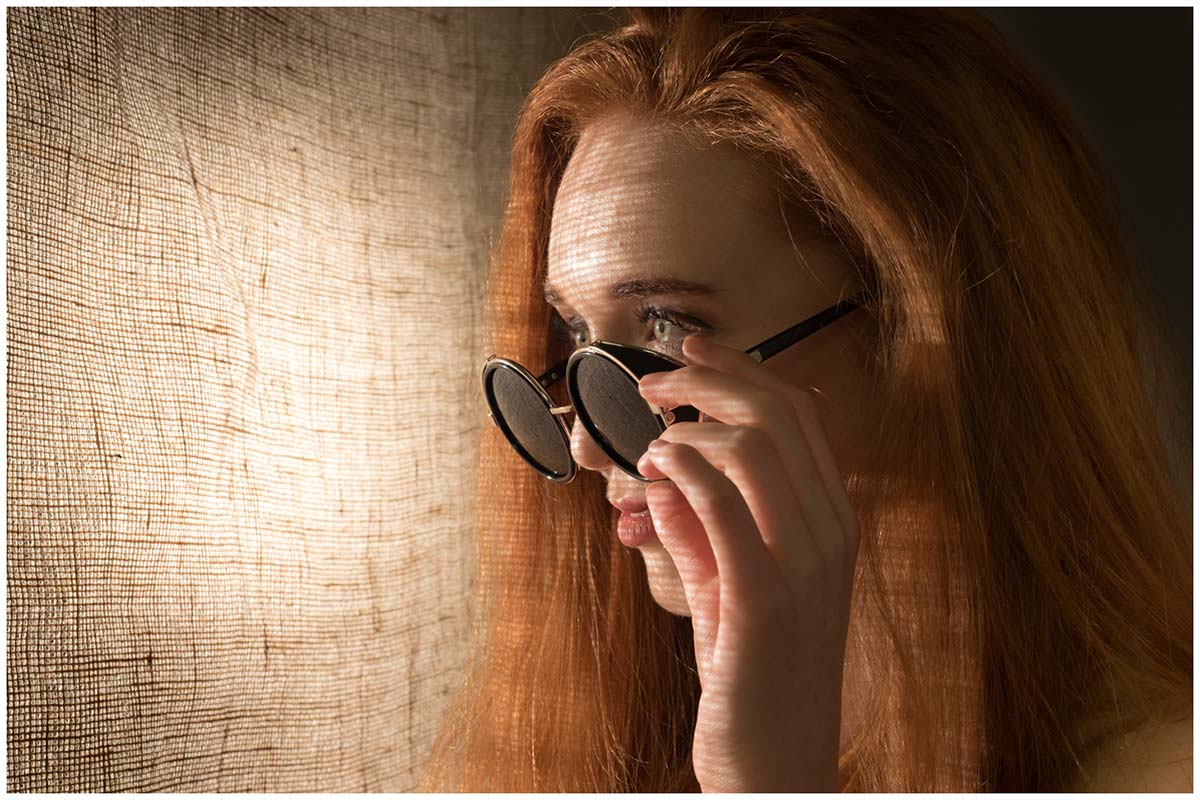
Sunglasses
Winter might sound like the wrong time of year to be on the hunt for novelty sunglasses but I find having a selection on hand can really help. On a very simple level it gives something for your subject to interact with but sunglasses can also become part of the styling of the shoot. With a bit of craft skills you can also transform a pair of dull, basic sunglasses into a fashion item in it’s own right!
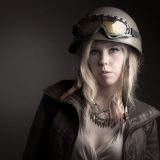
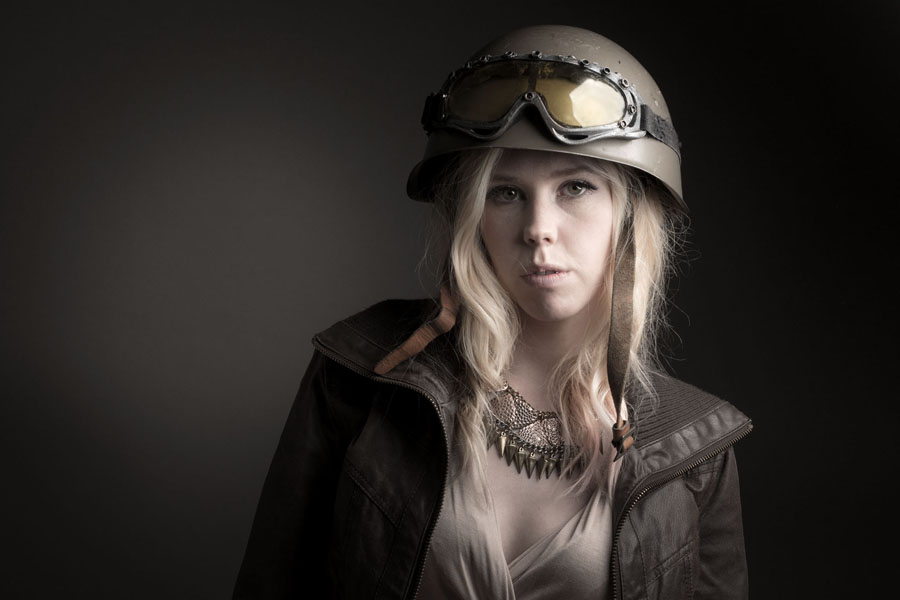
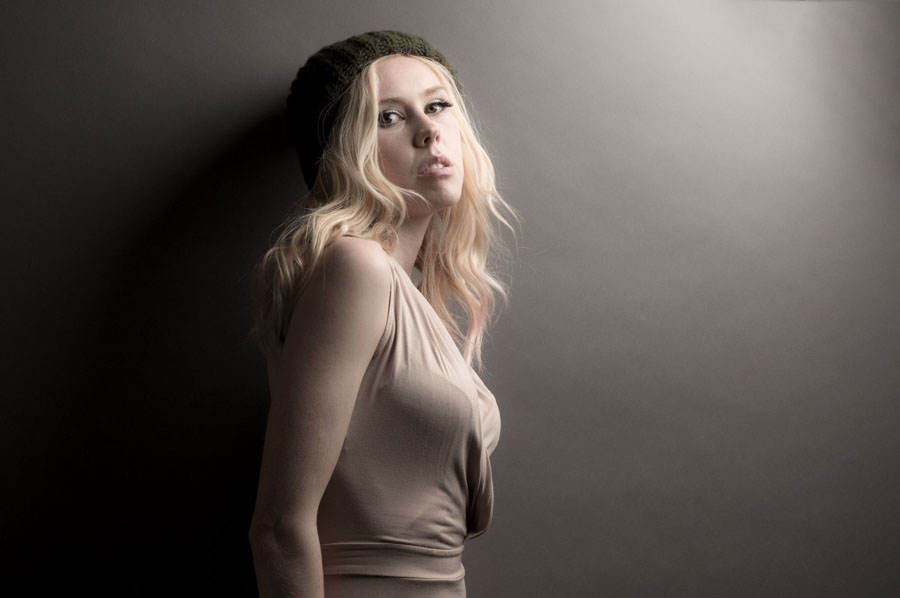
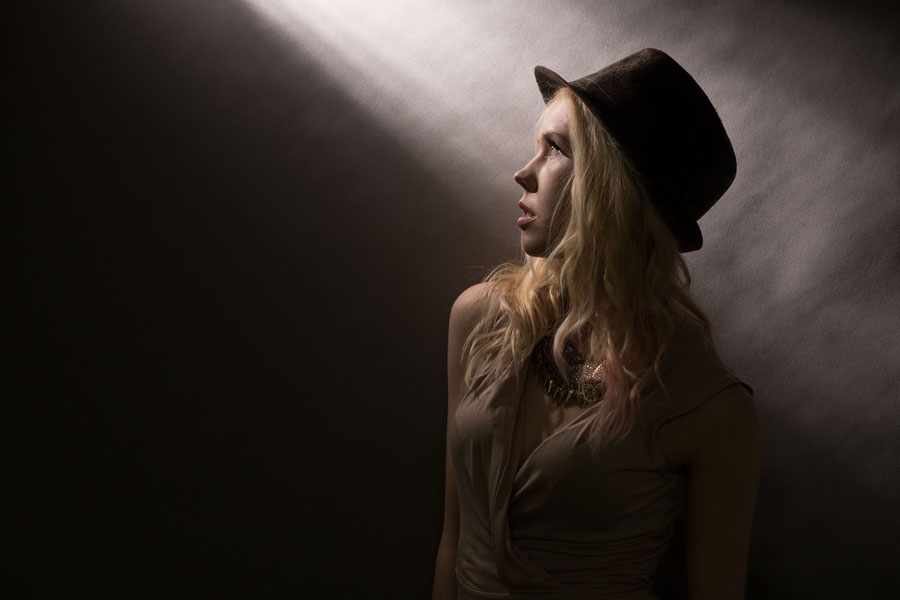
Hats
Just like sunglasses a hat can be worn or held once again giving your model something to work with. Hats can add character, hats can add mood, hats can be fun. Hats with brims can cast shadows which can cause problems as the model moves but with a bit of careful lighting that can be used to your advantage.
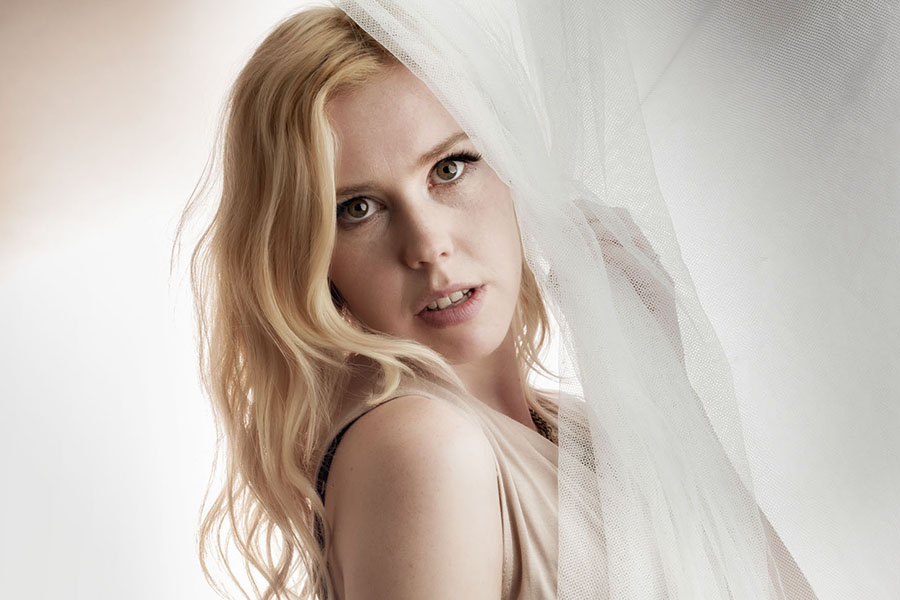
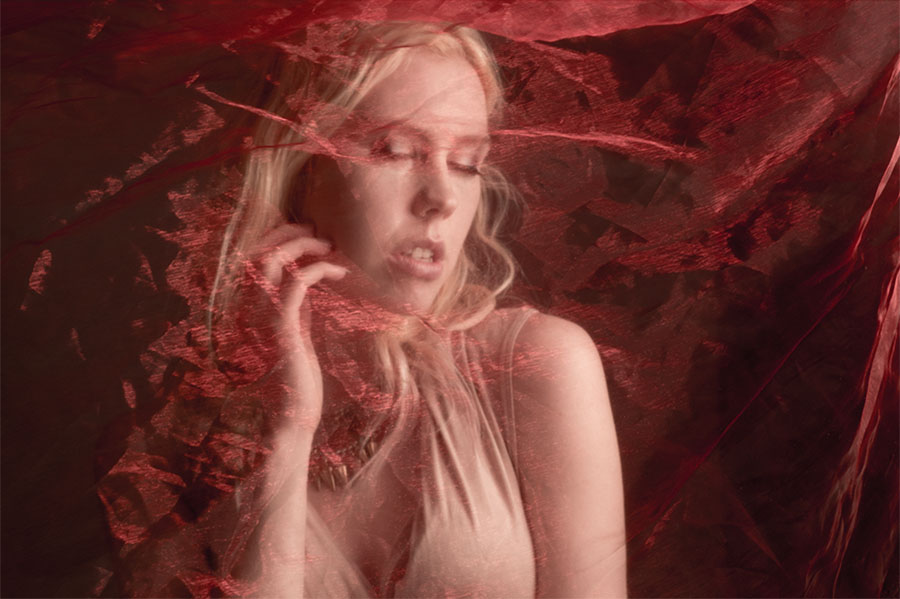
Fabric
Random bits of fabric are the perfect thing to have in the studio. They can be pegged up as backgrounds or wrapped around your model as a an outfit. Sheer fabric can be placed over your subject to add mystery or moved around for a floaty feel
There are endless ways to add ideas to your shoots, props can really help at this is just a few ideas to get you started.
A few weeks ago I ran a slimmed down version of my water workshop at the Jessops store in London’s Oxford Street. This was an Olympus UK sponsored event but was open to any photographer whatever make of camera they owned. It was also free for the 20 photographers who were lucky enough to get a space in one of the two sessions
I love this workshop for many reasons but mostly because it’s a real “hands on” event and as you’ll see in the time-lapse below, everyone gets involved.
Here’s a little info about the time-lapse. It was recorded on an Olympus TG Tracker action cam by Clare Harvey-May from Olympus UK. The TG Tracker has time-lapse recording built in and Clare recorded the two sessions (morning and afternoon) from two different angles, both in 4K.
I used Adobe Premiere Pro CC2015 to edit the two videos and add some of my stills from the workshop. As the final video was to be at 1080p HD, I was able to pan and zoom around the much larger 4K footage to create the motion you see in the final video.
I have to thank to Jessops and Olympus for hosting me and not complaining about the wet floor. Sam, for dragging crazy heavy bags of gear all over London. But mostly I can’t thank enough all the photographers who came along to both days and get so involved and slightly wet… you were warned!
Knowing the best focal length for shooting portrait isn’t as easy as it may sound. Different focal lengths give very different results, some more flattering then others. In this video I take the same head shot at several focal lengths and compare the results.
Traditionally a 50mm lens (on a full frame camera) has been considered the closest to the human eye but generally I prefer headshots with 70mm or more.
As you can see in the comparisons above, zooming in (and therefore stepping back from the model) has a few benefits. The longer focal lengths give even tighter crops on the background and stepping back compresses the facial features. Of course there’s plenty of scope for creative portraits when shooting head shots with a wide angle lens but for most photographers, longer focal lengths are better.
I love demoing photography and Photoshop to my fellow photographers, so when Adobe UK invited me to speak at their Photography Jam event in London, I jumped at the chance.
It was an amazing evening of photography education and inspiration. Adobe lined up some really great speakers and invited an audience of around 150 photographers. Despite it being a seriously hot room, the audience’s enthusiasm throughout the evening made the event come alive.
If you couldn’t be there Adobe UK have you covered with all of the talks and demos now available on re-watch including mine.
I was given about 20 minutes to talk about the new features of Photoshop CC2015.5 (and CC2015) that I actually use day to day. I also threw in a few general Photoshop tips along the way and would have loved to do more but time was not on my side.
You can see the rest of the talks and demos on the Adobe UK YouTube Playlist
Richard Curtis gave a great demo on the new features in Lightroom and Photoshop
Mike Watson passed on some of his Stock industry knowledge
Sophie Ebrard Talks about her amazing career journey
(NOTE: this link contains image that are NSFW – not safe for work viewing)
Bella Kotak shared some of here ethereal portrait work and how they are created.
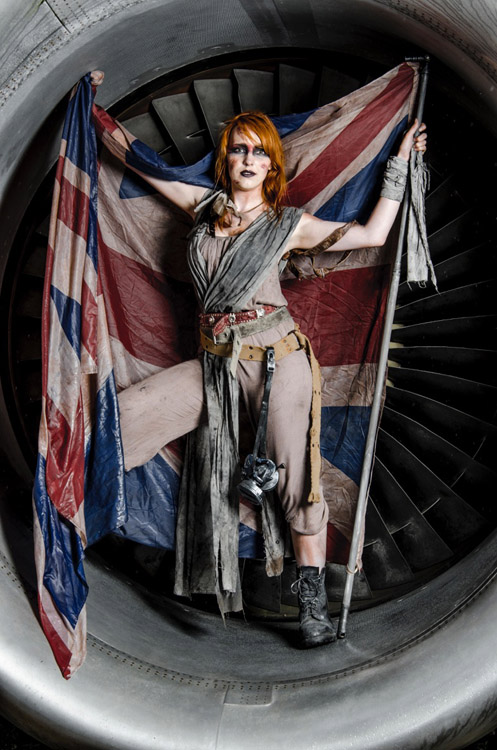
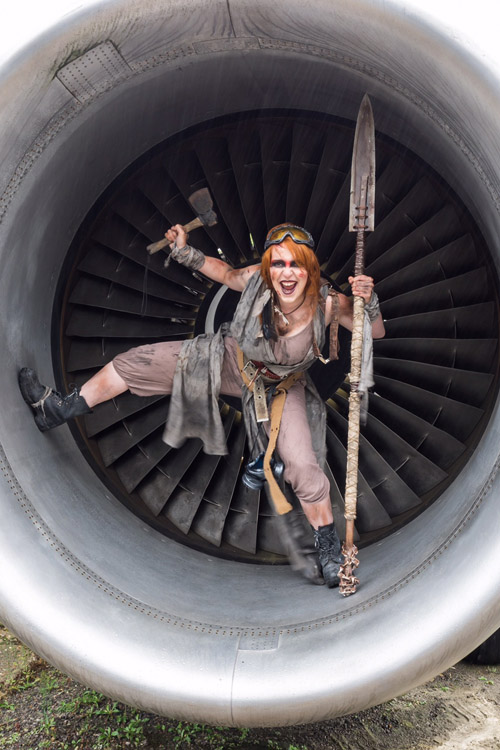
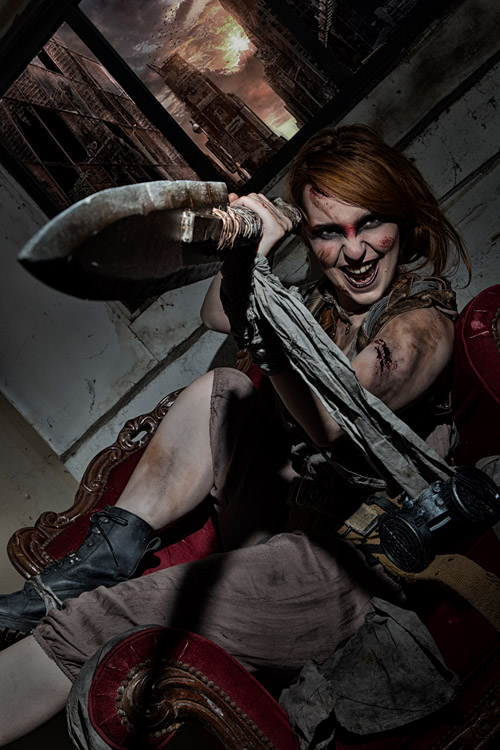
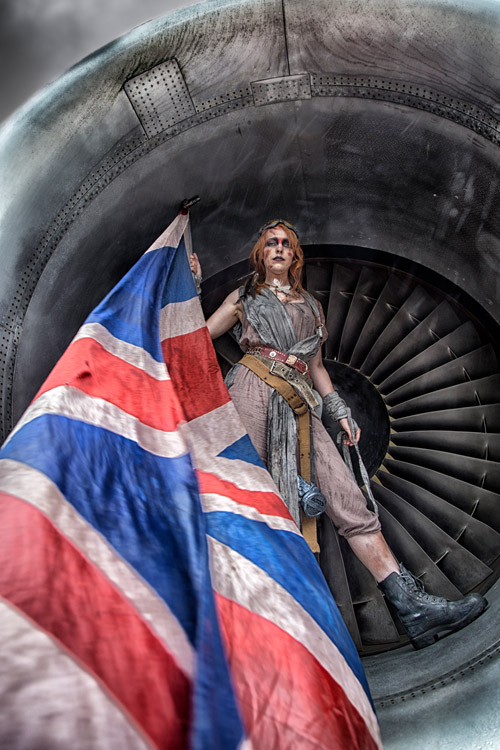
UPDATE: Scroll down to see the gallery from the 2nd running of the Aviation Apocalypse in September 2016
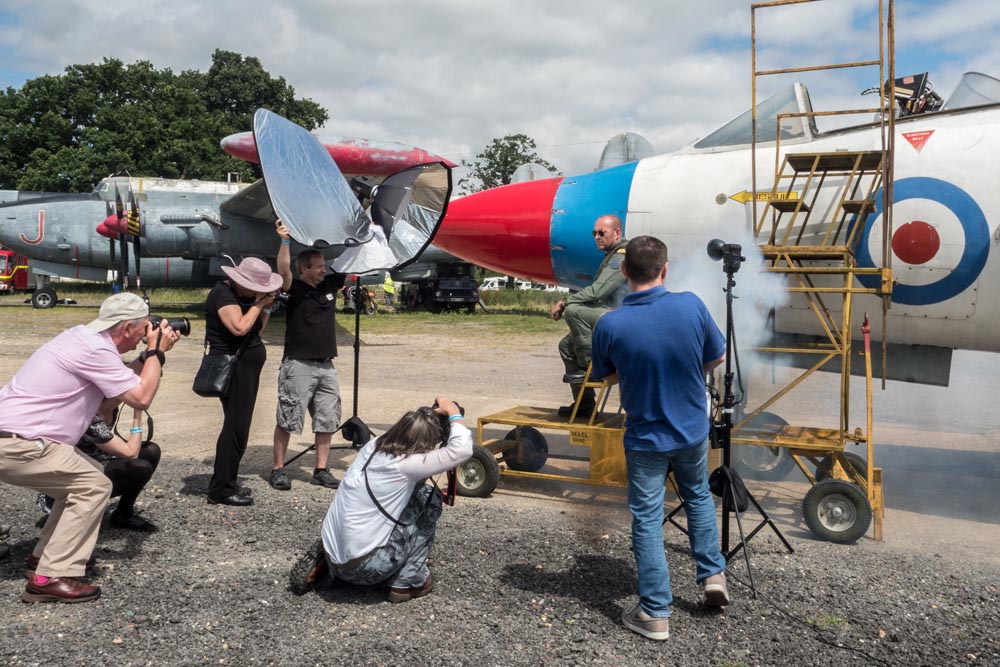
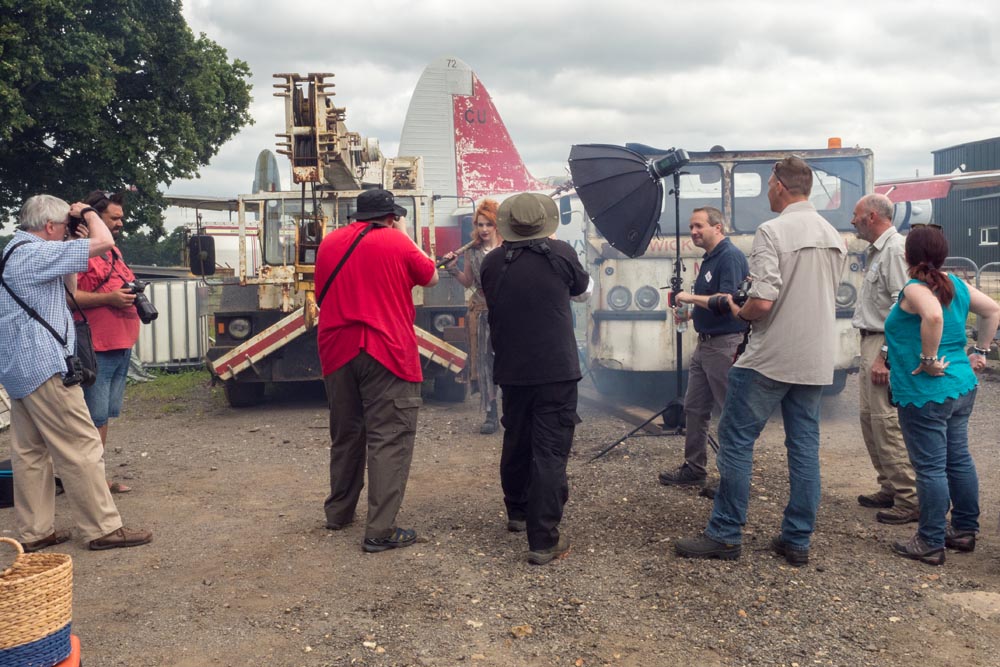
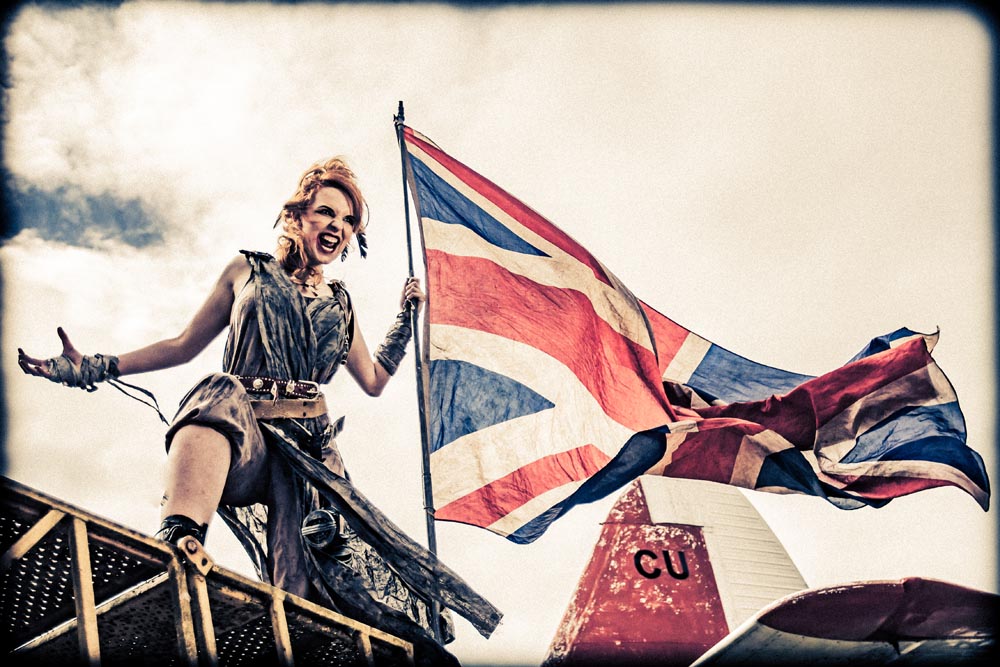
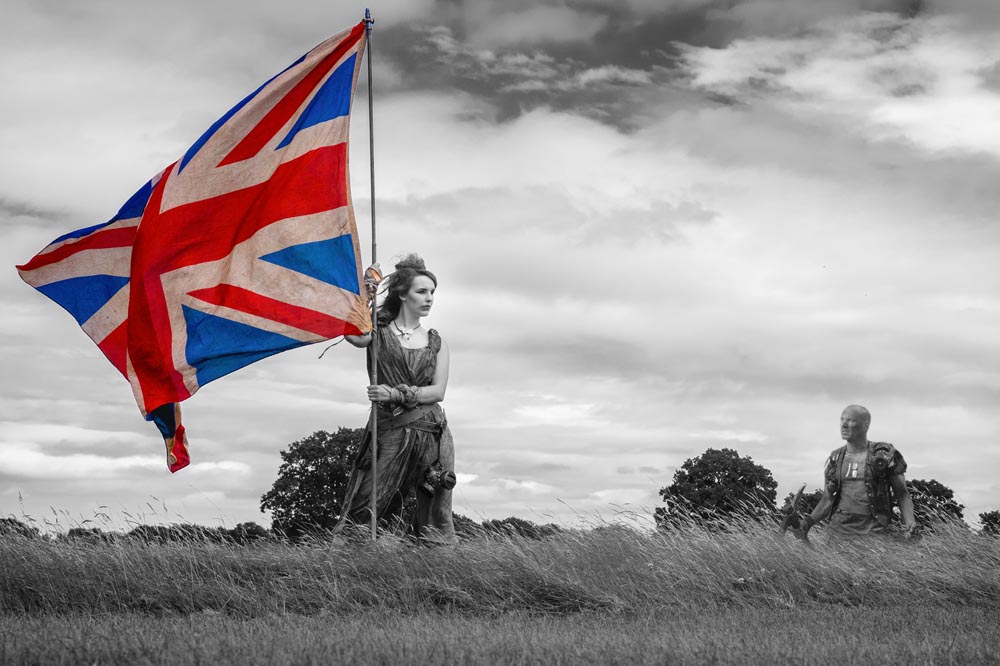
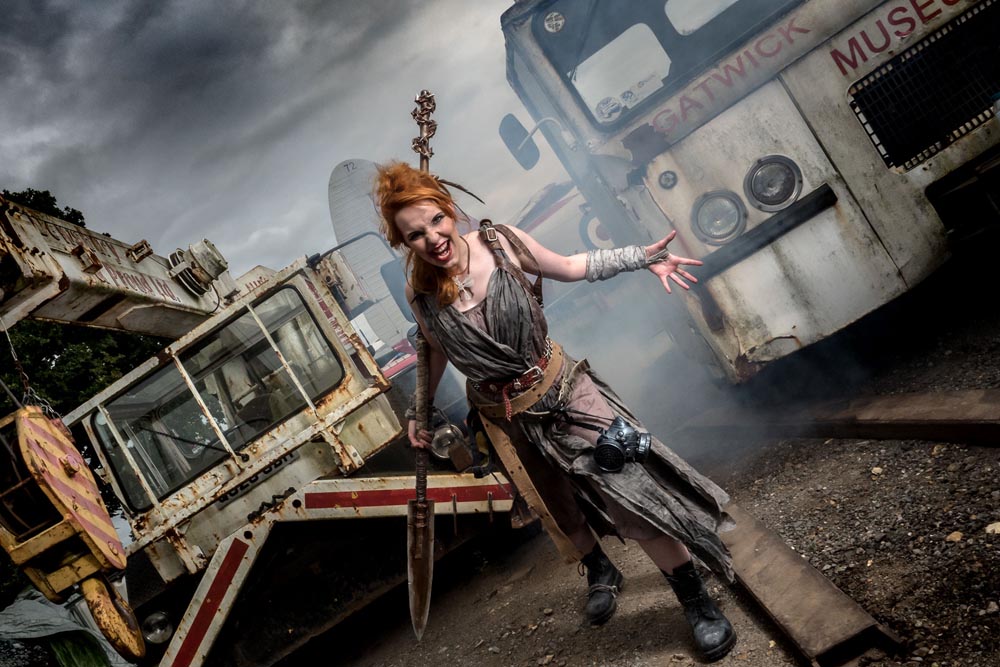
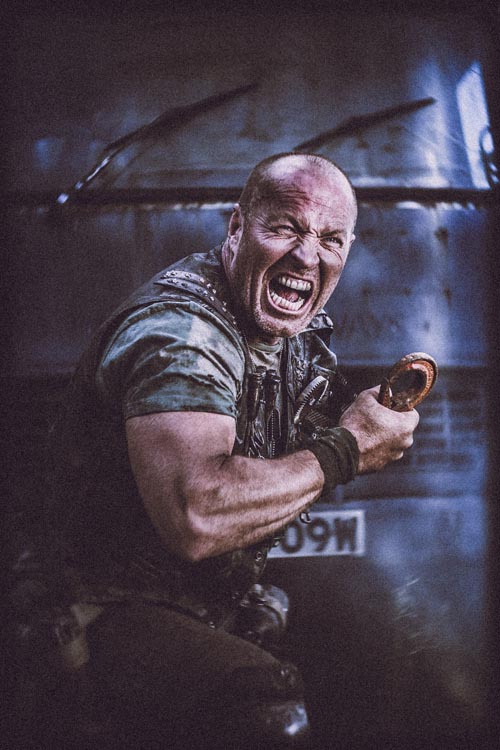
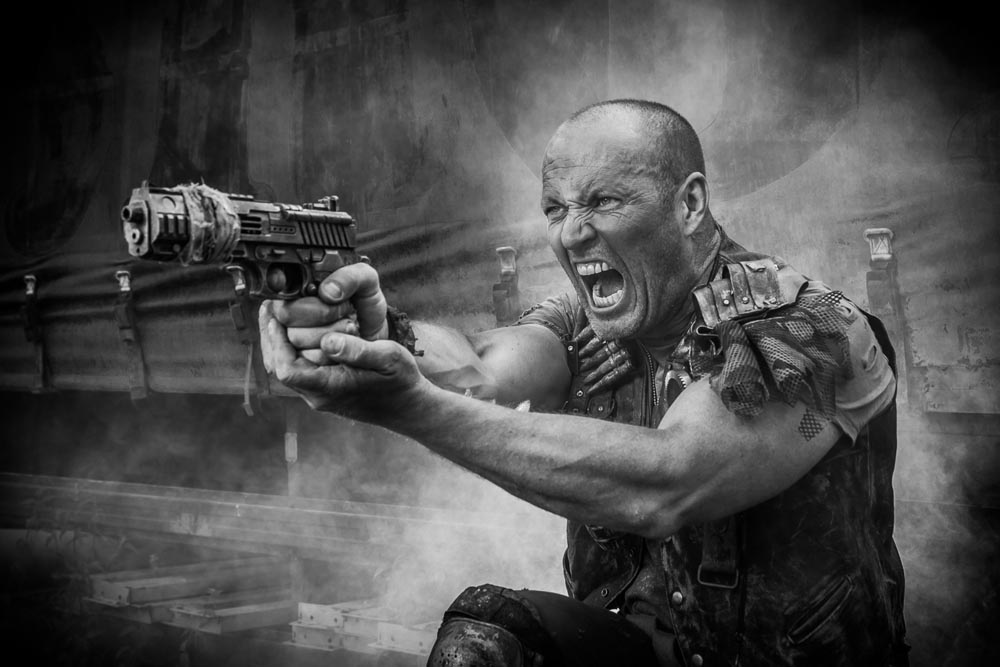
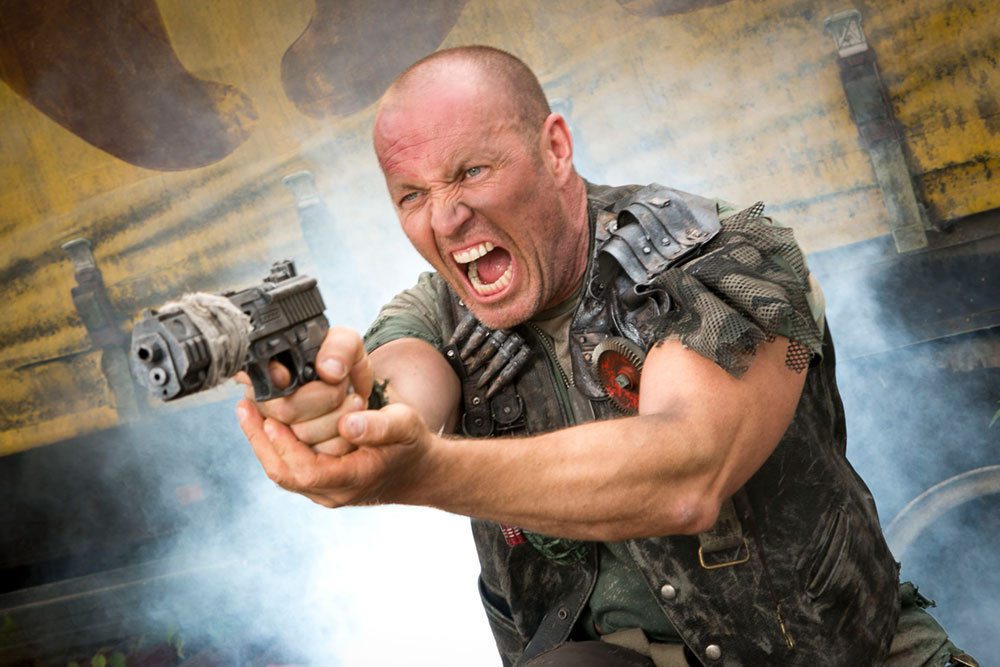
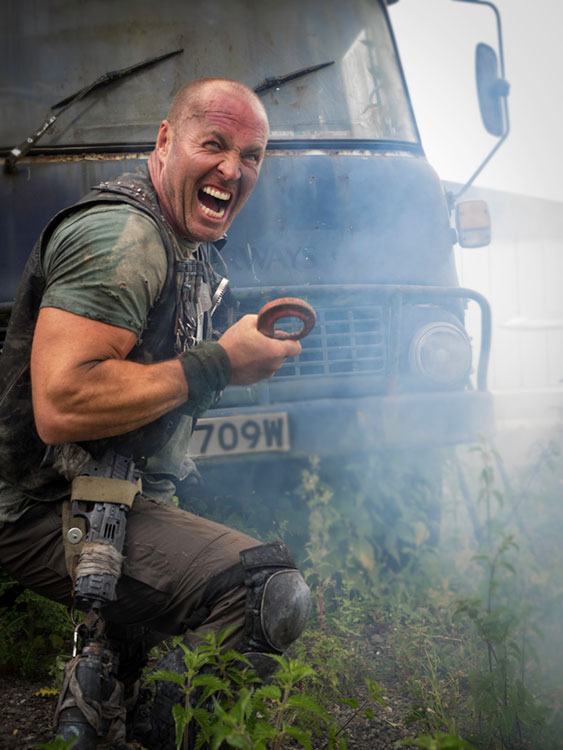
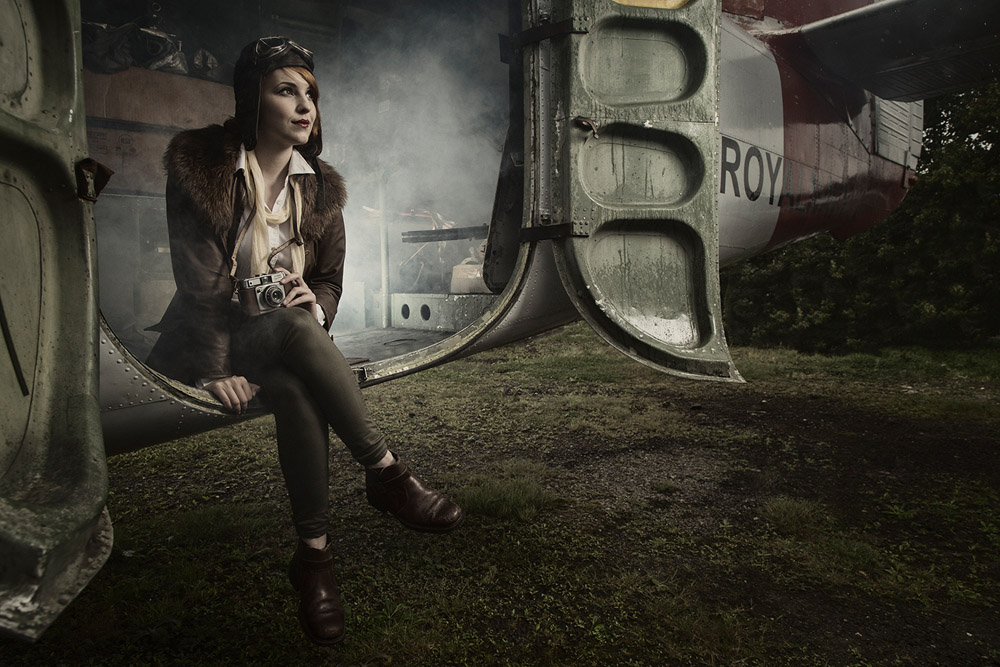
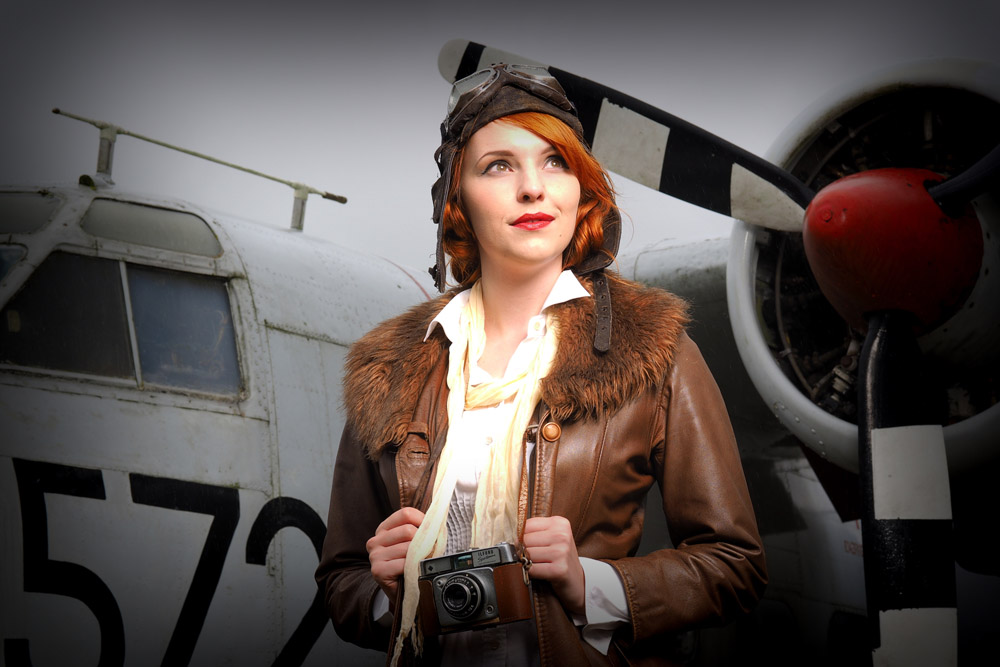
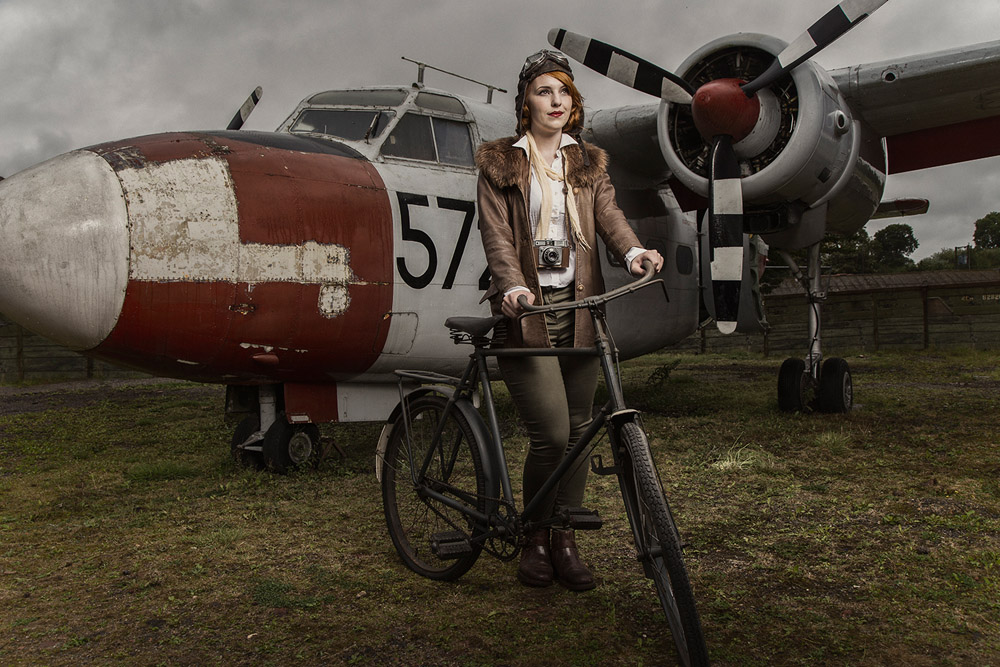
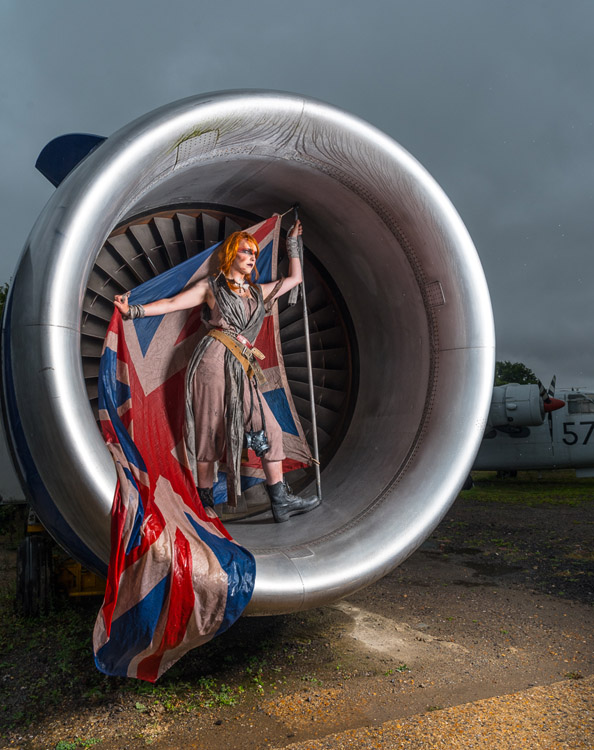
Last Sunday (24th July 2016) was the first Aviation Apocalypse workshop and after months of planning, building and testing ideas and outfits, it was amazing to see it all come together.
The Gatwick Aviation Museum was the location for the workshop and I was joined by 14 enthusiastic photographers and two amazing models. In order to keep the groups small and the shooting time high, I roped in the help of Tommy Reynolds as a group leader who did a brilliant job passing on his ideas and passion for the shoot.
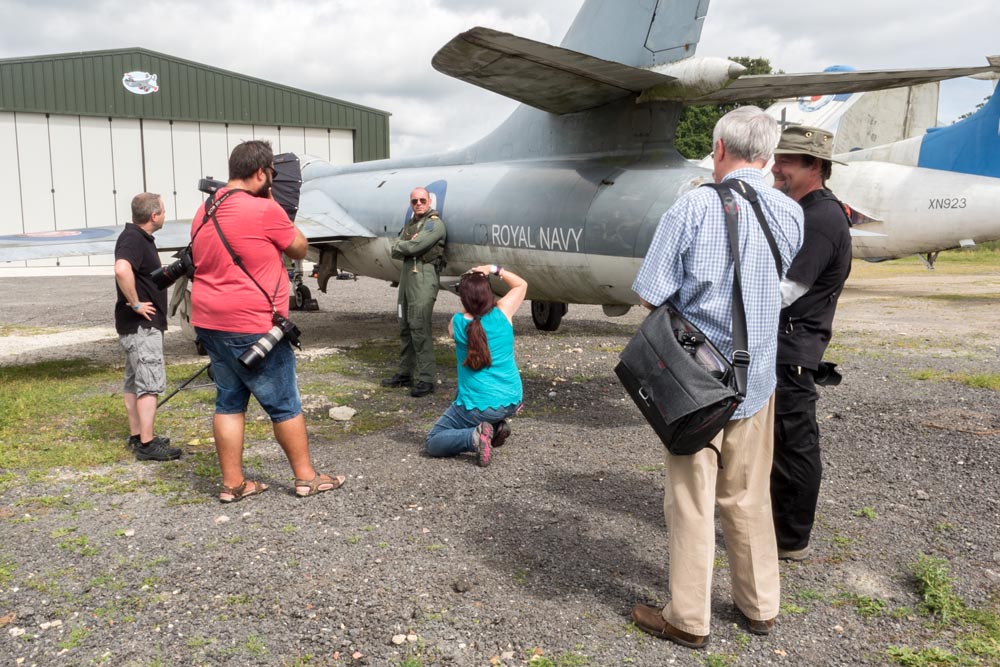
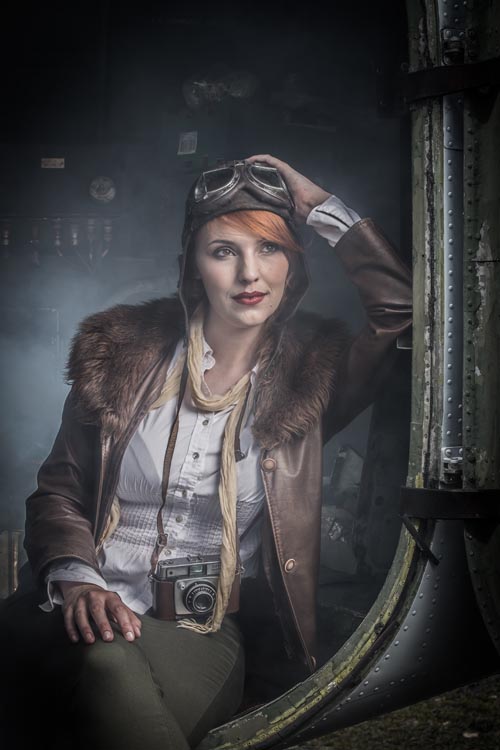
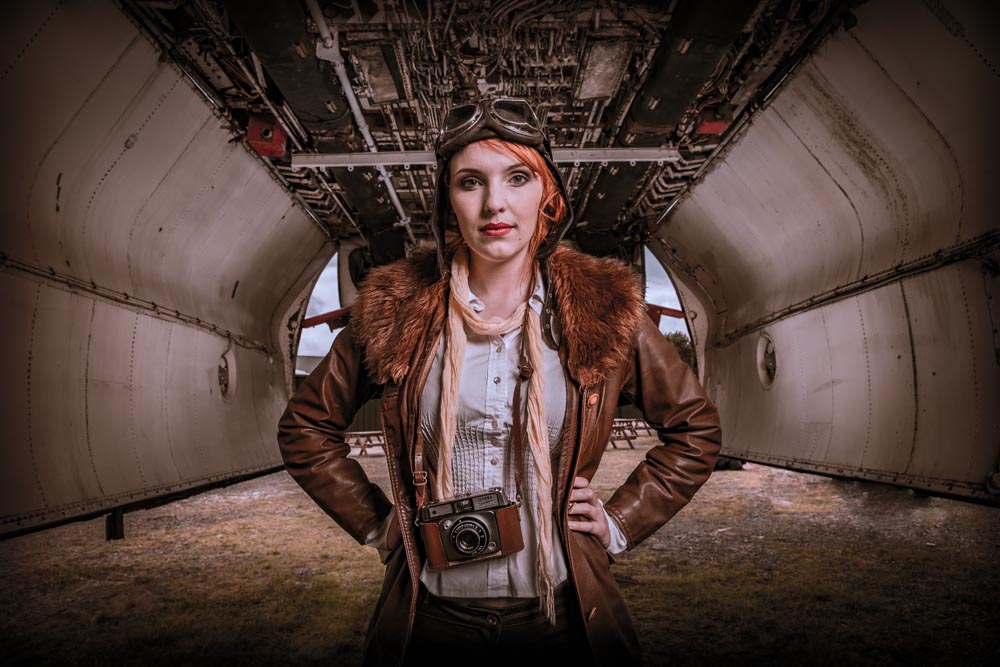
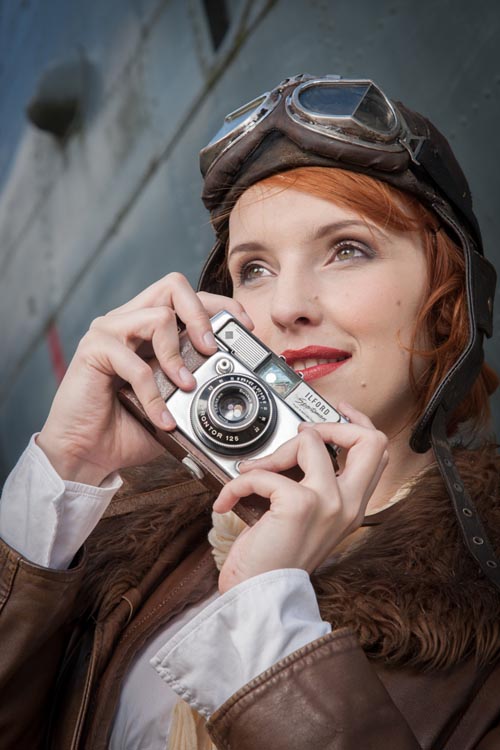
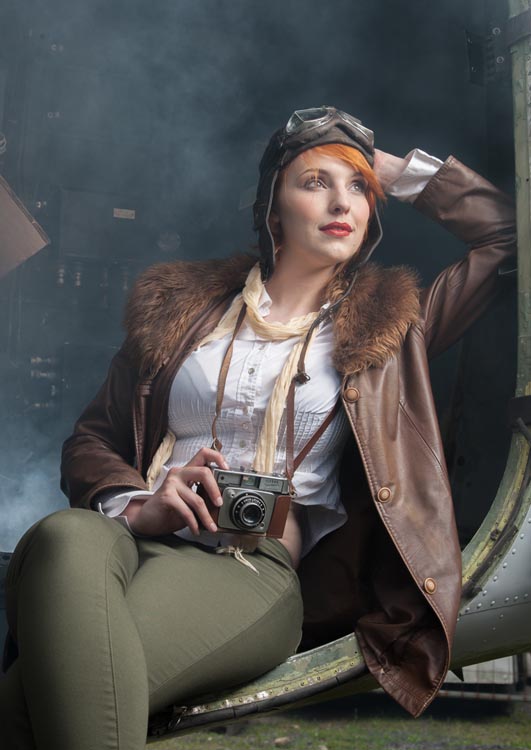
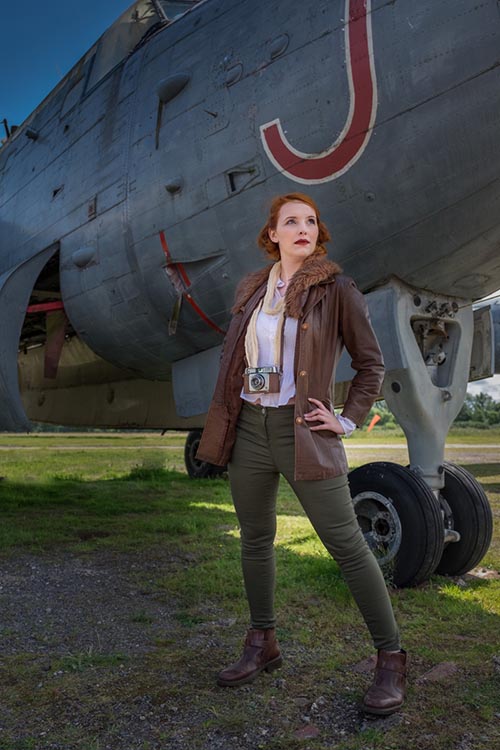
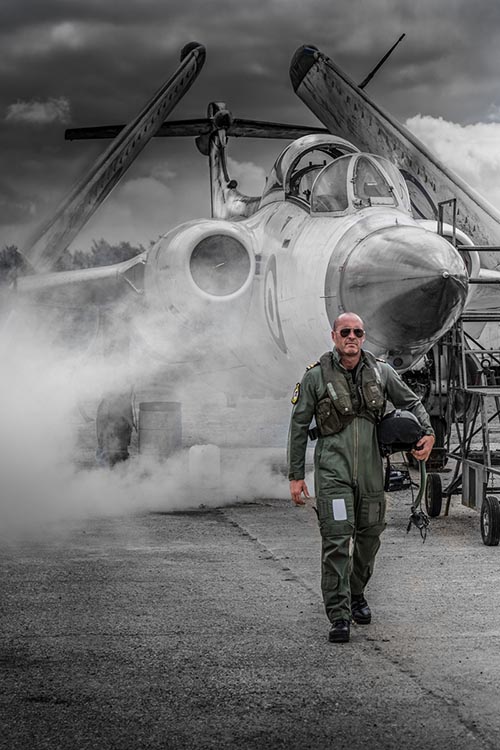
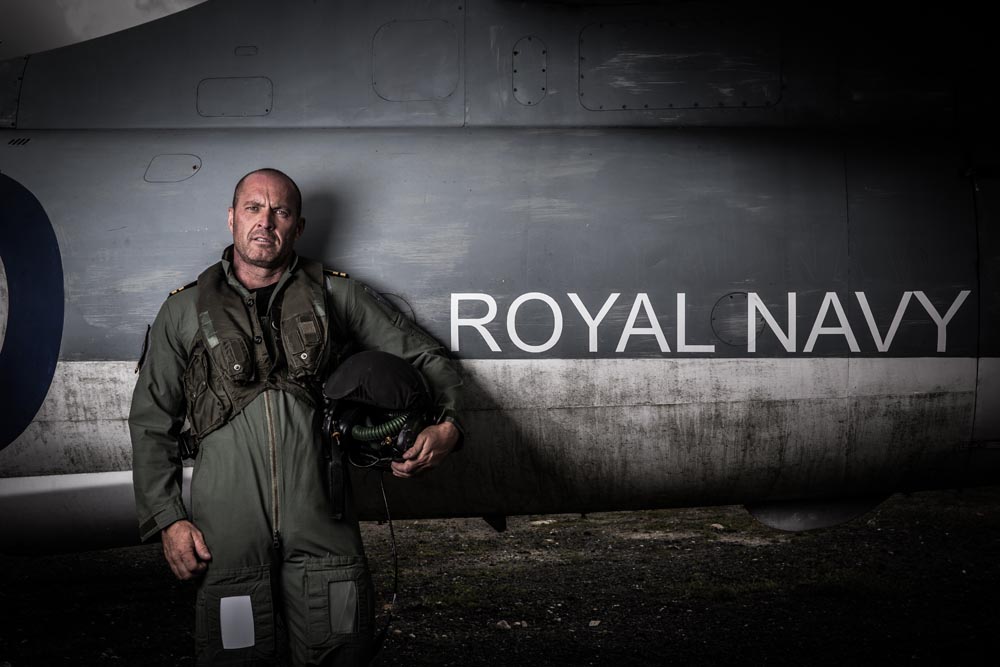
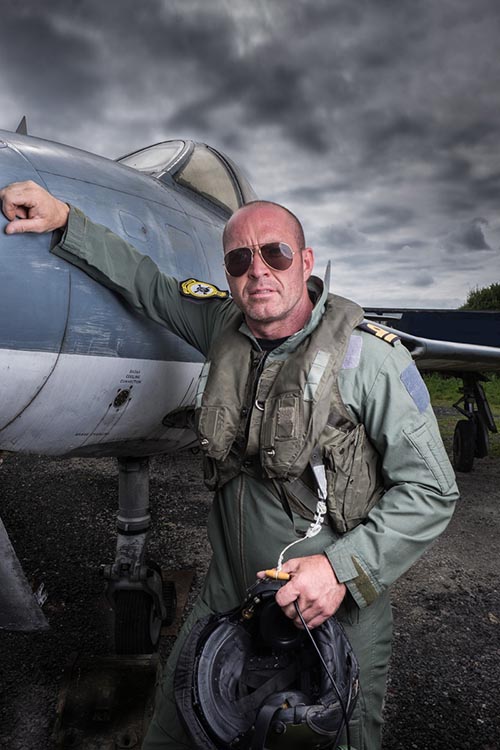
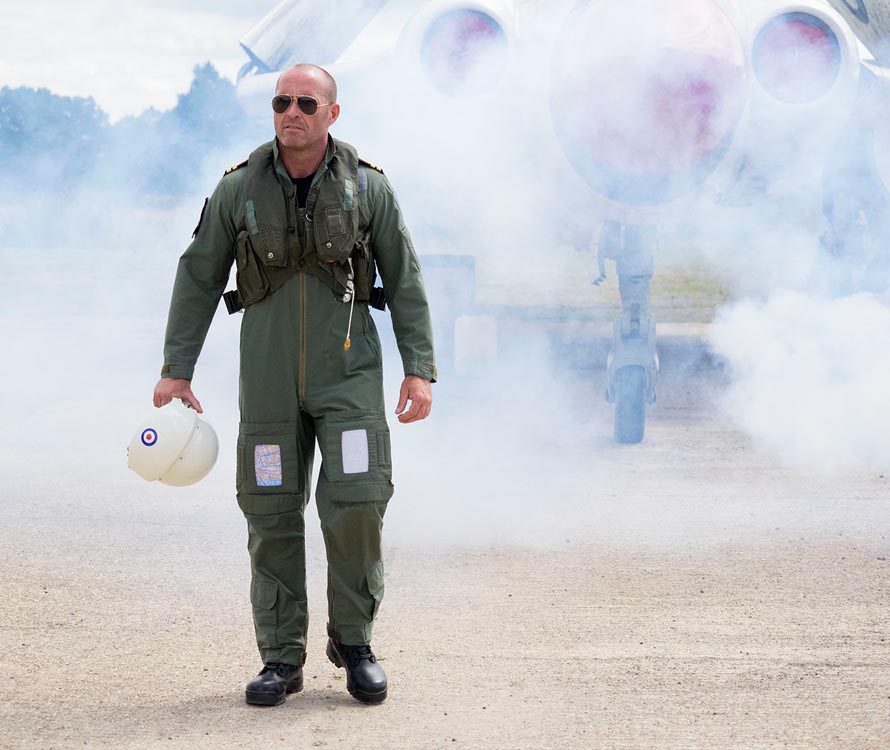
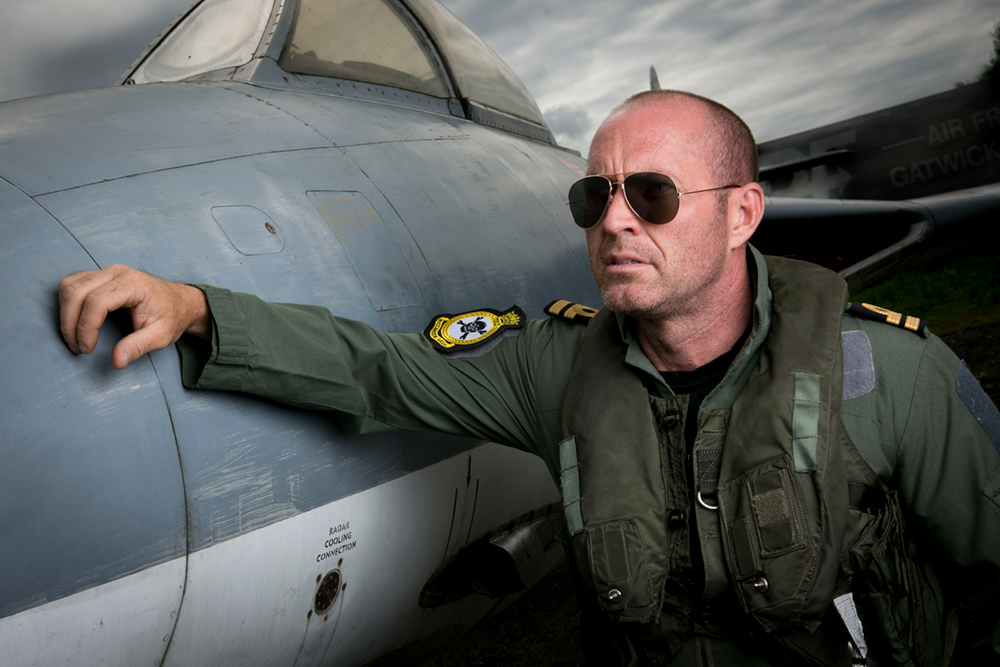
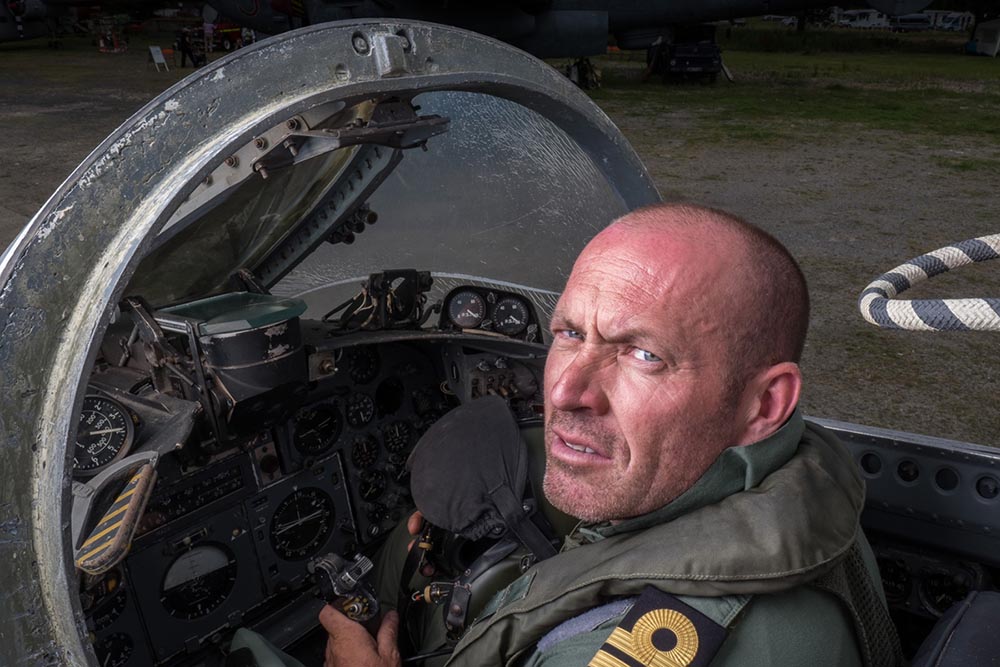
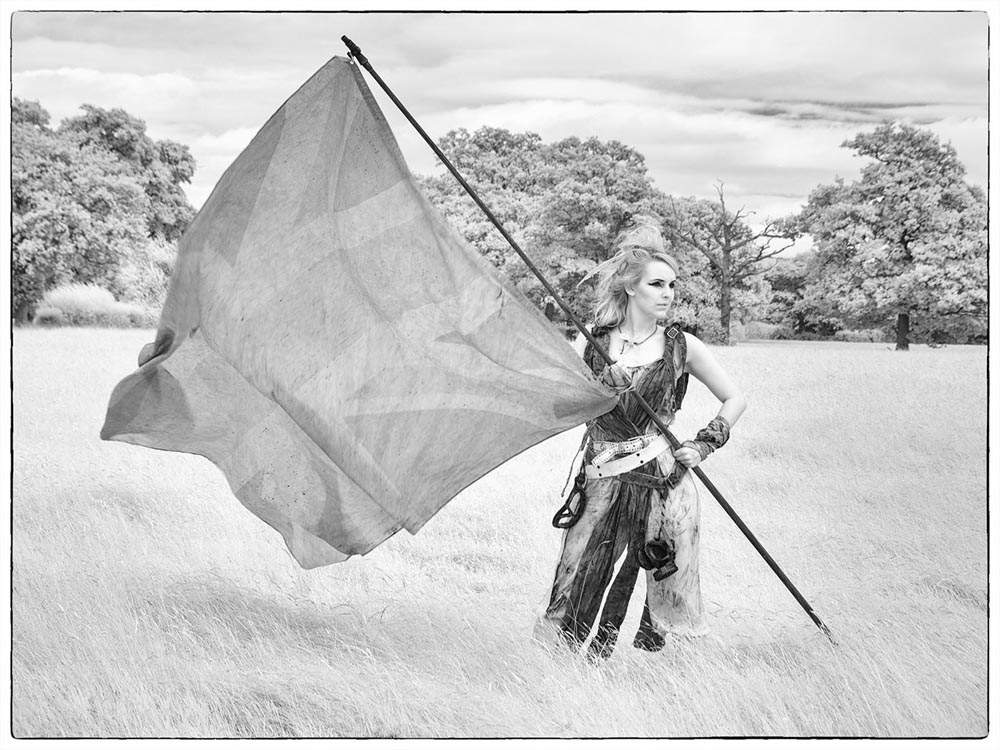
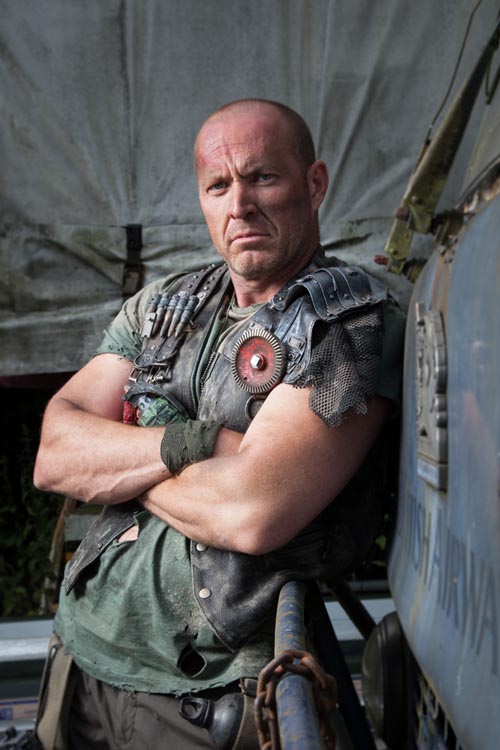
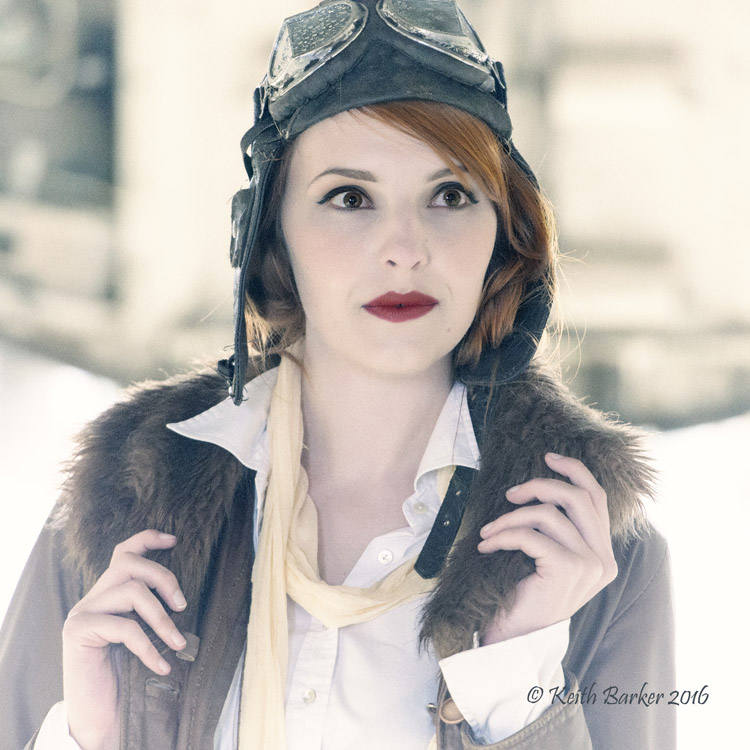
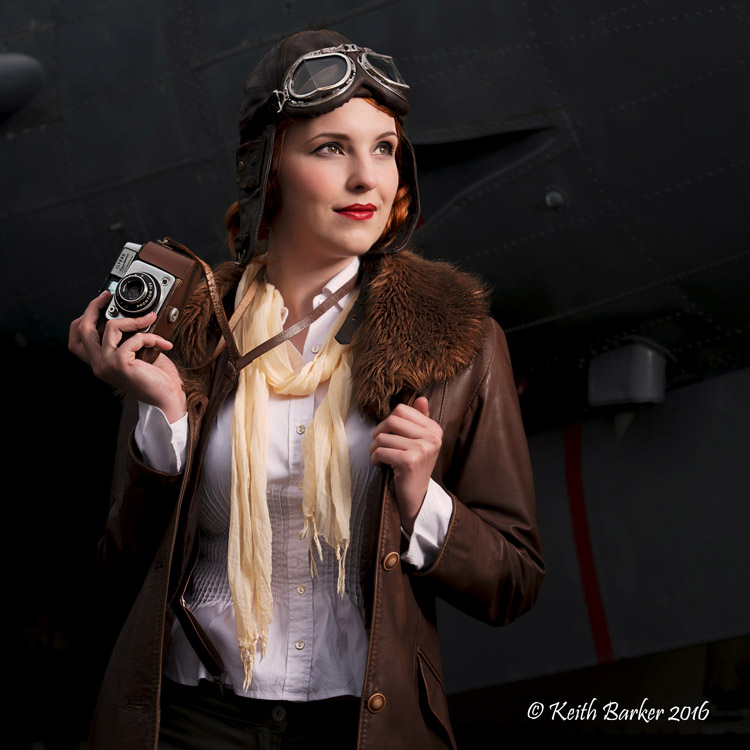
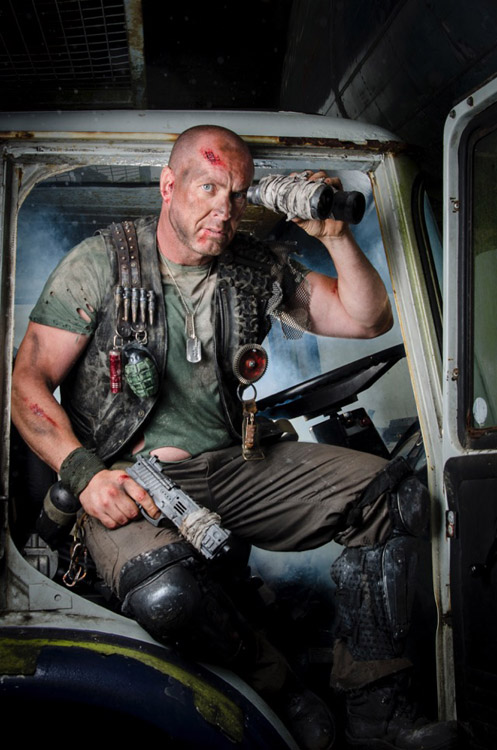
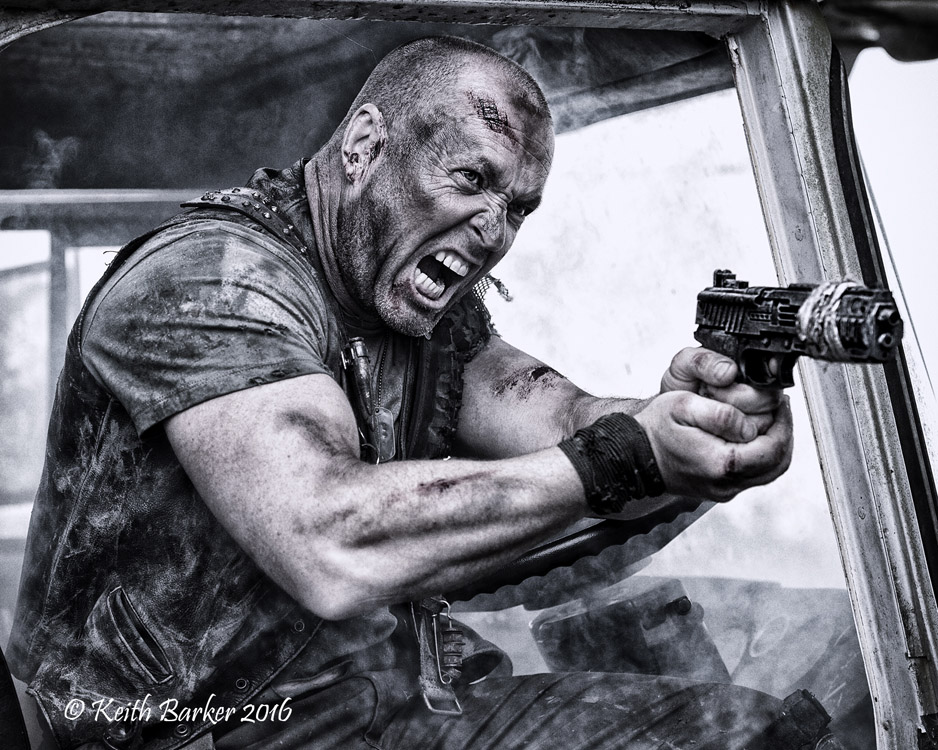
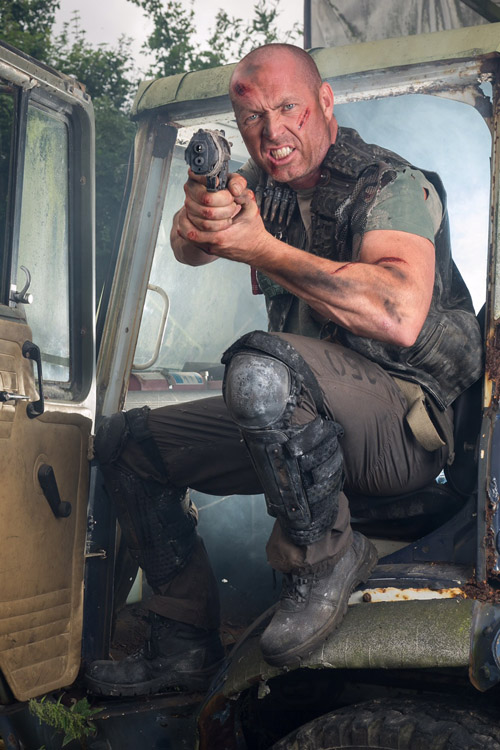
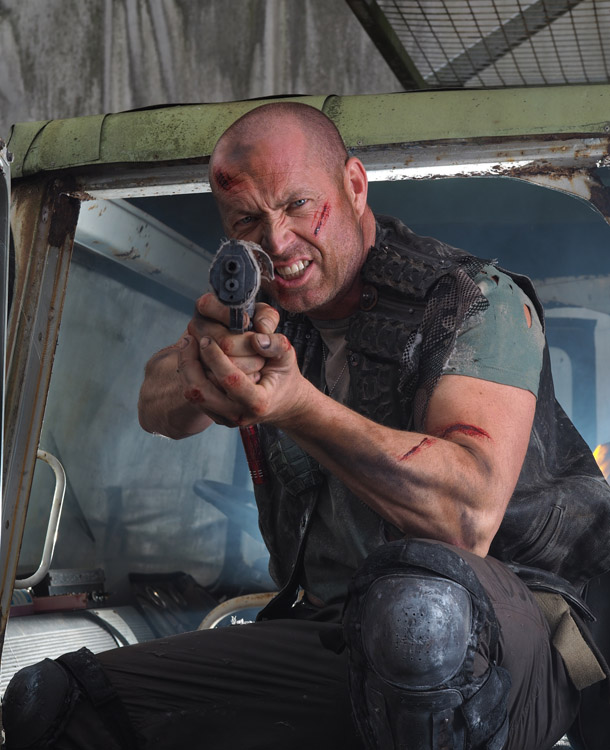
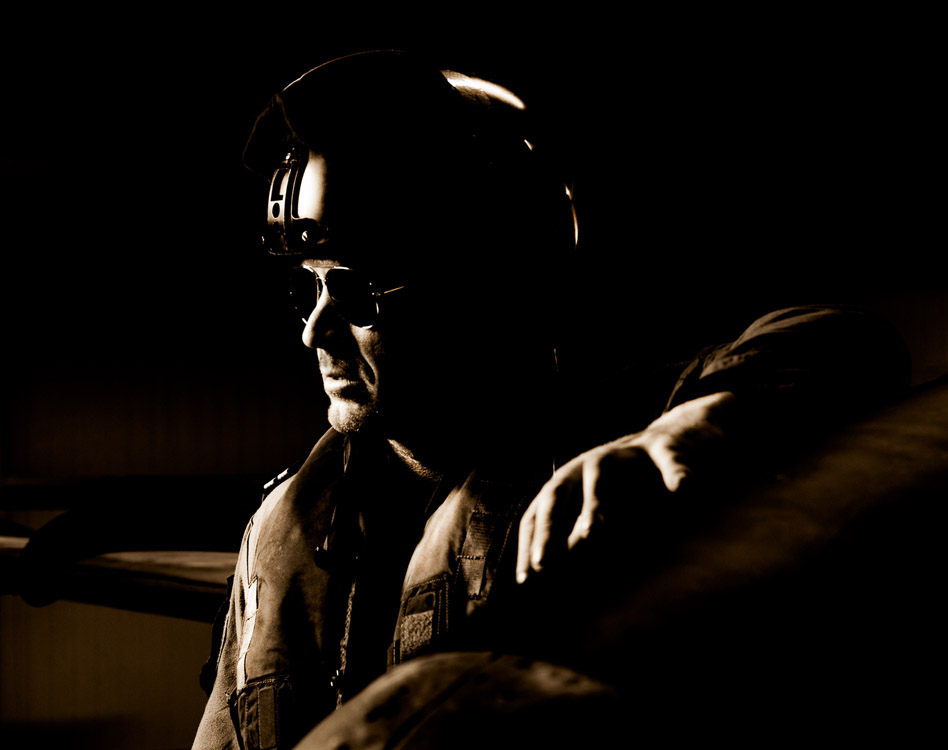
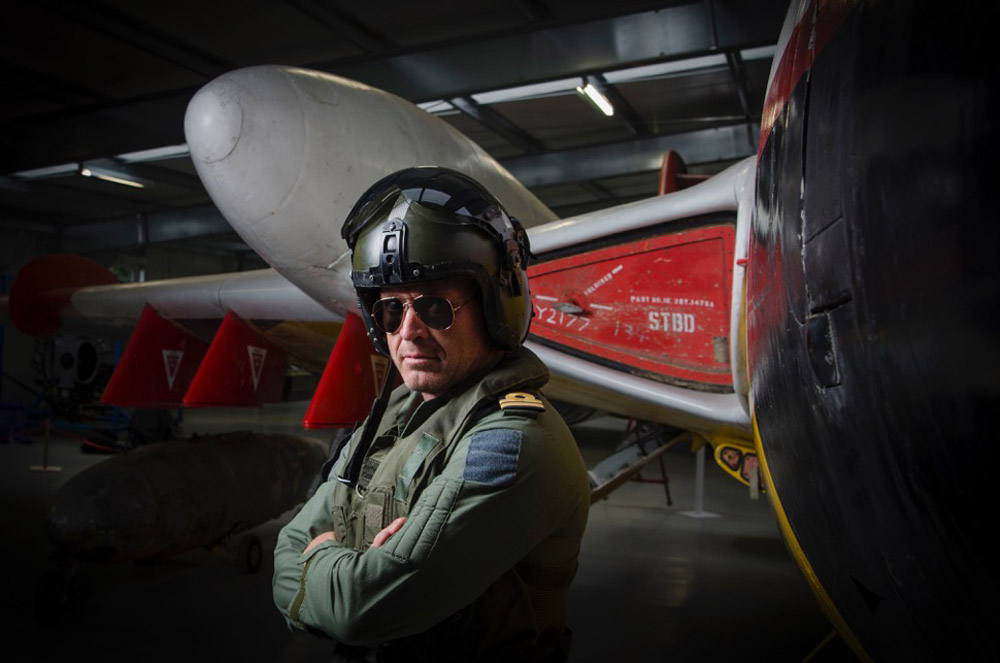
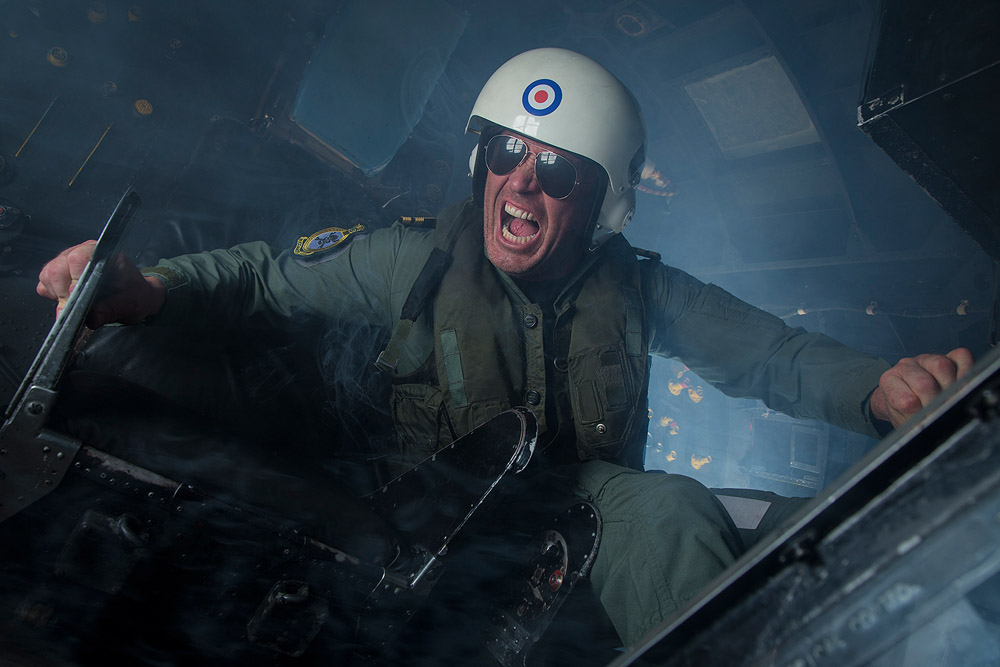
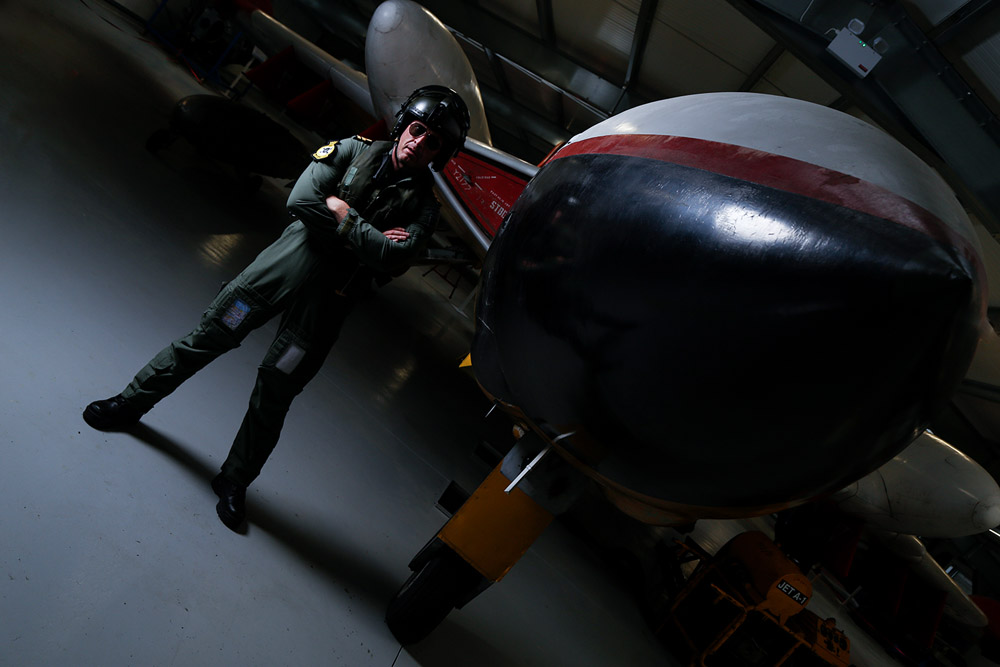
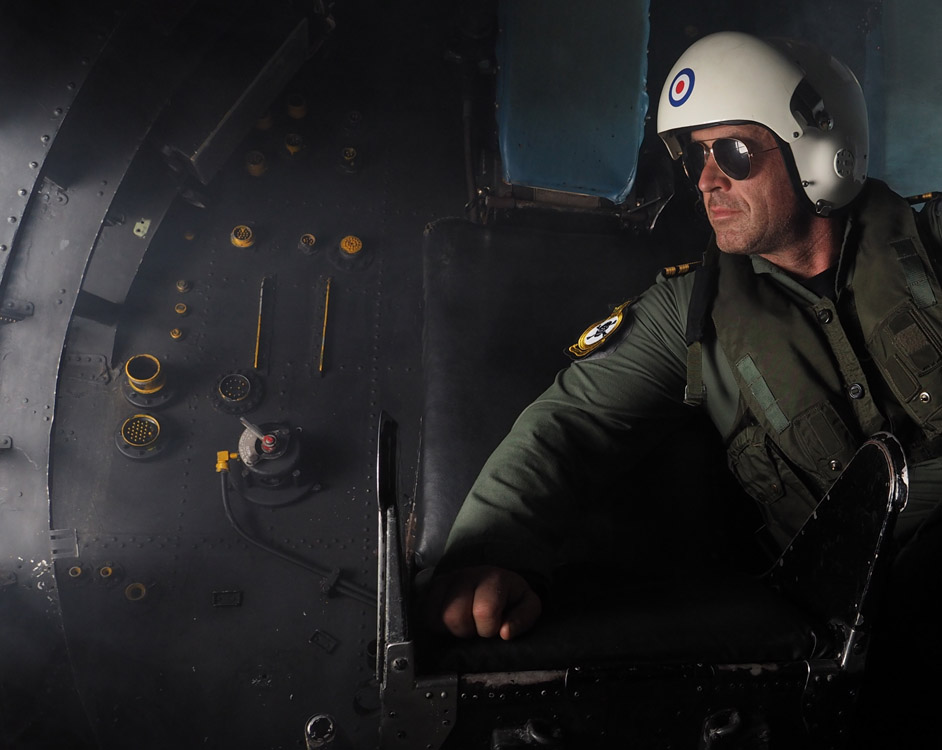
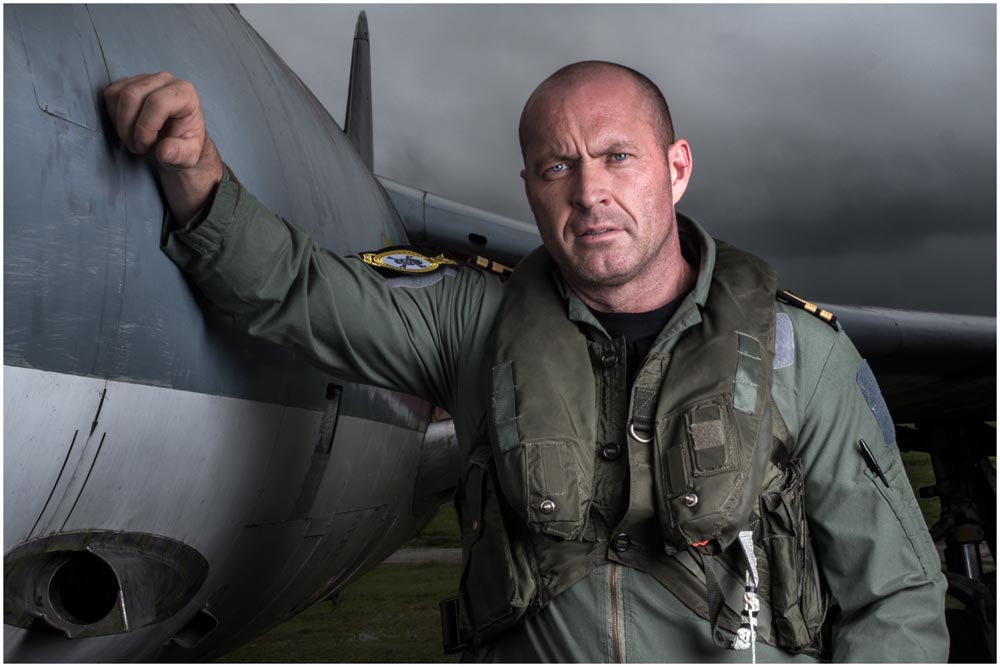
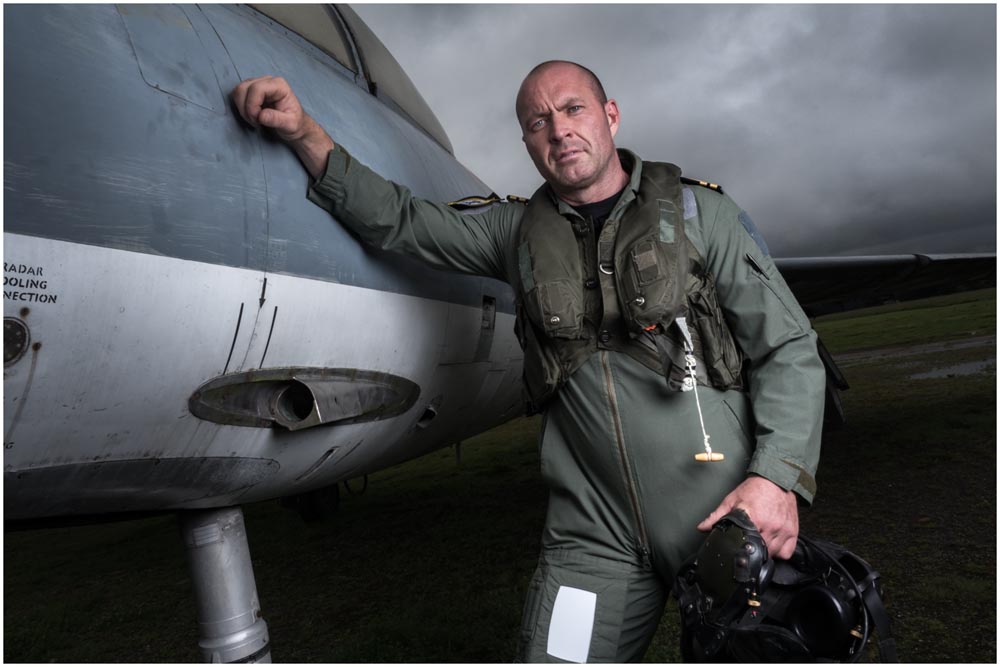
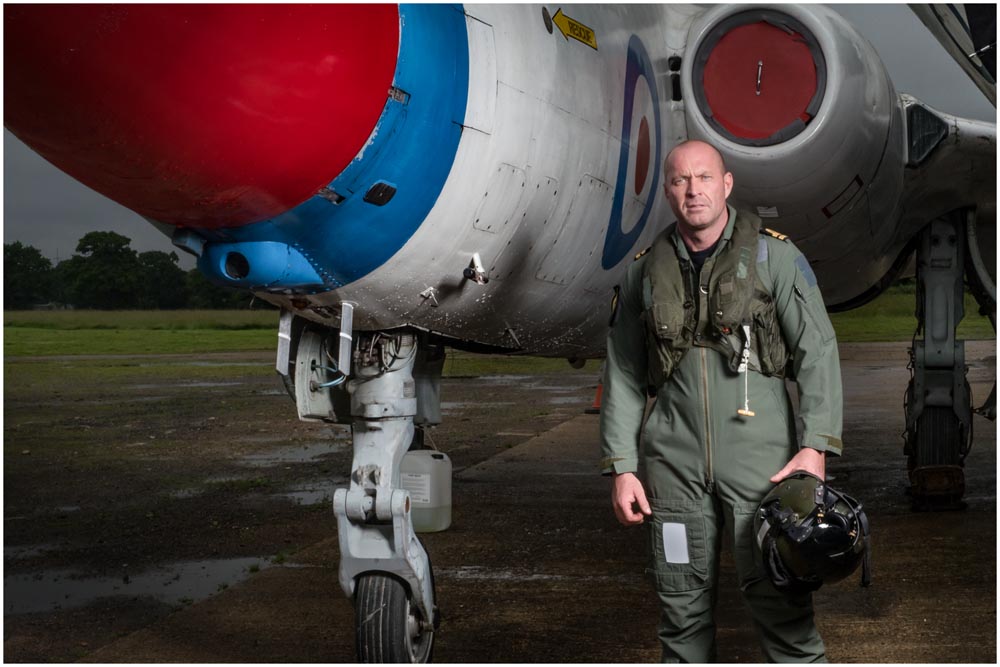
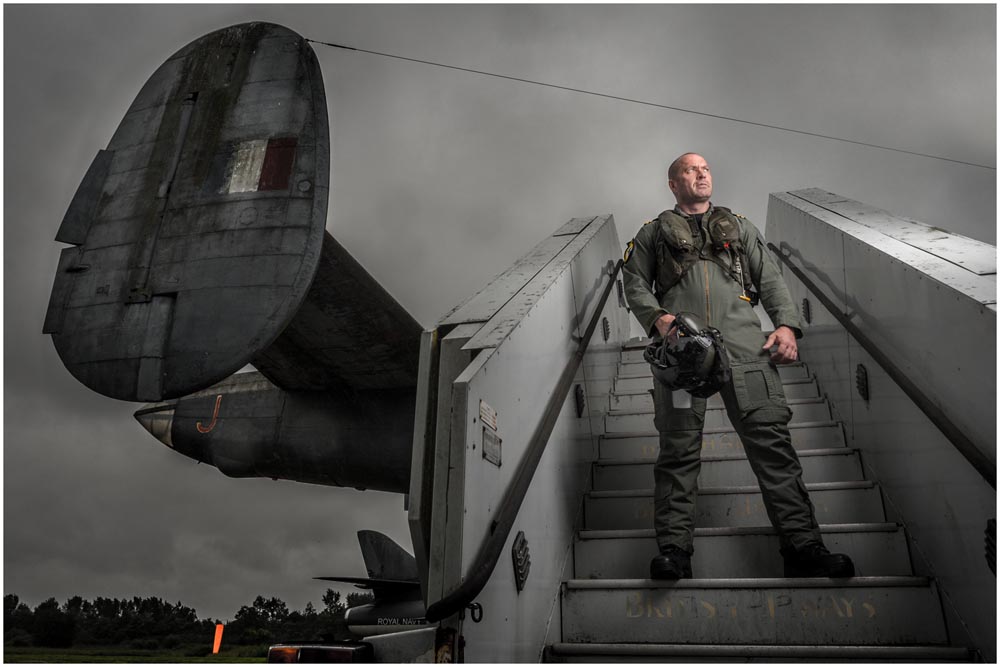
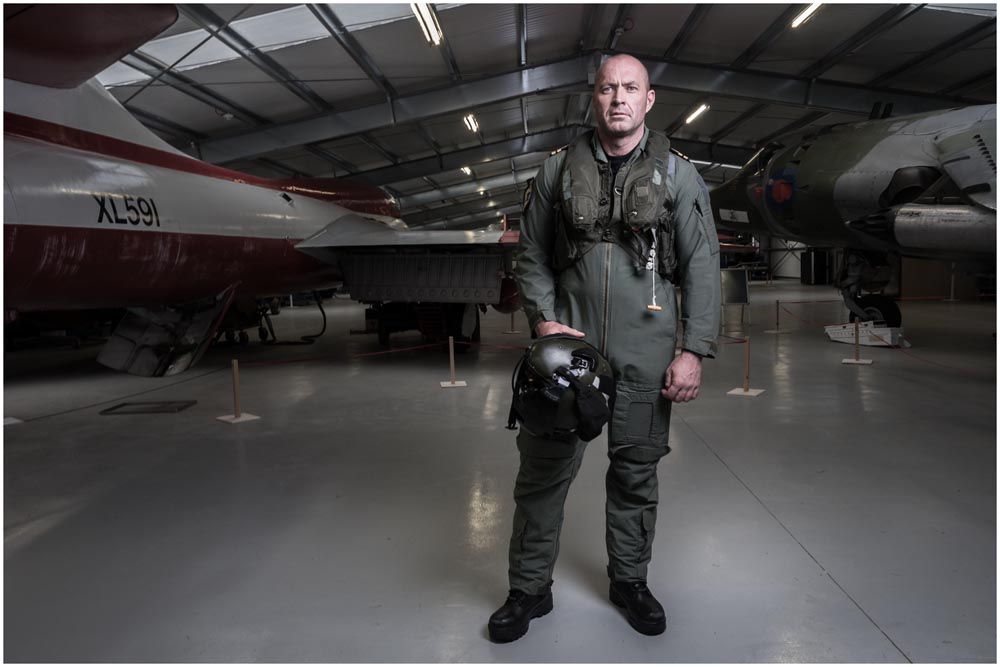
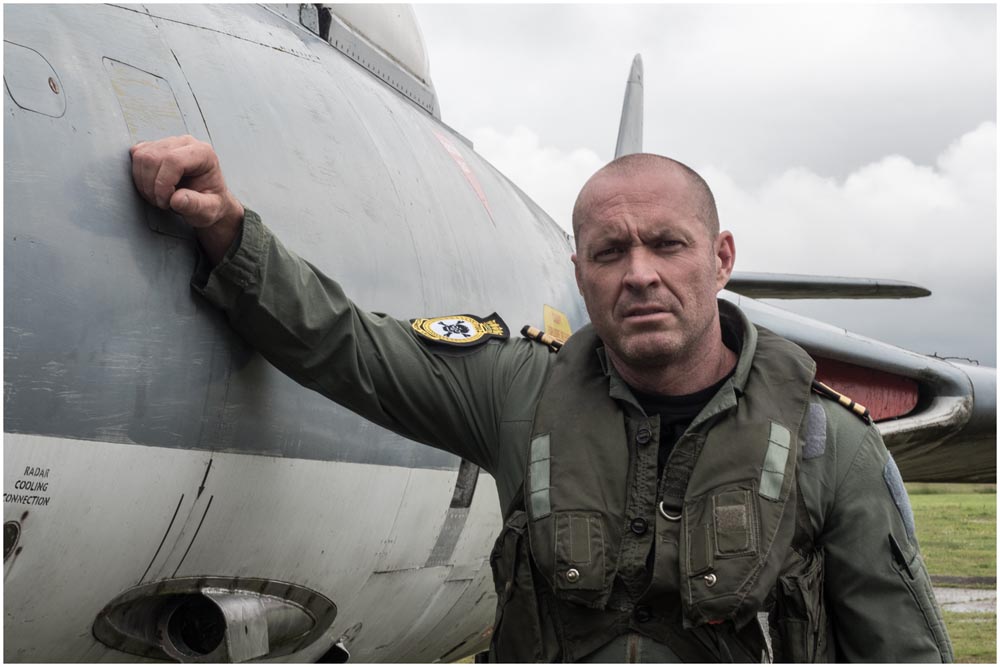
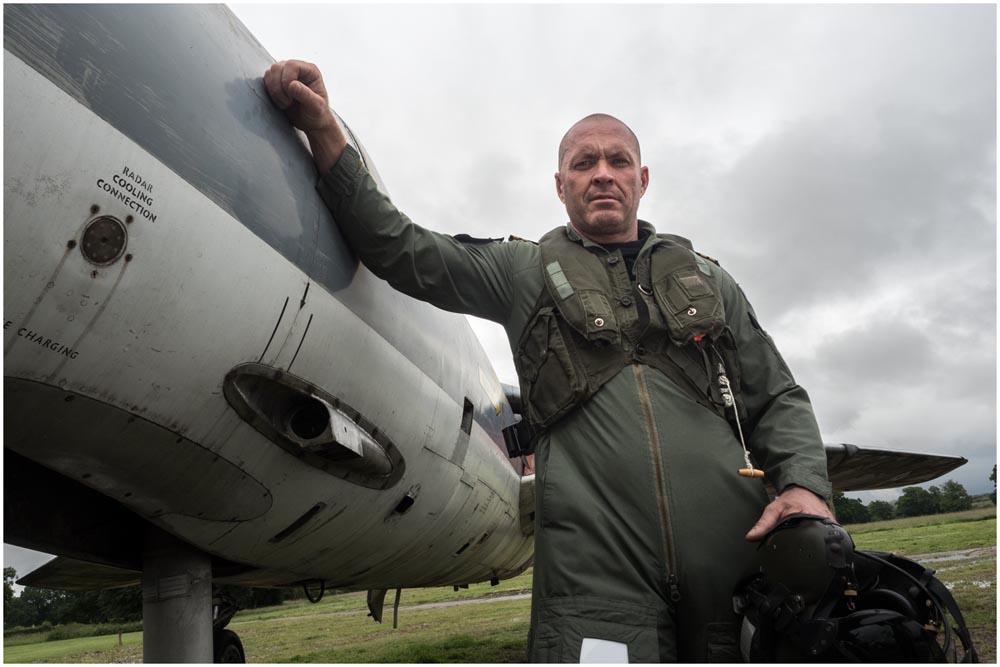
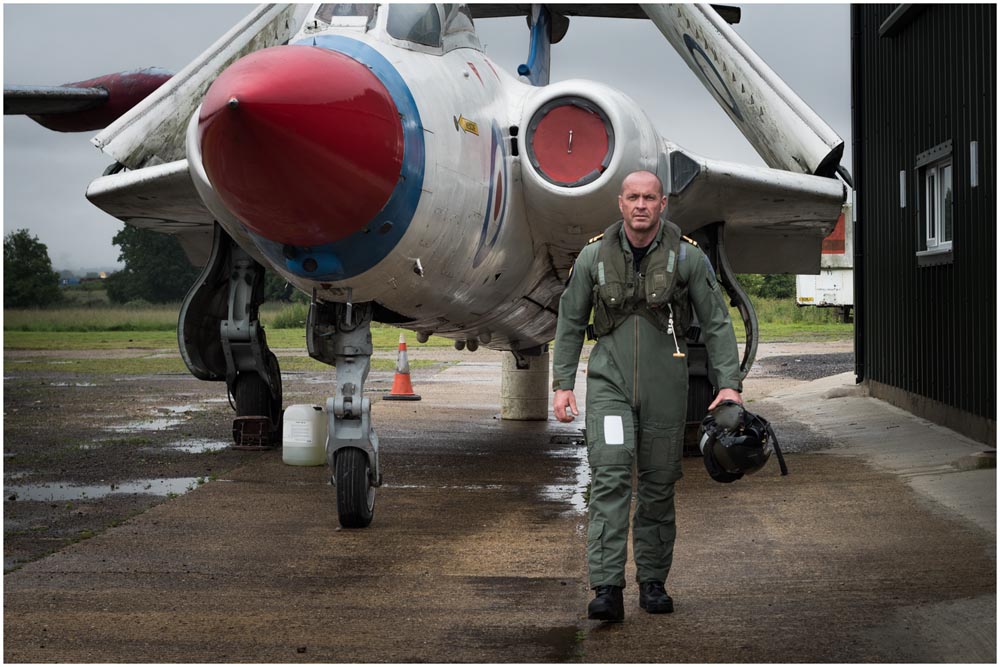
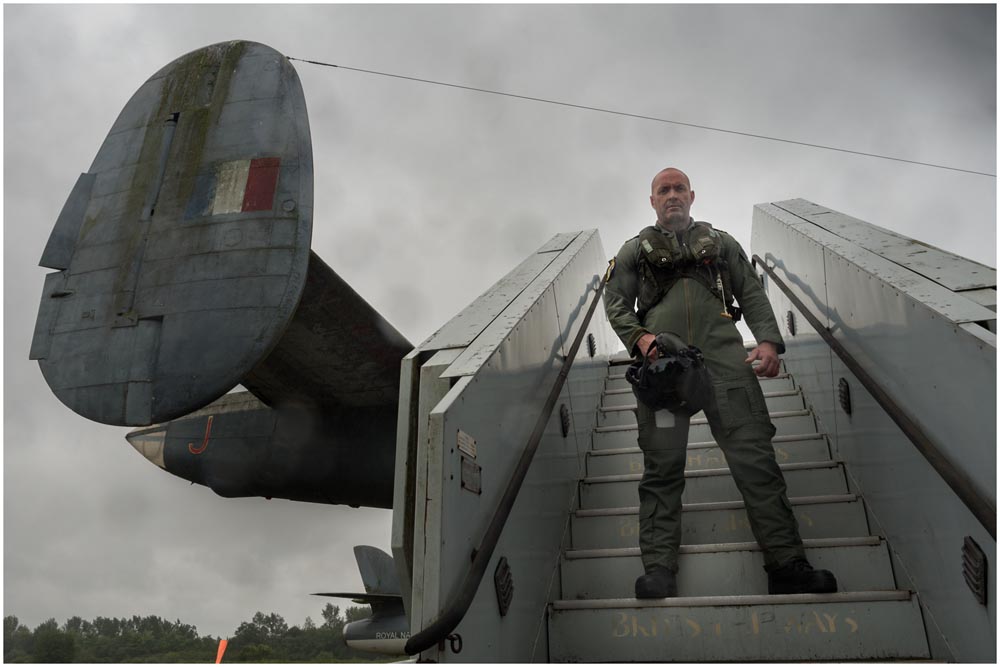
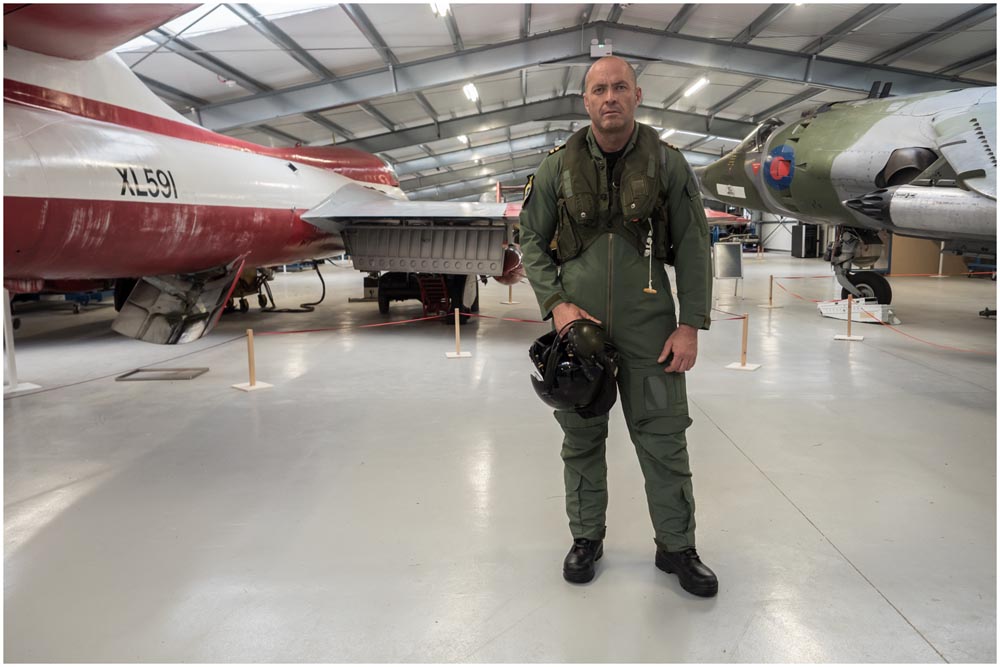
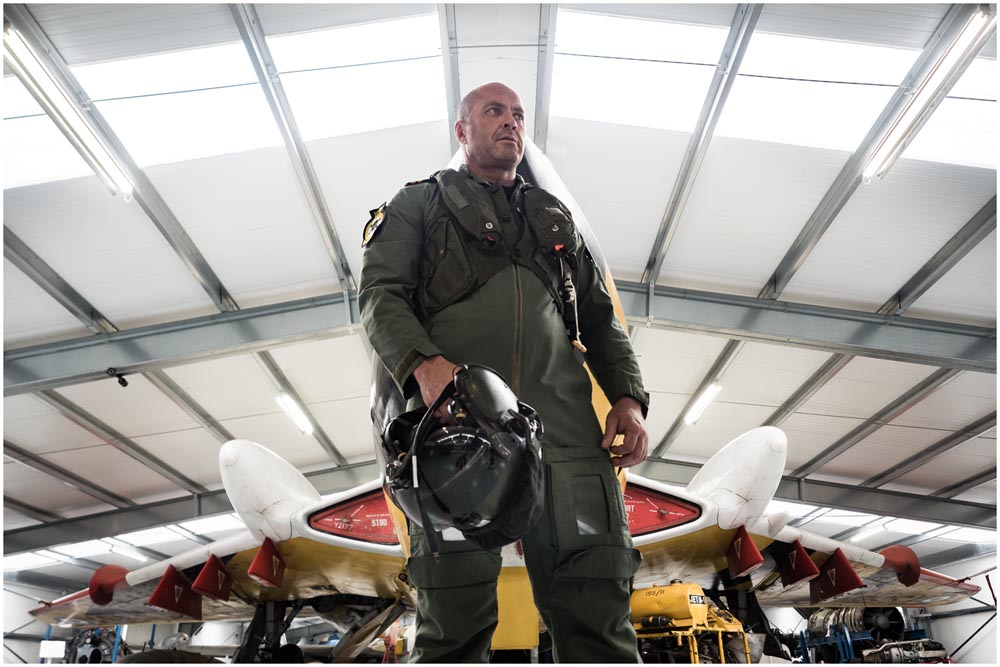
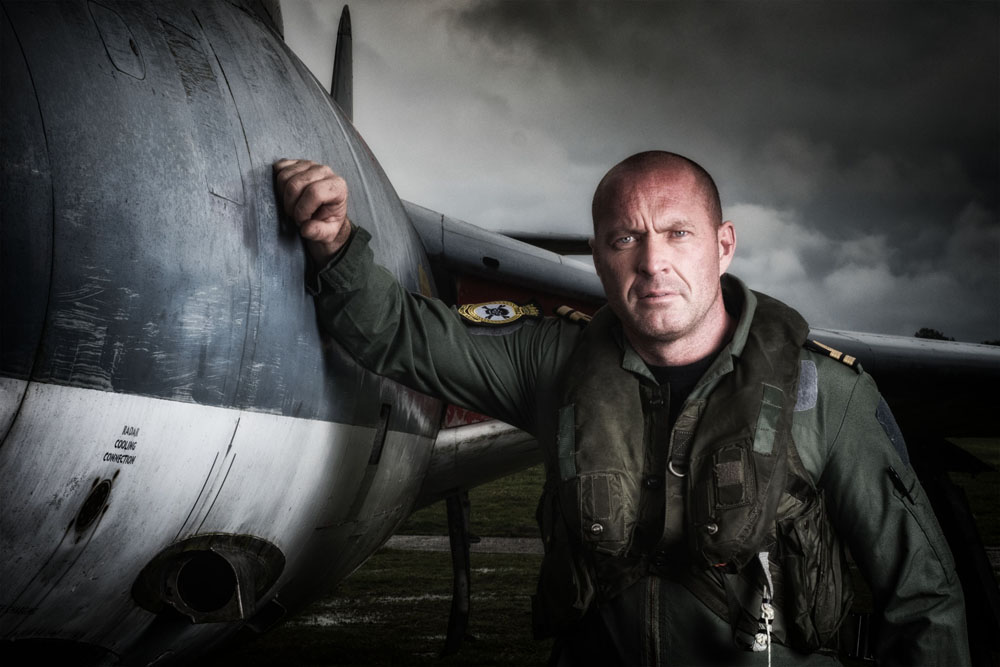
The theme for the morning was aviators. I worked with Roger who took on the role of a fighter pilot. The museums Buccaneer and Hunter aircraft were the backdrop and we were also granted special access to the Buccaneer’s cockpit.
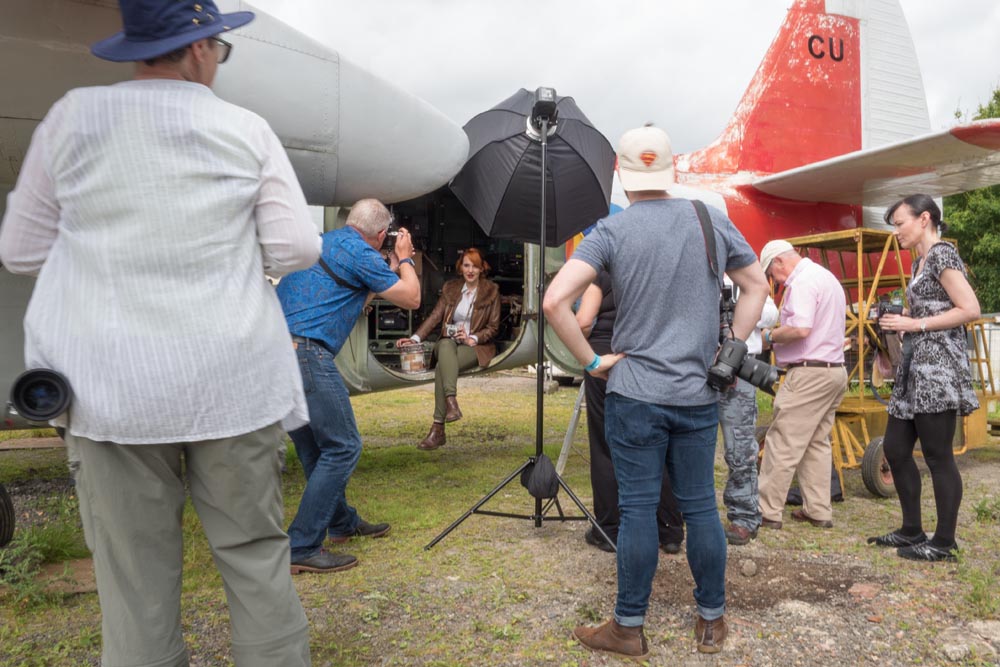
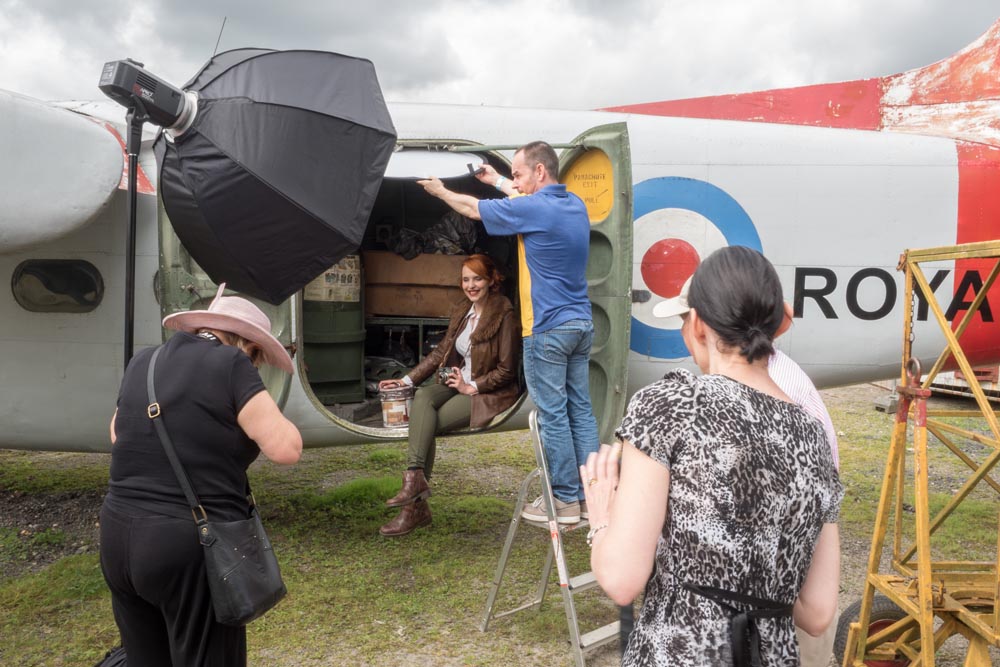
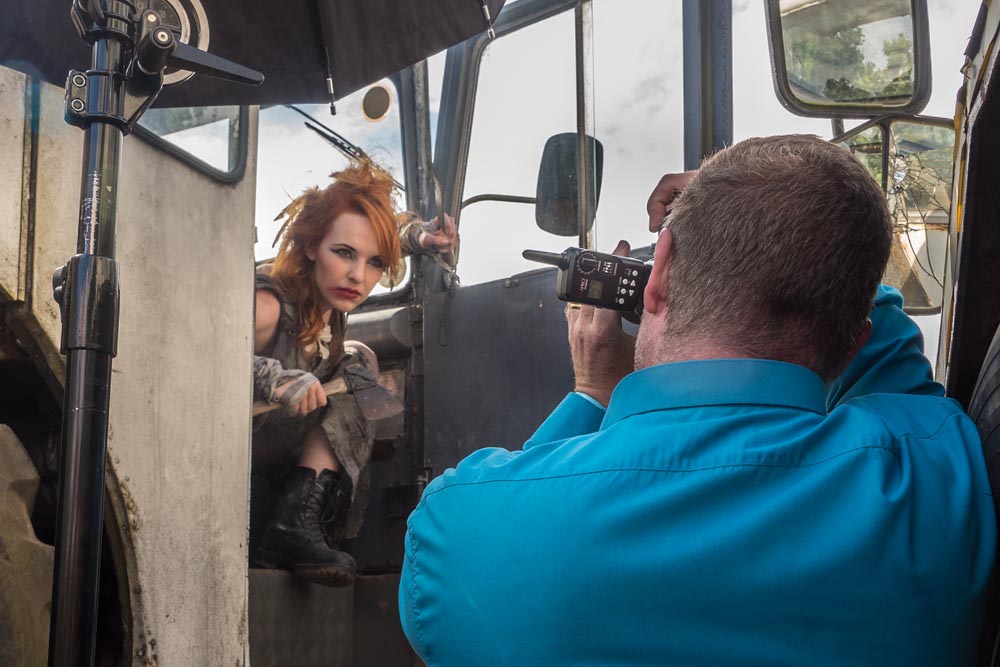
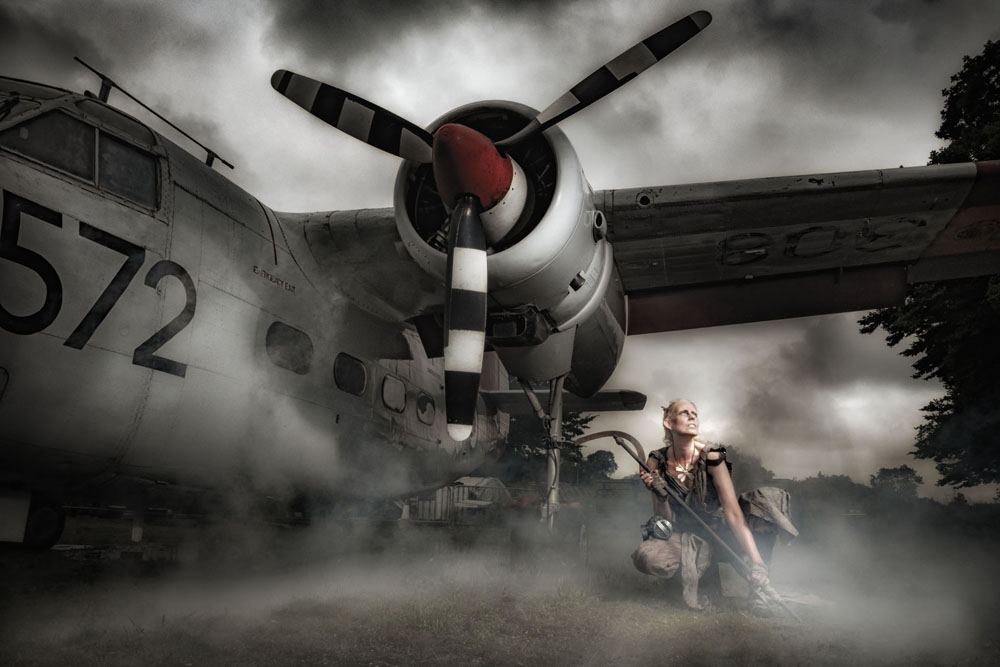
Tommy and Kerry turned back the clock with a vintage, Amelia Earhart inspired look. Once again the museum came up trumps, allowing us access inside the Sea Prince aircraft and the chance to get some really great shots. The group also made great use of the shade found under the massive Shackleton.
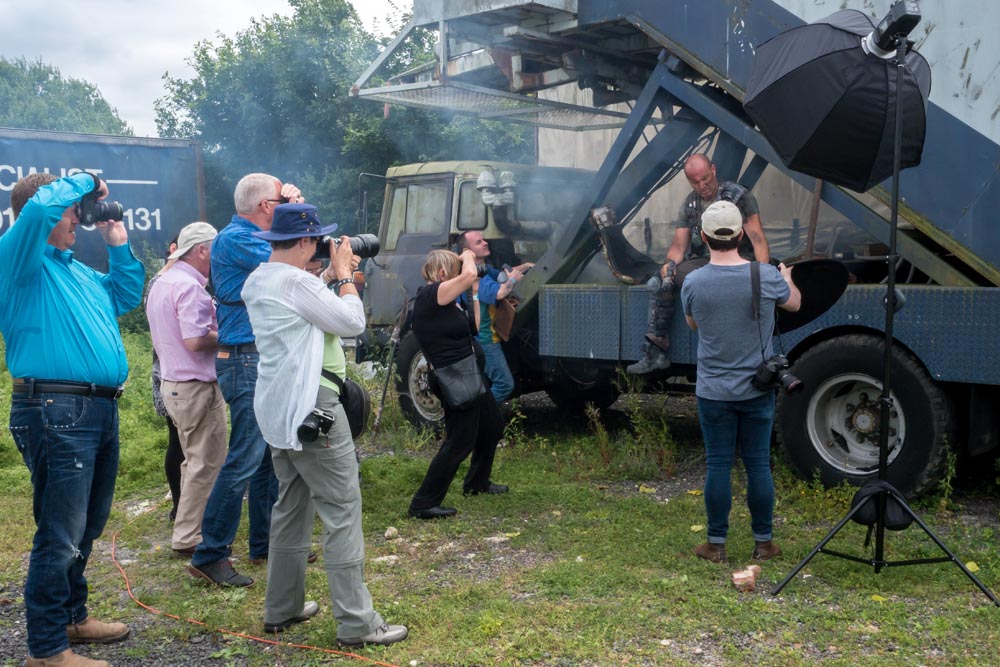
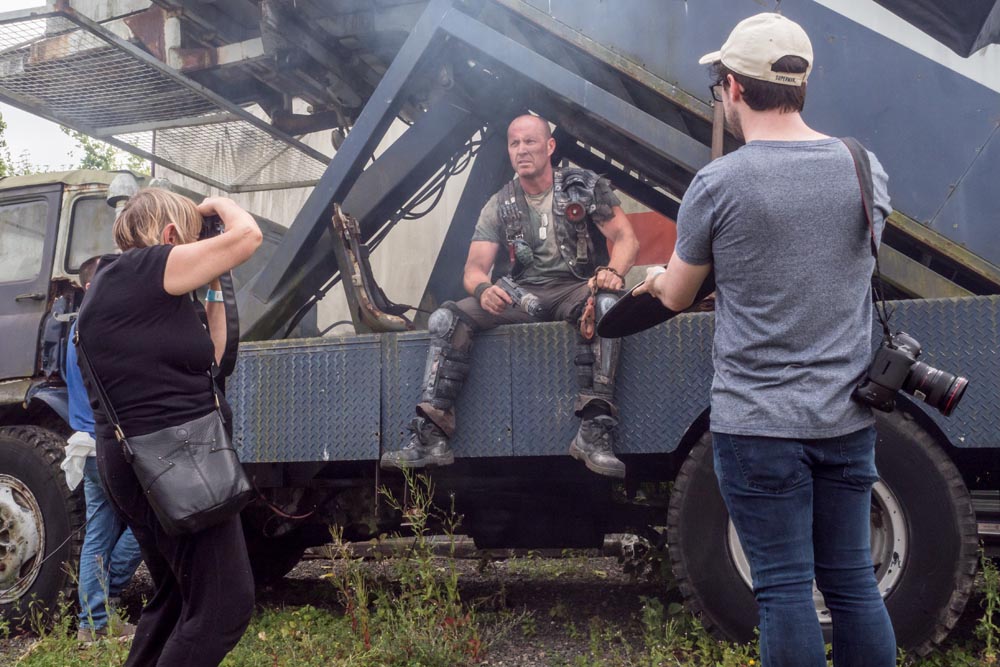
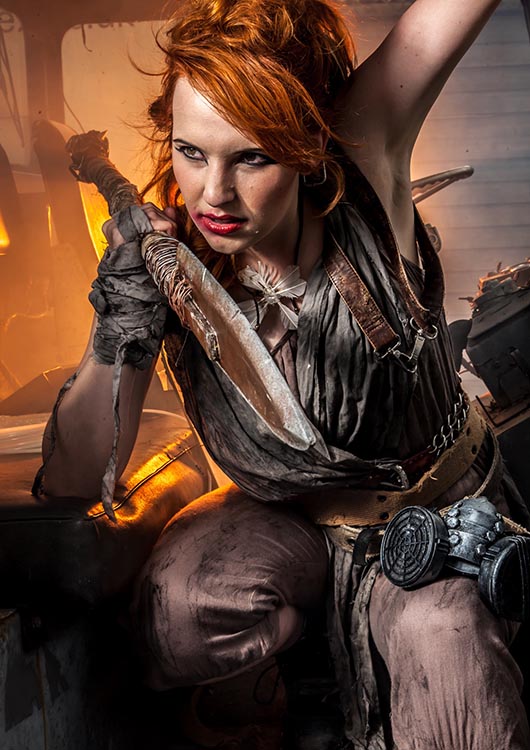
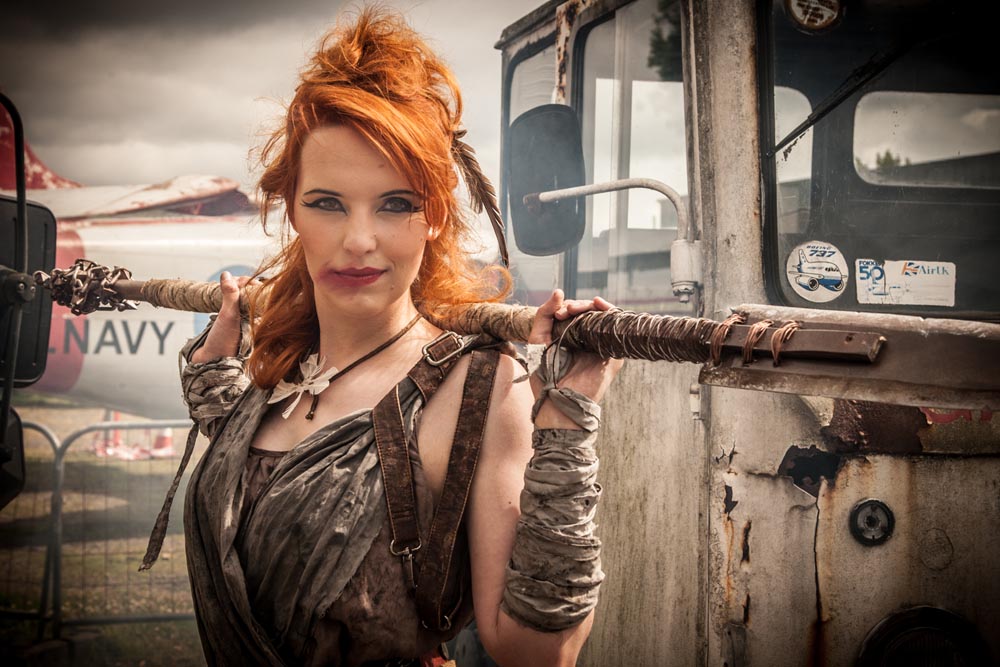
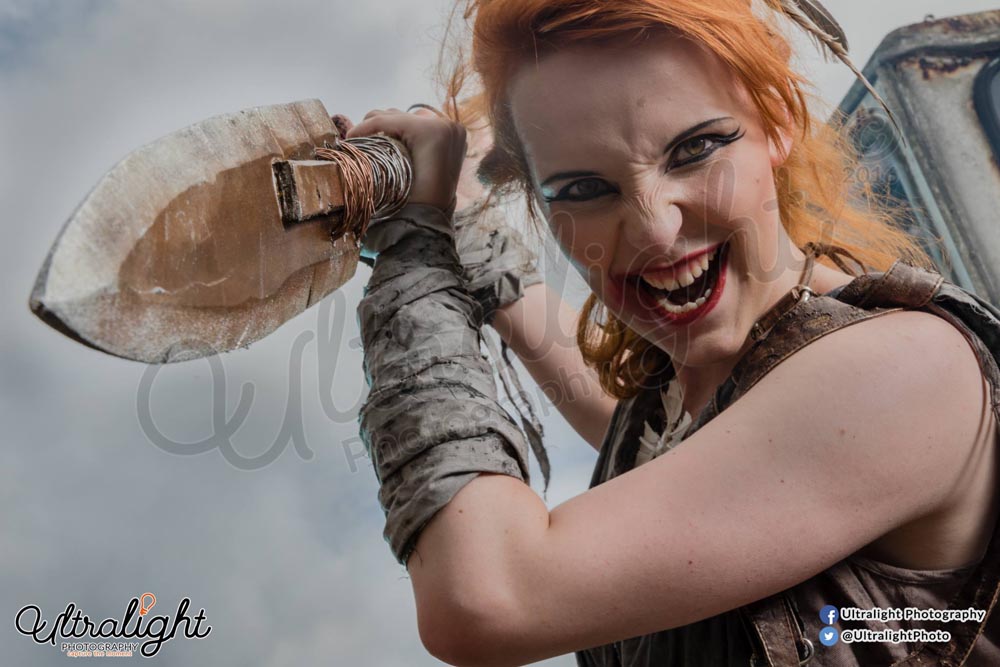
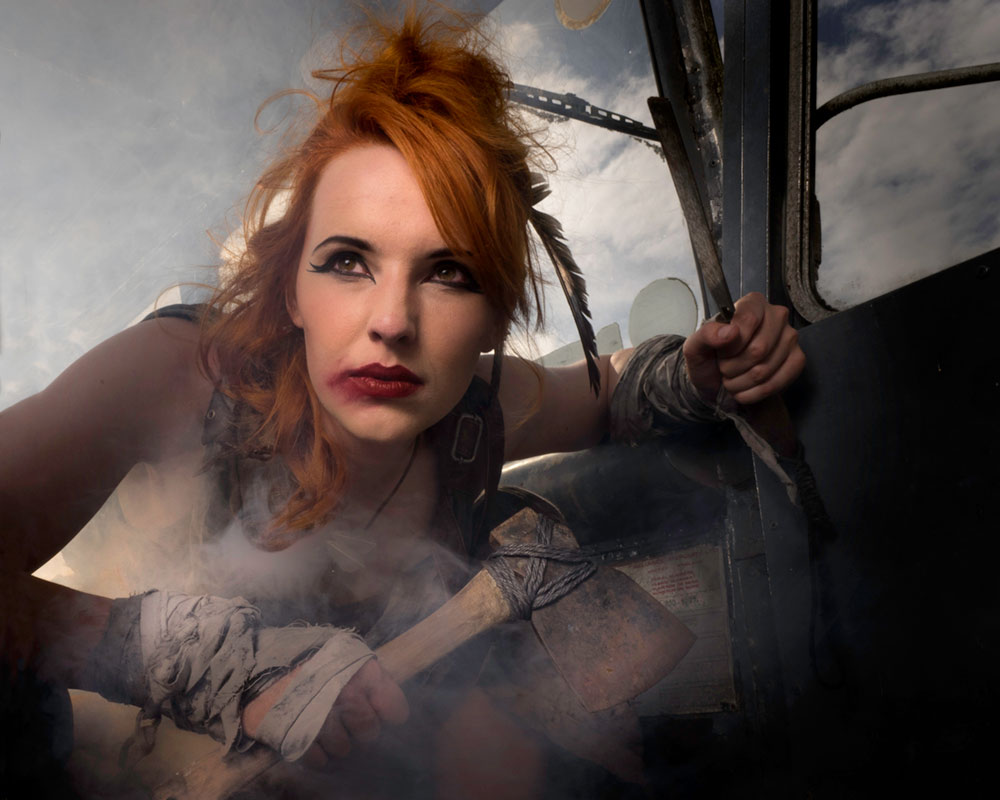
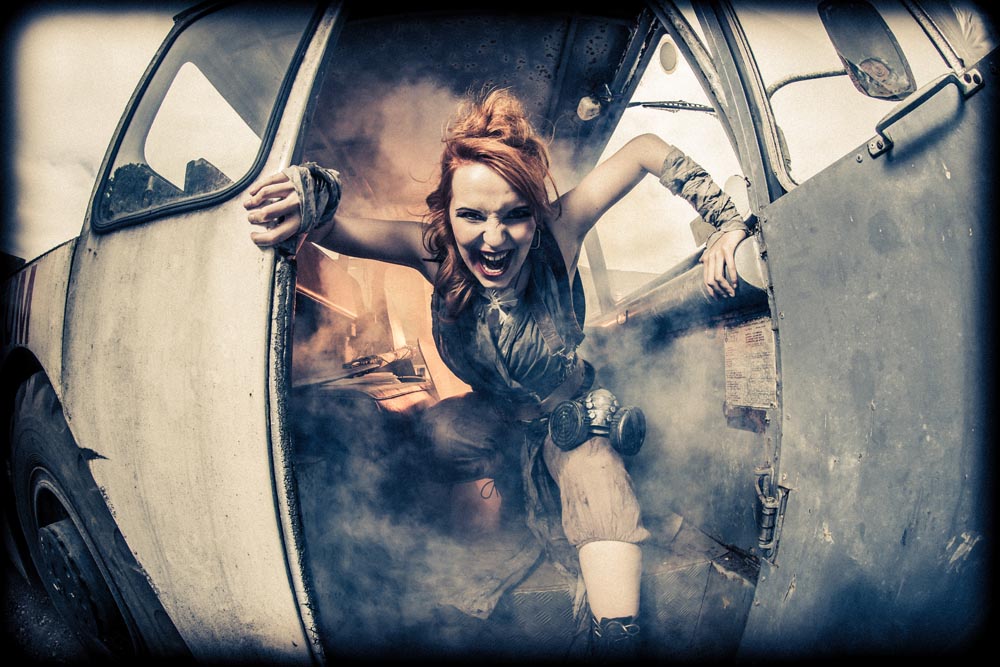
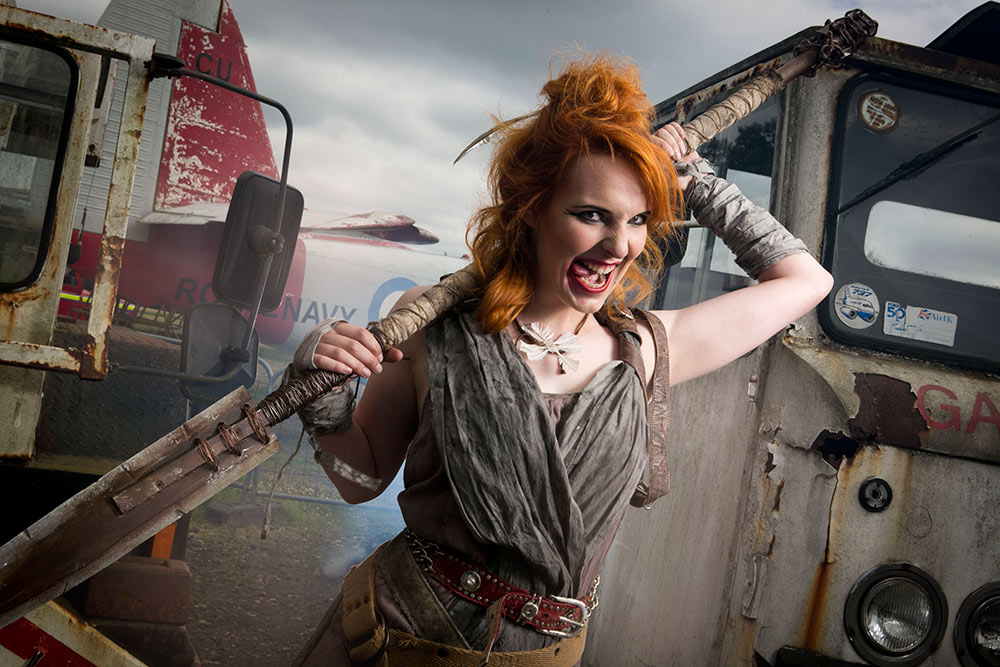
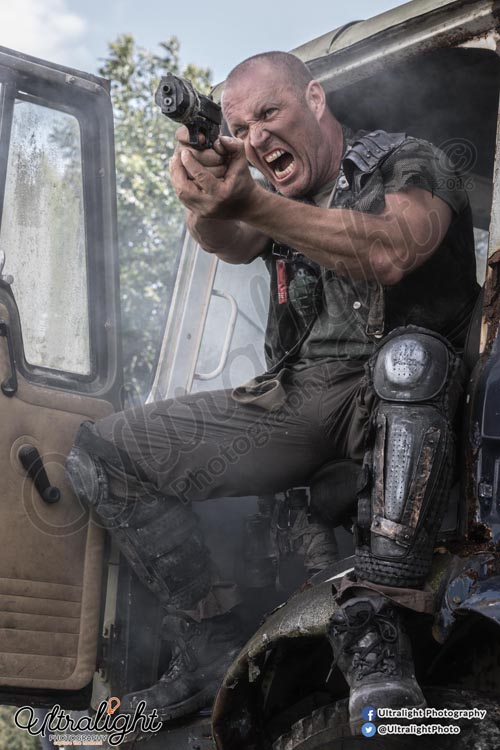
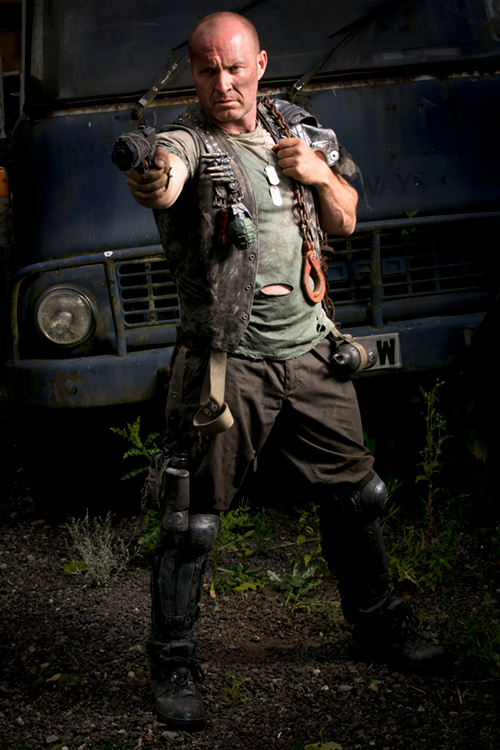
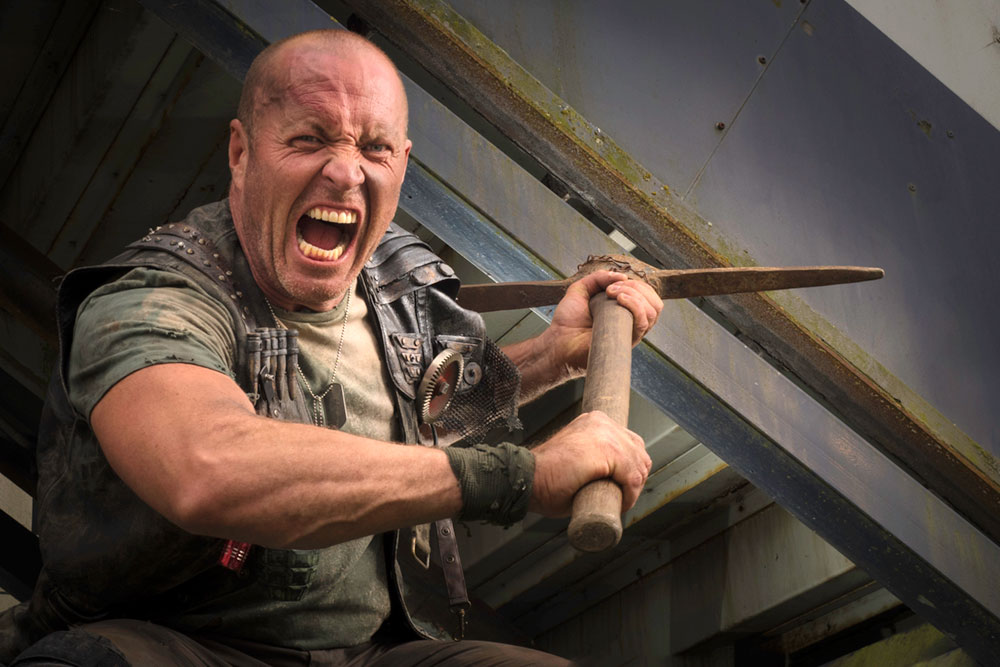
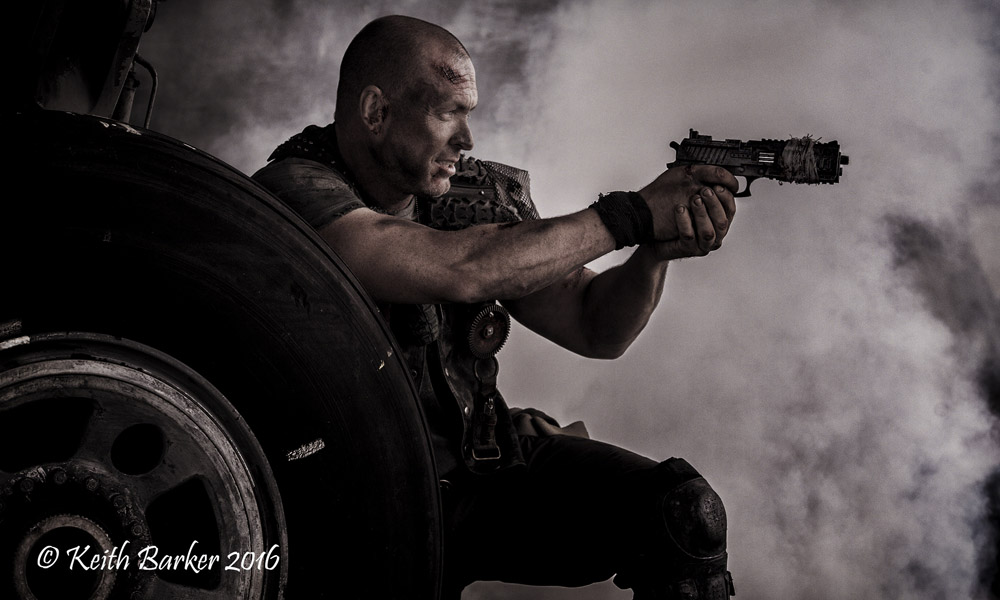
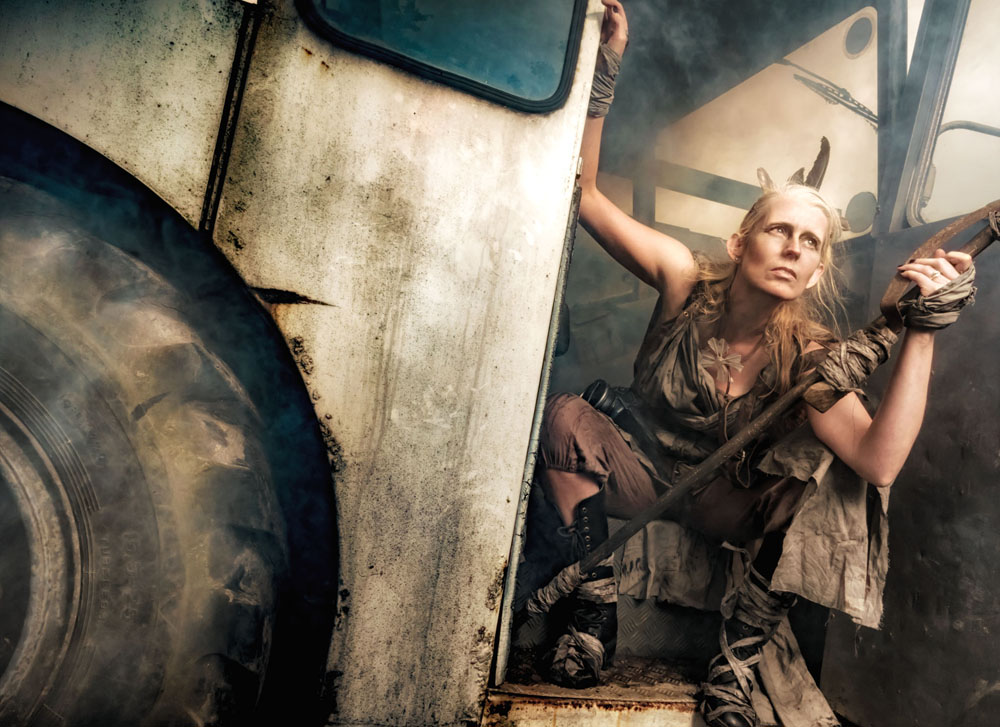
After a spot of lunch and a change of look we took on the apocalypse part of the themed workshop.
I took Kerry into the workshop area of the museum where there was plenty of rust and a few ageing vehicles. Smoke and flash combined with a bit of camera know how to create some serious moody images.
Tommy found plenty of post-apocalyptic inspiration at the other end of the museum and Roger unleashed his inner and outer strength with amazing results.
There’s nothing more frustrating to me than seeing a workshop organiser shooting photos for themselves at the expense of the attendees. As a result I hardly have a single “good” photo from the day. Fortunately, the photographers who joined us took thousands of shots and below are a few that I’ve been sent so far.
By Emma Bothamley
By Emma Bothamley
By Peter Jillians
By Peter Jillians
By Andrew Prior
By Richard Barry
By Vanessa Parker
By Andrew Prior
By Emma Bothamley
By Andrew Prior
By Vanessa Parker
By Chris Brudenell
By Andrew Prior
By Peter Jillians
By Emma Bothamley
By Peter Jillians
By Richard Barry
By Michelle Essenson
By Michelle Essenson
By Emma Bothamley
By Vanessa Parker
By Chris Brudenell
By Vanessa Parker
By Emma Bothamley
By Peter Jillians
By Peter Jillians
By Richard Barry
By Chris Brudenell
By Michelle Essenson
By Chris Brudenell
By Michelle Essenson
UPDATE:
We ran the workshop for a second time in September. Once again I was joined by Roger and Kerry as our models and Tommy as my second group leader. This time the weather was a lot more apocalyptic with rain forcing us to spend the afternoon. Luckily the Gatwick Aviation Museum is great inside and out.
Below are a selection of photos from the 14 photographers who came along and made the whole day very enjoyable.
When it comes to shooting portraits on location I know many photographers who love to make best use of the ambient light. I also know lots of photographers who wouldn’t dream of shooting on location without flash. Although I prefer flash, I’m very happy to work with ambient light if it does what I need. If you’re undecided about moving to flash or perfecting your ambient shooting techniques then this video should answer a few questions.
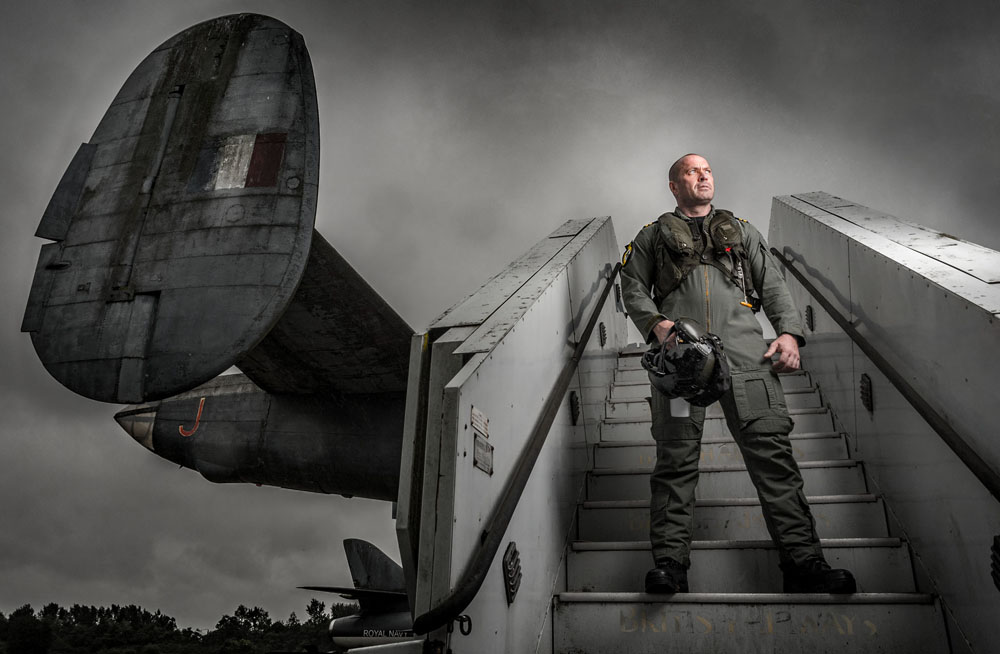
I must thank the Gatwick Aviation Museum for the use of their location and the loan of the pilots outfit. Part of the reason for the look and location in these shots was to test out the venue and one of the outfits for my big Aviation Apocalypse workshop. Judging by what we learned on this shoot, the workshops are shaping up to be very exciting!
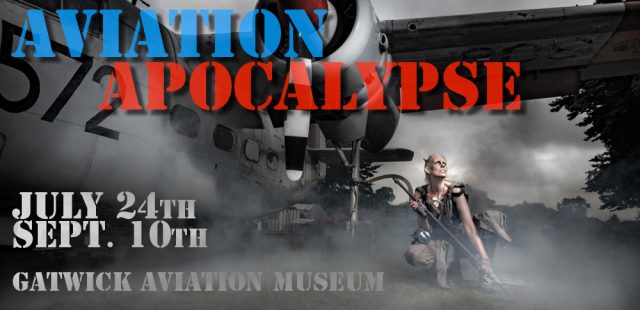
What happens if you combine a visit to a newly built aviation museum and a love of all things broken and old? Welcome to the Aviation Apocalypse!
This summer I’m running two all day photo shoots at the Gatwick Aviation Museum in Surrey and bookings are now open if you fancy joining me. Full details are on the event page here or if you just can’t wait, you can use the book now buttons below. Places are strictly limited and must be booked in advance.
Building on the success of last year’s woodland workshops, once again I’ll be joined by two models who will each have two looks. Half the day they’ll be aviators and the rest of the day they’ll be survivors in a post apocalypse world.
You’ll be working in small groups with plenty of time to get great photos of both models in their different looks. This is a great opportunity to capture some unique portraits whatever skill level you’re at.
The photos above are from my test session at the actual location we’ll be using. Despite the rather gloomy weather that day I had a brilliant time and I’m really excited to see what suggestions, ideas and images the photographers on the day create.
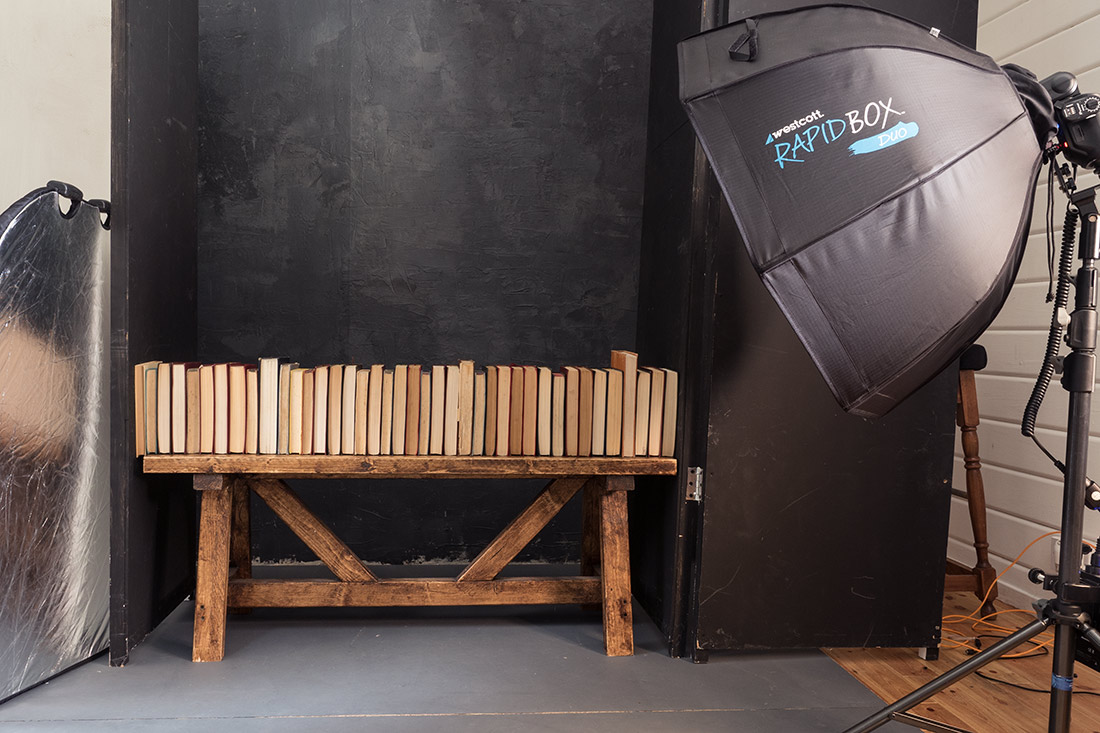
Recently I did a shoot which required a background made up of vintage books (video coming soon) and as luck would have it, I found 40 old books at a local boot sale for a bargain price. The books looked brilliant in the shoot but at the end of it I was left with a box full of slightly damaged Reader Digest books which I no longer needed.
So what do you do with 40 unloved books? Well the answer is obvious. I made them into a Friday Freebie to share on my blog. The more eagle eyed will notice there’s a few more books here than the 40 I started out with. You can thank the, magic of Photoshop for that.
This isn’t a template or a texture, it’s a stock image for you to use as you see fit (subject to the usage rules below).
As you can see from the behind the scenes shot above, I shot the books on a wooden bench in my studio. I then randomised the book order a couple of times and took some more shots. In Photoshop I did a quick cut and paste job to create the illusion of book case stacked high with books. You’ll also notice that you only see the pages of the book and not the spine. That’s a deliberate choice on my part for a couple of reasons but mostly because the pages are the bit with all the texture.
If you create a photo using the Friday Freebie then let me (and everyone else) know by leaving the link in the comments below.
Usage rules The image is copyright Gavin Hoey 2016. Use is limited to any personal but non-commercial purposes. Please share the Friday Freebie by linking back to this page. Do not redistribute the original image without my permission.
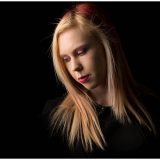
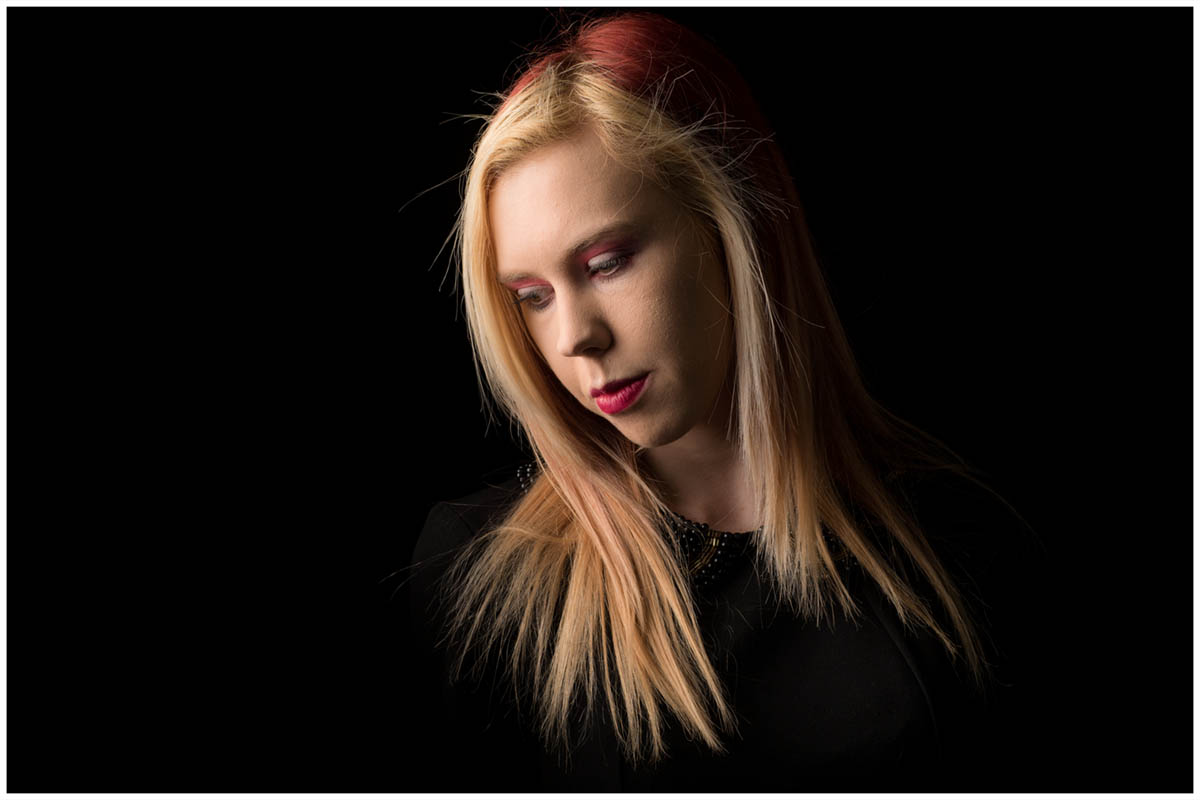
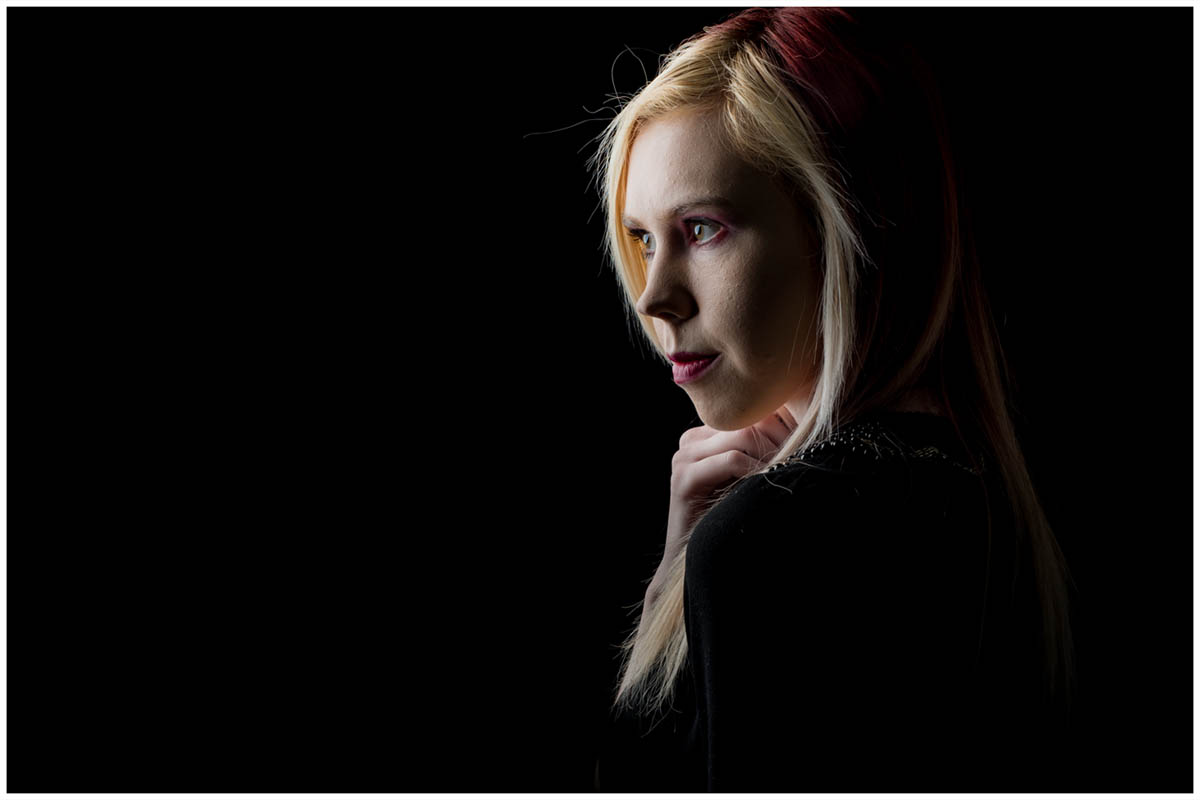
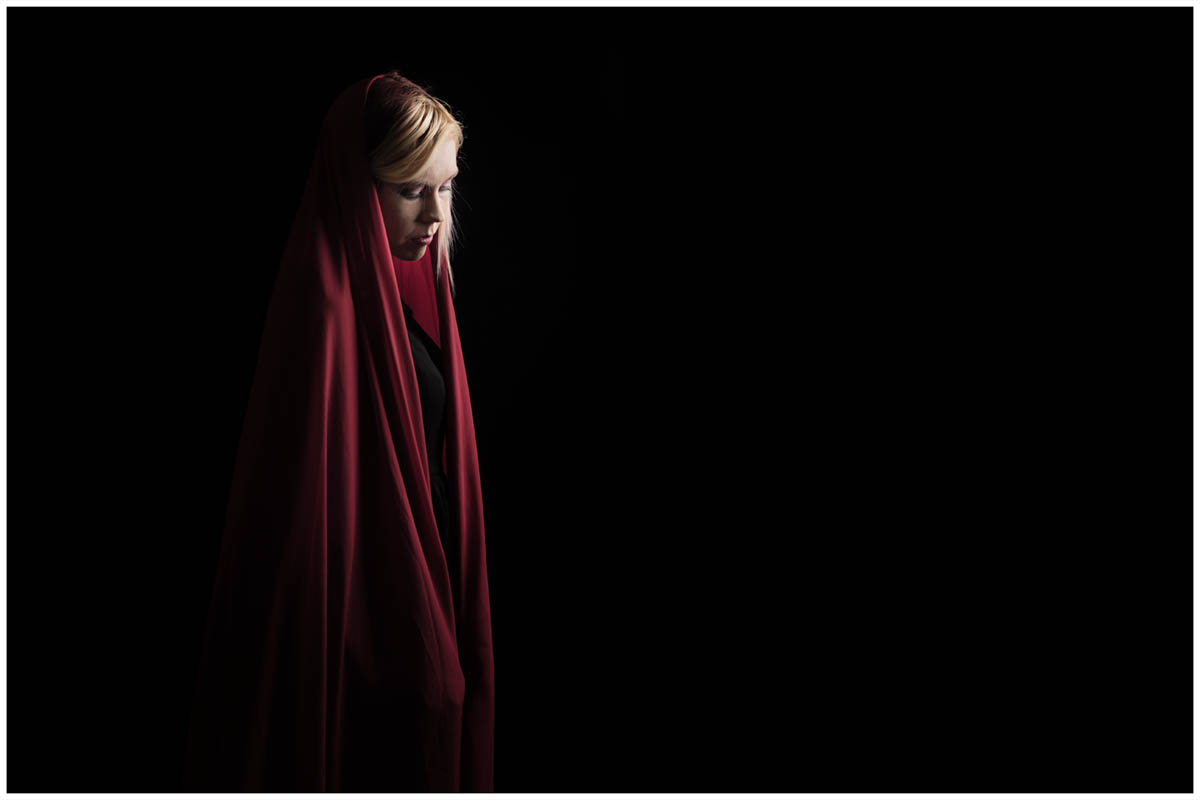
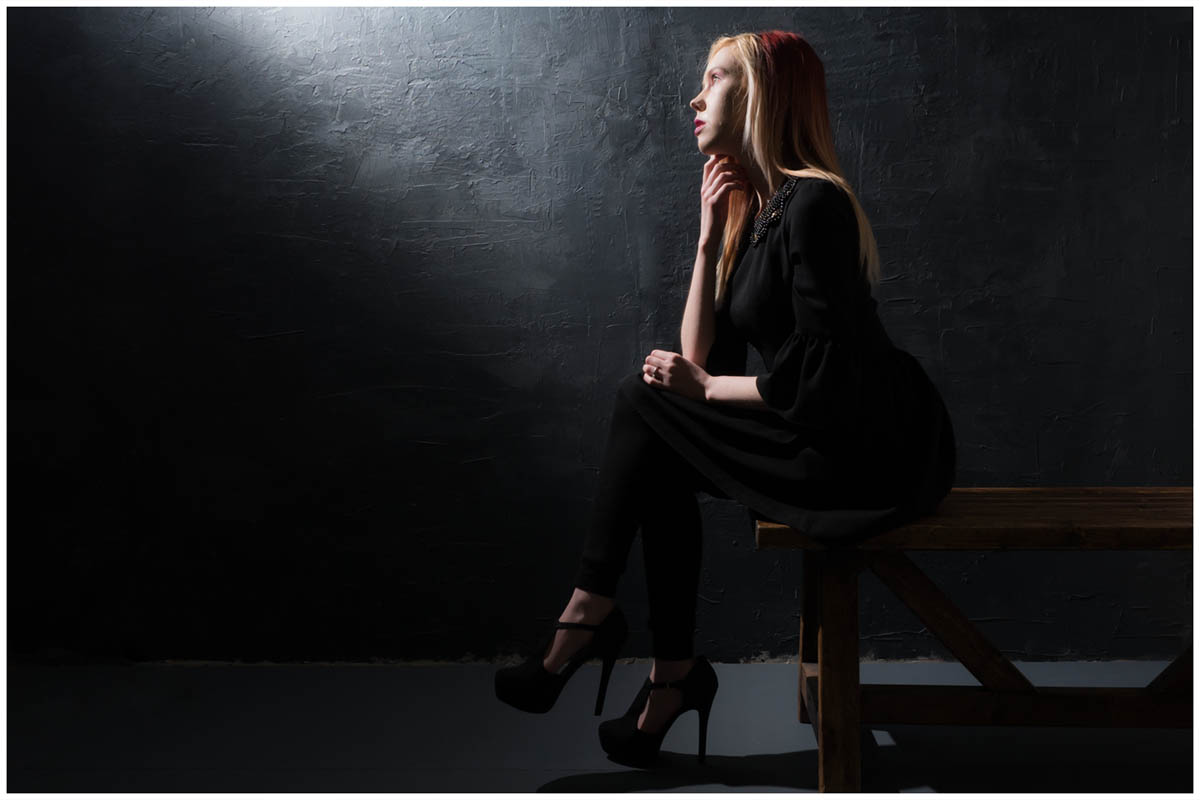
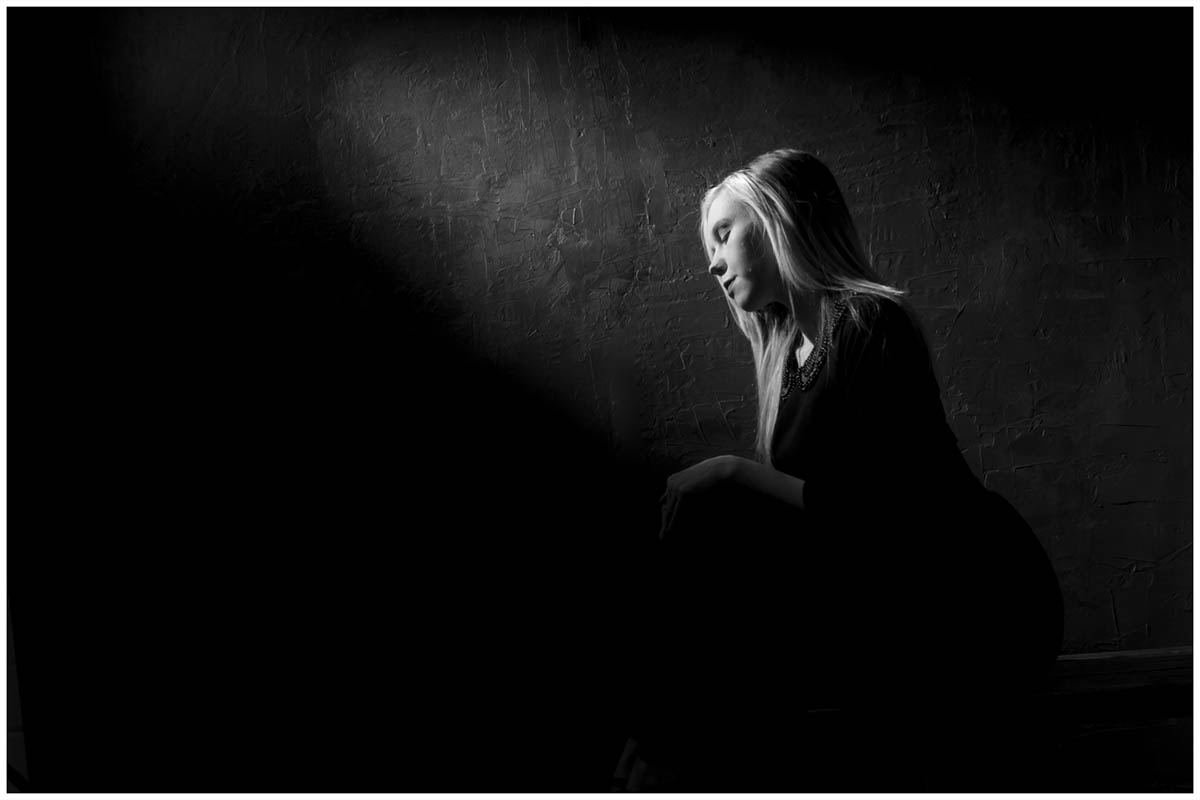
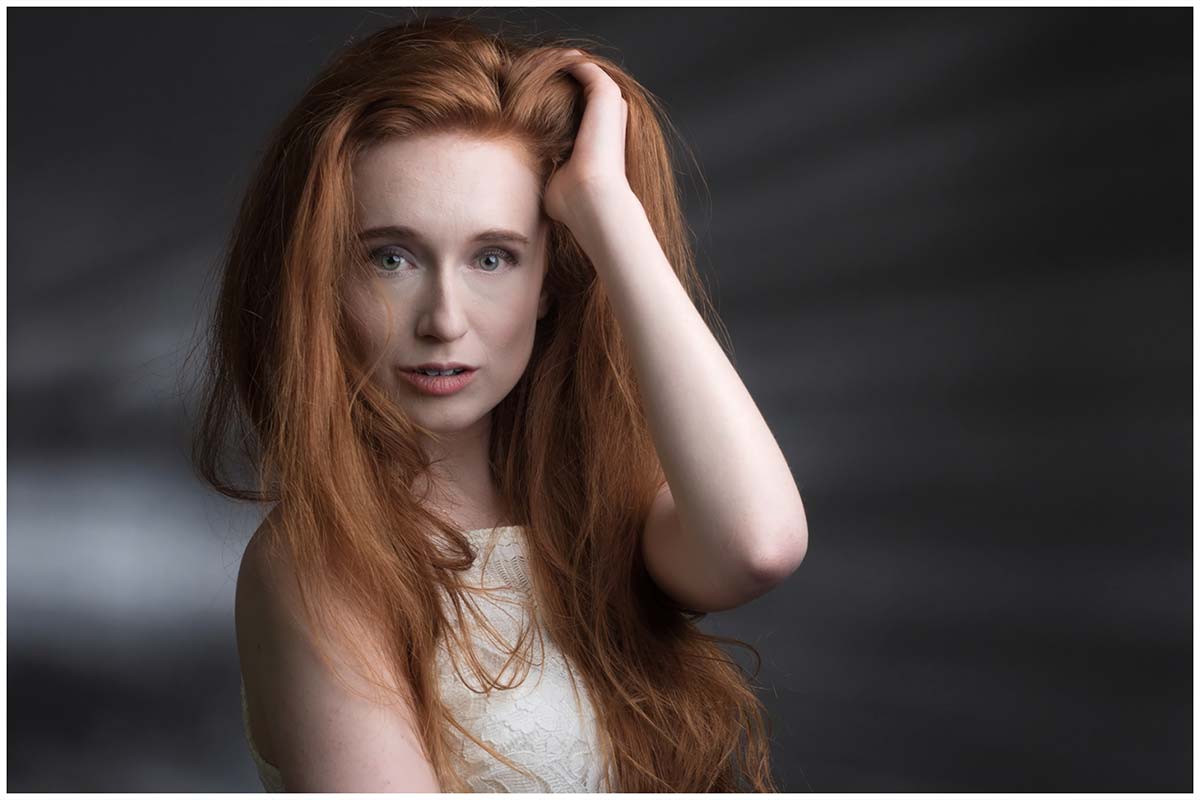
If you have a small or portable studio set up then low key portraits should be high on your list of “must have” lighting skills. Why? Apart from looking amazing, great low key lighting can be achieved with simple equipment against any dark background.
As the video above demonstrates, black backgrounds are the obvious choice for low key shots but grey backgrounds work too. So what makes a shot low key?
An underexposed image is not the same as a low key image. Whilst a true low key shot will have the majority of it’s tones on the dark side it will also have a few areas of highlights too. Contrast is key and that needs lighting but how you get there is all part of the creative process.
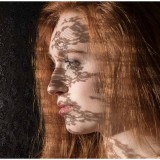
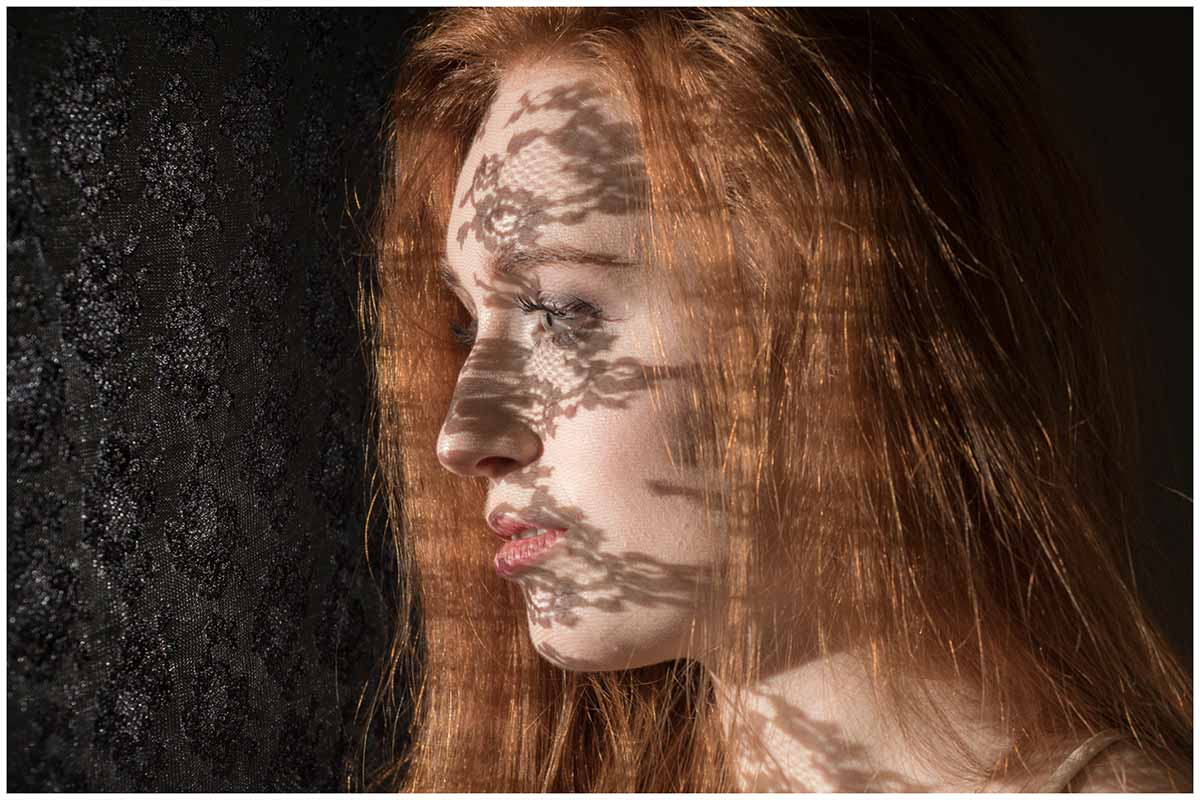
Placing an object in front of a light source will usually cast a shadow of some sort. In the studio, if the object is solid it’s known as a flag but if it’s full of gaps (or semi translucent) it’s called a GoBo and can be incredibly useful. The shadow cast by a GoBo is often used to add texture or shapes to an otherwise plain background but there’s more to GoBo’s then that.
GoBo’s can cast shadows directly on to your subject for dramatic effects or they can be used to give reflections of the light source a little more style. And you don’t need a fancy GoBo projector to do it. Fabric, glassware, twigs or even tinfoil with random holes in are just a few things you can find around the house.
One last thought. Many photographers will tell you that GoBo is short for Go Between because it’s something that goes between the light and the subject. Well, if that’s true why aren’t they called GoBe’s?