Free Chalk Texture

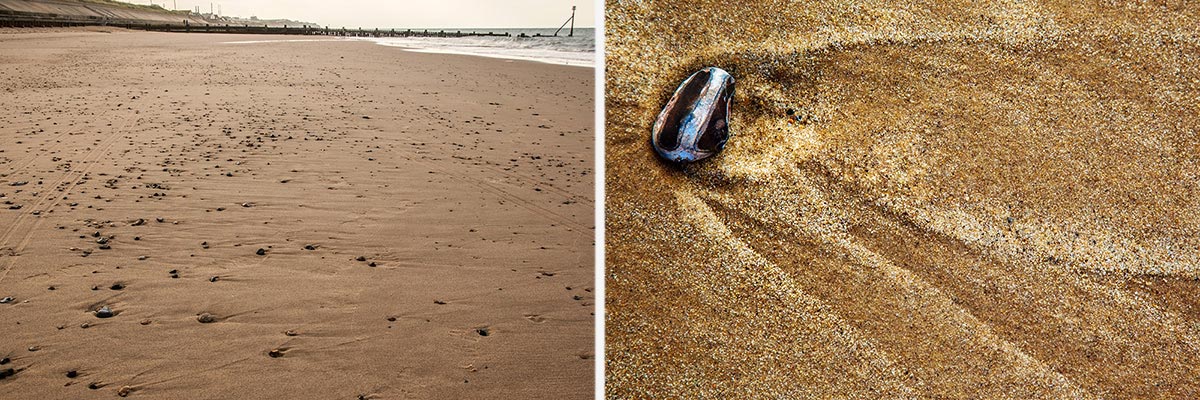
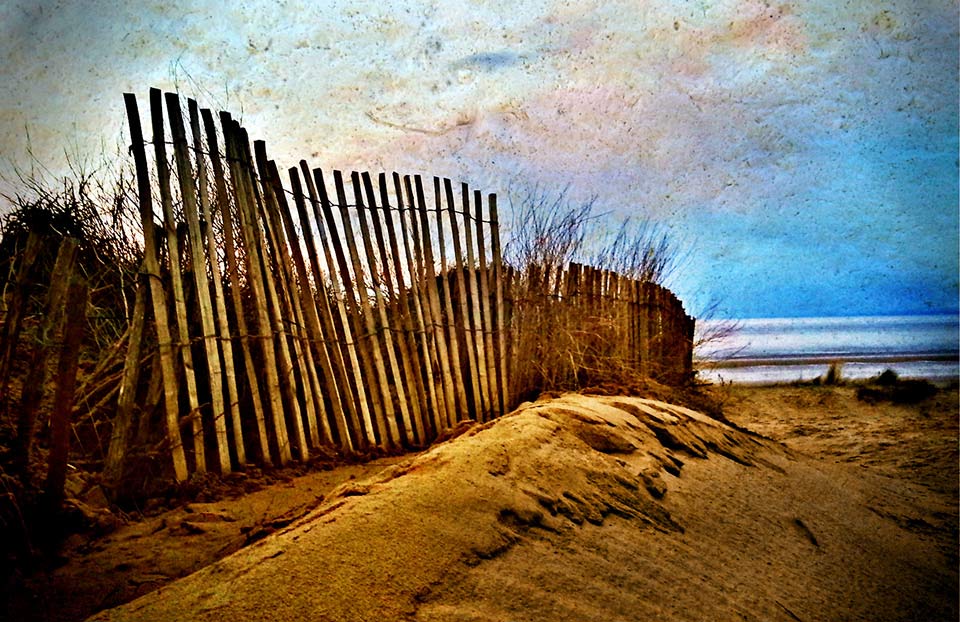
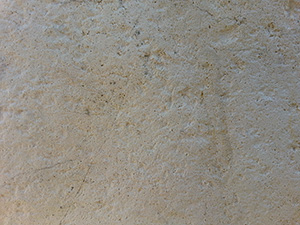
St-Marys-BayFor this Friday Freebie I’m going to share a brilliant texture that I photographed just a few days back. Despite it being a very recent image it’s already made it in to several of my images for one reason… It’s an image I shot with my phone!

The texture is a close up photo of chalk that I found on a beach just outside Brighton in Sussex and it makes wonderful texture shots.

Full download instructions are below but you can also
Click Here To Download the Free Chalk Texture

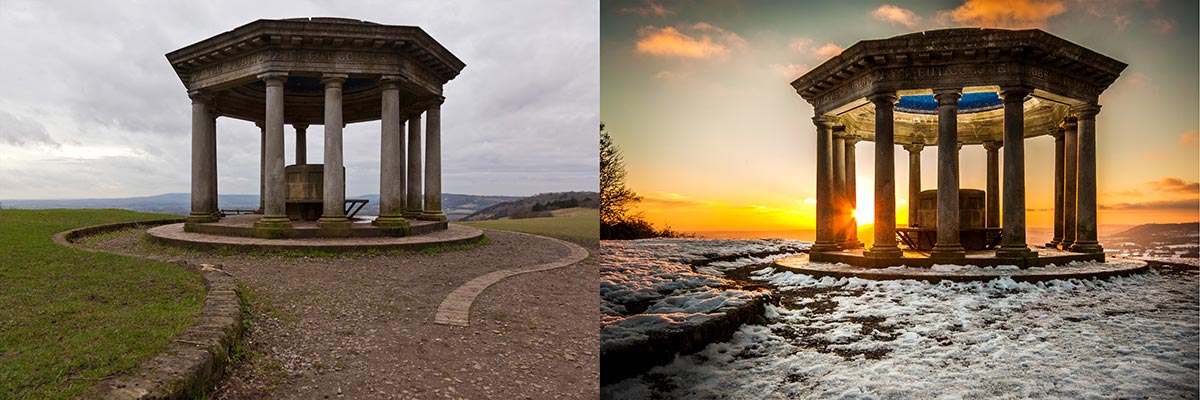
As with most textures, it works best with any photo that has large areas of light colour. I’ve found it particularly effective in landscape photos which feature plenty of sky. To apply the texture simply paste it over your photo and use Free Transform (CTRL+T) to resize it to your photo. Then change the layer blending mode to either Multiply or Overlay. Other blending modes will also work but those two are a good start. I’ve left the orgianal colour in the texture but you may wish to remove the colour or alter the colour to create a different look.
Chalk-Texture-LinkIf you create a photo using the Friday Freebie texture then let me (and everyone else) know by leaving the link in the comments below.

Usage rules
The image is copyright Gavin Hoey 2013. Use is limited to any personal, non-commercial purposes. Please share the Friday Freebie by linking back to this page. Do not redistribute the original image without my permission.

Download instructions
Click the link https://drive.google.com/file/d/0B_Mmmm3K1utNeGtRdlBDbm1jZ2s/view?usp=sharing

1. Click the Download button download_icon

2. The download should start automatically
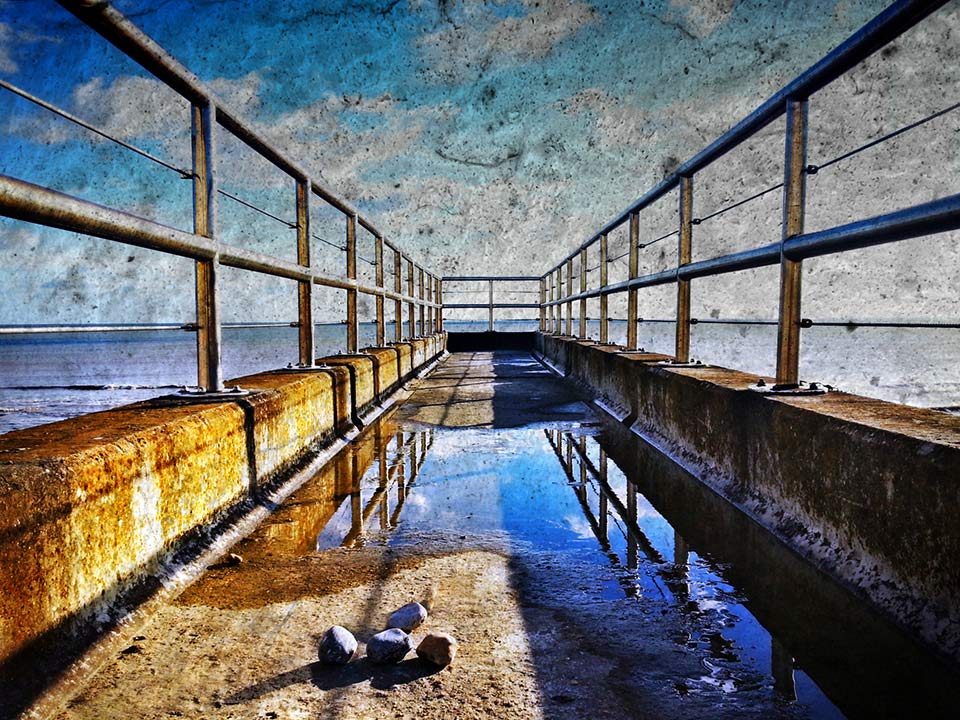
PS-Touch-12-3-13The photos in this post were made in Photoshop Touch for Phone and I’m seriously impressed by what it can do. I’ll do a more in depth write up soon but for now let’s just say that at £2.99, it’ the cheapsest and most portable version of Photoshop you can buy.

It’s unlikely to replace full photoshop for me but I’m really impressed by just how good an image you can make whilst sitting in the car, which is where both these photos were editied. Photoshop Touch for Phone is avaiable in both iPhone and Android version but you’ll need a really up to date handset such as the Samsung Galaxy Note 2 that I use.


Lovingly Made Photo Challenge

Lovingly-Made-1It’s been a while since undertaking my last 15 minute photo challenge so for all of you who have been asking when they’ll return I’ve got some happy news.

My latest 15 minute challenge is now out and with any luck it won’t be the last. This challenge was recorded at Lovingly Made which is a vintage home and garden store located just outside East Grinstead in Sussex. They were kind enough to invite me along to photograph anything that took my eye and there was no shortage of great photos to be had.

[youtube]http://youtu.be/lA_5cVYdv74[/youtube]
Can’t see the video? Click here

As you can see from the video much of my time was spent in the store finding the smaller scenes to photograph. Fortunately I’d packed my flash and the Westcott Pocket Box which I’m in the process of reviewing. This proved to be invaluable for controlling the light.

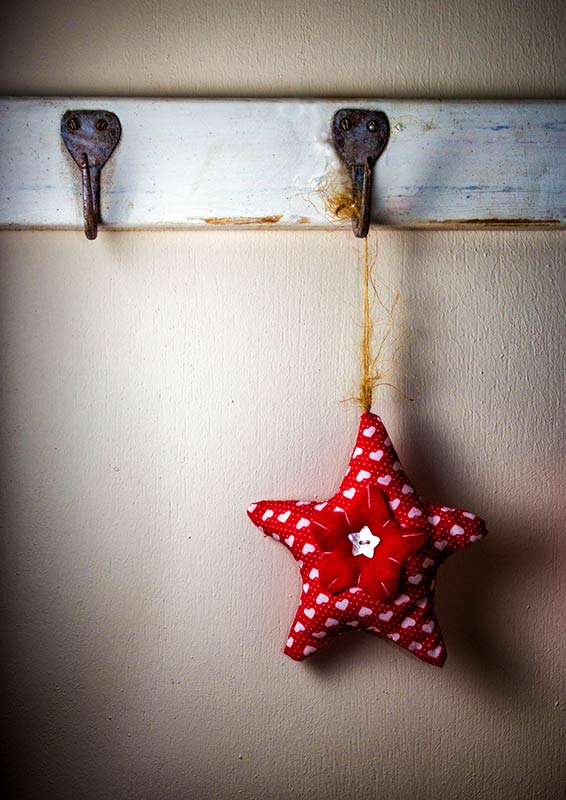
Lovingly-Made-3Products used in the video: 

Canon 60D

Canon 24-105mm L f/4 IS

Westcott Pocket Box kit

Canon Speedlite 600EX-RT

Adobe Photoshop CS6


How to sharpen in Photoshop

Smart-SharpenSharpening your photos is one of the least exciting things you can do in Photoshop but also one of the most important things too. It’s also right at the top of the frequently asked questions I get whilst teaching photo post processing.
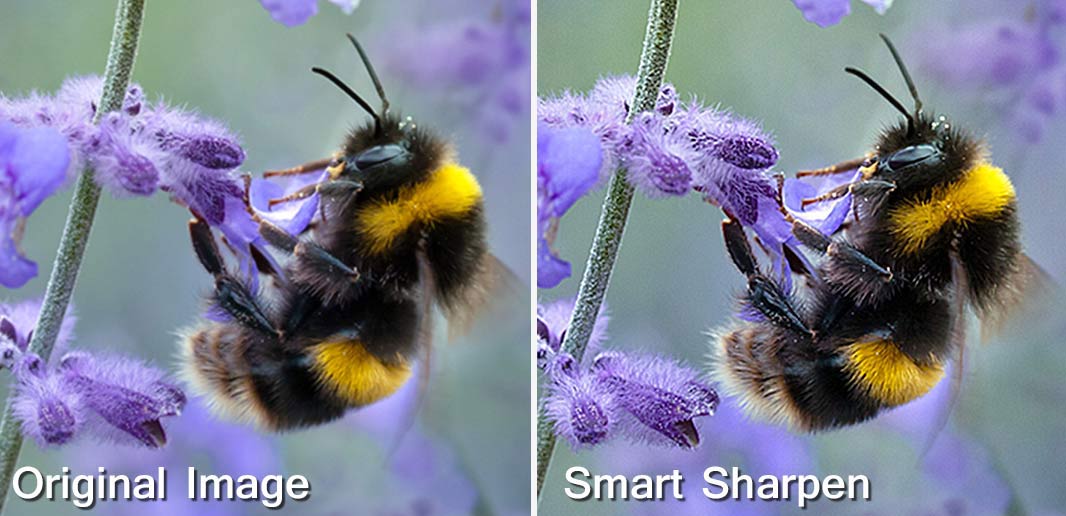
Let’s start by clearing up a few misconceptions. You don’t need to sharpen every photo and you don’t need to sharpen a whole photo the same amount. For example if you’ve taken a dreamy soft portrait you may want to sharpen just the eyes or you may want to sharpen nothing at all… It’s ultimately your choice.

When to sharpen
In this post I’m only looking at sharpening in Photoshop and I’m assuming you’re starting with a photo that’s basically in focus where it should be. Many people will make the fundamental mistake of sharpening just after they’ve applied their Photoshop effect, whatever that may be. WRONG!

For me sharpening is the very last thing you do moments before the image leaves your computer and goes to your printer, blog, Facebook page etc. In other words don’t sharpen your image and then resize it, always resize it first and then sharpen.

Smart-Sharpen-1

Unsharp Mask vs Smart Sharpen
For years I’ve used Unsharp Mask as my “go to” sharpen tool but no more. Photoshop has a raft of sharpening options but the Smart Sharpen filter has a couple of features that make it the best sharpening filter in Photoshop.

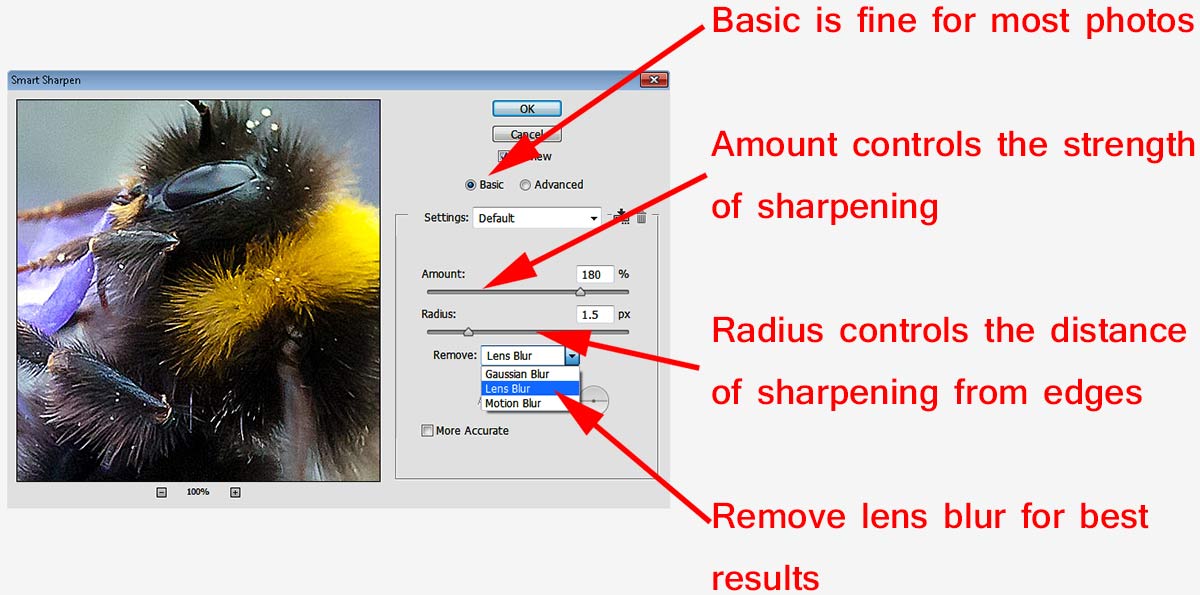
The Smart Sharpen Filter has three type options. “Gaussian Blur”” is in effect the same sharpening as Unsharp Mask. “Lens Blur” is my usual setting and “Motion Blur” try’s (and usually fails) to reduce blur from moving subjects.Smart-Sharpen-2

To get the best from Smart Sharpen set the amount to 500% and the radius to around 20 and you’ll notice a bunch of halos around edges in the photo. Slowly reduce the radius until the halos are all but gone. That’s the radius set for that image. Finally, reduce the amount slider to get the sharpen effect you desire.

Obviously there’s no magic number that works for all images so be prepared to experiment a little.

Local Sharpening
Smart-Sharpen-3Good as Smart Sharpening is you do have to remember that it’s a global effect which effects all the pixels in the image and whilst that’s usually exactly what you want there are times when it’s not. For example perhaps you have a shallow depth of field image, you don’t always want to sharpen the out of focus areas.

One way to do this is to make a duplicate layer of the image, sharpen the duplicate layer and use a layer mask to limit the sharpened layer to just the bits you wanted to sharpen.

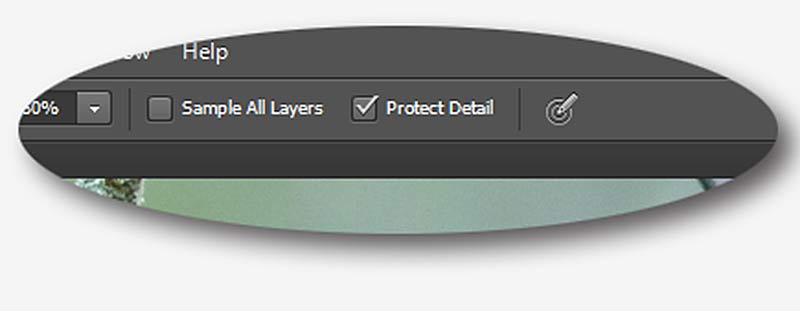
However for users of Photoshop CS5 and CS6 the best way to do this is with the Sharpen Brush which had a radical overhaul in CS5 onwards and is the best sharpening tool in any part of Photoshop as long as “Protect Detail” is turned on in the tool option bar. It’s as simple to use as any brush in Photoshop, all you do is paint where you want to sharpen and the more you paint the sharper thing become. Gone to far? CTRL+Z will undo the last click and CTRL+ALT+Z will keep going back one histrory step at at time.

So remember…

  • Only sharpen AFTER you resize your photo
  • Use Smart Sharpen for Global Sharpening
  • Paint with The Sharpen Brush for local sharpening

Painted Frame Template

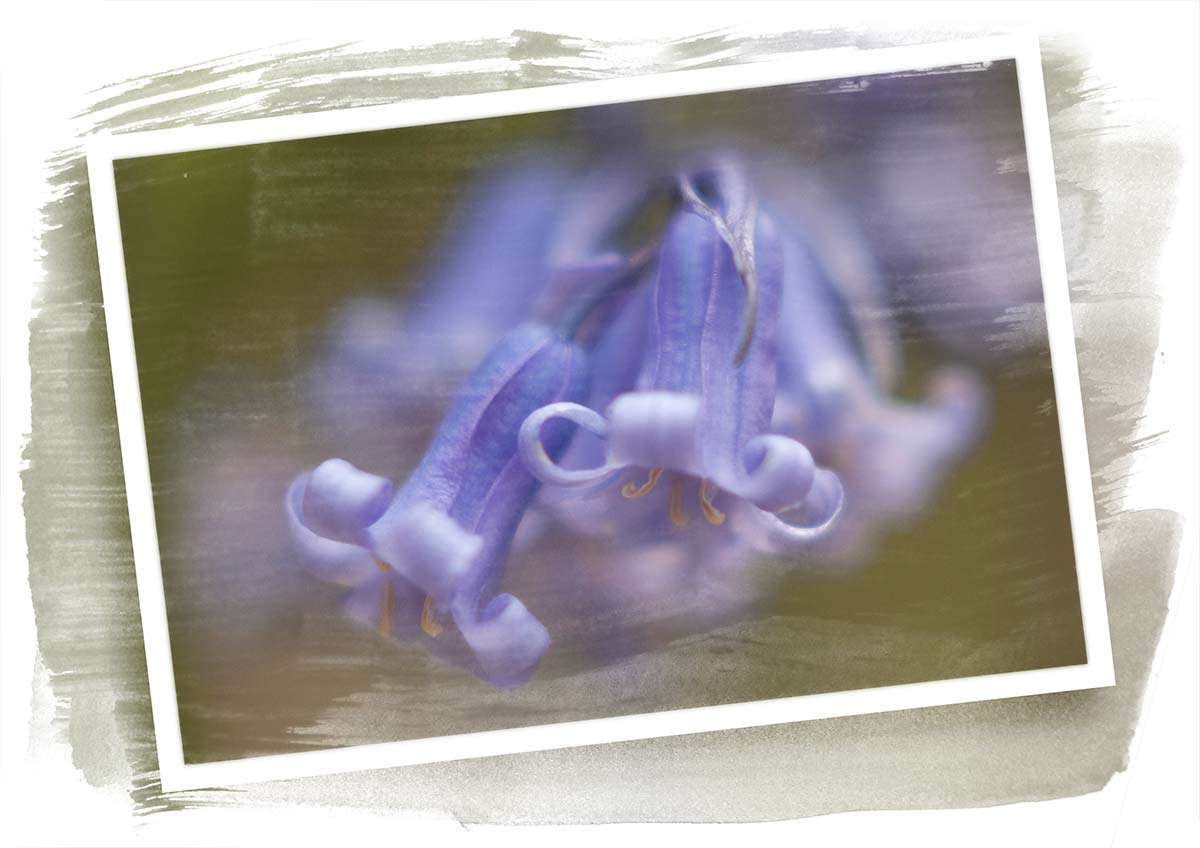
Painted-Frame-FinalHere’s a great Friday freebie for anyone who loves creating painterly effects.

The template is a simple JPG file which you can adjust to your own needs. For example you may wish to adjust the brightness using Levels or add a splash of colour with the Colorize option in Hue/Saturation. All you need to do is add your own photo over the whole image or just the framed area, then change the layer blending mode from Normal to Screen. Although the Screen blending mode will usually give you the best results, experimenting with other blending modes can yield some unexpected results which may be even better.

If you’ve had success with the template and you’d like to share your image with others, please pop a link in the comments section.

Download the Painted Frame Template

Usage rules
The image is copyright Gavin Hoey 2013. Use is limited to any personal, non-commercial purposes. Please share the Friday Freebie by linking back to this page. Do not redistribute the original image without my permission.

Download instructions
Click the link https://drive.google.com/file/d/0B_Mmmm3K1utNVnd4a2twTmNacW8/view?usp=sharing

1. Click the Download button download_icon

2. The download should start automatically

Grungy triptych template

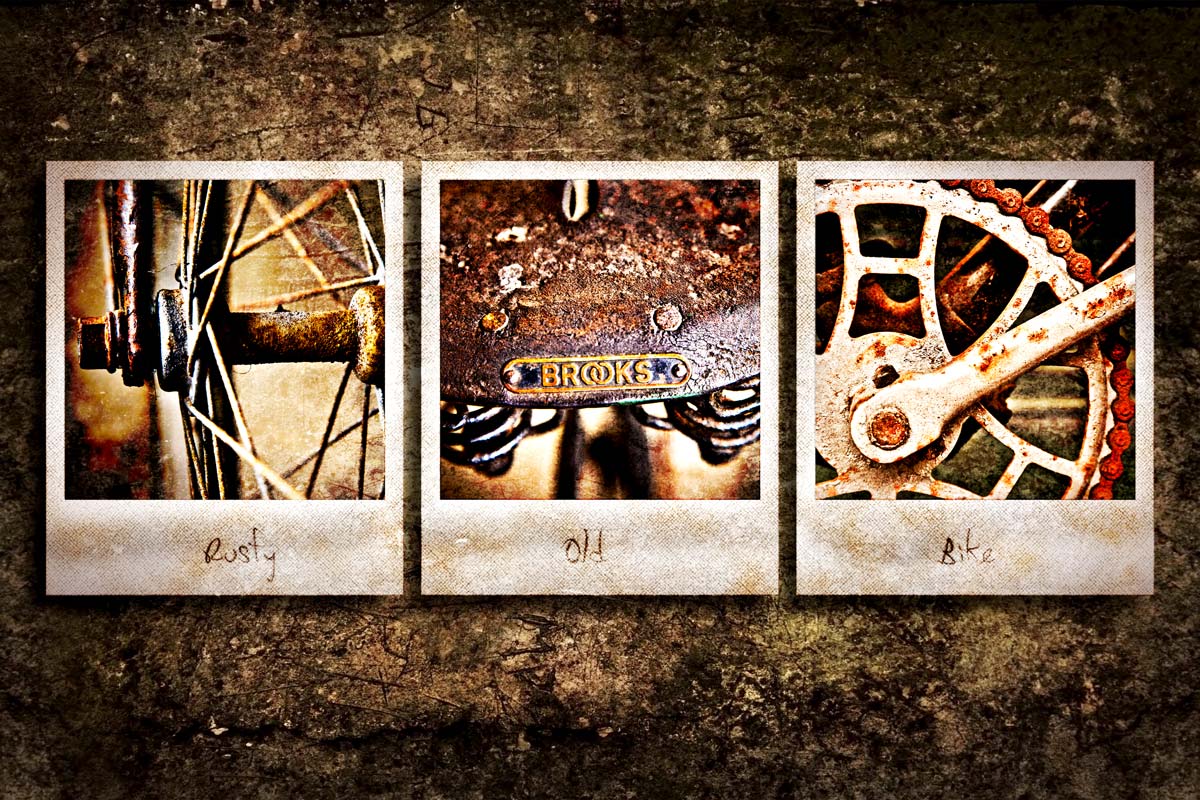
Rusty-Old-Bike-FFAs you take more photos, you’ll need to find more ways to display them. So todays Friday Freebie is a triptych template that uses up three of your photos in one go,

As you can see from the example here, the template has three spaces into which you’ll need to add your own images. An alternative would be to use one image but break it into three pieces. Download instructions are below and once again I’m sharing the JPG file through my Adobe Creative Cloud page. No sign up is required to get a copy of the template so you’re free to jump in and make your own triptych images.

Download the Grungy triptych template by clicking here

Download instructions
Click the link https://drive.google.com/file/d/0B_Mmmm3K1utNNzZPMHNQX0VVUG8/view?usp=sharing

1. Click the Download button download_icon

2. The download should start automatically

How to use the template
To add your own photo, first select and copy the photo you want to add. Then jump over to the template, Click inside one of the black squares with the magic wand tool and choose Edit – Paste Into (Edit – Paste Special – Paste Into in Photoshop CS5 & CS6)

You can then resize the photo before pressing enter to committing to the change.

Usage rules
Usual rules apply. The action is copyright Gavin Hoey 2013. You may use it for personal, non-commercial purposes only and please do not redistribute without permission. Thank you and enjoy Smile


2 Self-Portraits with 1 light

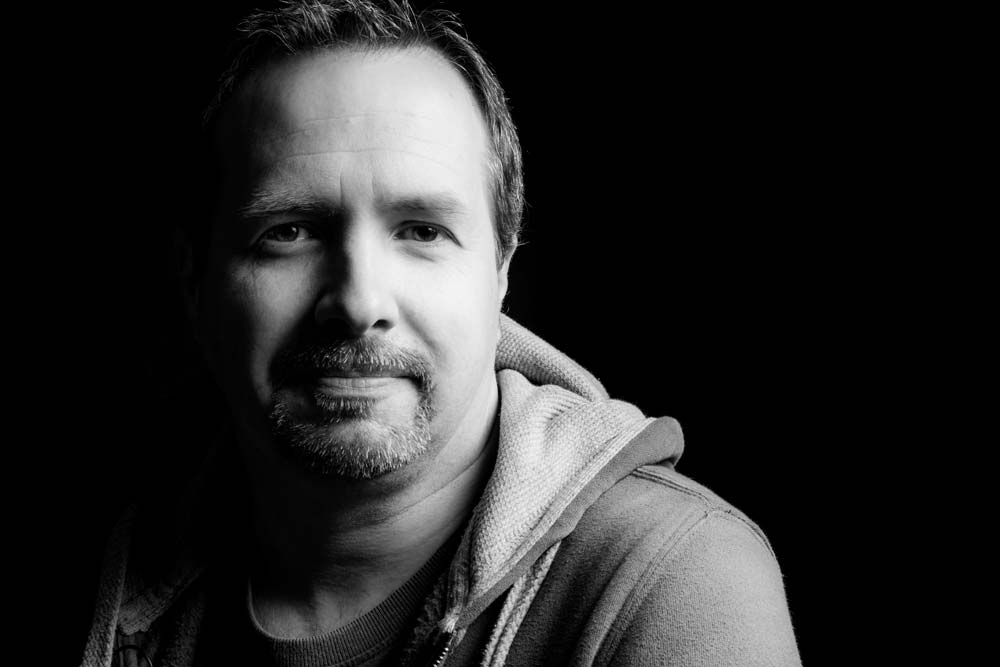
Self-portrait-1When I first started to learn about lighting I focused all attention on the complexities of flashes first and foremost. Of course whilst lighting is the cornerstone of great portraits, so is an ability to get the best from your model and trust me on this, that can be a lot harder to master.

One way to practice portraiture is shooting a self-portrait project. It’s a great way to practice and perfect various lighting arrangements without the need of a model, subject or assistant. 

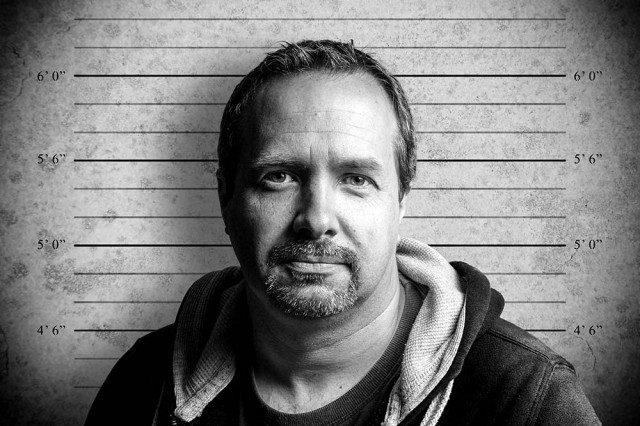
In this video I’ll show you how to shoot two very different self portraits but remarkably, the lighting will be identical for both. The only thing that will change is the background. 

Why change the background, you may ask. Well, the first shot has a black, low key background and the second set of photos has a grey background, which is much simpler to remove and replace with a new background in Photoshop, as you’ll see in the video.
[youtube]http://youtu.be/C2b61bZ-J44[/youtube]
If you can’t see the video Click Here

Self-portrait-2

Gear used in this video 

Interfit Collapsible Double Sided Background, Black / White

 Canon 60D

Canon 24-105mm L f/4 IS

Vanguard Alta Pro 263AT Tripod

Vanguard GH-100 Grip Head

Adobe Photoshop CS6

Canon 580 EX II Flash

Flash bracket

Interfit air cushioned light stand

Silver reflective umbrella

(All links go to Adorama, who sponsor all my videos)

5 Things Top photographers do & the rest of us don’t

At some time or another we’ve all looked at the work of top photographers and wondered… What makes their photos better then mine? Is it because they use the best camera gear, work with the best models or get access to locations that mere mortals like us can only dream of? Well perhaps but here are five things top photographers do that may be you and I don’t.

1 Fill the frame
From landscape photographers to portrait photographers there’s one thing that all top photographers know and that’s to fill the frame with your subject. Now I’m not talking about simply zooming or cropping in closer, although that can be one solution. I’m talking realising what’s important to your photo as you’re looking through the viewfinder and pressing the shutter when the composition is exactly what you want
Top Tip: If it’s not part of the story, don’t have it in your photo.
5-Pro-1

2 Revisit a location/subject
Like all photographers I look at the work of my peers and wish I could shoot an image even half as good. From time to time I’ve even gone to the same location to try and recreate the photo. Sadly it’s never quite the same.

So how do top photographers get great photos? They return to the shot again and again and again until they get it right. Each time they learn a little more about where to shoot, when to photograph and what makes a good image. You may have to visit the same location a dozen times before you get the perfect light, or shoot at the same sporting venue many times to discover the best vantage points.
Top Tip: If at first you don’t succeed… go back and do it again5-Pro-2

3 Specialise on a subject
Many photographers flit from one type of photography to another. One day they’re trying to master landscape photography the next they’re trying their hand at shooting weddings. There’s absolutely nothing wrong with mixing it up but try to specialise in one area more then any other.

The fact is top photographers tend to become well known for not for shooting one area of photography but for being the best at a small niche of one area in photography. For example great fashion photographers don’t make great wedding photographers. Motor sports photographers may be rubbish at shooting football.
Top Tip: You only need to be the best in one area of photography 5-Pro-3

4 Learn from failure
All photographers have bad days and most of us have bad weeks too. Sometimes nothing goes your way. Maybe the weather doesn’t play ball or you accidentally shoot with the wrong exposure or perhaps you just run out of ideas.

When that happens, it’s natural to feel down hearted, frustrated and ready to throw in the towel. Top photographers will quickly get over the initial disappointment and the best photographers will embrace failure as all part of learning.

Going further, top photographer will expect to mess up and they’ll plan accordingly. Things like taking more then one photo, moving the view point, bracketing exposure and experimenting with lens choice are all part of the secret of success.
Top Tip: You’re the only one who will ever see your bad shots. 

5-Pro4

5 Think about post processing whilst taking photos
Let’s be honest, every photographer aims to get the photo right in the camera most of the time. We all know that Photoshop can do amazing things to help to fix photos and enhance photos but top photographers are thinking about post processing whilst holding the camera.

Let’s be clear, they’ll not think “I’ll fix that in Photoshop” they’re thinking this might work best with a square crop or this scene would look better in black and white.

Being aware of what can be done in post processing and you’re skills at doing it, should be in your mind whenever the camera is in your hand.
Top Tip: Clicking the shutter is the start of the photo and rarely the end.5-Pro-5

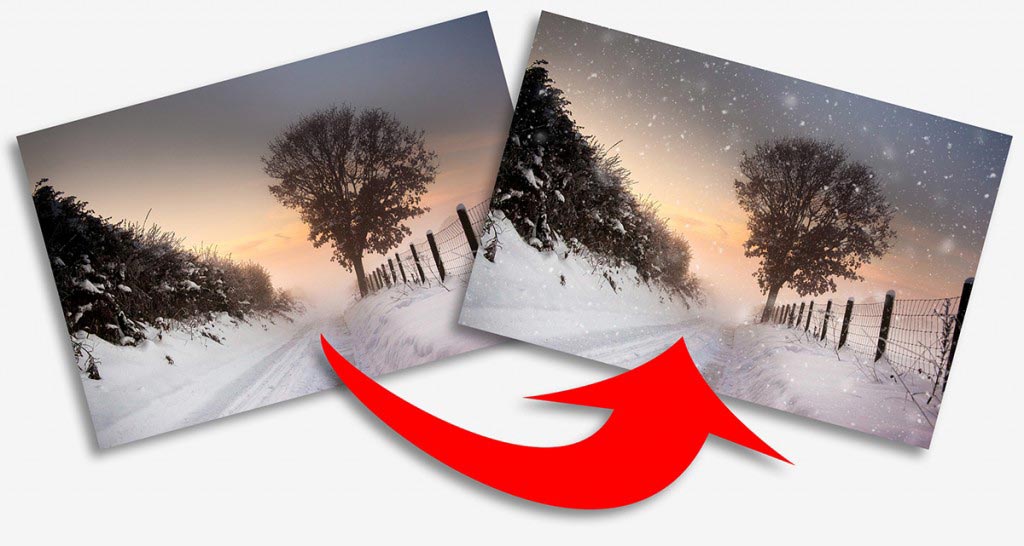
Instant Snow Action

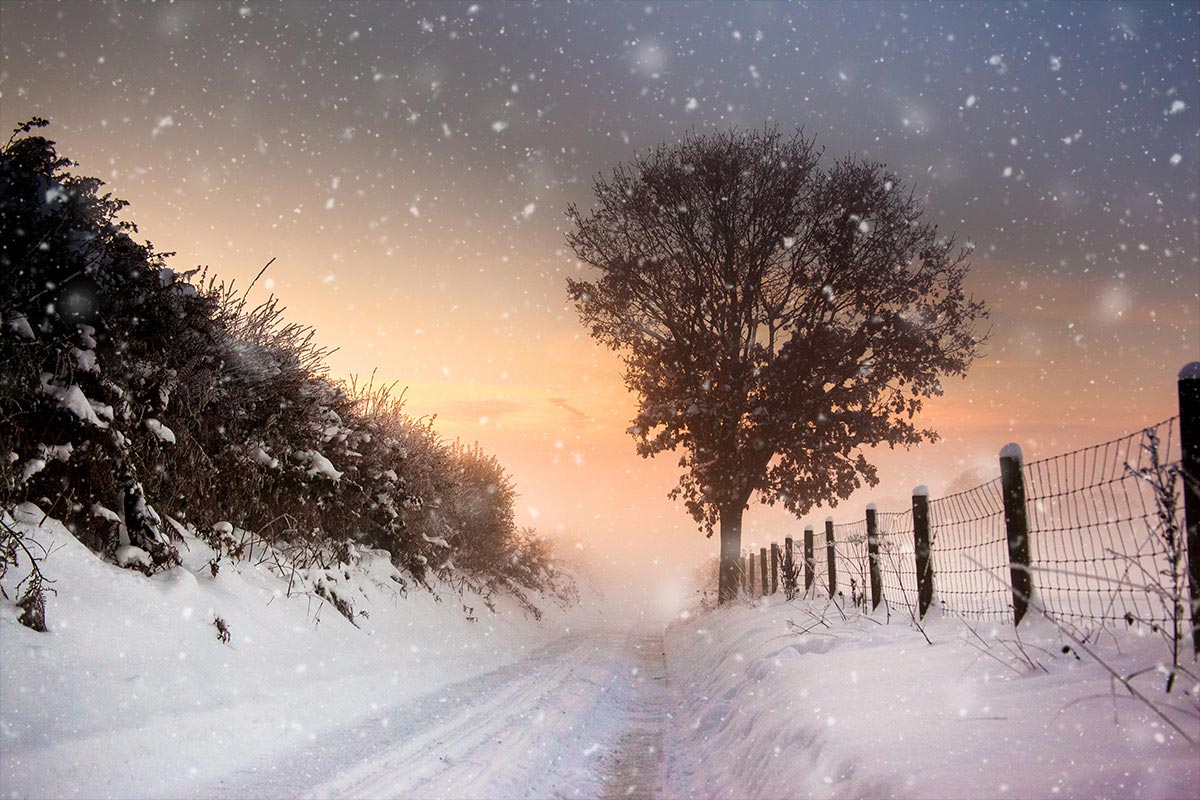
Here in the UK snow is something we get once or twice a year, which makes it a fairly rare event round these parts. So whenever snow arrives, everyone rushes out to build snowmen, go sledging and record the event with their cameras.

Instant Snow-1Now I realise some of you get snow all the time and some of you never see snow from one year to the next, but don’t let that stop you enjoying this weeks Friday Freebie.

You can download the action here: instant-snow

This is a one click action, so once you’ve unzipped it and installed it, you only need to hit the play button. The first thing the action will do is to make a copy of your photo and it’s the copy that gets the effect, leaving your original photo untouched.

The action will make three layers of snow and I’ve left all three layers active at the end of the action. That means you’re free to alter, adjust and tweak the snow in numerous different ways. Another nice feature of the action is the random nature of the snow. Put simply if you don’t like the snow the first time you run the action, just close the image down and run the action again and the snow will be different.

Usual rules apply:
The action is copyright Gavin Hoey 2013. You may use it for personal, non-commercial purposes only and please do not redistribute without permission. There is no support offered with this action and you use it at your own risk. Thank you and enjoy.

Instant Snow-2


Friday Freebie No.2

grunge-border-2I know a lot of you enjoyed using the Friday freebie grungy frame I uploaded a few weeks back, so I’m going to give away another one.

This time the grungy border has a more industrial feel with peeling paint and screw heads. The centre of the image has a smoother painted look which makes it perfect for for blending with other photos.

If you like your photos to have grungy feel you’ll love this grunge photo frame. This is a very high resolution file of 4666px by 3500px in size, which makes it perfect for print use or down sampling for use with your web based images.

IMG_8713

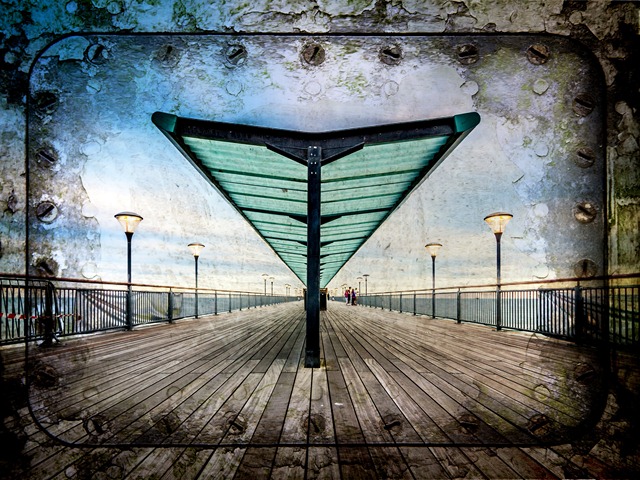
In the photo above I added a colour image as a new layer above the grunge border. Combining the two images is as simple as changing the layer blending mode to Multiply. You might need to use the dodge and burn tools and a levels adjustment layer at the top of the layer stack might be a good idea.

I’d also suggest using images which have lots of sky, large areas of simple colour/tone or lots of nice blurred parts in the photo. Basically a photo with lots of fine detail tends not to blend so well with a textured template like this.

If you create a photo using the Friday Freebie then let me (and everyone else) know by leaving the link in the comments below.

Usage rules
The image is copyright Gavin Hoey 2013. Use is limited to any personal, non-commercial purposes. Please share the Friday Freebie by linking back to this page. Do not redistribute the original image without my permission.

Download instructions
Click the link https://drive.google.com/file/d/0B_Mmmm3K1utNZEx4MEdDNEJldkU/view?usp=sharing

1. Click the Download button download_icon

2. The download should start automatically