Using two lights – Home Studio Essentials – Part 5

There are many ways you can use a single flash to take great portraits but sooner or later the limitations of a single flash will be reached. Adding a second flash can be a great way to open up new and creative photo opportunities.

In this video I fire up a second light to act as a hair light and separate the model from a dark background. Then in the final shoot I add a few bubbles to create something a bit special.

[youtube]https://www.youtube.com/watch?v=FcQg0cBncHs&list=UU8Pksdbj37CdE00kmE7Z1dw[/youtube]

More lights means more complexity but my advice is to treat each light separately and meter accordingly. Turning them both on and trying to balance them at the same time sounds easier but trust me it’s not!

Bubbles-Studio

Gear used in this video (Links back to Adorama)

Flashpoint StreakLight 360 Ws Creative Collection (Includes flash, battery, trigger, boom etc)

Flashpoint Streaklight 180 WS

Westcott Apollo Orb Softbox

Canon 5D Mark 2 

Canon 24-105L 

5 in 1 Reflector – Home Studio Essentials – Episode 4

HSE-EP4-FinalThere’s 1000’s of photographic gadgets, gizmos and accessories that you can spend your hard earned money on and whilst many are utterly useless, there are a few that are indispensable. Towards the top of my list of “must have” accessories is the 5 in 1 reflector.

A five in one reflector is so called because it has five surfaces. There’s the white and silver surfaces for bouncing light, a gold side for adding adding warm light (and usually best avoided), a black surface to block light and a translucent surface to diffuse light. Best of all it’s one of the least expensive bits of kit you can buy.

In this video I use the silver surface to bounce light and fill in troublesome shadows. In this case the shadows are caused by a wide brimmed hat. One way would be to add a second light but if that’s not available a reflector can fill in very nicely… and yes, that pun was intended!

[youtube]https://www.youtube.com/watch?v=TYQh9MNC3Is&list=PL821B7D720DEA39FA[/youtube]

Gear used in this video (Links back to Adorama)

Flashpoint StreakLight 360 Ws Creative Collection (Includes flash, battery, trigger, boom etc)

Westcott Apollo Orb Softbox

Westcott Basics 5 in 1 reflector

Canon 5D Mark 2 

Canon 24-105L 

If like me you like to keep a visual record of you’re lighting set ups then this image should come in very handy.

Reflector-Lighting-Diagram

The Softbox – Home Studio Essentials – Episode 3

There’s a reason why the softbox is my “go to” light modifier in my small home studio and it’s all to do with one of the biggest challenges photographers face when shooting in small spaces. With lots of wall close to the light source small studios can become one big reflector with light bouncing all over the place. Whilst that can be great for evenly lit shots it’s a disaster if you want moody lighting or even just basic control of the light direction. Softboxes like the Westcott Apollo Orb I’m using for this shoot, focus the light forward and cut out light spilling behind and to the sides. The upshot is beautiful soft light that has direction even in a small studio.

In this video I use 1 meter wide round softbox to give just the right amount of light on the model to achieve the effect I want. Of course in the real world of studio portraits getting the light right never happens first time so run through a couple of different light positions to see what works as well as cover the Photoshop processing to enhance the vintage feel.

[youtube]http://www.youtube.com/watch?v=z0MTQFYnvQA&list=UU8Pksdbj37CdE00kmE7Z1dw[/youtube]

For this series of videos I want you to do more then just watch it, I’m hoping you’ll get your camera and take a photo based on the ideas you see in the video. That might be the lighting set up, the models pose or the Photoshop post processing. If you do (and you’re on Facebook) then please add them to Adorama’s Facebook page. I’ll be checking it regularly and giving constructive feedback on as many as possible

Softbox-demo-retro

Gear used in this video (Links back to Adorama)

Flashpoint StreakLight 360 Ws Creative Collection (Includes flash, battery, trigger, boom etc)

Westcott Apollo Orb Softbox

Canon 5D Mark 2 

Canon 24-105L 

If like me you like to keep a visual record of you’re lighting set ups then this image should come in very handy.

Softbox-lighting-diagram-onelight

Building a DIY studio background

For a long time I’ve fancied the idea of adding a grungy textured background to my studio but due to the limited space available I’ve stuck to using a white vinyl and black fabric backdrops. Now these have worked really well for me over the years but there comes a time when you want to break free and recently I got a great excuse to do just that.

I’m currently in the middle of filming a mini-series of videos for Adorama TV all about shooting portraits in a small studio, something I know a lot about. You’ve probably seen my log cabin studio in various videos before so in order for this series to look and feel different I bit the bullet and built my dream textured backgroundKings-of-Sussex-5

The Plan
I’m a reluctant DIY guy, so if you’re looking for plans, specifications and a fool proof guide to building a background this ISN’T it. After clearing out my old background and removing anything breakable from the area I went online and ordered a bunch of stud work timber, two 2400mmx1200mmx12mm sheets of MDF and three 2400mmx800mmx18mm T&G chipboard sheets for the floor. I ordered them from a well known DIY store chain, paid a whopping £25 for next day delivery and got them four days later… but that’s another story.

DIY-Background-2

The Build
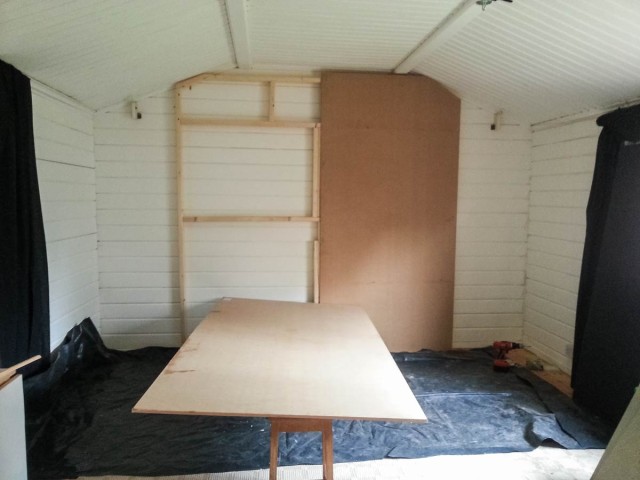
The idea was to make the background 8 feet (2.4 meters) square but my studio roof height made that impossible, so the frame work “evolved” to fit my needs. One thing I know all too well is log cabins move, even heavy duty ones like mine. So my background is almost free floating rather than permanently attached to the wall.

The MDF panels needed the corners cut too (wearing a mask to avoid inhaling the dust) and screwed to the frame.  I then primed the MDF with a coat of PVA glue and water mixed together and left it to dry overnight.

The Texture
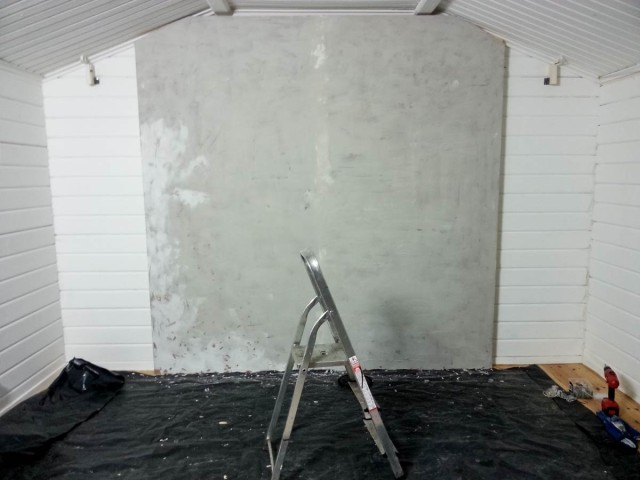
The texture I was going for was a grainy concrete feel. Choosing what material to use was tough. I had no idea of what might work best but I knew it would need to stick to vertical surfaces and be flexible enough to withstand a few knocks without cracking too much or bits falling off.

I settled on a flexible tile adhesive from Dunlop. It did everything I needed and best of all it was pretty cheap.  All I had to do was slap it on the MDF and try not to get it too smooth or too rough, not as easy as you might think. Too smooth and the effect would be lost, too rough and it could do some damage to a model or their clothes.

DIY-Background-3

Finishing Touches
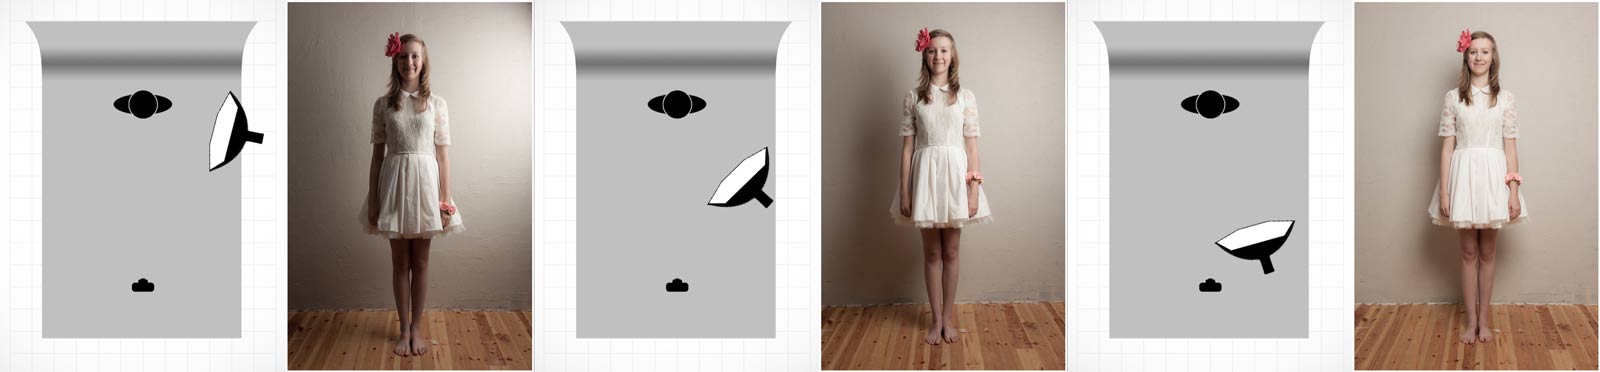
Once dry the last job was to give it a coat or two of Matt Grey paint which was randomly added to with a lighter colour for a mottled effect. The mid grey colour is perfect in a small studio as I can add or restrict light to make it appear black or white. I can even add gels to my lights for a splash of funky colour if required.

All in the cost was around £100 for materials and about three days’ work.
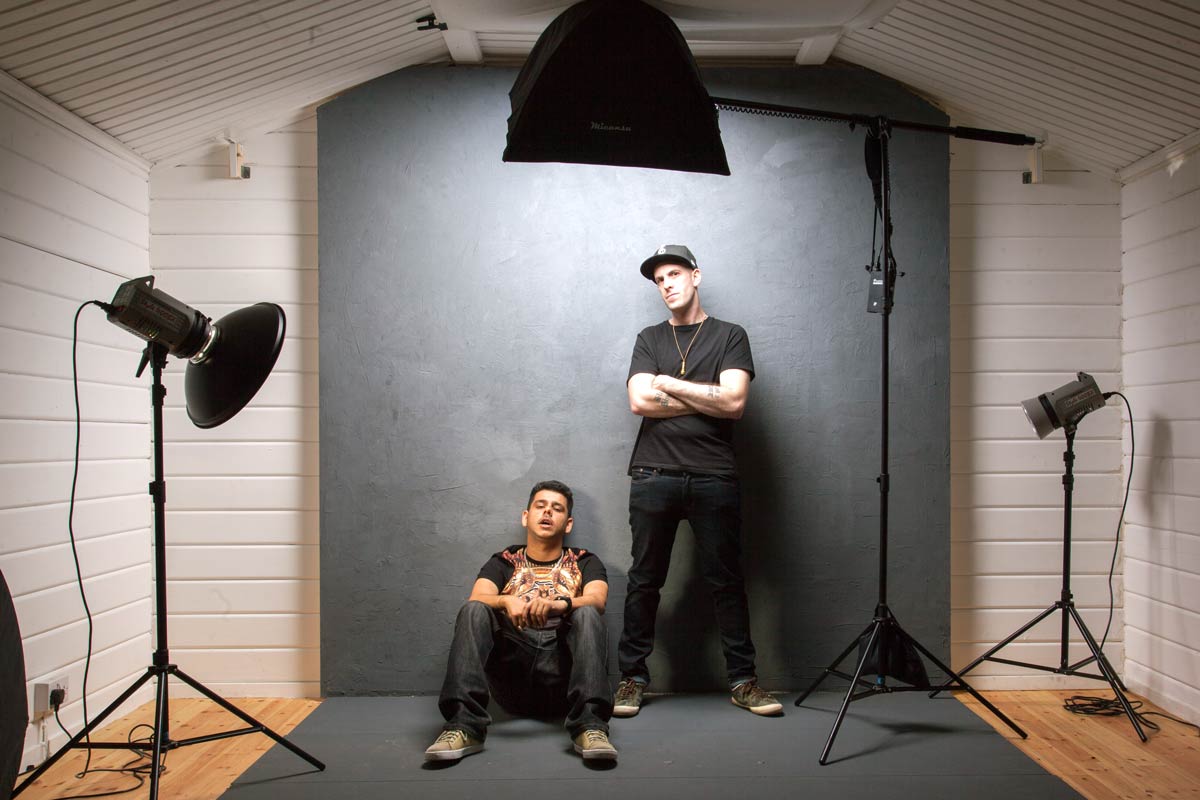
In Use
The end results is perfect for my needs. With hindsight I’m not sure MDF was a great choice of wood but it’s working for me.

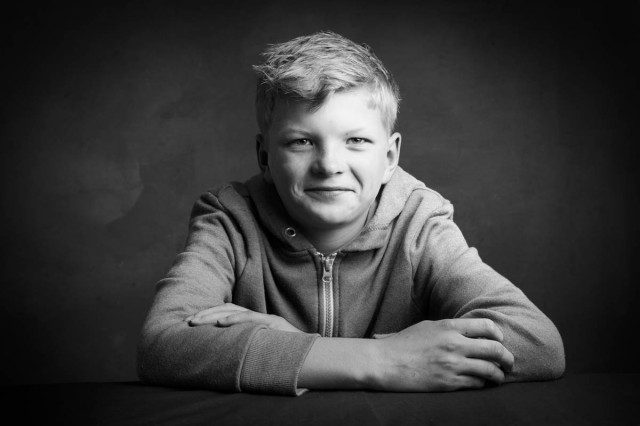
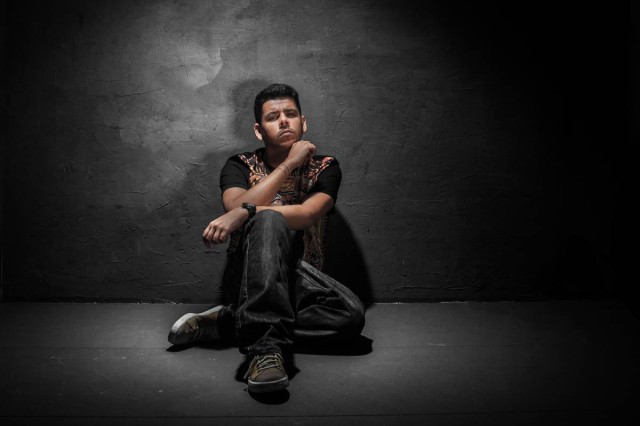
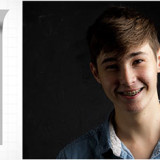
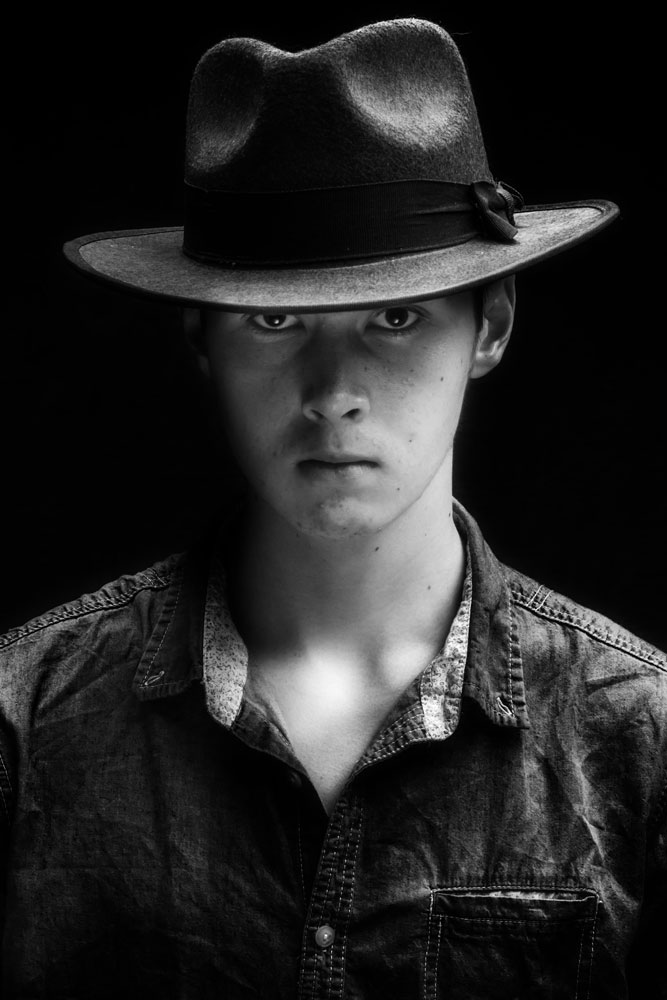
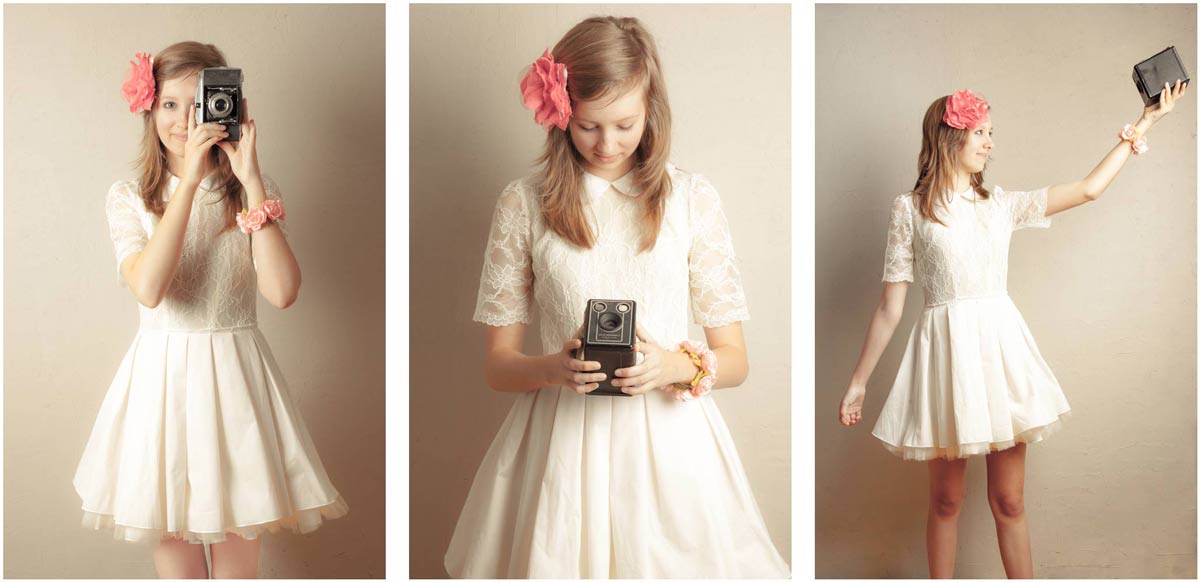
Here’s a few photos of the background in use!

Kings-of-Sussex-3
Joel-1


IF-E-1

Adorama TV LIVE!

It’s been a busy few weeks for me with trade shows and travel filling my diary. Top of the list was a flying visit to the Adorama store in New York, a city like no other!

I’ve never been to New York before but of course I’ve seen it many times before. I’ve seen it in Hollywood movies, I’ve seen it in music videos and I’ve seen photos taken by other photographers but nothing compares to actually being there… I absolutely loved it!

The main reason for the visit was both to meet the amazing people who work at Adorama and to talk to the brave group of photographers who endured the freezing New York weather to spend a few hours with me. If you were there I’d like to thank you for making me feel so welcome.

The Adorama team wanted to share the event with those that couldn’t attend in person and so they organised a live stream.

[youtube]http://www.youtube.com/watch?v=0HVBEk2fI5E&feature=share&t=7m11s[/youtube]
The video above is about 90 minutes long and is a recording of my lighting demo on how to get the best from just one light. You can skip the first 7 minutes as they are blank!

Not having done live streaming before there were a few technical glitches, particularly with the audio but that aside the video contains 90 minutes of amazing tips.

Adorama-TV-LIVE-1

My model is an Adorama employee called Damian who excelled himself by being amazingly patient and a total pleasure to work with. All the photos you can see in the post are the actual shots taken during the Live Stream.

Adorama-TV-LIVE-2

I’d like to say a huge thank you to Adorama for making the event happen, particularly to the team who worked tirelessly before, during and after the live event. I won’t embarrass them by naming them directly but they know who they are and I’m hugely grateful for all that they did.

Adorama-TV-LIVE-3

7 Questions About Soft Light

softlight-portrait-2In the studio there’s two types of light that photographers use to define their subject, hard light and soft light. Both have their place but usually in the studio I use soft light when shooting portraits. Getting the light from your studio flash or speedlite can be done in several ways. You can use one light or multiple lights, a softbox or umbrella and in this video I look at them all.

In total I cover seven questions you should know about soft light and how it’s different to hard light.

The final images you see here have had a little bit of Photoshop applied. How much Photoshop? Surprisingly little and I show you exactly how it’s done towards the end of the video too.

[youtube]http://www.youtube.com/watch?v=MfBmNfMb7WA&feature=c4-overview&list=UU8Pksdbj37CdE00kmE7Z1dw[/youtube]
Can’t see the video? Click here http://youtu.be/MfBmNfMb7WA

Gear used in the video (links to the Adorama store)
Canon EOS 60D Digital SLR Camera
Canon EF 24-105mm f/4L IS USM
Lastolite Collapsible Background (Washington/Dakota) 
Lastolite Hot Shoe Ezy-box Softbox 24×24″ 
Flashpoint Triple Shoe Mount Bracket 
Adorama 33″ Translucent Umbrella

softlight-portrait-1