My best of 2015

2015-6With the year drawing to a close, now seems like a good time to take a moment and look back at what I did with my camera during 2015. A lot (but not all) of my time goes into making videos for Adorama TV and in 2015 I made 26 of them, which have had over 1.4 million views so far.

So here are a few of my personal highlights. If you have your own, please leave me a comment.

Most watched video
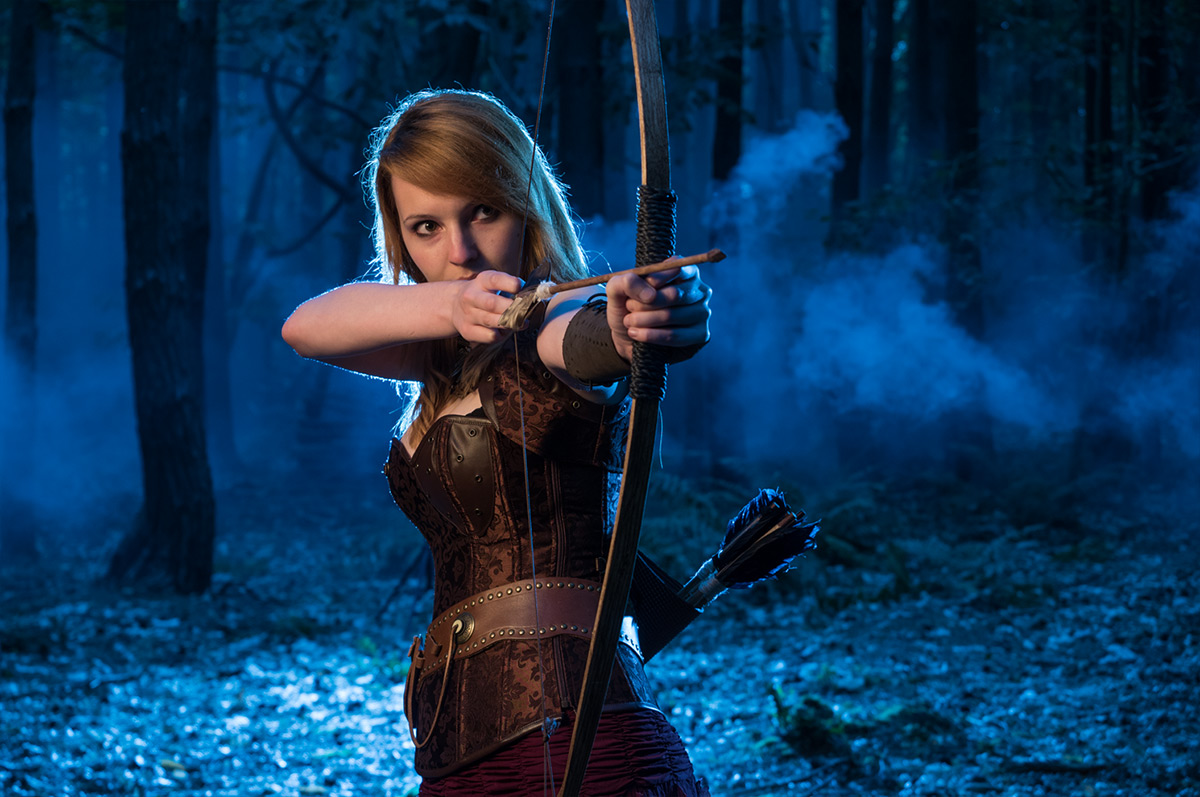
At 150,000 views in just over 5 months, my “day to night” video for Adorama TV has easily been the most watched video I made in 2015. As anyone who makes YouTube videos will tell you, it’s almost impossible to predict which videos will become “popular” and often it’s not the ones you would expect, or perhaps that should be wish.

[youtube]https://www.youtube.com/watch?v=aGsQxXUEvc4[/youtube]
However I’m really thrilled this video has taken off. It was a sound idea that took a long time to plan but was great fun to shoot. Best of all I the final photos came out even better than I had hoped.

Most fun video
It’s tricky to choose just one as I enjoy them all in different ways. But the poker player shoot I did with Brian back in February was a very memorable one.

[youtube]https://www.youtube.com/watch?v=kum6KjmToYU&index=22&list=PL821B7D720DEA39FA[/youtube]
I know absolutely nothing about poker and as it turned out, neither did Brian. Fortunately Brian is an excellent actor as well as a model and once the technical bit was out of the way, he excelled in the role. I loved the range of emotions he produced although some of that may have come from drinking the “whisky” which was in fact cold tea!

Video I’m most proud of
usually my videos are all about taking and making a great shot but back in June I made a video that was more technical than usual. It covered how focal length can affect the compression in a photo.

For years I’ve listened to photographers go on about how they use a longer focal length lens to compress the foreground and background but that’s actually not strictly true. Yes they used a longer focal length lens but it’s camera to subject distance that does the compression and in this video I prove it… although I still get photographers telling me I’m wrong!

[youtube]https://www.youtube.com/watch?v=GbESqYkodmQ&list=PL821B7D720DEA39FA&index=14[/youtube]
I had photography students firmly in mind when I made this one but I know a few “expert” photographers who learned from it too.

Most fun photo shoot
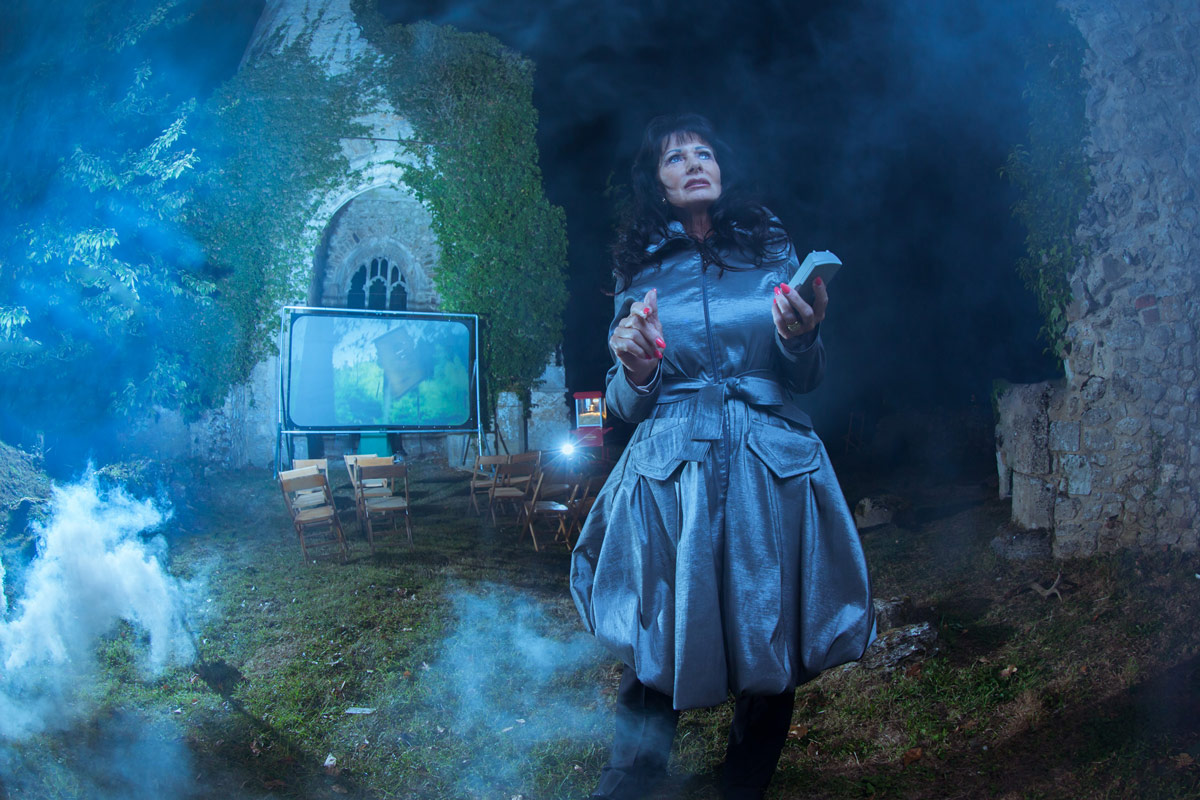
I don’t just make videos, I’m also a full time photographer. I always throw myself in to any shoot but occasionally a job comes along that really stands out. The best example of that in 2015 was a PR shoot I did with LG mobile and the Three network here in the UK.

When I got an email asking if you can photograph a medium and ghosts at a ruined church in the most haunted village in the UK, I jumped at the chance. The full brief included shooting a spooky outdoor cinema in the dead of night at a location without power… I loved it!
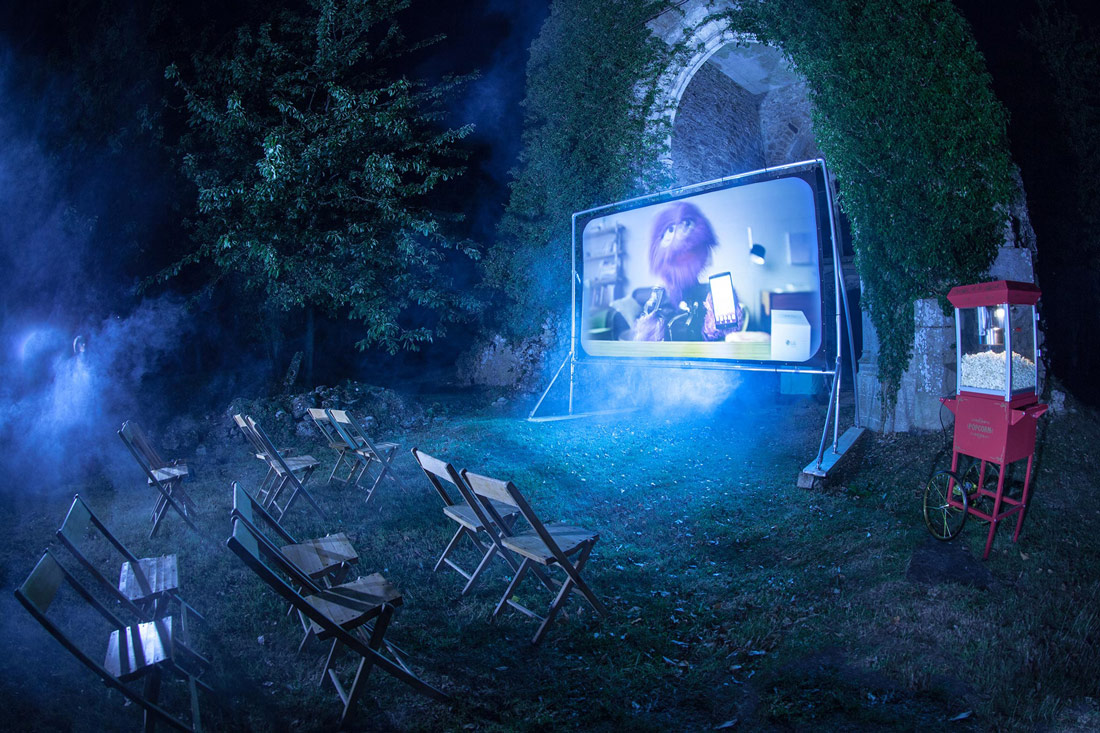
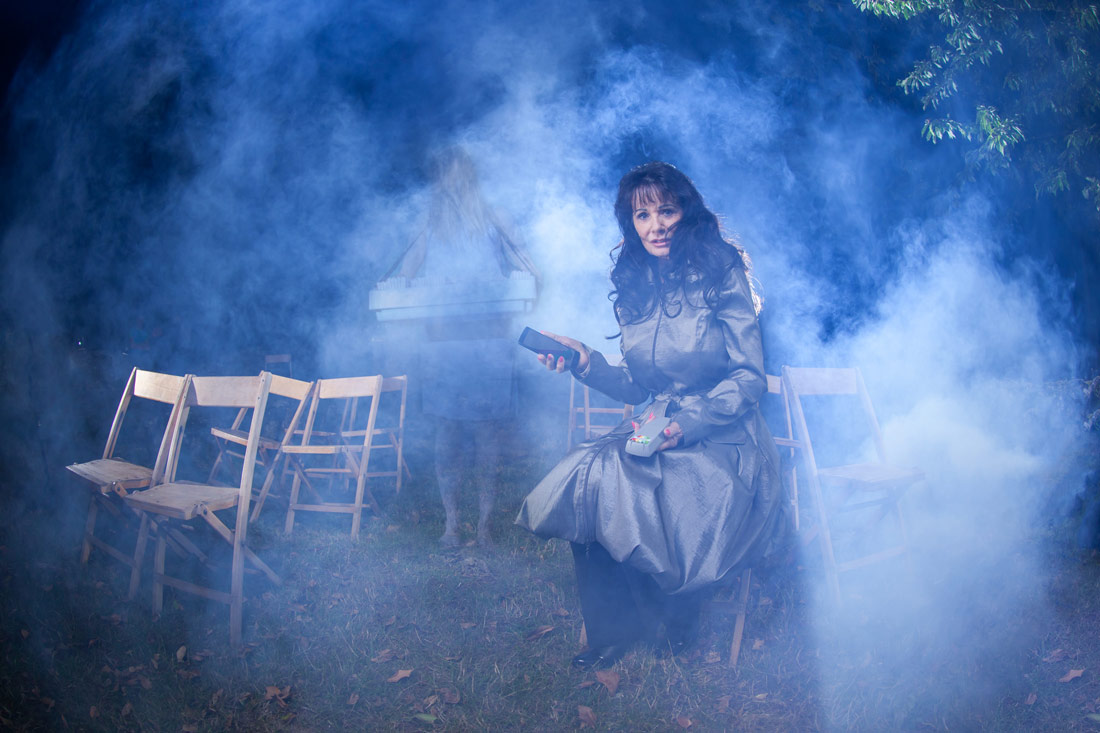
As you can see from the photos, things got very spooky and smoky. Our medium arrived late at night having just come from a séance but I guess my lights must have frightened away the spirts as she was unable to detect any ghosts until I was packing my gear into the car!

Best “Subscribe” ending
Do you watch my videos to the end? If you do then you’ll know I like to have fun with the “Subscribe” button. And yes I do spend far too much time on it.

This year I’ve made the subscribe button float in a balloon, appear on a London bus and ripple at the bottom of a fish bowl.

But my favourite subscribe button was at the end of my 15 minute photo challenge at the Pantheon in Rome. Chiselled on to the 2000 year old wall with just a little help from Adobe After Effects, this subscribe button took a fair bit longer to make then the rest of the video took to film!

[youtube]https://www.youtube.com/watch?v=9XaF-IPSwJo[/youtube]
Tips for Better Bokeh

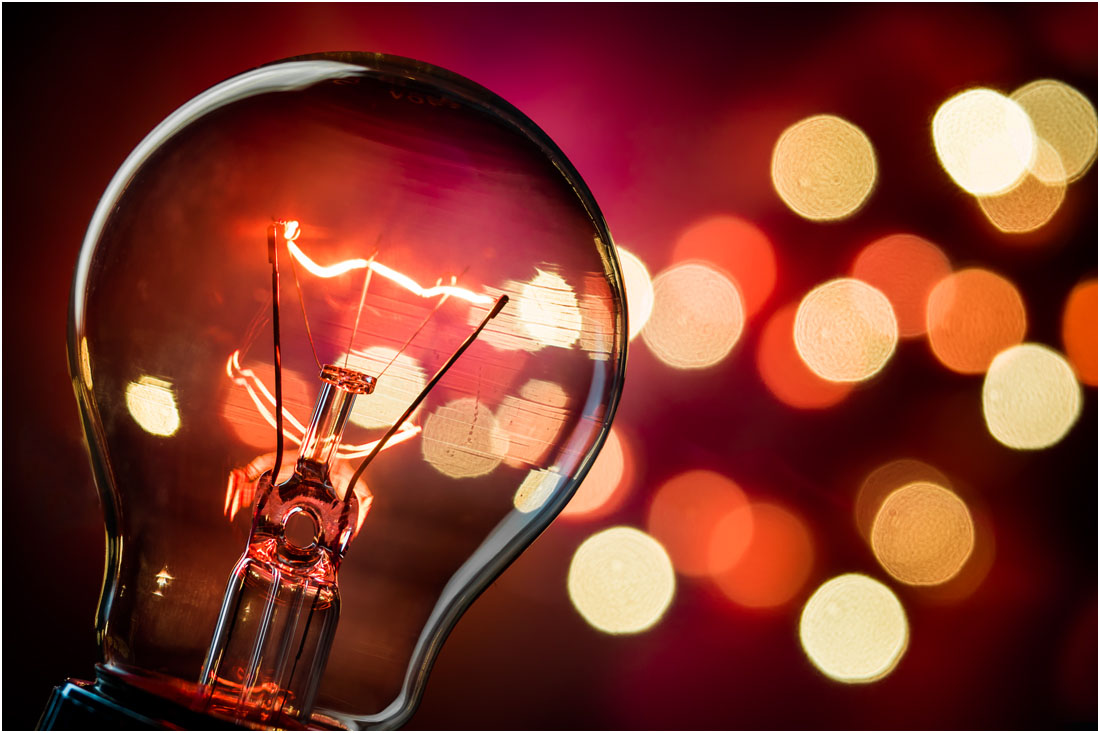
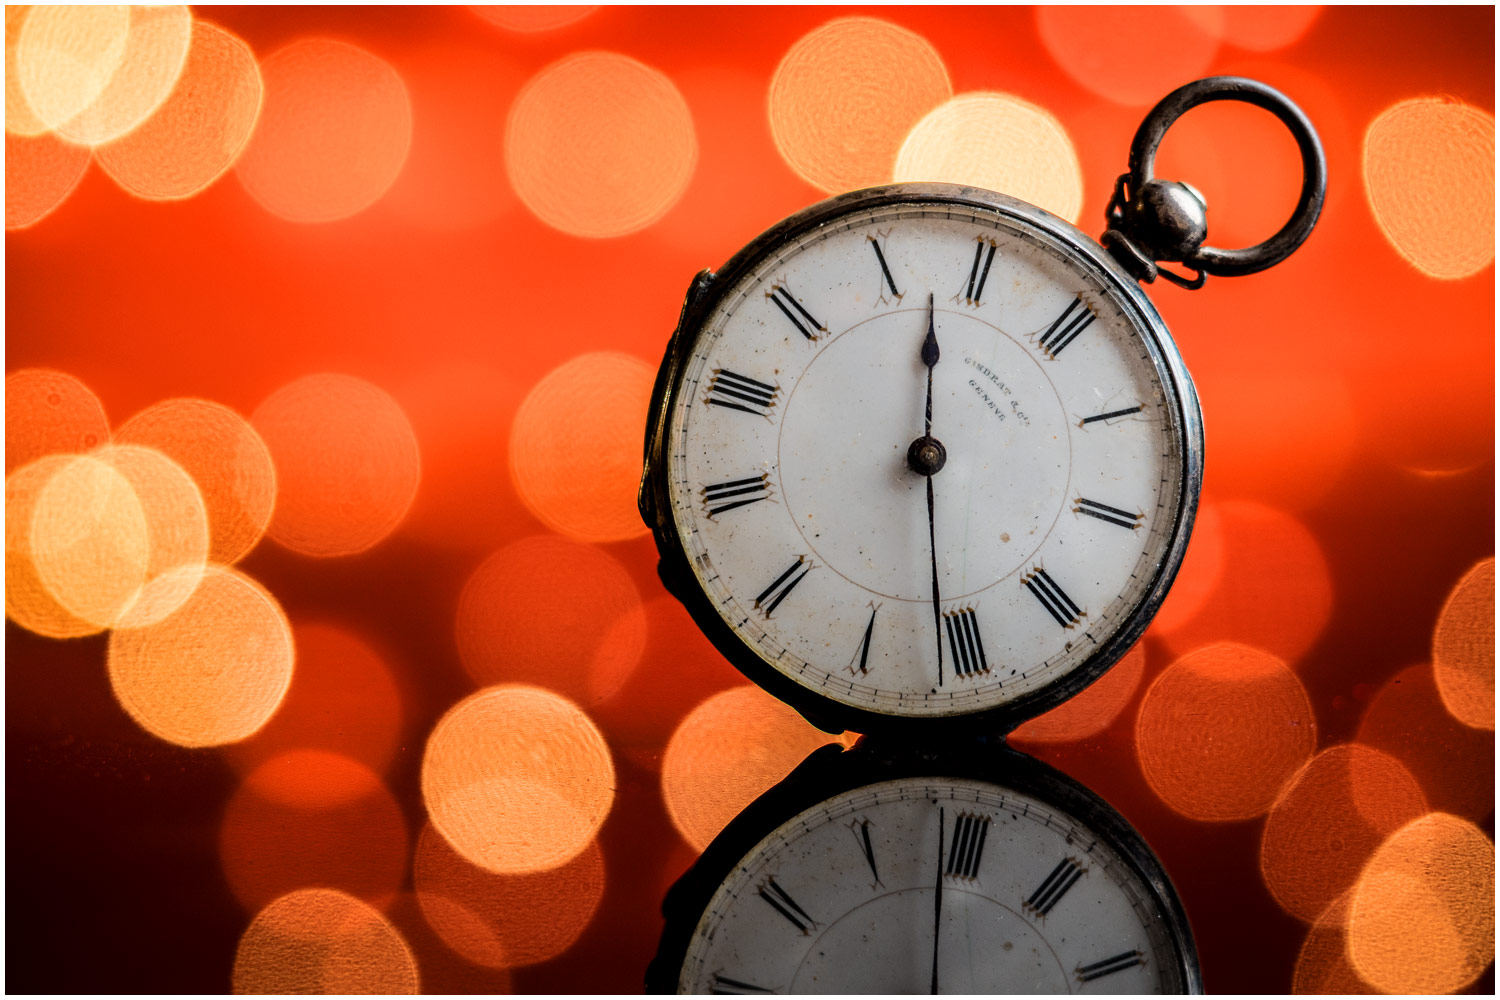
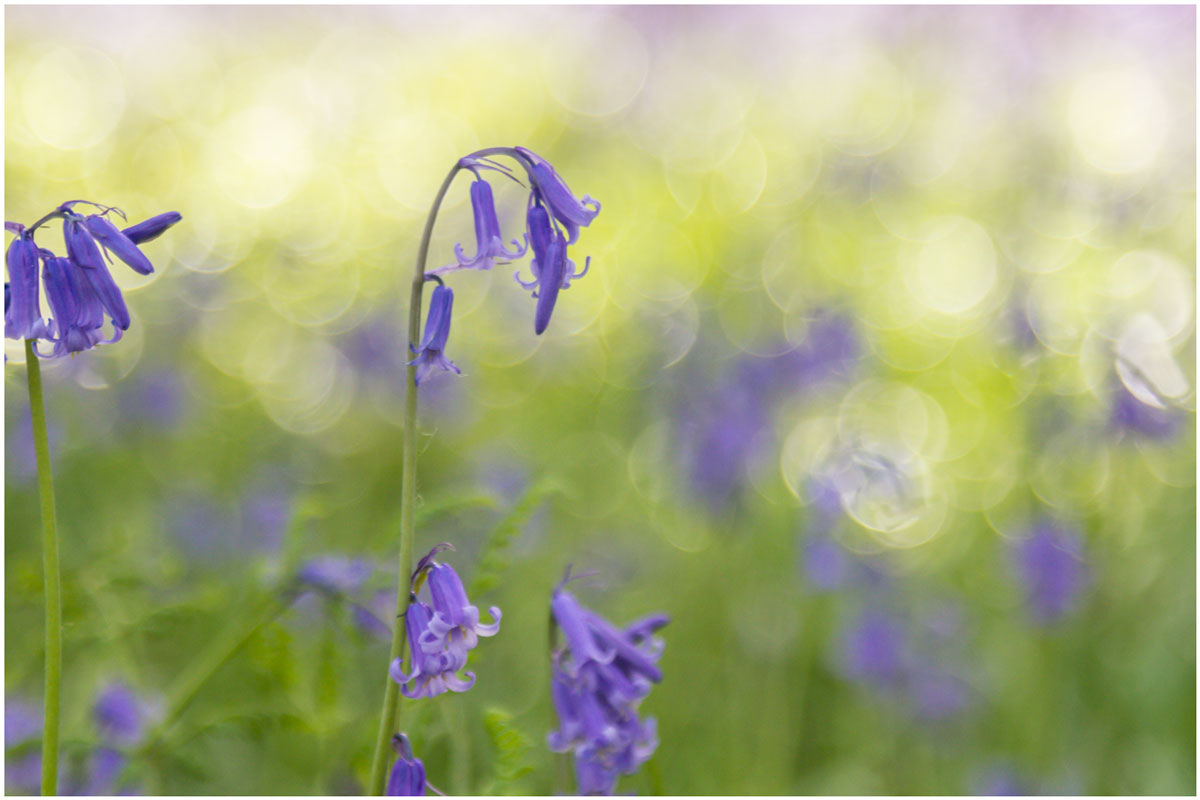
Recently I shared a few of my bokeh shots as a Friday Freebie. Nice as they are, nothing beats shooting your own stock shots and luckily bokeh is easy to do. This time of year is also perfect for bokeh shots with many places covered in festive lights which makes brilliant bokeh.

In the video below I cover the basics of bokeh, what it is, how you can control it and some simple tips for getting some great photos with it.

[youtube]https://www.youtube.com/watch?v=4zBfBDNyGpA[/youtube]
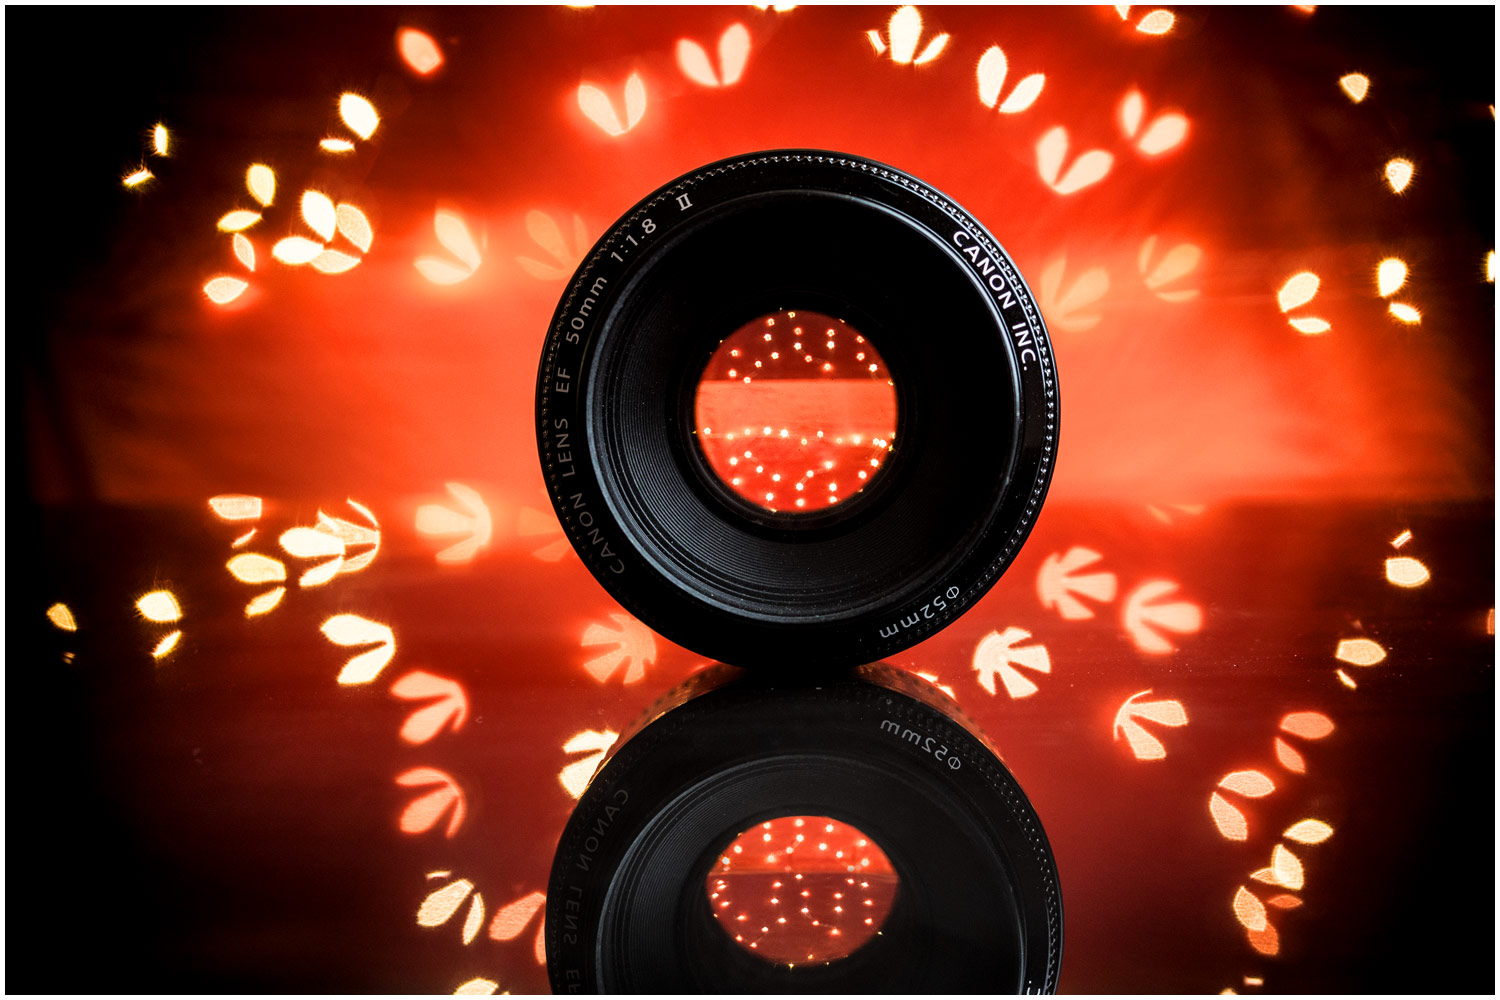
OK, so you’ve mastered bokeh and it’s time to go beyond basic bokeh. In part 2 of this mini series I dive a bit deeper by adding flash, doubling my bokeh count and changing the bokeh shape.

[youtube]https://www.youtube.com/watch?v=3mXg7-Juvrc&feature=youtu.be&a=[/youtube]
Bokeh is brilliant fun to play with but remember it’s not just for Christmas, the basic principles can be applied year round on any shot that has small points of light in the background.

Photoshop vs Make-Up

If you’re shooting any kind of portrait, the value of good quality make-up can’t be underestimated. For example, editing time can be massively reduced in family photo shoots by applying a little powder to reduce shiny skin on men. More creative photo shoots often demand more elaborate make-up and whilst I always try and get things as good as possible in camera, I do enjoy a spot of Photoshop fun.

So I decided it put make-up and Photoshop head to head in a battle to see which was better. You can see the results in the video below.
[youtube]https://www.youtube.com/watch?v=PUWY5jvCdG4[/youtube]
Photoshop
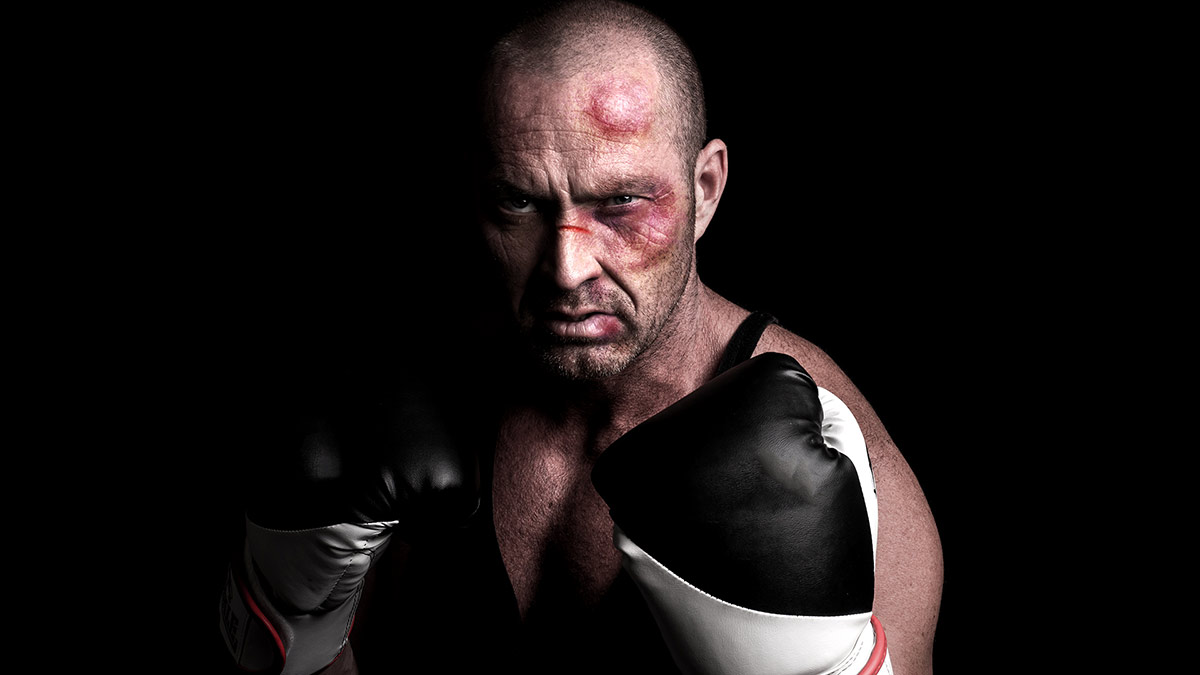
For a single photo, given enough time and skill it’s perfectly possible to create the effect of bruises. In fact using tools such as liquify I could create some pretty convincing swelling that make-up alone couldn’t do.MUA-vs-PS-2

Of course the downside is I’d need to do this to every photo and there are plenty of make-up styles that would be far harder (if not impossible) to recreate in post-production.


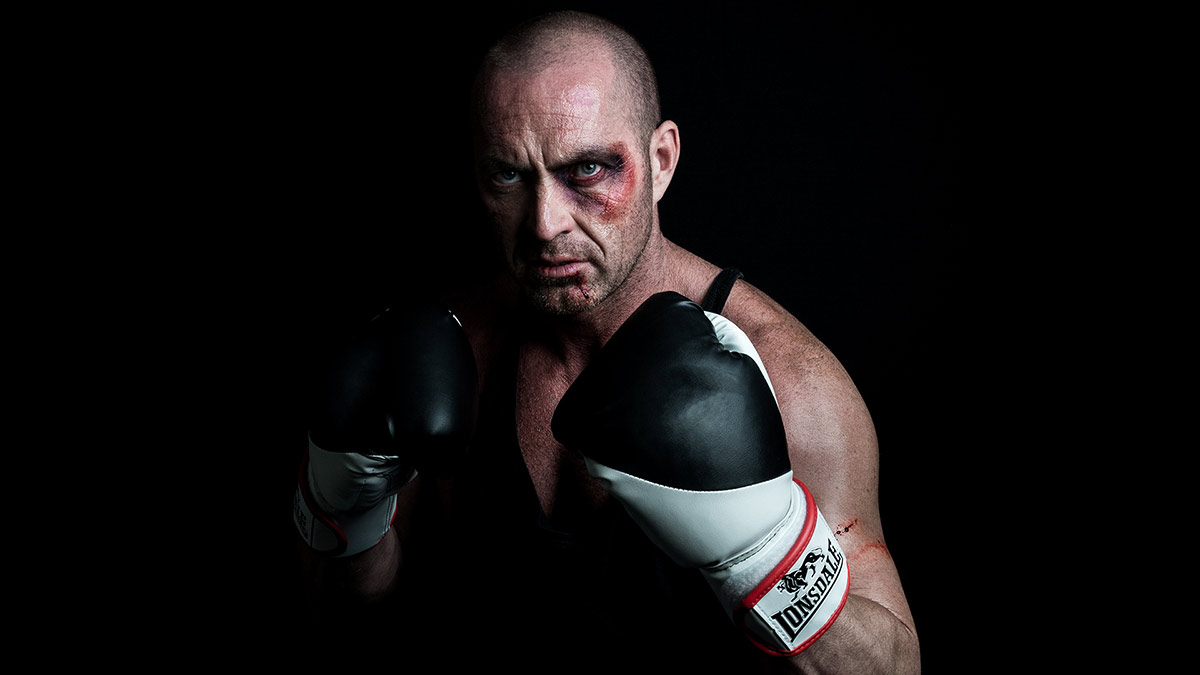
Make-Up

Give the choice, this is the way to go. An experienced make-up artist will be able to create amazing looks and once applied the make-up is there shot after shot, after shot.MUA-vs-PS-3

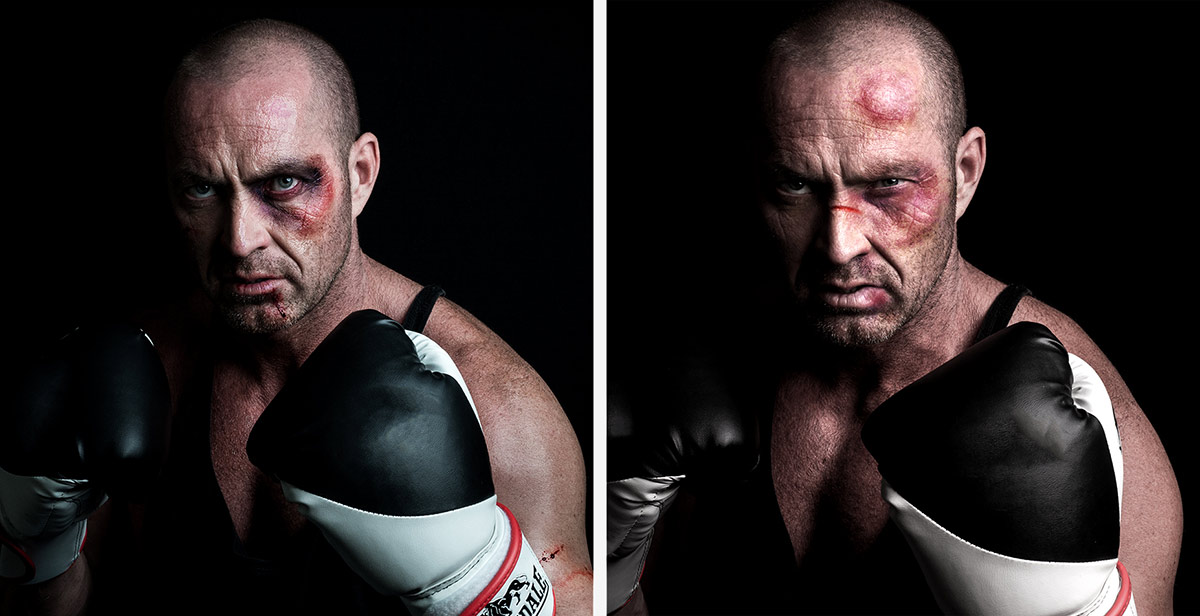
Of course there’s no reason why Photoshop and make-up can’t be combined and that has the potential to take your portrait photography to a whole new level.MUA-vs-PS-1

5 Questions about flash meters

One of the very first lighting accessories I brought was a flash meter, in fact the same meter gets used and abused almost every time I use manual flash. I’ve used my handheld flash meter with speedlights and studio flashes of all makes, I use it in the studio and on location. Honestly, I couldn’t work without it.

If you’re thinking of getting your own flash meter or already own one but are not sure how to get the best from it the video below should help answer some of the most common quesions.

[youtube]https://www.youtube.com/watch?v=UG4P-Odutr8[/youtube]
Not a video viewer? No problem, try this instead.

1 Can’t I just use my camera meter?
Nope, you’re camera meter is designed to work with continuous light and can’t react fast enough to meter flash. However you can use your cameras LCD to review the photos and adjust the flash power based on what you see. This trial and error approach is OK but does have its drawbacks… see the video for more on this.

2 Do all meters work the same?
Well, they all meter the light so at a basic level they’re all the same. In my case I simply set the meter to match my camera’s ISO and shutter speed and when the flash fires I can read off the aperture.

Of course there’s plenty of advanced flash meters around that have features that might make life a lot easier for you. Some meters can measure the amount of ambient contamination in your shot, others can figure out lighting ratios and there’s even some which have pocket wizard radio triggers built into the meter itself.

3 How do I fire the flash?
That largely depends on the flash meter. On my Sekonic L-308s I prime the meter by pressing a button on the side and then fire the flash by pressing the “test” button on either the flash or radio trigger.

Other firing options include attaching a PC Sync cable from the flash to the meter or as I previously mentioned, finding a meter that has a built in radio system (such as Pocket Wizard)

4 Where do I point the meter?
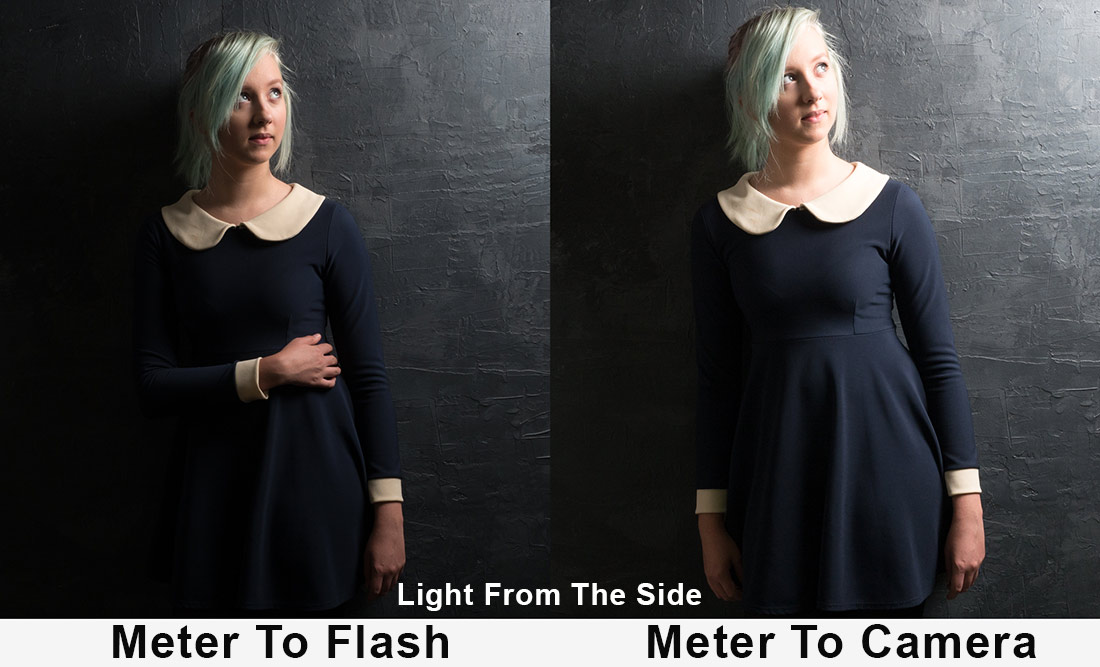
This is the question that usually sets off much debate among photographers. For me it’s always… Point the meter at the light, however as you’ll see in the video, if the light is mostly coming from the camera position, the same exposure is recorded by pointing the meter at either the flash or the camera.

Meter-Before-After

One mistake a lot of photographers make is to place the meter in the shadow cast by the chin or by the models hair etc. It’s easy done, so if the meter is telling you something that feels wrong, move the meter and try again.

5 Do I really need one?
No, you can do the trial and error way of working and get very good exposures. However if you move or modify the light you’ll need to do the same work all over again.

A flash meter saves time on a shoot and gives you extra confidence in nailing the correct exposure. However it’s always worth remembering that correct exposure isn’t the same as perfect exposure so it’s a good idea to ignore the meter from time to time and get a little experimental with your shots.

Lastly there’s one more reason for using a flash meter and it has nothing to do with how it works… Just like shooting with a big camera, the untrained eye can equate using a flash meter to knowing what you’re doing. Now, whether that’s a good or bad thing I’ll leave up to you.

Day to night in a flash

Shoots at night can yield some stunning photos but the lack of light has a bunch of problems that can easily trip you up… literately. However if you have a little bit of flash know how, it is possible to do a portrait shoot and make day turn to night in just a few steps. Here’s how I did it in four steps

Step 1 – Underexpose the ambient

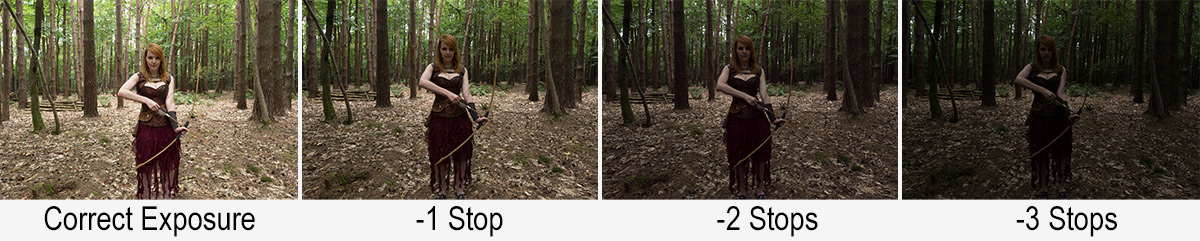
Unless you live in the Polar regions night time is usually associated with a lack of light, so the first thing I had needed to do was convince my camera to see less light. One way to do this is by using exposure compensation and dialing in a negative amount but because I was going to use flash to light the model I took a different route.

Day-Night-1

Flash and Manual mode go hand in glove, so switching to manual is the way to go. After setting the aperture to f/4 and the ISO to 200 the correct shutter speed turned out to be a feeble 1/10th second. By halving the shutter speed to 1/20th I underexposed the ambient light by 1 stop. 1/40th second gave me another stop and finally 1/80th second underexposed by three stops and gave a shot that was dark but not black.

Step 2 – Set the flash

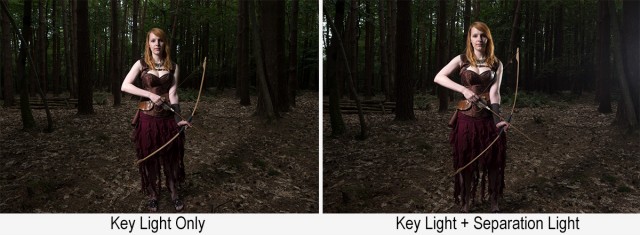
1/80th second gave a nice dark background but also underexposed the model, that’s where flash comes in. With the key light in place all I had to do was set my flash meter to match my camera (1/80th sec, 200 ISO) and adjust the flash power until I hit f/4 on the meter.

Day-Night-2

So now I’ve got the flash power to match my camera setting and giving a perfect exposure on the model, however the same camera settings are under exposing the background keeping it dark.

Once the key light was in I added a second light to separate the unlit side of the model from the dark background.

Step 3 – Moon light

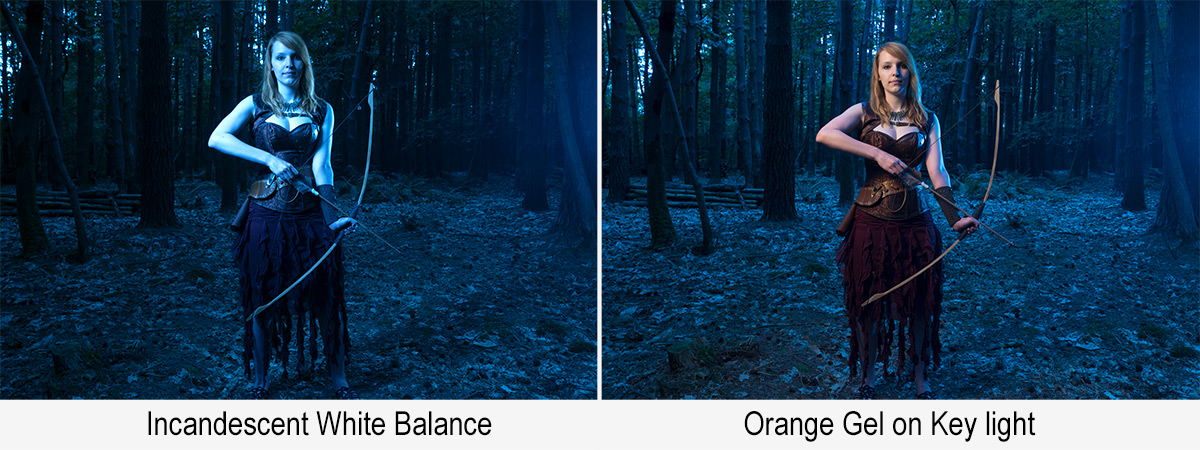
Thanks to Hollywood we assume that the moon always comes out at night and it produces blue light. Of course neither is true but let the dream live I say. Turning the warm afternoon light blue is as simple as setting the wrong white balance. Switching to Tungsten or Incandescent white balance will do the job in camera or it can be changed in Lightroom / Photoshop Camera RAW.

Day-Night-3

The blue looks great on the background but a bit odd on the model, so to warm her up I added an orange gel to the main flash. There are gels marked as CTO (Colour Temperature Orange) which should perfectly balance out the white balance but I don’t have one.  Luckily Lightroom / Photoshop Camera RAW can easily fine tune the colours, especially if you do the same as me and shoot a gray card in the same light.

Step 4 – Moody Mist

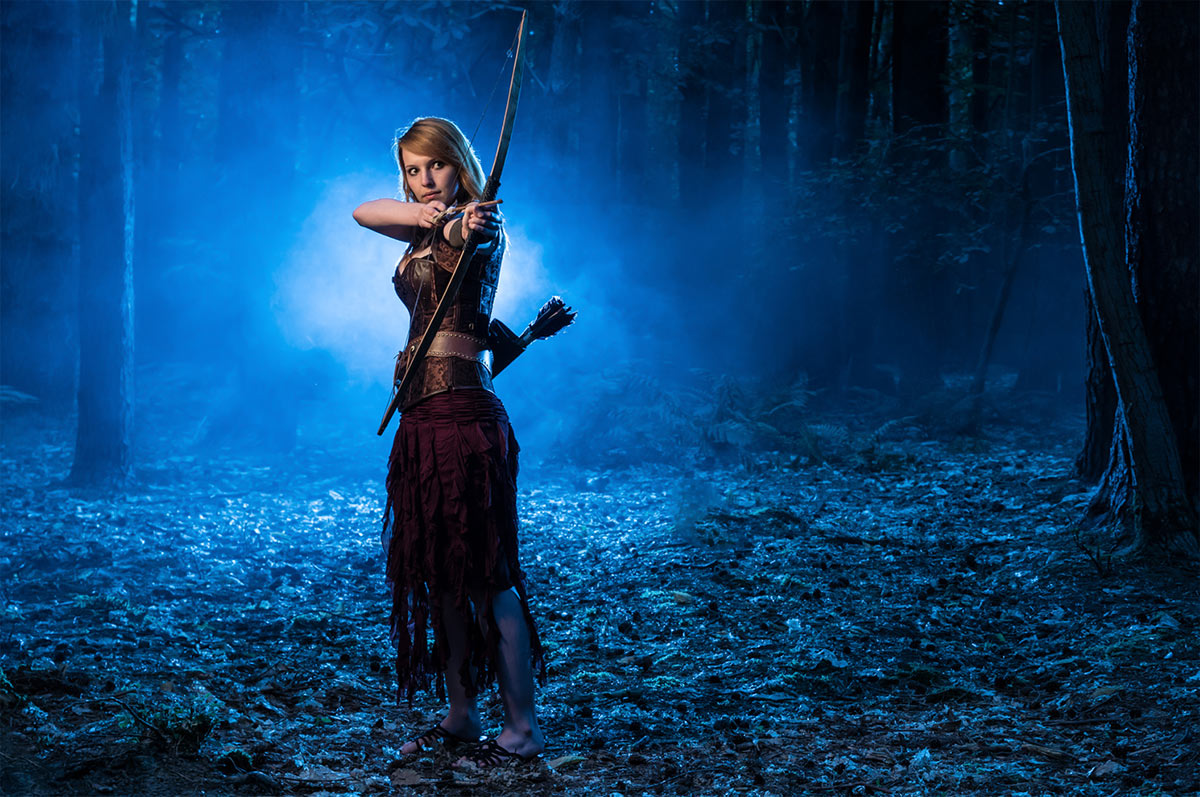
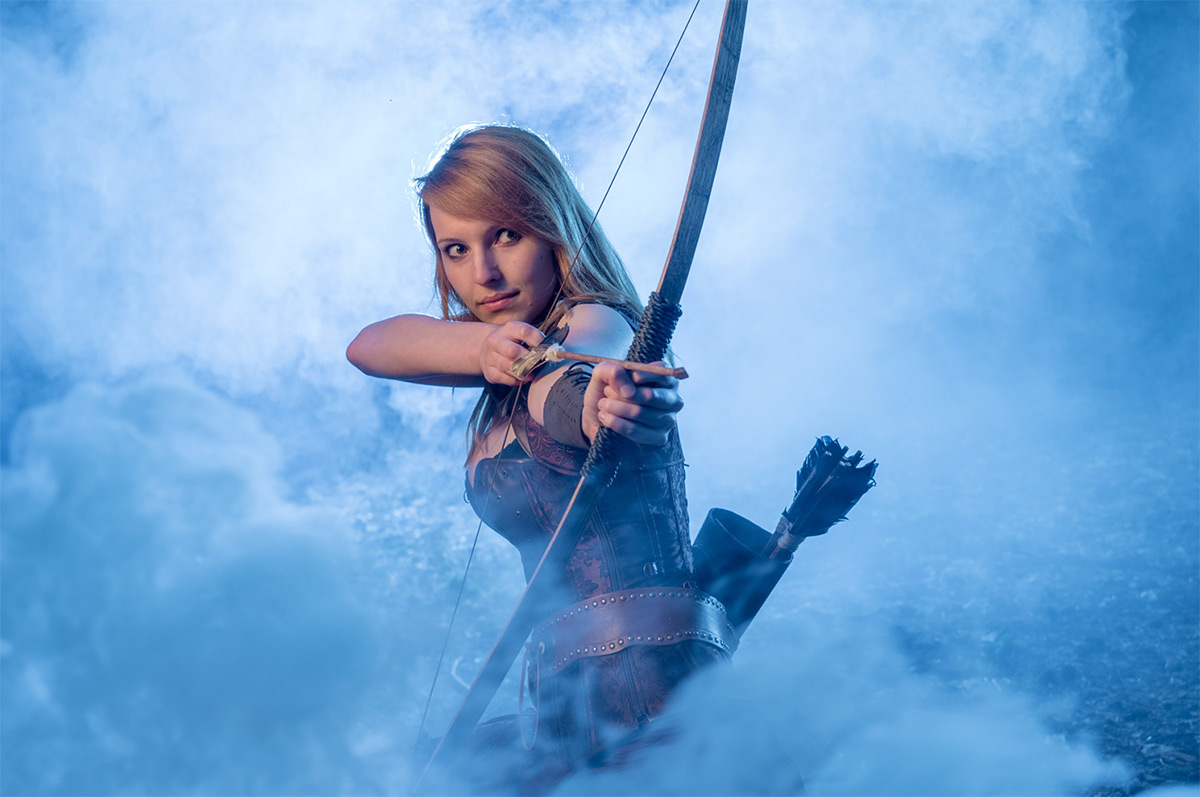
This is the fun bit. Again I’ve got the movies to thank for this but adding a little bit of mist seems to sell us the whole night feeling. It also helps to cover up anything distracting in the background and by adding a third light right behind the model (and the smoke) adds a splash of light to an otherwise dark scene.

There are many ways to make smoke. Being a long way from a power supply I opted for smoke grenades. You’ll find them at your local paintball / airsoft park and whilst they’re not cheap, they do offer a safe and reliable source of smoke. I used two Enola Gaye smoke grenades which gave around 90 seconds of smoke each. Yes after all that setting up the whole shoot was over and done in under three minutes!

So there you have it, day to night is perfectly possible and whilst the results are very different from really shooting after dark, they look pretty darn good to me.

[youtube]https://www.youtube.com/watch?v=aGsQxXUEvc4[/youtube]

Smoke on location

It’s amazing how adding a little bit of smoke can completely alter the look of a portrait shoot and a few months back I made a little video showing how I use a smoke machine in my studio.

But with the long summer days and warm weather I love to get out of my home photo studio and into the great outdoors. Of course shooting portraits in the woods makes using an electric smoke machine a real challenge but I found an alternative that’s even better.

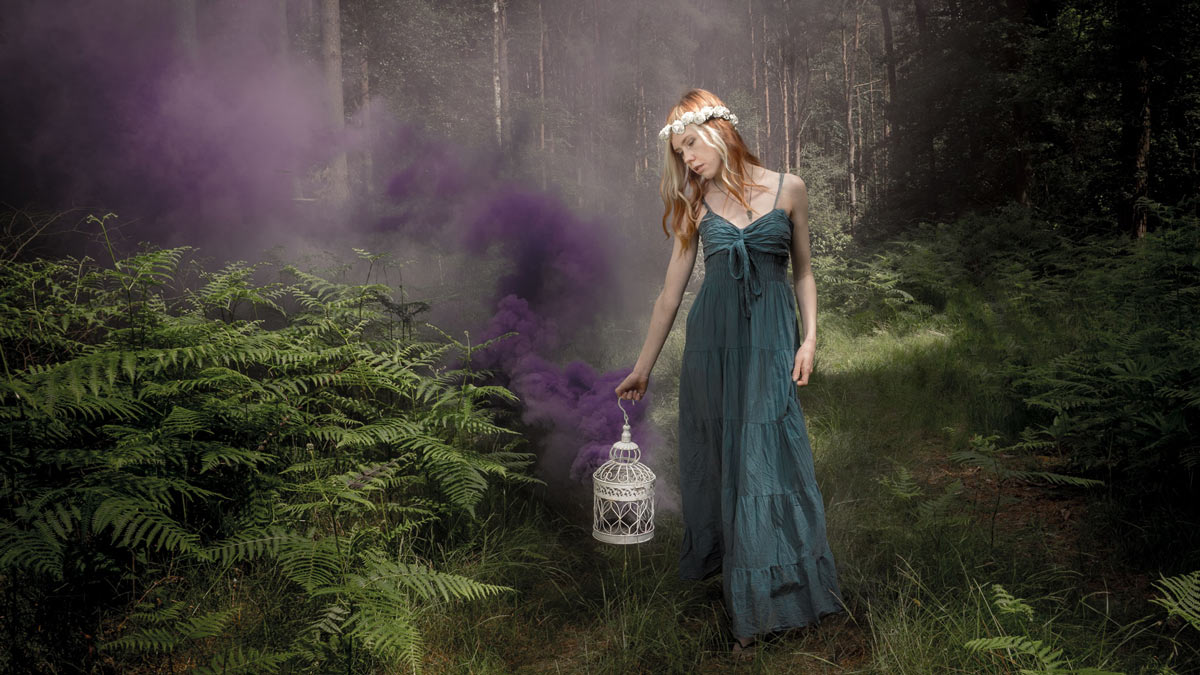
Smoke-Granade-Portrait

The smoke in the photo above comes from a small smoke bomb. Also called smoke grenades, it’s basically a firework without the explosion. I used smoke bombs from Enola Gaye which is a UK company that sells their non-toxic smoke granades around the world. You can get them online but if you head along to your nearest paint ball or airsoft park you should be able to pick them up fairly inexpensively and in smaller quantities.

[youtube]https://www.youtube.com/watch?v=f064pZ41Fz4[/youtube]

If you’re going to use smoke bombs in your photography, do so responsibly. I cover most of the important stuff in the video above but read the instructions on the smoke bombs before use. If nothing else follow the final bit of advice written on the side of every Enola Gaye smoke bomb… Don’t be a dick with this product.

How Focal Length Affects Your Background

There are many reasons for choosing one lens over another and which one you shoot with can have a massive impact on the final photo. Like many photographers I love the flexibility of zoom lenses and often have to make the choice of shooting with a wide angle and short telephoto lens. At first glance the choice of lens is pretty obvious… if I want to go close I shoot with a telephoto focal length and if I want to see more I zoom out with a wide angle focal length.

Look around on the internet or ask your photography peers and you’ll find that the general consensus is that wide angle lenses increase perspective distortion and telephoto lenses compress background. It’s common knowledge but sadly, it’s also not true… although I completely understand why so many photographer think it is.

[youtube]https://www.youtube.com/watch?v=GbESqYkodmQ[/youtube]

In the video above I explain and show how changing focal length alone doesn’t affect compression or distortion but moving your feet does

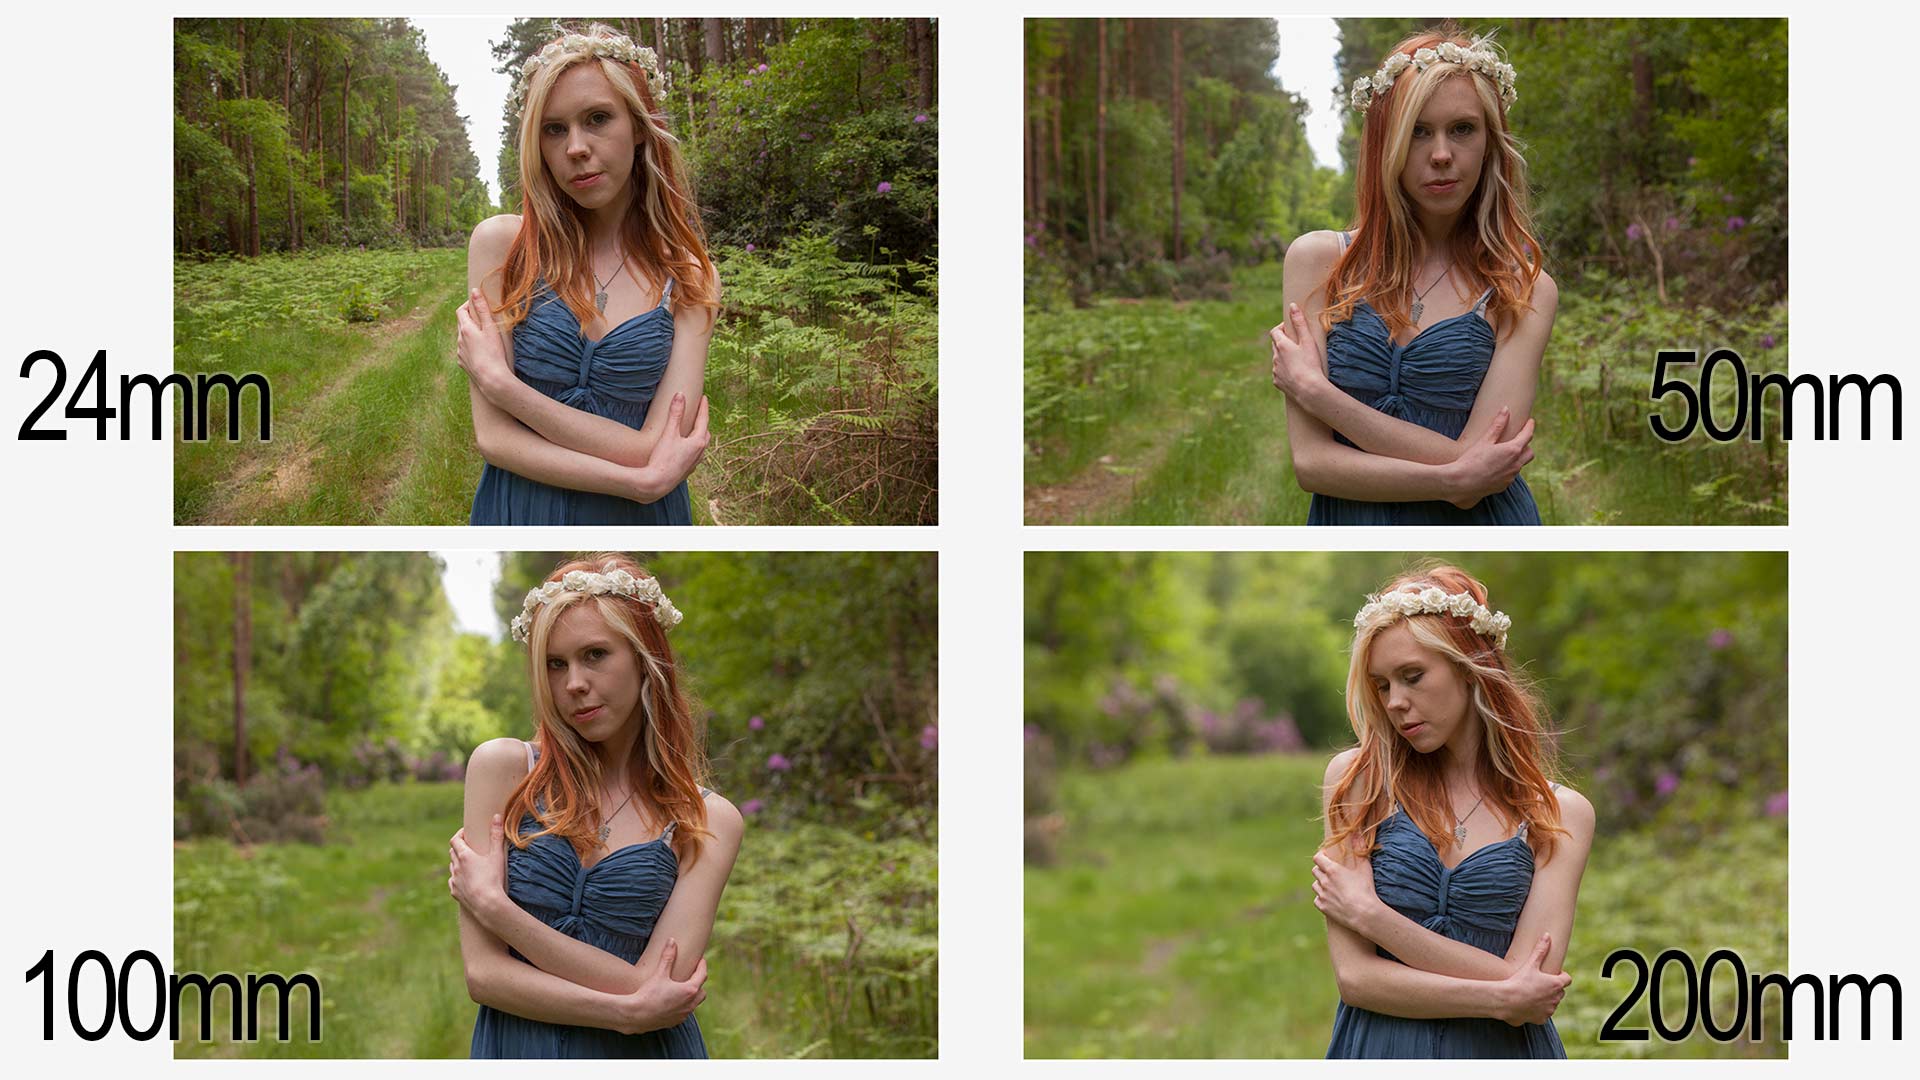
Google focal length compression and you’ll see photos like the one below and as you can clearly see the more I zoom in the more the background appears to grow in relation to the model. We call it background compression and it’s a really handy trick to learn.
Compression-ALL

But in order to keep my model (The amazing model Fern Meave ) the same size I had to increase my shooting distance as I zoomed in and it’s that increase in distance that causes the background to compress. Let me say that again…
Increasing your focal length does NOT compress your shot, increasing your distance from the subject does. Unless you want your subject to be small, once backed up you have to zoom in to maintain the composition and that’s why so many photographers will tell you telephone lenses compress your shot.

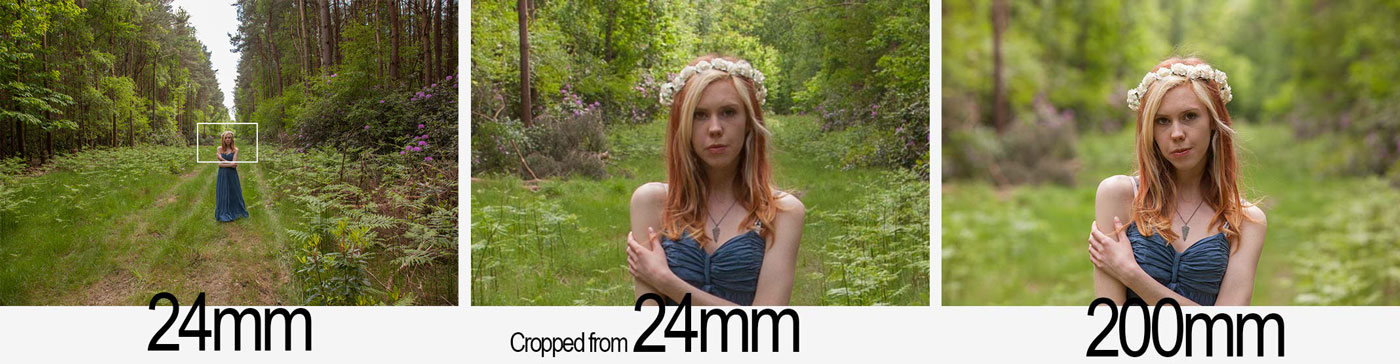
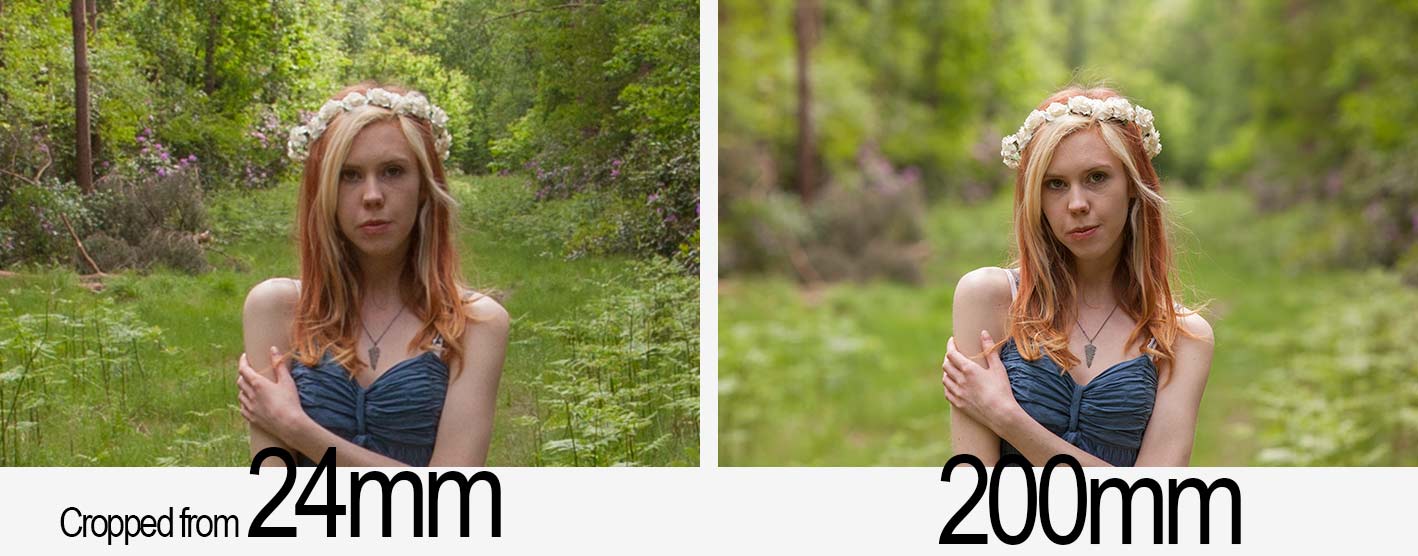
To prove the point. Take a look at the photos below. For the one on the right I used a 200mm lens, the one on the left is a from a shot taken with my 24mm lens and the middle image is a tight crop from the centre.

lens-compress-debunk

The distance from myself and the model was the same in each shot, only the focal length changed. Spot the difference?  Ignore the the depth of field difference between the two shots, that’s a side effect of the different focal lengths and I’ll save that for a future blog post. There really is no difference in compression and perspective distortion when you change lens focal length.

So if background compression isn’t caused simply by zooming in, do wide angle lenses increase perspective distortion? No they don’t (excluding exotic lenses such as fisheye’s). With a wide angle lens you often go close to fill the frame and that increases the distortion. In theory you could take a wide angle shot using a 200mm lens, you’d just need to take lots and lots of images and join them together like a jigsaw puzzle. Search Google for Gigapans to see this in action.

Still not convinced? Here’s a simple test to try, no camera required… next time you’re in front of the bathroom mirror, get your head really, REALLY close. Close one eye and look around at your refection. Your nose will look huge, your ears will look small and all because you’re close to the mirror. Step back and your face will appear as normal as it was before.

Bluebell 15 Minute Photo Challenge

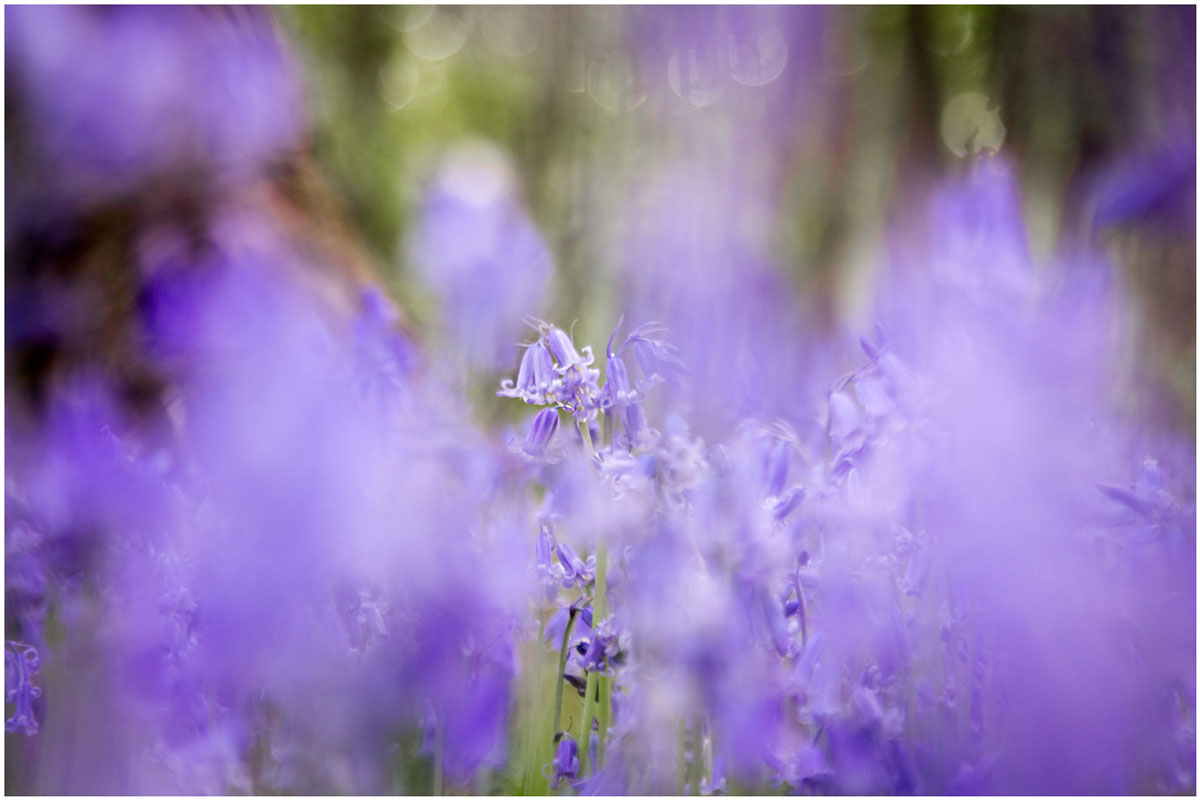
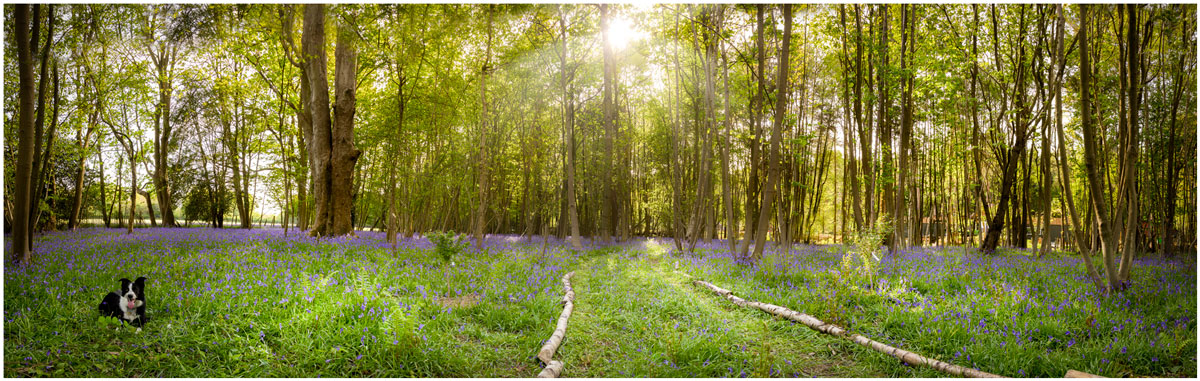
I’m a sucker for bluebells, so when I got the chance to shoot some at a local wood I grabbed it. The bluebell season can be very short but there’s still something to be said for waiting for the right light and shooting at the right time of day. For me that meant late afternoon when the sun was low but not so low that it would make the woods very dark.

Bluebells, like many flowers, are a bit top heavy so as well as picking the right light I wanted to avoid shooting on a windy day. Luckily everything came together so I packed my camera and by 24-105mm lens and set off to do another 15 minute photo challenge.

[youtube]https://www.youtube.com/watch?v=2b0trjfaRok[/youtube]

Bluebell-1jpgBluebell-2Bluebell-Pano

Making The Most of Motivated Lighting

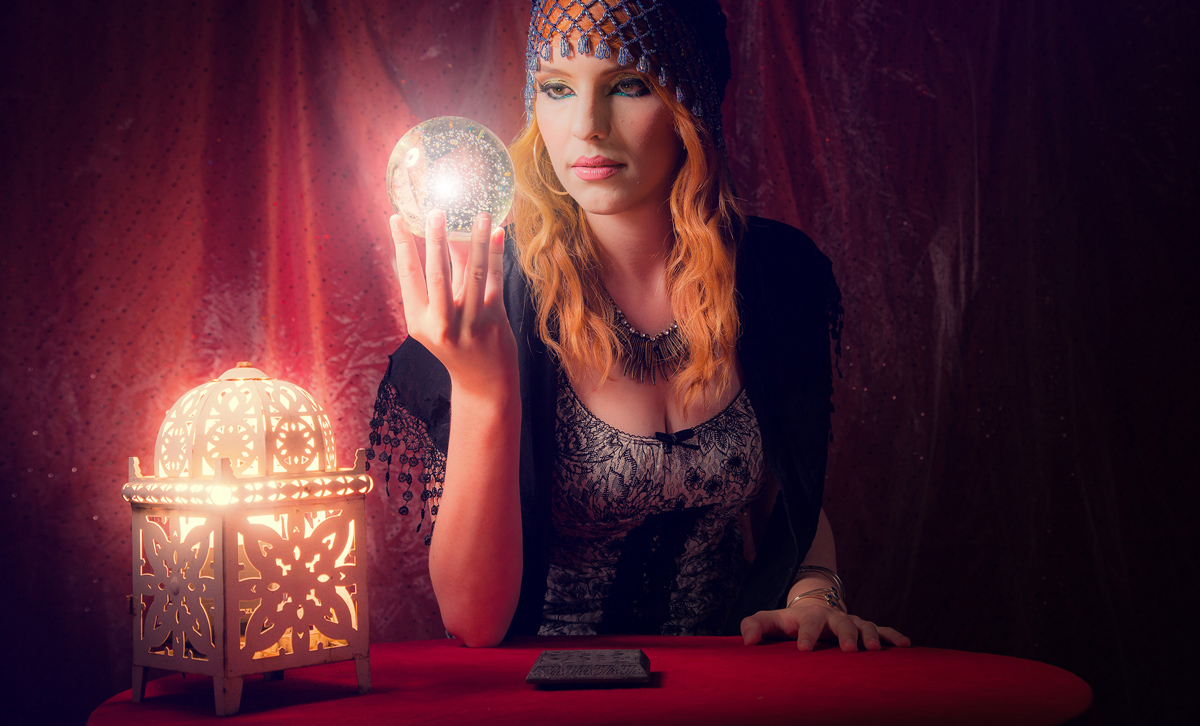
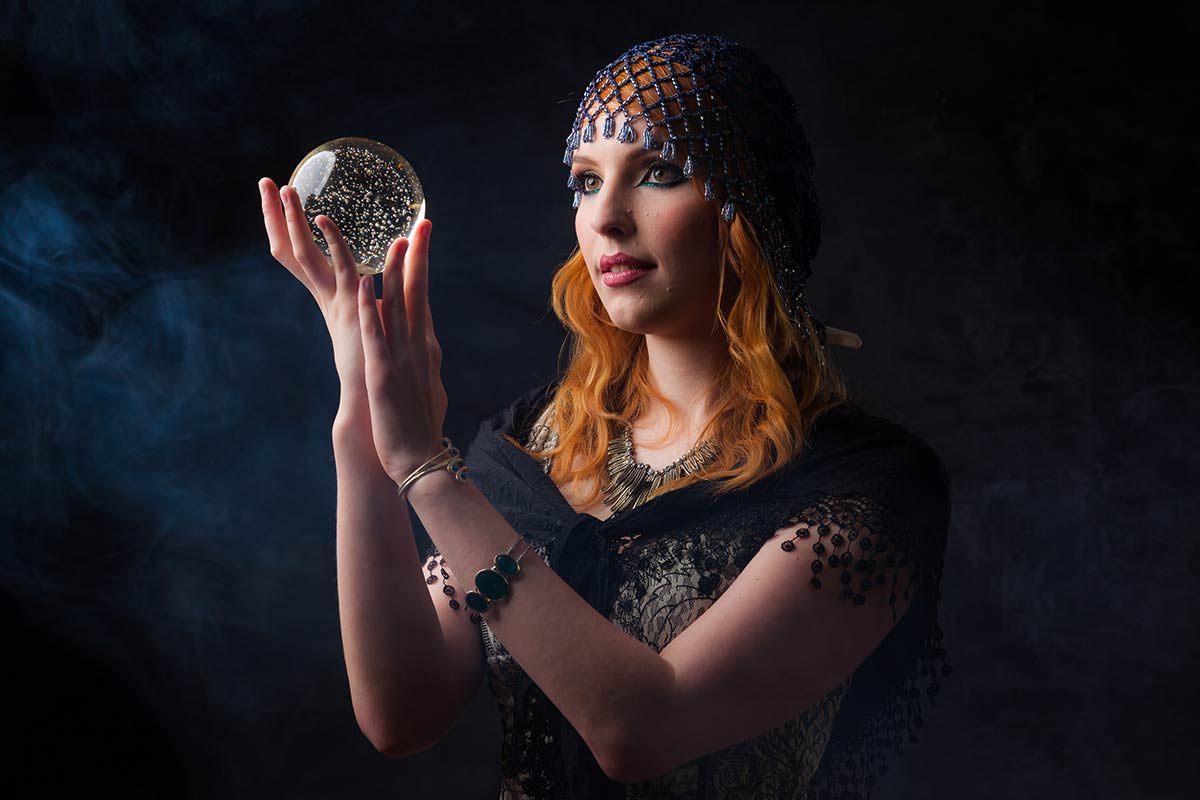
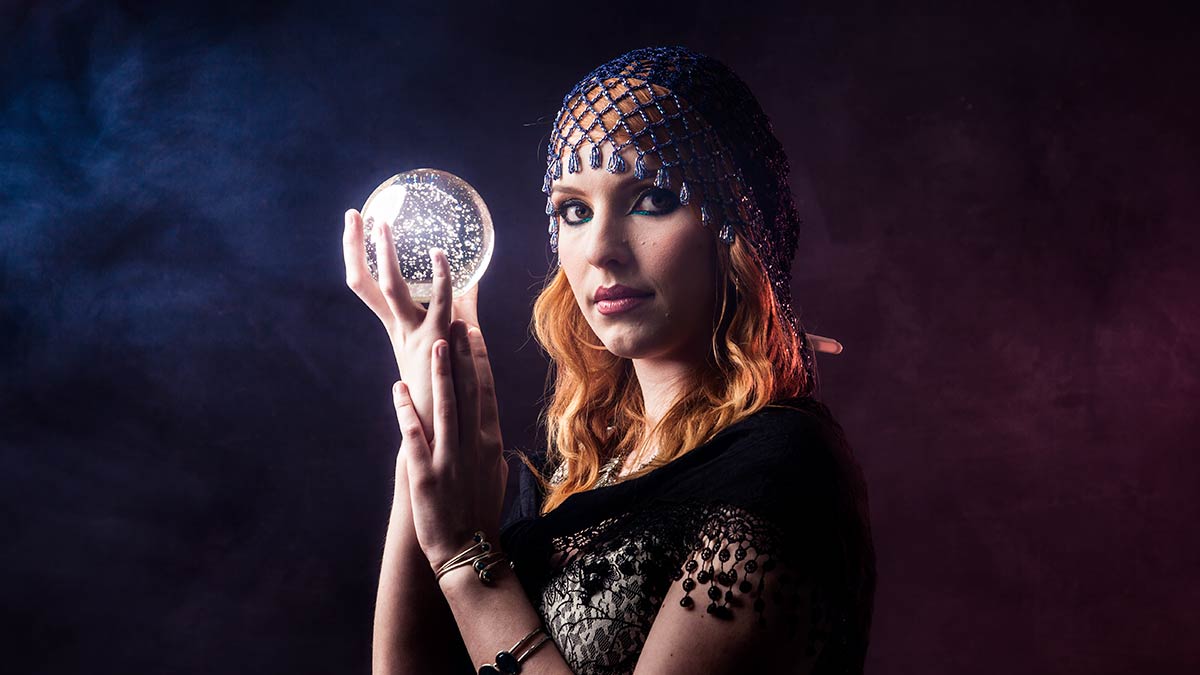
Motivated light is a term that’s more normally used in the world of the movies but there’s no reason for us stills photographers not to be aware of it and use it to create some great effects.

So what is motivated light? Put simply if you can see (or think you can see) the source of the light that’s illuminating the scene, you’re looking at a motivated light. But there’s a bit more to it than that.

Kerry-Fortune-Teller-(2)

Usually I go to great lengths to avoid seeing my lights in the shot, especially if the light is directed towards the camera lens. Even a tiny edge of light in the frame can play havoc with contrast and flare. If I have to see a light I can minimise flare by turning the power right down but then it doesn’t produce the light needed to get the exposure right. So how can I have the motivated light source in the scene and keep control of the exposure?

The answer is… I cheat!

In the video below I’ll look at two ways to create motivated light. The first way is in camera by teaming a low powered flash with a high powered flash that’s out of shot but in the same direction. The second way is by creating the effect in Photoshop.

[youtube]https://www.youtube.com/watch?v=U6sZlhhe3h4[/youtube]

Of course motivated light doesn’t have to be done like this and by definition motivated light can be something as simple as a window or room light that’s in the shot. So the chances are you have used motivated light in the past without even knowing it.

Model: Kerry Allingham
Make-Up: Anna Matos

Gear used in this video

Canon 5D Mark III www.adorama.com/ICA5DM3.html?KBID=67338

Canon EF 24-105mm f/4L IS USM Lens www.adorama.com/CA24105AFUC.html?KBID=67338

Flashpoint Light Stand www.adorama.com/FPLS9.html?KBID=67338

Black Rapid RS-7 Strap www.adorama.com/BRRS7.html?KBID=67338

Flashpoint StreakLight 360 Ws Creative Collection www.adorama.com/FPLFSL360K2.html?KBID=67338

Sekonic L-308S Flashmate www.adorama.com/SKL308S.html?KBID=67338

Flashpoint Zoom Li-on Manual On-Camera Flash http://www.adorama.com/FPLFSMZL.html?KBID=67338

Smoke Machine Background

One of the draw backs of working in any studio is the finite nature of the backgrounds you can work with during a shoot. Of course if you’re handy at a bit of DIY you can build your own sets and create some amazing backgrounds but that takes time and besides, carpentry isn’t one of my strongest skills as you’ll see when I made my current studio background.

So what can you do to quickly change the background? Well I have a bunch of different fabrics which work really well but as you’ll see in this video, nothing beats the smoke machine for effect and downright fun!

[youtube]https://www.youtube.com/watch?v=LvLjiahVBrs[/youtube]

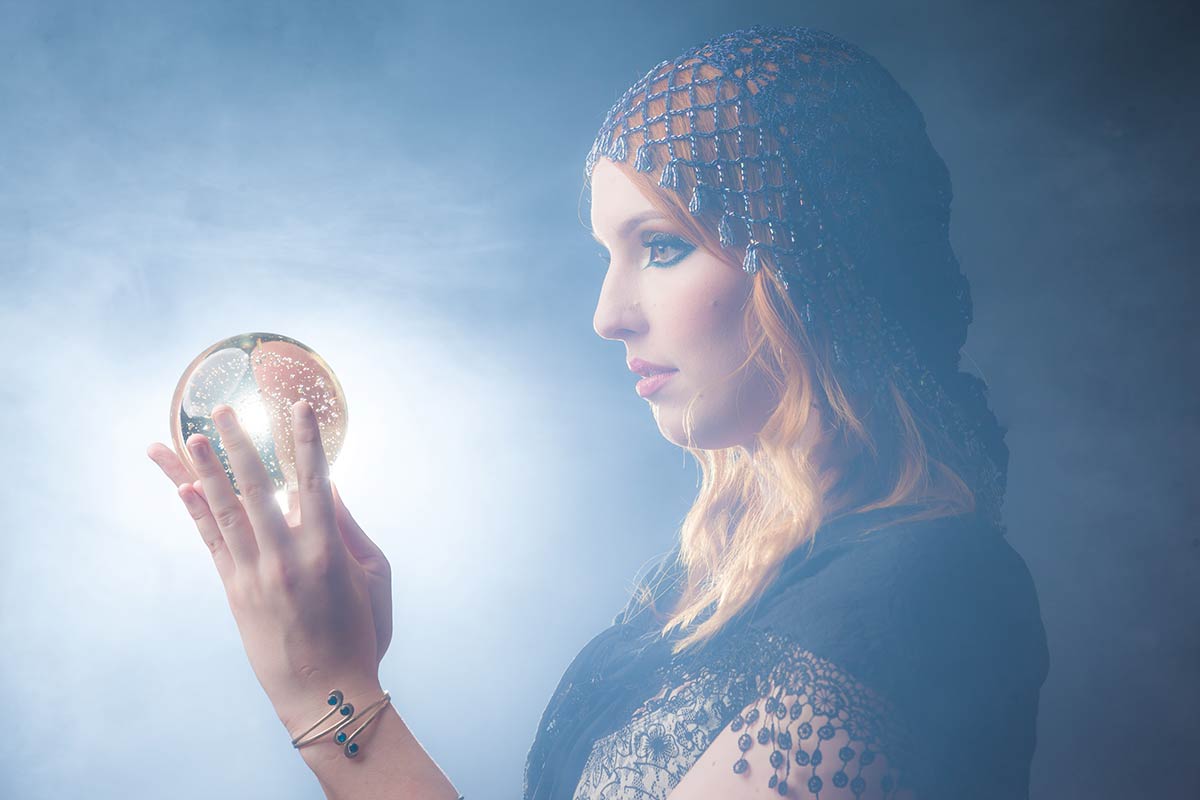
That shoot was part of a series I shot with a Fortune Teller theme and the smoke machine was perfect for the background, as the smoke builds up, the effect changes from a slight haze to thick fog.

Kerry-Smoke-1

The smoke is a whitish/blueish colour so to get the full effect of the smoke you’ll need a dark background and ideally a light to illuminate the smoke from either the side or back.

Kerry-Smoke-2

Adding a splash of colour to the fog is as easy as popping a coloured gel on the flash that illuminating the fog. In this case I added a red gel to the flash on the right and increased the saturation of the natural blue colour of the fog in Photoshop.

Too much smoke can ruin the shot by reducing contrast, especially if you light it from the front. For that reason I keep any smoke shots until the end of the shoot.

Kerry-Smoke-3

Finally it’s worth checking that the smoke “juice” is water based to avoid leaving a residue all over your studio and is non toxic… pretty obviously. The smoke builds up pretty quickly so also keep a check on the model and anyone else in the studio. At the first sign of problems get some fresh air.

Model: Kerry Allingham
Make-Up: Anna Matos

Gear used in this video

Canon 5D Mark III www.adorama.com/ICA5DM3.html?KBID=67338

Canon 50mm f/1.8 II www.adorama.com/CA5018AFU.html?KBID=67338

Flashpoint Light Stand www.adorama.com/FPLS9.html?KBID=67338

Black Rapid RS-7 Strap www.adorama.com/BRRS7.html?KBID=67338

Flashpoint StreakLight 360 Ws Creative Collection www.adorama.com/FPLFSL360K2.html?KBID=67338

Sekonic L-308S Flashmate www.adorama.com/SKL308S.html?KBID=67338