Curtain Action – Friday Freebie

It’s been a while since I’ve done a Friday freebie so lets put that right with a Photoshop action.

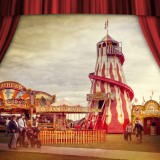
This Action creates a set of beautiful curtains in a theatrical style with a single click of your mouse. There’s four colours to choose from and it’s a brilliant way to frame your vintage style images. The curtains are created from scratch using standard Photoshop filters and effects and to add an extra touch of realism they have a ragged edge and a gentle bow.

Full download instructions are below but you can also Download the Curtain Action
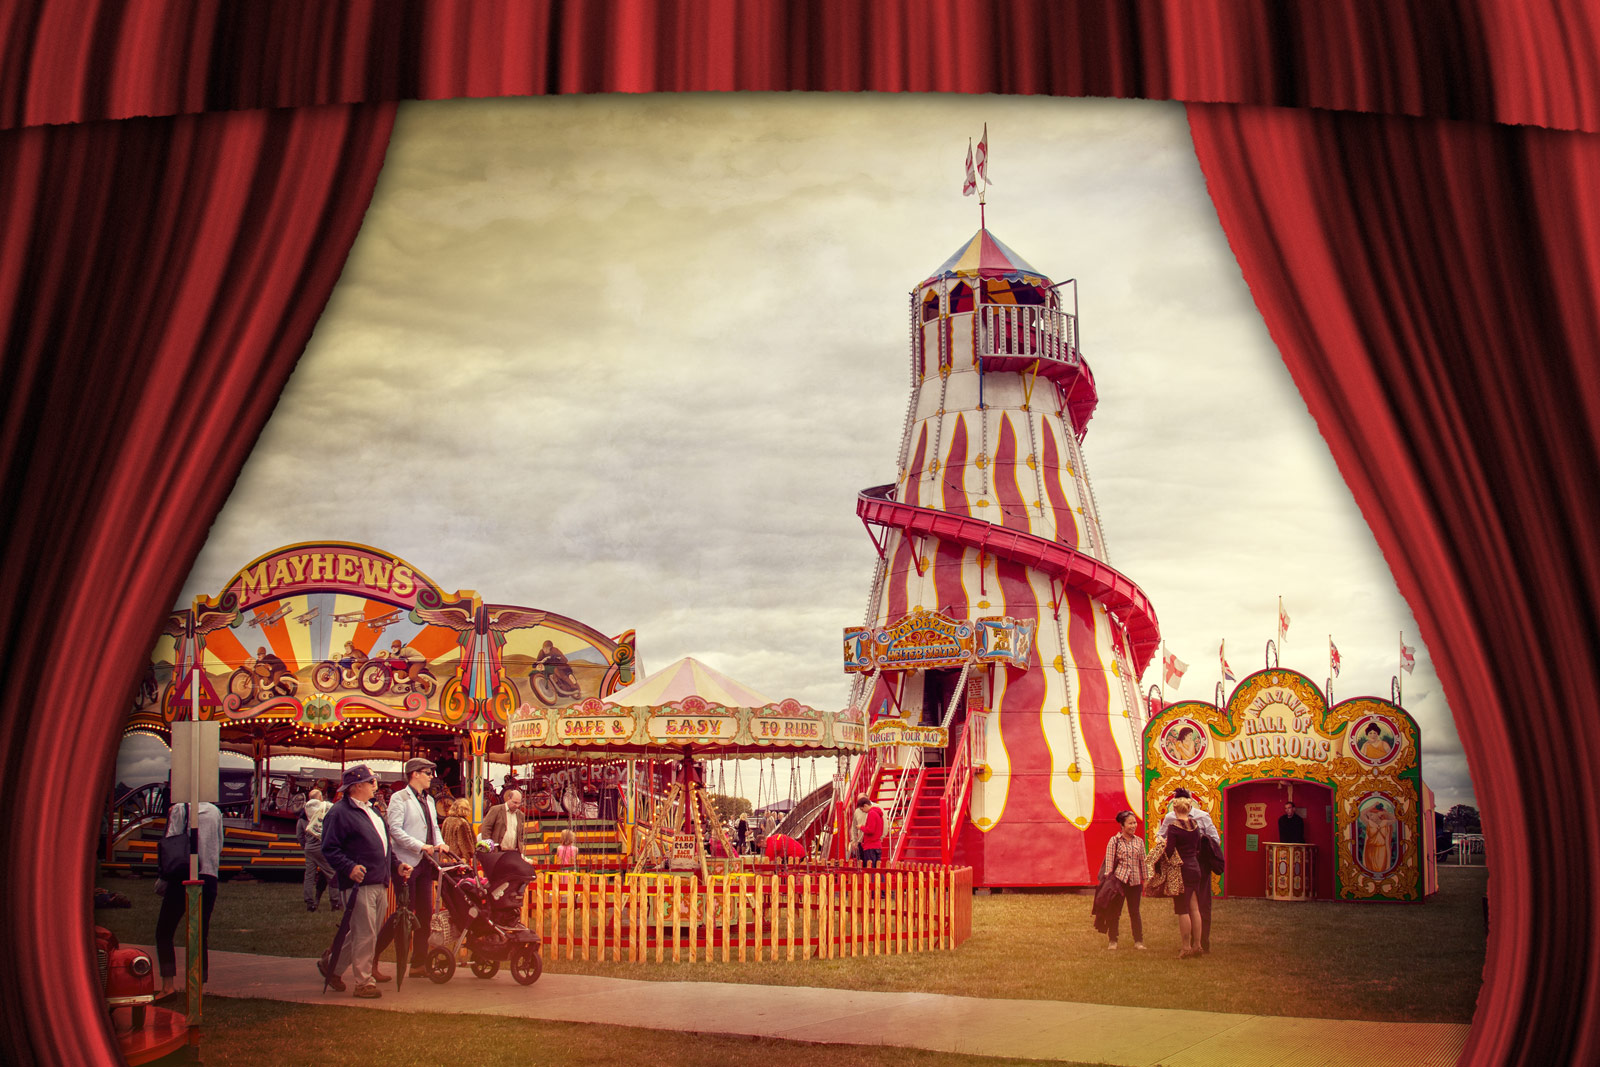
Basic-Curtains

Once downloaded just unzip and install the action into Photoshop. Unfortunately this action is unsuitable for  Photoshop Elements

To use the action, start with the photo you wish to use already open in Photoshop and then play one of the four actions in this set. The first thing it does is make a copy of your photo so the original will be untouched and safe. There’s a lot of things for Photoshop to do with this action so it may take a minute or two to run through.
DO NOT switch to another image whilst running the action.

There are no options or controls for this action but at the end you may need to use Free Transform (CTRL+T) to re-size and re-positing your photo under the curtains

The action will work with Photoshop CC2014, CC, CS6, CS5 and CS4

If you create a photo using the Friday Freebie then let me (and everyone else) know by leaving the link in the comments below.
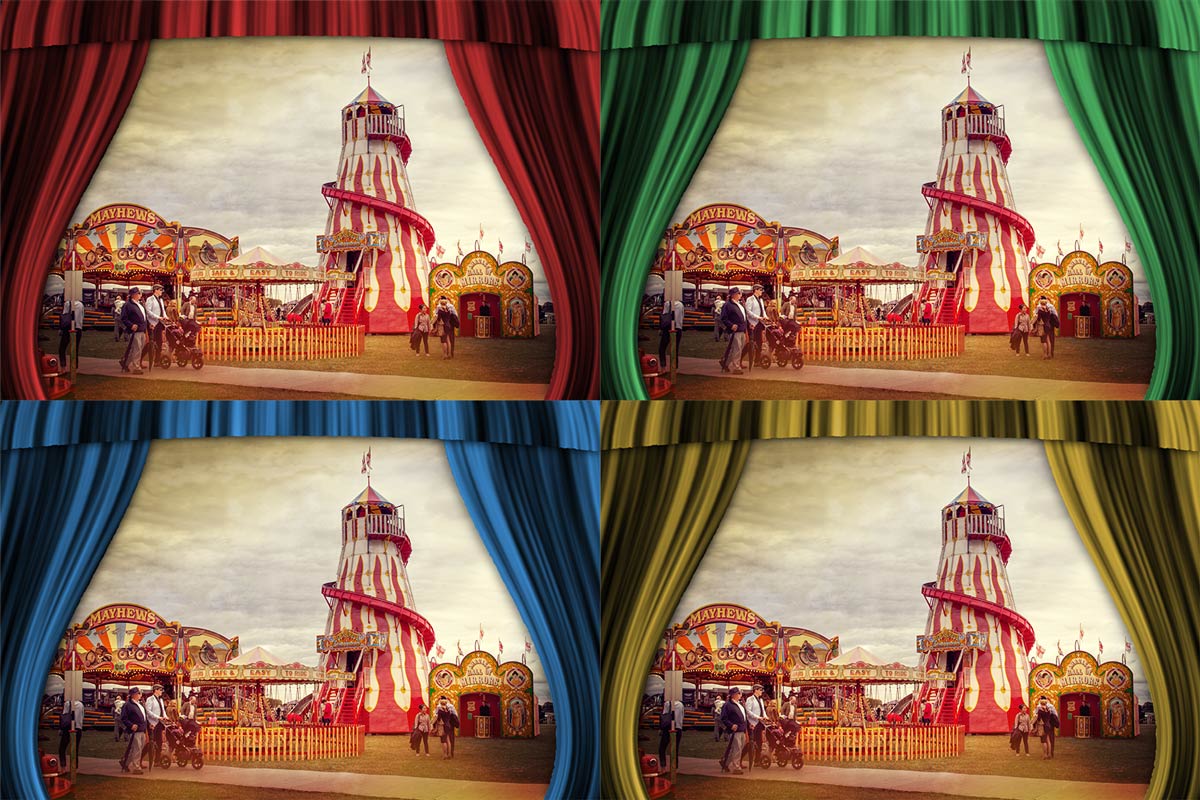
all-curtains

Usage rules
The action is copyright Gavin Hoey 2015. Use is limited to any personal but non-commercial purposes. Please share the Friday Freebie by linking back to this page. Do not redistribute the original image without my permission.

Download instructions

he direct link to download the actions is https://www.gavtrain.com/wp-content/uploads/2015/05/Cutains-Gavtrain.zip

You must UNZIP the action before installing it in Photoshop

No support is provided with the Friday Freebies. If you need help Google or YouTube the question and you’ll almost certainly find the answer :-)

Flash Duration To Freeze Action

One of the many amazing things you can do with flash is use it to stop fast moving things in their tracks. Unlike working with a continuous light it’s not the shutter speed that freezes the action, it’s the tiny amount of time that the flash lasts… its duration.

Flash-Duiration-Final

Basically it works like this. The more light you need the longer the flash duration, so reducing the flash power shortens the flash duration and increases it’s freezing power.

Different flashes produce very different flash durations and older design studio heads worked in a very different fashion but if you take a standard speedlight as an example, it will have a flash duration of around 1/200th second at full power and 1/10,000 sec at minimum power.

In the video below I put the theory into practice by bumping two wine glasses together and photographing the results with different flash powers

[youtube]https://www.youtube.com/watch?v=WwcFbRUfHkk[/youtube]

In case you’re wondering, the wine glasses are made of plastic and I drilled two tiny holes in each to attach them to the fishing line.

Gear used in this video (Links to Adorama)

Canon EOS 60D Digital SLR Camera Body Kit

Canon EF 24-105mm f/4L IS USM AutoFocus Wide Angle Telephoto Zoom Lens

Flashpoint Zoom Li-on Manual On-Camera Flash

Vanguard Alta Pro 284 Carbon Tripod

Universal Swivel Holder

Flashpoint Pro Air Cushioned Heavy Duty Light Stand

My Photography Show 2015 Schedule

There’s only two weeks to go until The Photography Show opens its doors at the N.E.C. in Birmingham and I can’t wait. Running from the 21st – 24th March, it’s the UK’s biggest and busiest photography show and it’s packed to the roof with major photographic suppliers and small independent retailers.

TPS-LOGO

But this isn’t just another trade show, there’s also loads of things to see and do. There’s a constant stream of live demos and talks from some of the best photographers in the UK and beyond, there’s also hands on workshops and masterclasses.

I’ll be there for the whole four days giving various talks and demos on Photoshop, Lighting and Photography. If you’re coming along it would be great to meet you and the best place to find me is at one of my talks either in the Adobe theatre, the Guild of Photographers “speakers corner” or in the Behind the lens theatre.

Saturday

10.15 am Adobe theatre Video Editing In Photoshop
1.00 pm Behind the lens Take & Make Great Photos
2.30pm Guild of Photographers J75 Fearless Flash Photography
3.30 pm Adobe Theatre Make your photos look amazing with Photoshop

Sunday

10.15am Adobe theatre Video Editing In Photoshop
2.30 pm Guild of Photographers J75 Fearless Flash Photography
3.30 pm Adobe Theatre Make your photos look amazing with Photoshop

 Monday

10.15 am Adobe theatre Make your photos look amazing with Photoshop
12.30 pm Adobe theatre Hidden gems in Photoshop for photographers
2.30 pm Guild of Photographers J75 Fearless Flash Photography

 Tuesday

11:00 pm Adobe theatre Make your photos look amazing with Photoshop
1.15 pm Adobe theatre Hidden gems in Photoshop for photographers
2 pm Adobe theatre Video Editing In Photoshop
3 pm Guild of Photographers J75 Fearless Flash Photography

All my demos are free and available on a first come first served basis. There’s no need to book but as the Adobe theatre in particular has limited seating I’d recommend getting there early!

Show tickets are free for professional photographers and the trade (if booked in advance) and £13.95 for enthusiasts (£18.00 on the door)

Controlling reflections in glasses

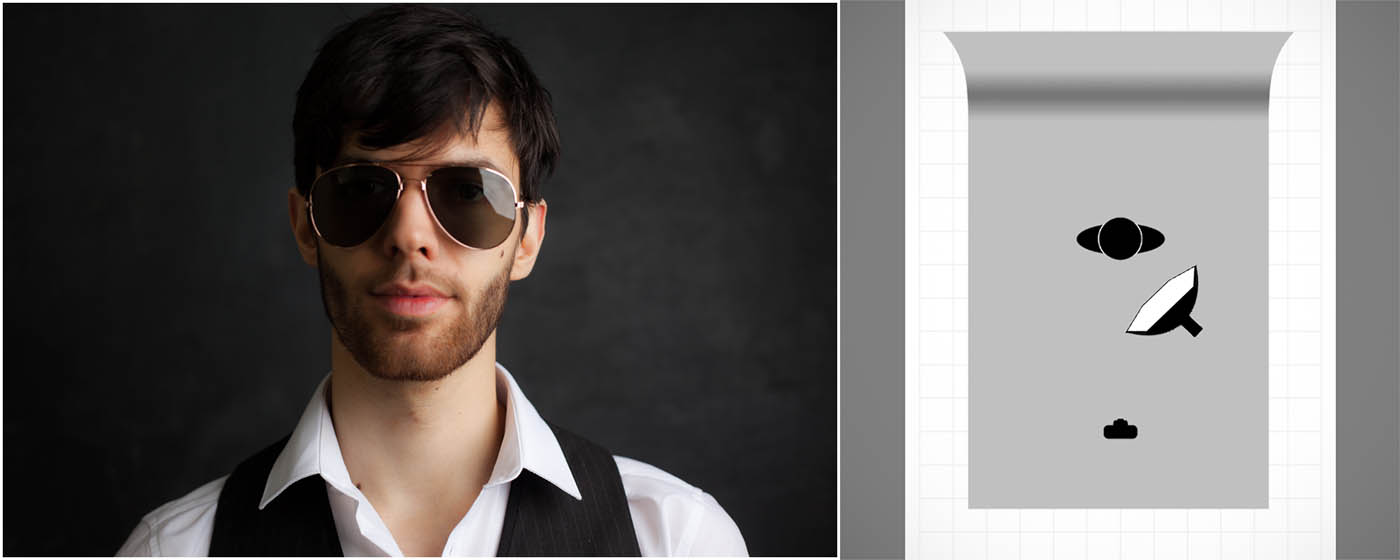
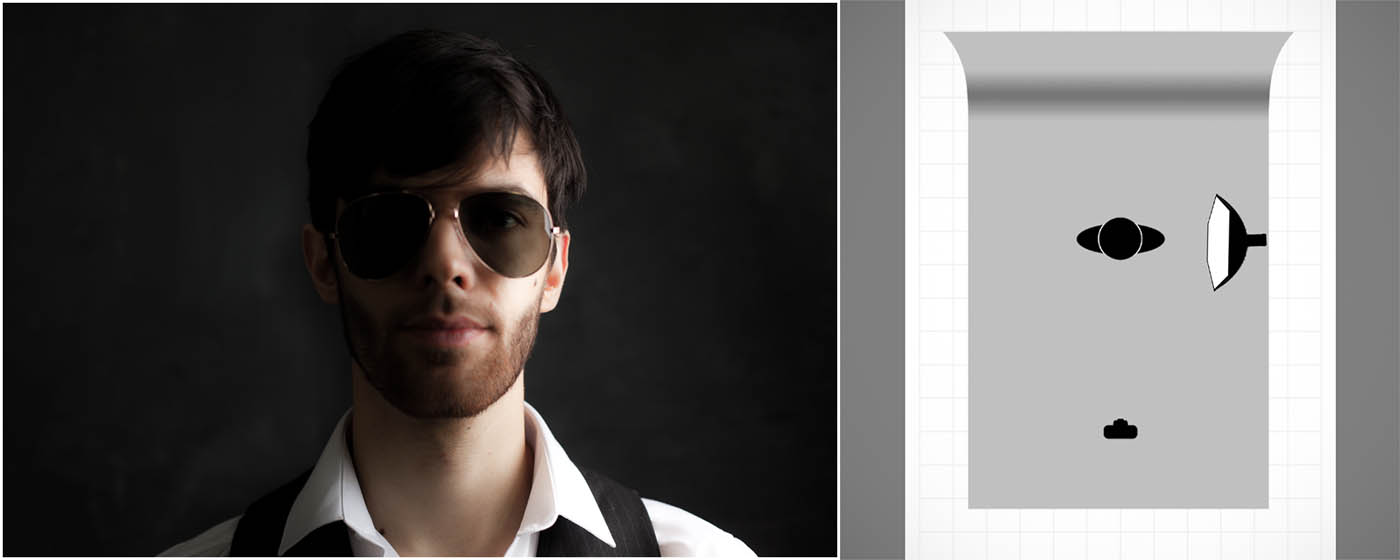
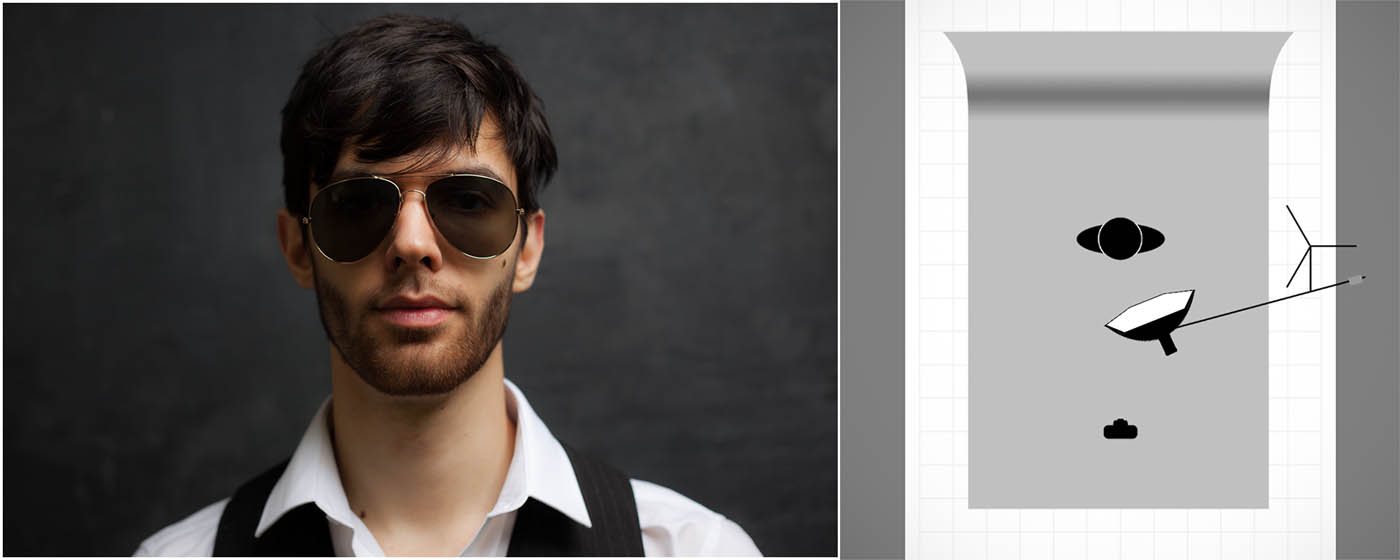
So you’ve got the lights, you have your model and you’re ready to shoot. Then you take a test photo and all you see is huge white reflections. It’s a problem that happens all too often but fortunately there are a couple of solutions that are quick, easy and effective.

Let’s start with the simplest solution. Get your subject to remove their glasses. It sounds obvious but it’s surprising how many photographers don’t have the nerve to ask. Whilst this can work wonders with occasional spec wearers, anyone who wears glasses full time will look most weird without their specs on. It’s also not going to work with the cool crowd who wear sunglasses all year round.

If you’re using flash or continuous light the chances are the reflections are likely to be from your lights and where you position the lights will affect the reflections you see in the photo.

photo-1Light from the front (including on camera flash) will produce the biggest, brightest and least attractive reflections. Because light travels in straight lines it’s going to hit the front of the spectacle lenses and bounce right back in to the camera. This really is one lighting position to avoid.

photo-2Knowing that light travels in straight lines means that moving the light source to the side will move reflection. Here the light is at about 45 degrees and the result is a reflection that’s much reduced in size.

photo-3Taking the idea a bit further, if the light is fully 90 degrees to the glasses results in a tiny reflection but also produces a split light effect which might not be the look you’re after. If you look really close you’ll still see a slight reflection. Why? Well the surface of glasses isn’t flat like a window, it’s curved so you’re never at a 90 degree angle across the whole surface of the lens.

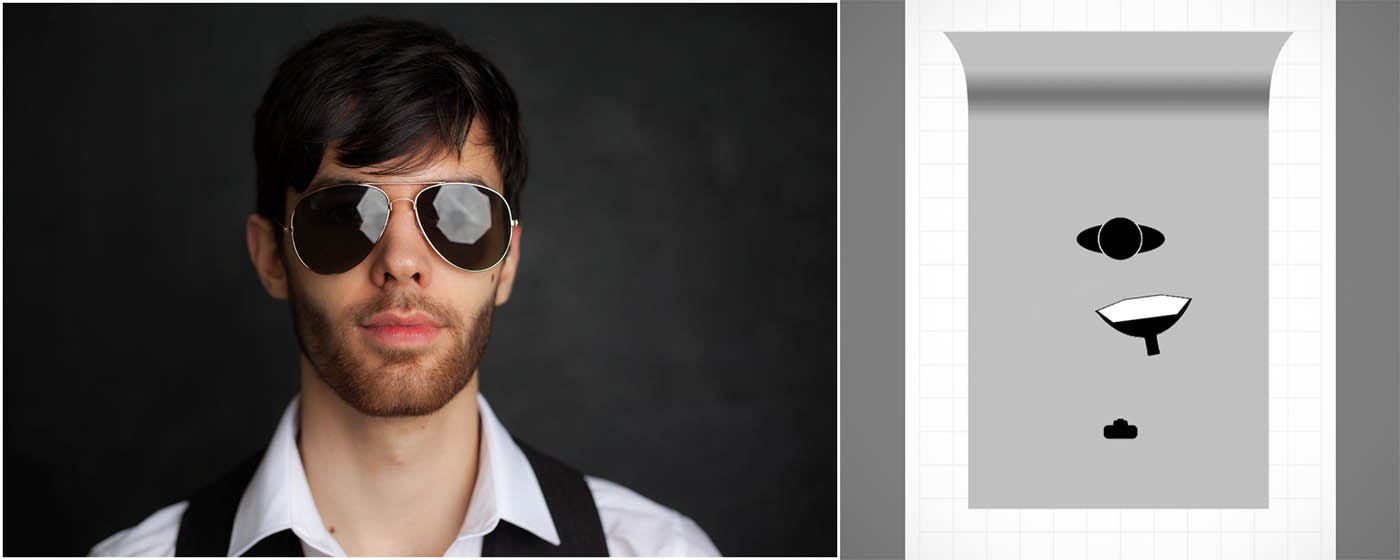
photo-5To minimise and remove reflections the best position for the light is up high. By elevating the light the reflections will disappear and the lighting pattern remains flattering too. Asking the model to drop their chin or slightly angle the glasses down can have a similar effect.

In the video below I go through all of the tips in this post in more detail and even give you some tips on how to add a reflection of your own choosing.

[youtube]http://youtu.be/kOzPWkkmZPE[/youtube]

Gear used in this video

Canon 5D Mark III www.adorama.com/ICA5DM3.html?KBID=67338

Canon 50mm f/1.8 II www.adorama.com/CA5018AFU.html?KBID=67338

Flashpoint Light Stand www.adorama.com/FPLS9.html?KBID=67338

Black Rapid RS-7 Strap www.adorama.com/BRRS7.html?KBID=67338

Flashpoint StreakLight 360 Ws Creative Collection www.adorama.com/FPLFSL360K2.html?KBID=67338

Sekonic L-308S Flashmate www.adorama.com/SKL308S.html?KBID=67338

Westcott Rapid Box 26″ Octa Softbox www.adorama.com/WERB26OM.html?KBID=67338

Fractured Paint Brush – Friday Freebie

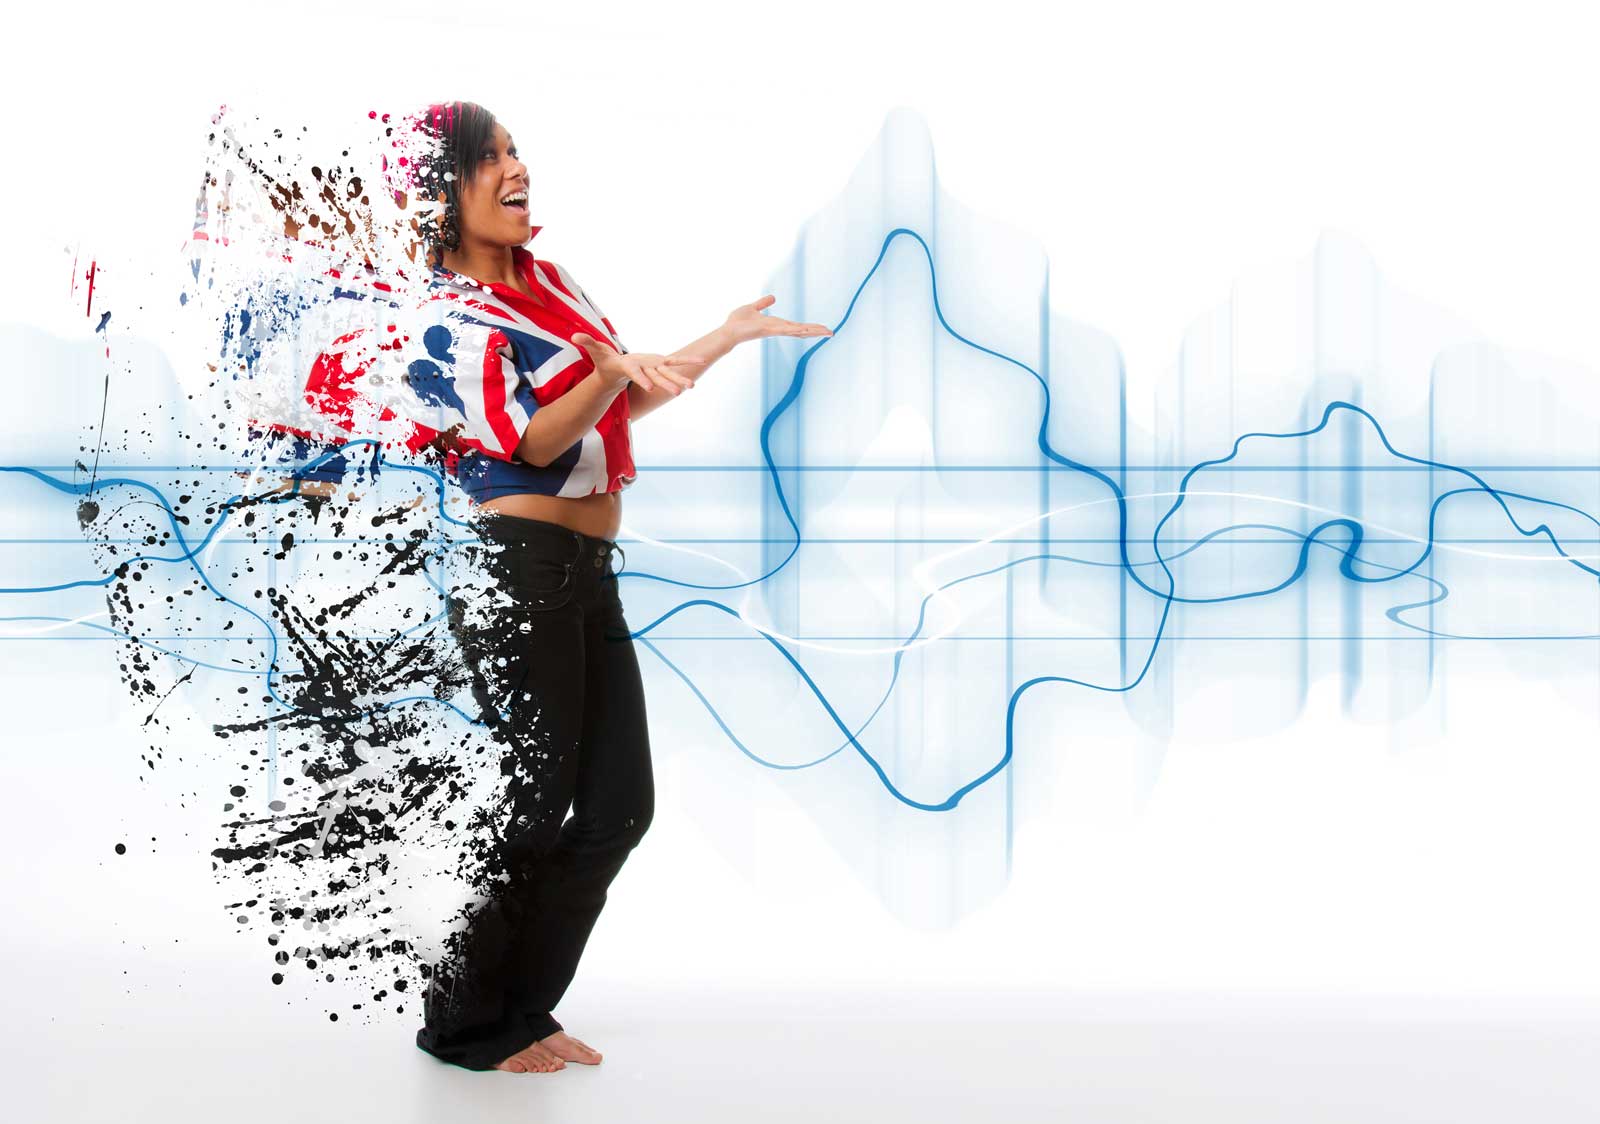
Back in 2011 I made a video on how to create a fractures or shattered image using Photoshop. I’ve added it to this post in case you missed it. To create the effect I made some fractured paint brushes which I uploaded to the Adobe Exchange website and shared for free. Three and a half years is a long time in the fast moving world of the internet and the Adobe Exchange (as I remember it) is no more, so I’m sharing them again here.

Spatter-copy

Full download instructions are below but you can also
Download the Paint Spatter brushes

Once downloaded just unzip and install the brushes into Photoshop or Photoshop Elements and your ready to go. The video below should give you some ideas of how to use the brushes.
[youtube]https://www.youtube.com/watch?v=JUjXJ5ZPO5M[/youtube]

If you create a photo using the Friday Freebie then let me (and everyone else) know by leaving the link in the comments below.

Usage rules
The brushes are copyright Gavin Hoey 2015. Use is limited to any personal but non-commercial purposes. Please share the Friday Freebie by linking back to this page. Do not redistribute the original image without my permission.

Download instructions
1. Click on the correct download link below (no sign up is needed)
https://drive.google.com/file/d/0B_Mmmm3K1utNcjlPYWRvekRYanc/view?usp=sharing

2. Click the Download button

3. The download should start automatically

4. No support is provided with the Friday Freebies. If you need help Google or YouTube the question and you’ll almost certainly find the answer :-)

Getting your photography noticed

Recently I recorded a series of short videos as part of the Lovers of light” photography competition. In this clip I have a few words to say about getting your work noticed.

[youtube]https://www.youtube.com/watch?v=10TGbr0XfTQ[/youtube]

Who’s your audience
The first step to getting your photography noticed is deciding who you want to be noticed by. Are you trying to attract customers, looking to reach corporate clients or seeking the approval of your photography peers. If you know your target audience you can start planning a strategy to reach them.

Find your style:
Shoot what you love and it will show in your photos. It might be that you have a hobby or sport that combines well with photography or maybe you have a passion for a type of photography and want to explore it.

If you shoot and share a random selection of photos your audience will be most likely be the same.

Develop your style:
Sticking to a style that you can explore and develop will also help you develop a band of followers who share your style. But don’t get stuck in a rut, challenge yourself to try new ideas within your area of photography. Look at the work of photographers you admire and try and emulate their shots. Don’t try and reproduce the same shot exactly but give it your own spin.

Be Social:
Social media is a great way to talk to fellow photographers and share your work. Post new photos to your social media channels regularly and post your work to more than one place. Stick at it, the more you post the greater the chance you’ll break through.
Don’t give up!

And finally, enter competitions. Even if you don’t win you’ll gain experience and have a reason to shoot more. Remember the first  step of winning a competition is to enter. http://www.velux.co.uk/loversoflight

Softbox Size vs Soft Light

One of the primary uses of a softbox is to give soft lighting, but with so many sizes available, which one should you use?

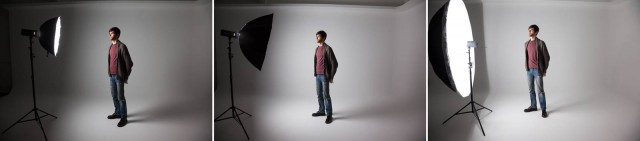
The answer in part comes from the classic rule with soft lighting which is this. The bigger the light source (relative to the subject) the softer the light produced. In other words bigger softboxes give softer light and as long as your softbox is close to your subject that holds true. To test it out I got my 28″ Parapop softbox from Adorama, a medium sized softbox and borrowed a giant 7′ Westcott umbrella softbox.

soft-1

You can see this in action in the three photos above. In each shot the distance from light to the model was 1 meter and the light was metered at f/8. Notice how the shadows blend in with the highlights as the softbox size increases and that’s soft light in action.

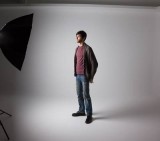
Now remember I said the softness of light is also relative to the subject size. Well here’s what happens if you zoom out and shoot a larger, full length portrait. Once again the distance and settings are the same in all shots.soft-2

Look at the shadow behind the model. With the small and medium sized softboxes you’ll see a sharper, harder edge to the shadow then the big softbox. You’ll also see that the smaller softbox gives a smaller spread of light compared to the more even illumination of the large softbox.

So if you want to shoot full length portraits with soft light then an oversized softbox is one answer but it has another use to. Unless you want to spend time in Photoshop cloning out the light you’ll need to back it up. Moving the light away from the subject makes it that much smaller and therefore harder. Oversized softboxes allow you to get soft light without the source being in the scene.

Take a look at this video where I cover all of this and more.
[youtube]https://www.youtube.com/watch?v=a-rAnxVX9kE[/youtube]
Of course there are a few downsizes to large softboxes, one of which is the lack of directional control. In the video above I add some control using Photoshop but in the next video I’ll add it to the light.

Gear used in this video

Flashpoint RoveLight 600 http://www.adorama.com/FPLFRL600.html?KBID=67338
Glow ParaPop 28″ R Softbox http://www.adorama.com/GLSBSM28PPFP.html?KBID=67338
Westcott 7′ Silver Parabolic Umbrella http://www.adorama.com/WEUSLP7.html?KBID=67338
Westcott diffusing cover for 7′ Umbrella http://www.adorama.com/WE4631D.html?KBID=67338
Canon 5D Mark 2 http://www.adorama.com/ICA5DM3.html?KBID=67338
Canon 24-105L http://www.adorama.com/CA24105AFU.html?KBID=67338
Black rapid RS-7 Strap http://www.adorama.com/BRRS7.html?KBID=67338
Sekonic L-308S Flashmate http://www.adorama.com/SKL308S.html?KBID=67338

Tips for buying a camera

With the January sales either looming or already here, you might be considering buying a new camera. Now I’m not going to tell you which brand and model of camera you should choose as there are countless options out there and not one of them is right for everyone. However here are some things to consider when buying a camera

[youtube]https://www.youtube.com/watch?v=_P_3lgXYkpM[/youtube]

The two most important questions are…
What sort of photography will you be mostly shooting?            
How much do you want to spend?

Answer those and your search can begin in earnest.

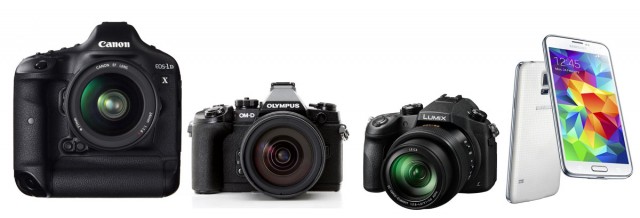
camera-type

There are basically four types of digital camera. DSLR, Compact System camera (CSC), Bridge Camera and Mobile phone. All types have their pro’s and cons

If you’re want the best quality images then DSLR is probably the way to go. If you’re after great quality but with less bulk the CSC is the answer for you. Need portability and flexibility? Then a Bridge camera could be the answer. If you just want a point and shoot then the mobile phone ticks that box.

Don’t forget the lens. If you’re buying a DSLR or CSC then you’ll need to budget for a lens or two. When it comes to image quality the lens you use can make a bigger difference then the camera it’s attached to.

Bridge cameras are famed for their super long zoom lenses but often that comes at the expense of a true wide angle. The lens is built into the camera so make sure it can do what you want before you buy one.

Mobile phones can get a hard life inside pockets and bags. Before you take a photo check the lenses is clean and scratch free.

Whatever style of camera you choose and whatever name is printed on the front, remember it’s the person behind the camera that makes truly great photos happen.

Bokeh Background – Friday Freebie

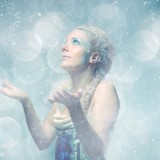
At this time of year there’s the potential for bokeh shots all over the place. With the right lens, twinkling Christmas lights can make great bokeh photos and that’s exactly what I used to create this Friday Freebie background / texture.

Bokeh-SNOWQUEEN-SAMPLE

Full download instructions are below but you can also
Download the Bokeh Background Here

Once downloaded just open the bokeh image and your photo. Copy and paste the bokeh onto your photo and use Free Transform (CTRL+T) to make the bokeh fill the image. Next you’ll need to blend the two images together. For this shot I changed the Layer Blending Mode from Normal to Screen but as all the blending modes create a different look try them all.

The bokeh will most likely need masking or erasing away to reveal your main subject. Another thing to try is duplicating the bokeh layer to deepen the effect.


Bokeh-SNOWQUEEN-B4

If you create a photo using the Friday Freebie then let me (and everyone else) know by leaving the link in the comments below.

Usage rules
The image is copyright Gavin Hoey 2014. Use is limited to any personal but non-commercial purposes. Please share the Friday Freebie by linking back to this page. Do not redistribute the original image without my permission.

Download instructions
1. Click on the correct download link below (no sign up is needed)
https://drive.google.com/open?id=0B_Mmmm3K1utNZHVCSldJS2REMzQ&authuser=0

2. Click the Download button download_icon

3. The download should start automatically

4. No support is provided with the Friday Freebies. If you need help Google or YouTube the question and you’ll almost certainly find the answer :-)