NYC here I come!

Next month, for three days only, I’ll be in New York City and thanks to Adorama I’ll be sharing part of the experience with as many photographers as possible.

If you’re in New York on Tuesday 25th February I’d love to meet you. I have a whole day of photography talks and demo’s lined up and the best bit is… it’s all FREE!

Full details are over on the Adorama website. It’s a ticket only event and very much first come first served so bag yours now!

If you can’t join me in person then you can still join me online. The plan is to live stream a small part of the day, so no matter where you are in the world you can join me live! More details to follow.

How my photo made the BBC news

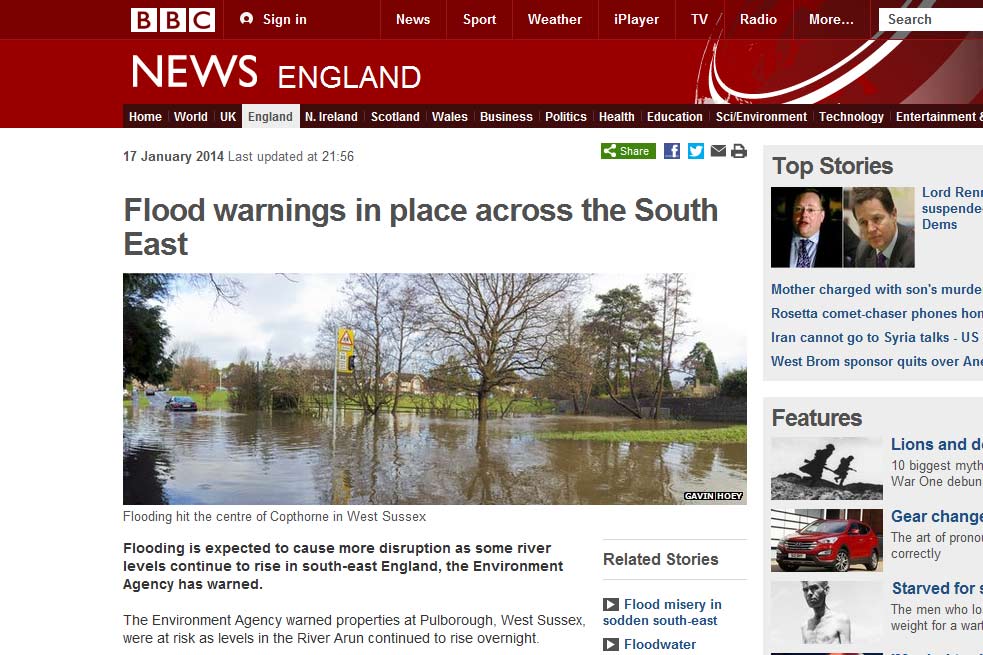
bbc-screengrabLast Friday one of my photos wound up on the BBC website and although the subject matter was a potential tragedy for those affected, I’m still very proud to see my work on the BBC news website.

To be honest the biggest surprise was just how many people noticed the small “by line” on the photo and got in contact. I also got plenty of questions about how my photo ended up being used, so here are some answers…

Was it commissioned
Not this time. Following weeks of wet weather we had one day of rain too many and the small stream that flows through the village in which I live, decided to flood in a way that I’ve never seen. I snapped a few photos just as record.

So how did it end up on the BBC website?
I was supposed to be travelling to London but trains were all cancelled and the roads blocked, so I was reading the Local BBC twitter feed to find out what was running. By chance a new tweet pop up asking for any photos of the flooding and I thought… why not. The local BBC retweeted my photo and a few minutes later I was contacted by a lady from the BBC website asking if they can use my photo.

Did you get paid?
In this case I didn’t ask to be paid and to be honest payment was the last thing on my mind.

Do you usually work for free?
No I don’t. Had I been commissioned to photograph or video the flooding then it would be another matter but this was simply me sharing a piece of the history of Copthorne.

Would you do it again?
Absolutely I would.

Did the BBC alter your photo?
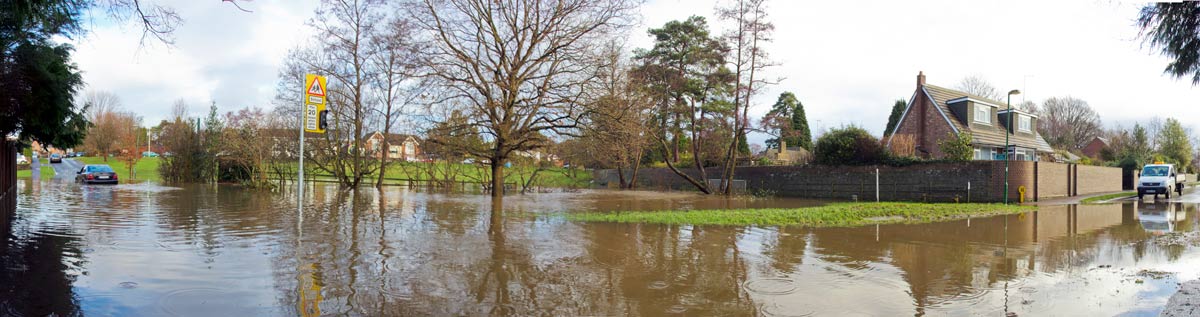
My original photo is below. It’s a multi image panorama made up of 7 or 8 photos and cover a field of view that’s just under 180 degrees. I sent the BBC a high res version with permission that they could crop it as required and that’s exactly what they did.

Copthorne-Flooding-blog
So how bad was the damage?
It looked worse then it was, no one was injured and although the road and a few gardens were flooded, the houses were mostly fine. Some damage was self inflicted when a couple of drivers decided to brave the flooded road. A big mistake!

Did you get flooded ?
No we were just fine.


Do you under or overexpose?

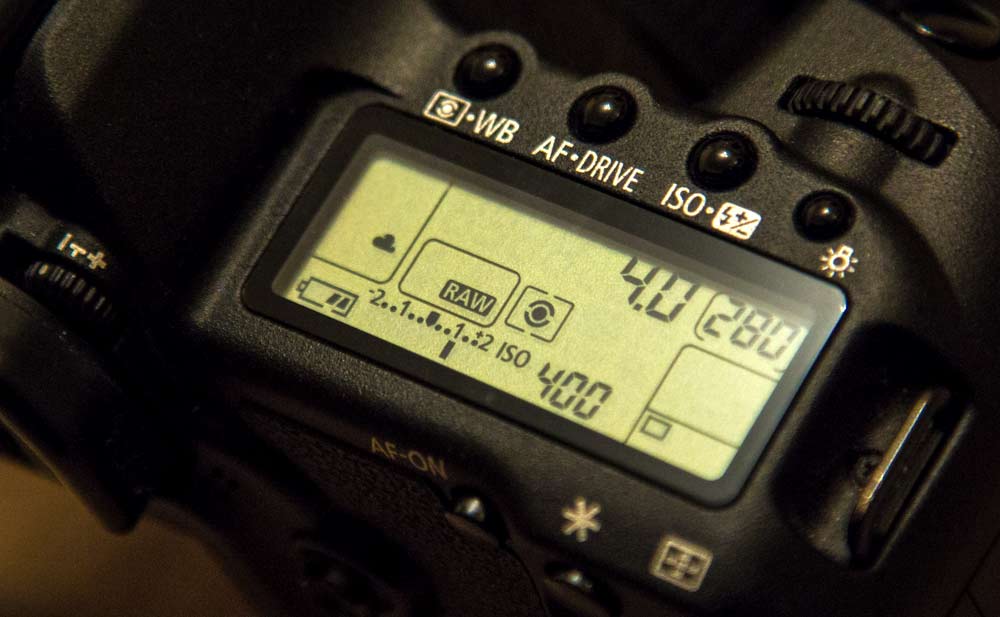
exposure compensation CanonIt’s a question I haven’t thought much about since the days when I shot JPG images only. Now that’s a long time ago. Back then if you lost the highlights in your image you’d basically lost the image, so it was general practice to underexpose the JPG by 2/3rds of a stop from the cameras meter reading. Yes every photo was a little dark but that could be fixed in Photoshop and you still had highlight detail.

With RAW there’s a lot more exposure latitude and worries about clipped highlights in day to day photography are almost a thing of the past. In fact there’s so much hidden image information in the highlights of a RAW file I know plenty of photographers who will deliberately over expose their images knowing they can recover it in post-production.

Why overexpose?
In a word, noise, and the theory goes something like this. Noise is very evident in the dark, shadowy areas of a photo that are made lighter when processing. But as RAW files have all this hidden highlight detail, if you start off with RAW files that are a bit too bright and make them darker, you won’t add any more noise.

Sounds crazy right? Well, believe it or not it really works… but keep reading because there’s a catch.

over-under-1

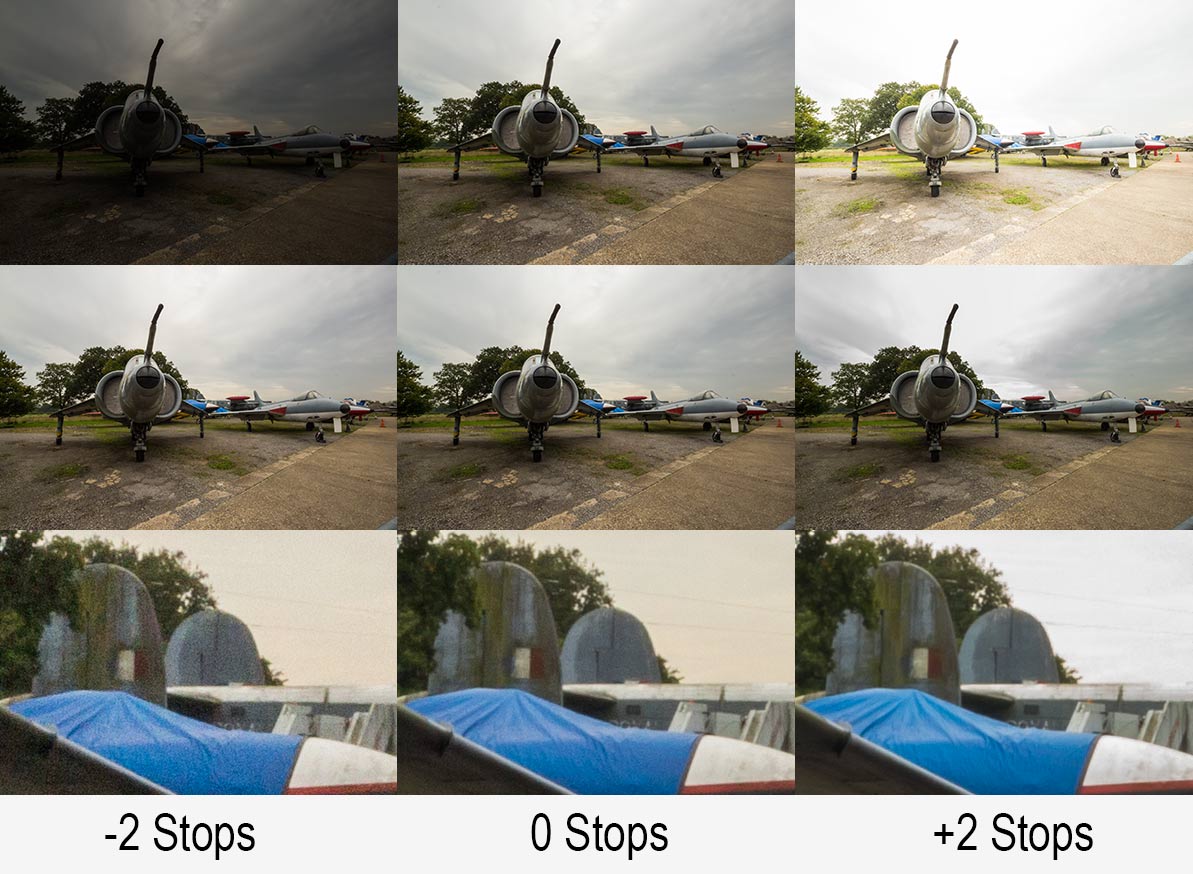
Take a close look at the image above, you’ll need to click it to really see what’s going on.

I shot the same scene at three different exposure (Top Row) I then brought all three RAW files into Adobe Camera RAW and edited them so they looked more or less the same (Middle Row). From a distance the three images in the middle row all look the same but a close up says otherwise (Bottom Row).

The bottom row confirms the theory. Brighten an under exposed image and they’ll be more noise evident but darken an over exposed RAW image and the noise is about the same as the correctly exposed image and may be even slightly less!

The catch
So you may be think that I’m going to say from now no you should over expose your images by a stop… well I’m not.

You see, although the lower noise is brilliant there are other things to think about.

over-under-2

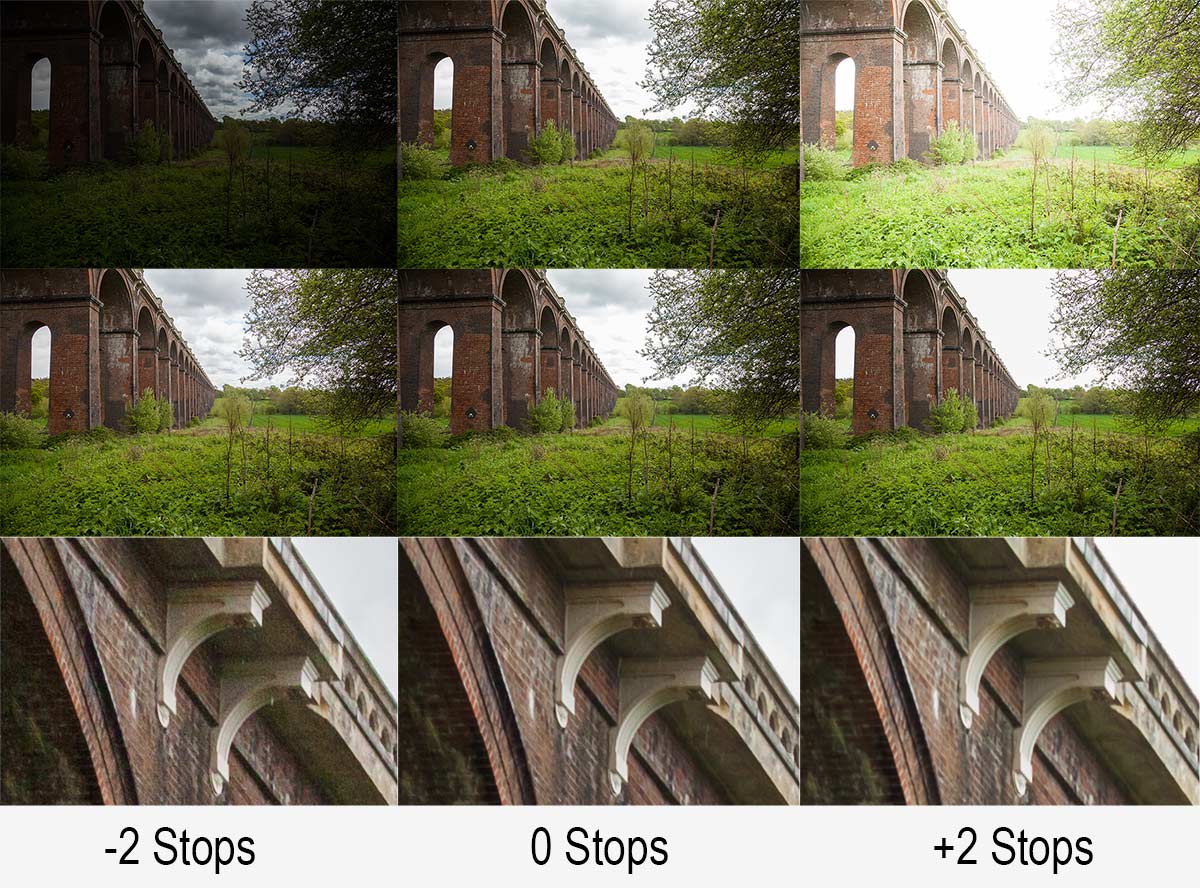
First there’s the question of just how much highlight detail you can recover. Take a look at the photo above and you’ll see the problem. Where’s the sky gone on the right hand (overexposed) image? The correctly exposed image (middle row) struggled to keep highlight detail so over exposing is asking just a bit too much, even in RAW.

That’s not all. One stop over exposure means your shutter speed is twice as long and that could be the difference between a sharp shot and a blurred shot. You might be able to counter that by opening up the aperture if the lens / depth of field allows it and of course you could double your ISO but that rather defeats the purpose doesn’t it.

Over, under or as metered?
As is so often the case there’s no rights or wrongs that will apply to every situation and camera meters are prone to errors by design. However for me, I’m sticking to the as metered reason unless there’s a valid reason to do otherwise and I’d recommend you to do the same.

2014 Exciting Times Ahead

With the new year upon us it’s time to say goodbye to 2013 and hello to 2014 and all the exciting opportunities that it brings. Whatever your plans for the coming year, I hope 2014 proves to be a year to remember for all the right reasons.

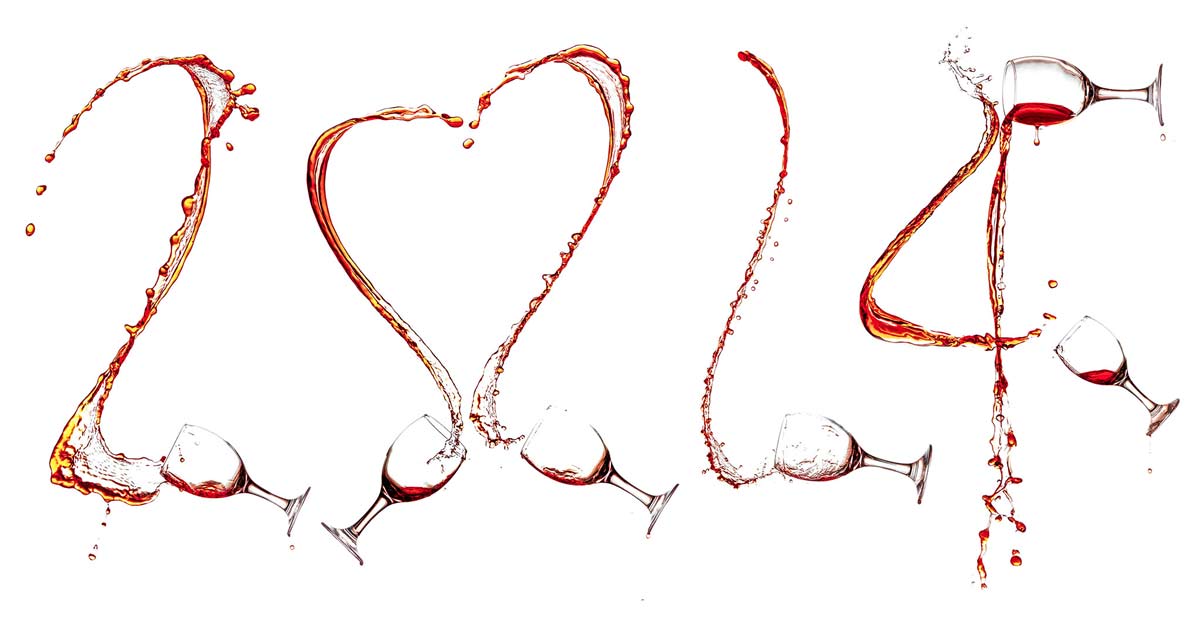
2014-Poster-Wine

I’ve got some great plans for 2014. A workshop in New York City, live streaming videos from my studio and a bunch of new and exciting workshops here in the UK are all on the cards. Details will be here on my blog and also on my Facebook page and you can be sure I’ll be tweeting about it too.

By the way the 2014 image above is a montage of six splash photos taken in my studio specifically for the shot. You can find out how it’s done by watching my video for Adorama TV.

8 bit, 16 bit or 32 bit?

When it comes to the technology that surrounds digital photography I’m really not interested in how things work. All I want to know what things work and which is best for me. So if you’re looking for an article about how 8 bit is technically different to 16 bit then this isn’t it. However it you want to know how much better looking 16 bit images can be compared to 8 bit then read on.

UneditiedWhy does bit depth matter?
In a nutshell the bigger the bit depth the more data is in the image and the more adjustment you can make to that images shadows and highlights. Not only that, the adjustments will be less damaging to the image too.

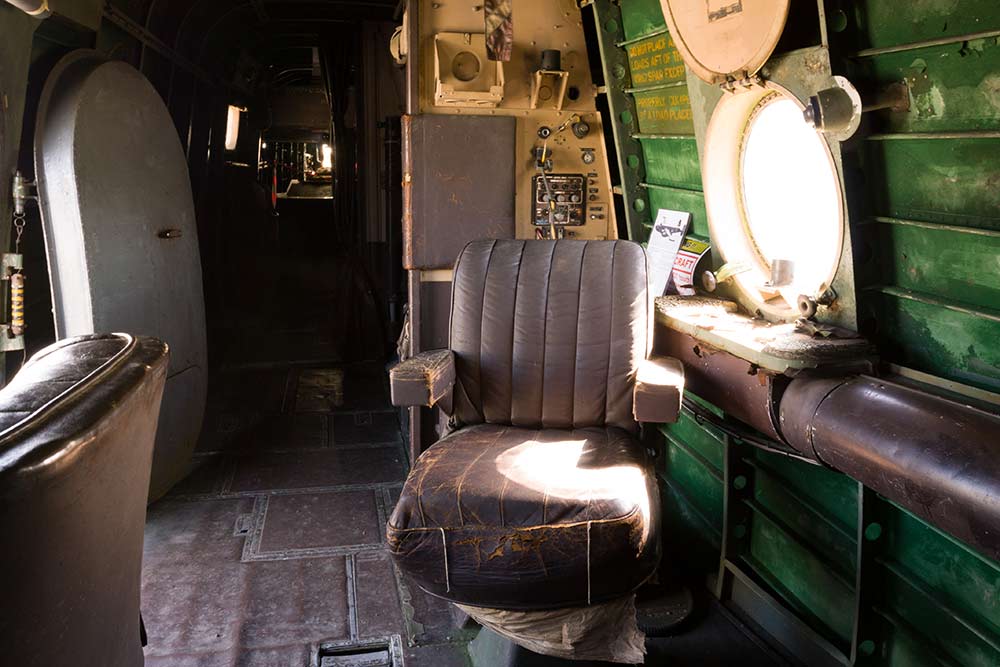
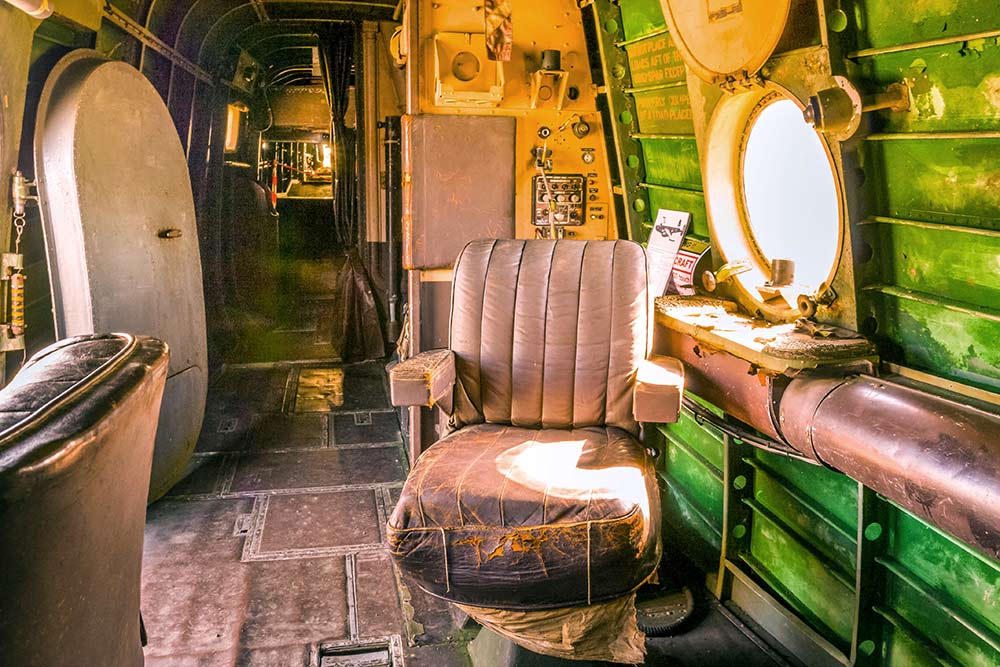
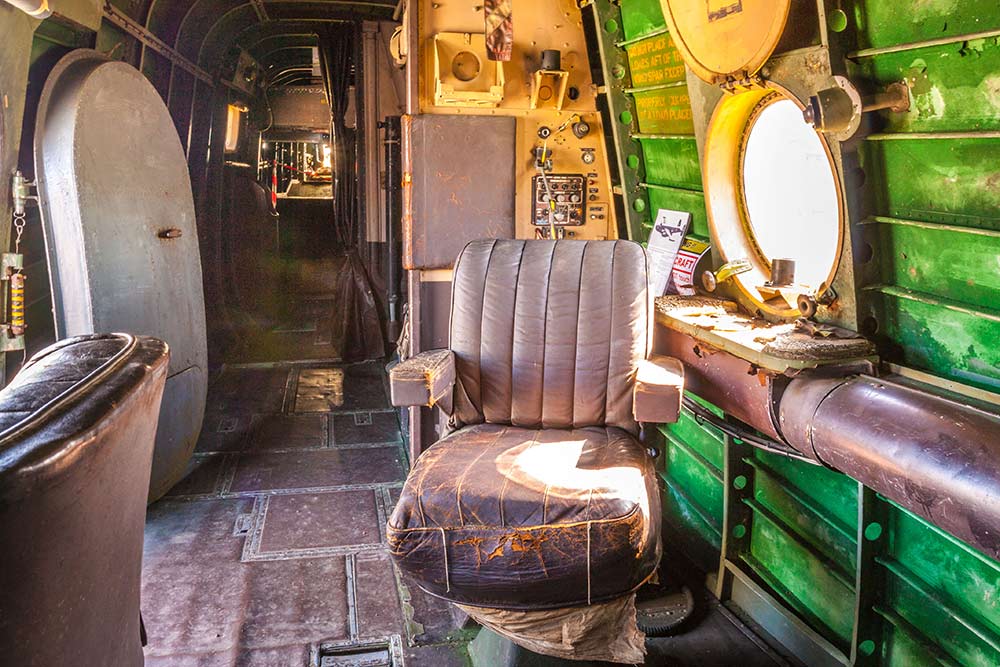
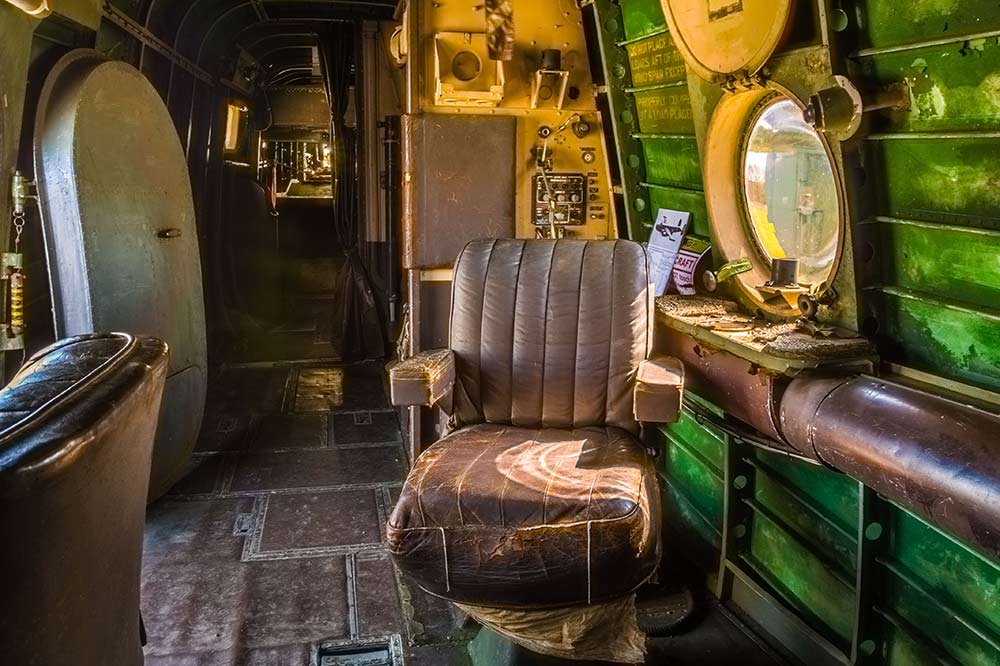
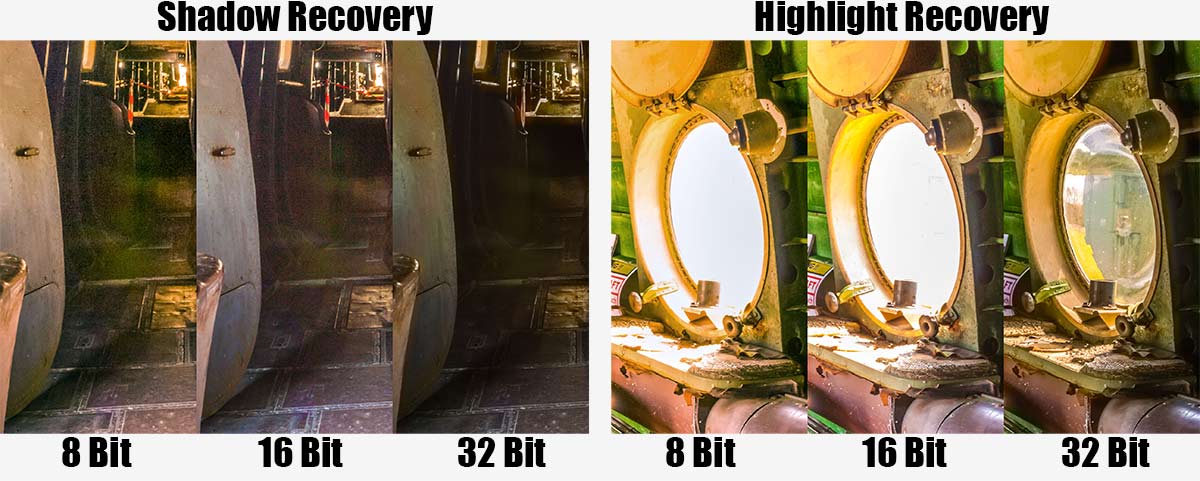
In order to see how bit depth affects the image I’ve taken this test photo which I have in both 8, 16 and 32 bit and pushed them to the max in Adobe Camera RAW. That means I’ve pulled out all the highlight and shadow detail that I can, way beyond what would be considered acceptable. Click the small image to see the unprocessed original.

8 Bit
Do you shoot jpg images? Are your images destined only for the internet? Is the size of the file important to you? If the answer to any of the questions is yes 8 bit images are for you. 8-bit8 bit has enough information to show colour images with smooth tones and even has a little bit of wiggle room to tweak exposure a little bit. It’s possible to pull detail out of a photos shadows but the results become noisy very quickly. Highlight recover is much less effective and as a result many people who shoot JPG choose to slightly under expose or darken the image.

8 bit images are great if the image you shoot needs little or no exposure adjustment in post processing.

16 Bit
Although technically not a true 16 bit image I’m basically talking about the RAW files from your digital camera. 16 bit files are packed with a lot more information then your standard 8 bit JPG and that means a lot more space to make adjustments to the exposure.16-bit

Shadow areas of an image can be made slightly lighter without adding noise to the image but heavy adjustment (as seen in the sample image) will still look terrible. As with the 8 bit image recovering highlight detail is less effective then shadow but once again the extra data can yield more detail.

Saving your 16 bit images as JPG’s isn’t possible, so TIFF or PSD are your top options to save as. It’s also worth noting that not all of Photoshop is compatible with 16 bit images, for example some of the older filters will be greyed out.

32 Bit
The new kid on the block is 32 bit. To date no consumer cameras can capture 32 bit images, at least not in one click. However by blending 3 or more differing exposure inside of Photoshop you can create a 32 bit image that contains a vast amount of image data.
32-BitAdobe Camera RAW in Photoshop CS6 and Lightroom 4 (or newer) can open and edit 32 bit files. Best of all you can choose to have the highlight detail from the dark exposure and shadow detail from the light exposure. Now if that sounds a little bit like HDR (HighDynamicRange) you’re not wrong.

Because 32 bit is so new don’t expect much to work with it. Photoshop can open the files but almost everything will be greyed out. It’s also worth noting that your 32 bit TIFF files will be enormous, they can easily be 10 times bigger in memory size then RAW files but they’re worth it!

shadow-highlight-recovery

Countdown To Christmas Freebie

christmas-countdown-sampleHere’s a little bonus freebie for you which could well be the perfect tool to help plan your time in the run up to Christmas.

At this time of year it can be very easy to lose track of what needs to be done and when, that’s where this little planner could be really handy.

As well as filling in your important events you can add vital dates such as the last posting dates for your orders and christmas cards. I’ve designed the countdown planner so there’s more room for you to fill in the important reminders as the big day approaches and of course, the biggest space is reserved for Christmas day itself.

You can download it from www.gavtrain.com/free/christmas-countdown.zip

The planner is A4 in size, so it’s perfect for home printing. Happy planning 🙂

christmas-countdown-sample2

Questions to Canon

canon_logoOn Sunday I mentioned on my Facebook page that I was visiting Canon this week and asked for any questions I should put to them.

There were a few questions about bagging some freebies but most of the questions raised were about future Canon cameras, lenses and features. Understandably Canon were very tight lipped about that kind of thing so I can’t tell you when the 7D2 will be announced.

However there were lots of questions Canon were happy to help with. Please note this shouldn’t be read as official Canon policy but my interpretation of our conversations.

Will Magic Lantern firmware invalidate my warranty?
Possibly yes, possibly no. Magic Lantern is 3rd party firmware for Canon cameras and adds some very useful video / photography features. I got the feeling that Magic Lantern firmware was a grey area with no official company line but there was a firm feeling of “use it at your own risk”.

The impression I got was if the firmware runs just off the Memory Card you should be OK but if the Canon firmware is replaced, modified or added to in anyway whatsoever don’t expect Canon to be willing to help if you run in to trouble. For the record I run Magic Lantern on my 60D and have no plans to stop using it anytime soon.

Can Canon fix rolling shutter issues on DLSR’s
As far as I could tell the answer is no. Rolling shutter is a phenomenon seen in videos. When the camera pans suddenly to the side, upright things will bend or go diagonal. If it’s a problem that you can’t live with then Canon’s Cinema bodies is the way to go.

Is it true that DSLRs are on their way out?
Again Canon aren’t going to tell me about their future plans but similarly they didn’t show any signs of ditching DLSR’s anytime soon.

Why don’t they incorporate a time-lapse function in their cameras.
No reason given but no comment if it will be ever added. To me it seems like an easy add to the firmware and I for one would like to see it.

Time-lapse is part of Magic Lantern firmware (see above regarding warranty issues) but bare in mind if you take 1000 images in your time-lapse that might be 1% or more of the life expectancy of the shutter. 100 timelapses and your shutters is dead… which is why I rarely do time-lapse with my DSLR.

5D-Mode-DialIs there a Spot Meter button on the 5D Mark3?
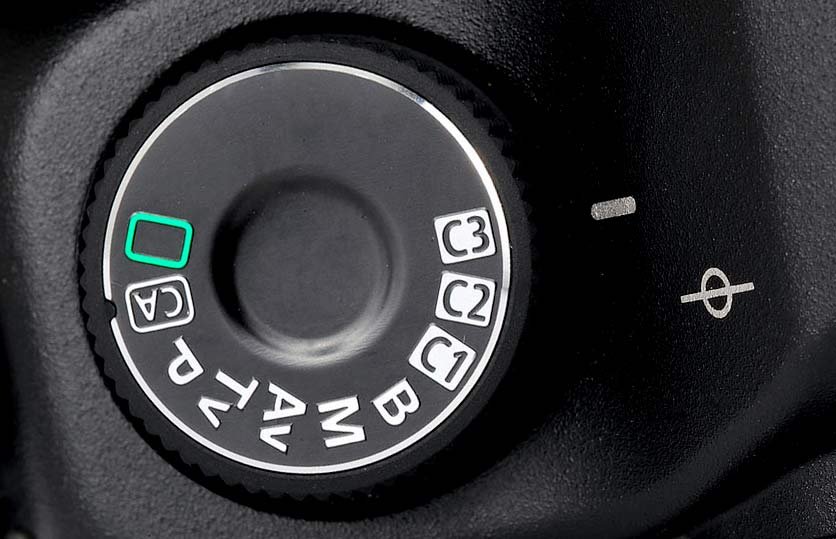
There’s no single button but it’s all part of the meter mode button. If you need a fast way of switching between spot metering and standard metering then consider setting up a custom profile of the mode dial. EG set C3 as spot and C2 as standard.

3 Non-Photographic Items In My Bag

Like many photographers my camera bag is stuffed full of gear. Some things like Camera bodies and lenses are obviously essential and get used all the time, whilst other things like lens cloths and random batteries are always handy to have around.

Space in my camera bag is always at a premium and I hate carrying around things that I won’t use. None the less there are a few things I always have with me which, on the face of it, have nothing to do with cameras but have proved their worth time and again.

So here are my top three most useful non photographic things I keep in my camera bag.

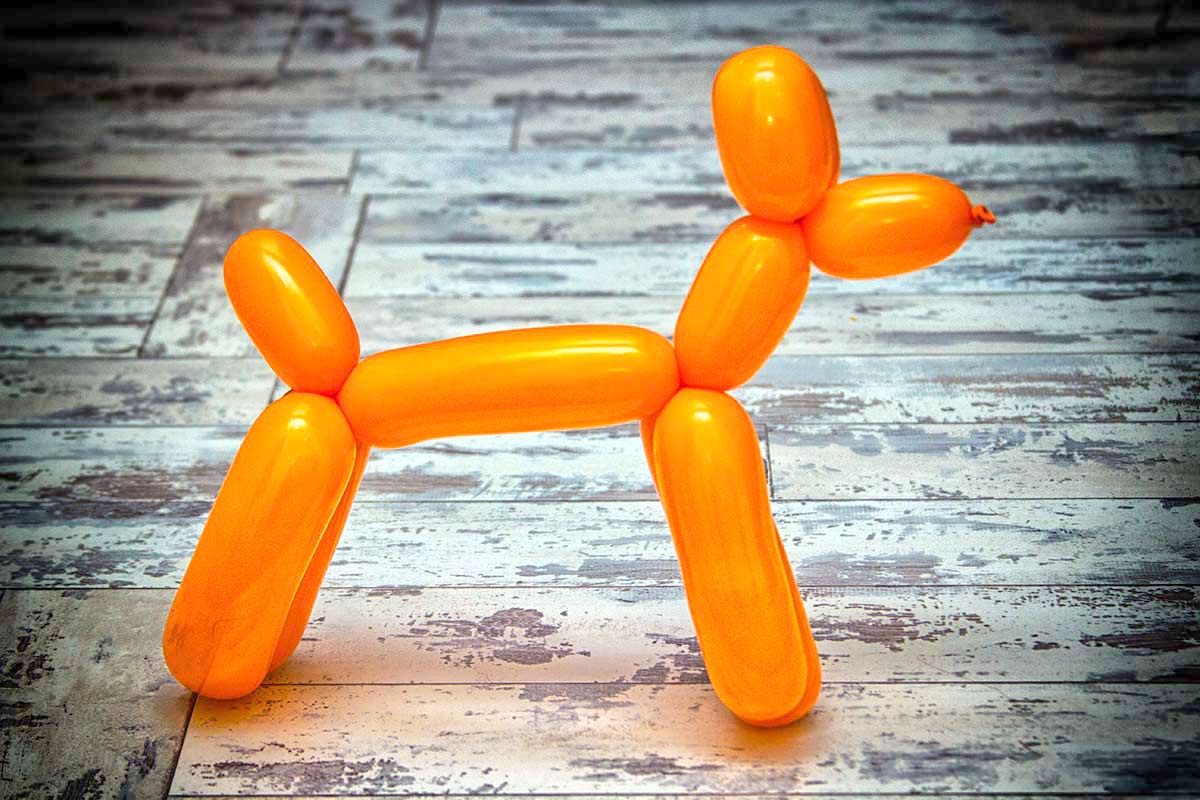
Balloon-DogNo.3 – Modelling Balloons
These first found their way into my camera bag back in the days when I was a wedding photographer. As the only professional at the wedding for the whole day, the photographer is also a bouquet fixer, guest liaison officer and occasional shoulder to cry on. The modelling balloons came in handy in my role as Photographer / children’s entertainer. If you can get the kids on your side photographing them (and the adults) becomes much easier!

So why are they still in my bag? Knot one up and you have an elastic band, adjustable strap or a quick way to mark your gear out from the crowd (hard to miss pink rubber band wrapped around your lens) Of course it’s also handy to surprise clients with kids by making an impromptu balloon animal!
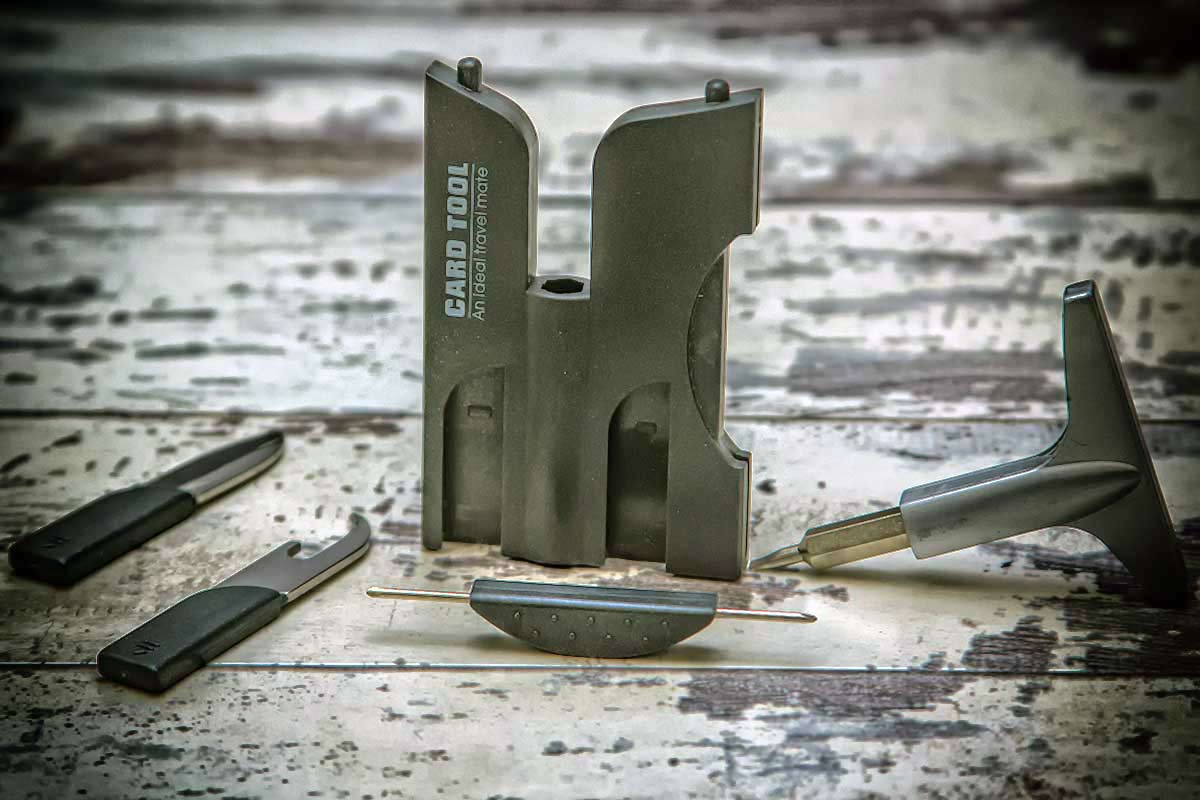
Multi-Tool-CardNo.2 – Multi-Tool card
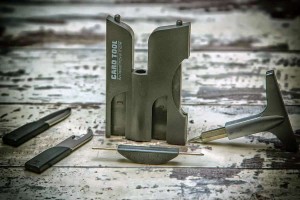
From the traditional Swiss Army Knife to top of the range Leatherman, multi tools come in all shapes and sizes but my personal favourite is the small card type like this. It has everything I need from a small knife, handy for getting into cellophane wrappers and the all important selection of screwdrivers.

It’s probably the screwdrivers that I’ve used the most. From the tiny screws that work loose in modern electrical items right up to the full size screwdriver need for running repairs on bigger items, this tools can handle them all.

Whether it’s repairing my gear, or more often someone else’s, these things were cheap, durable and endlessly useful. They also take up next to no room in my bag.

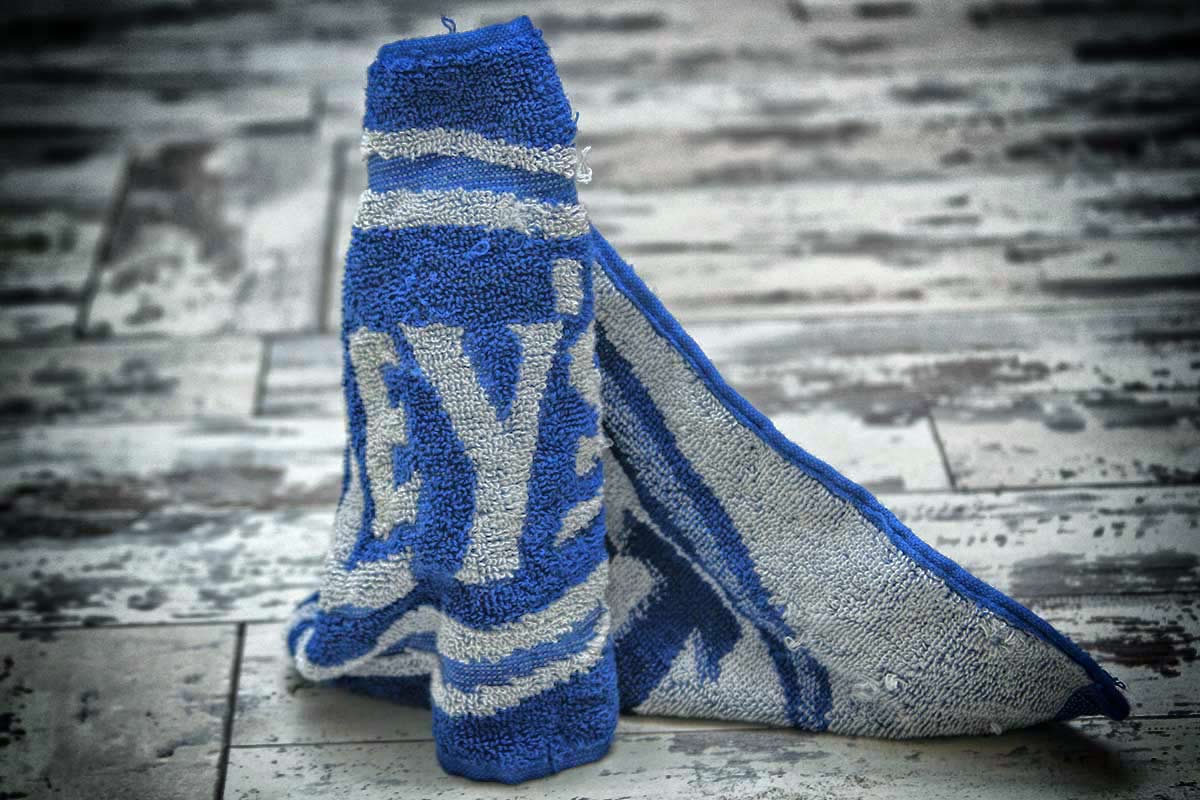
 Beer-TowelNo.1 – Beer Towel
A towel, The Hitchhiker’s Guide to the Galaxy says, is about the most massively useful thing an interstellar hitchhiker can have… It’s also top of my non photographic gear must have list. These small, rectangular towels are priceless to me.

Need to protect something in your bag? No problem, just wrap it in a beer towel. Need to wipe a bit of light rain, mud or snow off you or your gear? Reach for the beer towel. Need to kneel on the ground without getting muddy? Use the beer towel… I could go on.

You can buy a pack of 10 beer towels for about £1.50 per towel and they’ll last for years. Small, cheap and endlessly useful they are my number one must have non photographic accessory.

Do you have a non photographic accessory that lives in your camera bag (and you actually use) if so I’d love to know what it is so please leave a comment below.

Perfect Photo Suite 8 First Look

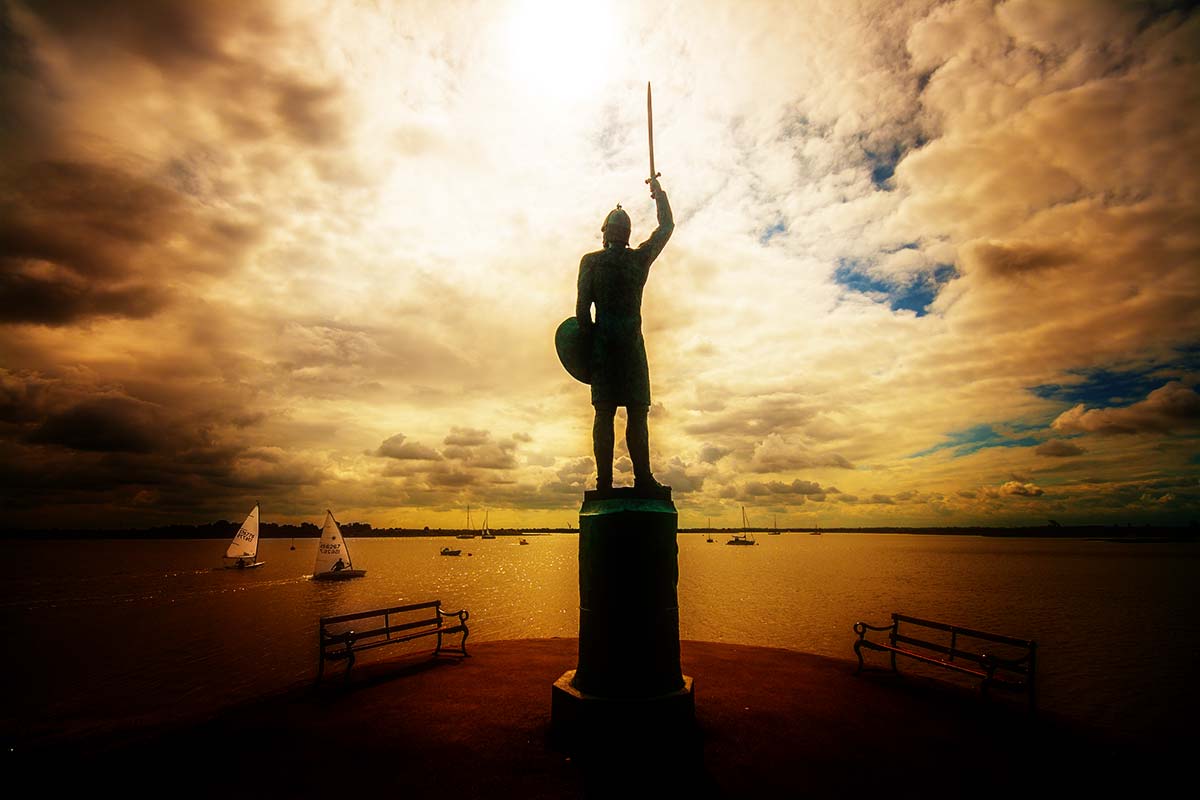
maldon-1There’s no shortage of plugins for Photoshop, Lightroom and Elements and many of them can really help get the most from your photos. For years I’ve been really happy with Nik Software and Color Efex Pro 4 has become a standard part of my workflow, I even did some webinars for them. The problem is, since Nik was sold to Google in late 2012 there’s been little news of upgrades, improvements or even minor tweeks and that’s a shame. At the moment it feels like Nik Software is just going to be left to fade away gracefully.

So I’ve been on the hunt for an alternative. Something that does the things I can’t do in Photoshop and makes it quick and easy too. Enter Perfect Photo Suite 8 from onOne software. You can download the free public beta here.

Alternatively if just want to dive in you can Pre-Order Perfect Photo Suite 8 here

I’ve been using the public beta version of Perfect Photo Suite 8 for the past few weeks and my inital reaction has been really positive. It does the things I do with Nik such as enhance detail in a way not possible with Photoshop and it has an excellent black and white conversion section. In fact because it’s a complete suite you could use it as a standalone photo editor or do as I do and use it as an extra add on to my Photoshop work. That does mean I don’t use modules that replicate what I would do in Photoshop but the Perfect Effects and Perfect B&W are getting plenty of use.

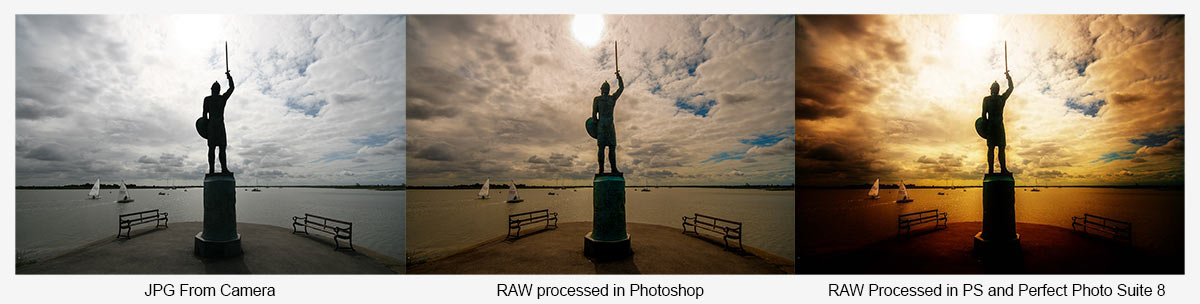
maldon-1-JPG-RAW

OnOne Software have just launched a free to try version of Perfect Photo Suite 8 Beta 2 so my advice is to download a copy and give it a spin. Do keep in mind that it is a Beta and that means they’ll be some bugs, not everything will be 100% working and the final version will be better.

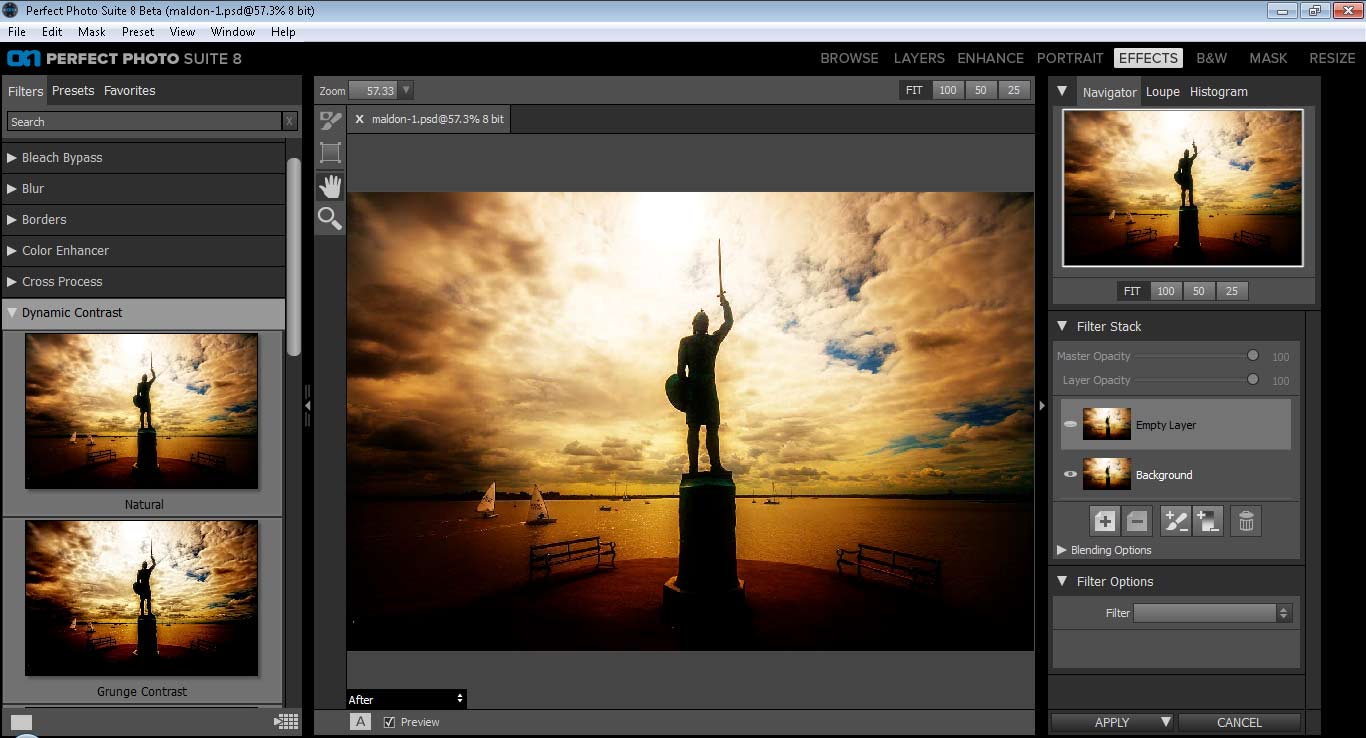
I’d recommend jumping in and trying the Effects module first (File – Automate – Perfect Effects). The example above made use of the sunshine effect to add a warm glow to the image but the thing that caught my eye are the clarity style adjustments. Things Like HDR, Dark Contrasts and Dynamic Contrast are already shaping up to me some of my favourite features. There’s even an effect called Grunge… How can I resist that! All the effects come with a bunch of presets which are previewed on adjustable sized thumbnails. You can also take control with the sliders to create your own style and save it for future use.

If you do give it a go I’d be interested in hearing what you thought, especially if like me you’re a user of Nik.

PPS8-1


Who’s stealing your photos?

Image-TheftWarning! This blog post might cause annoyance and paranoia… but don’t let that stop you reading it!

Thanks to the internet, image theft is on the rise and the harsh reality is there’s not much us photographers can do to stop it.

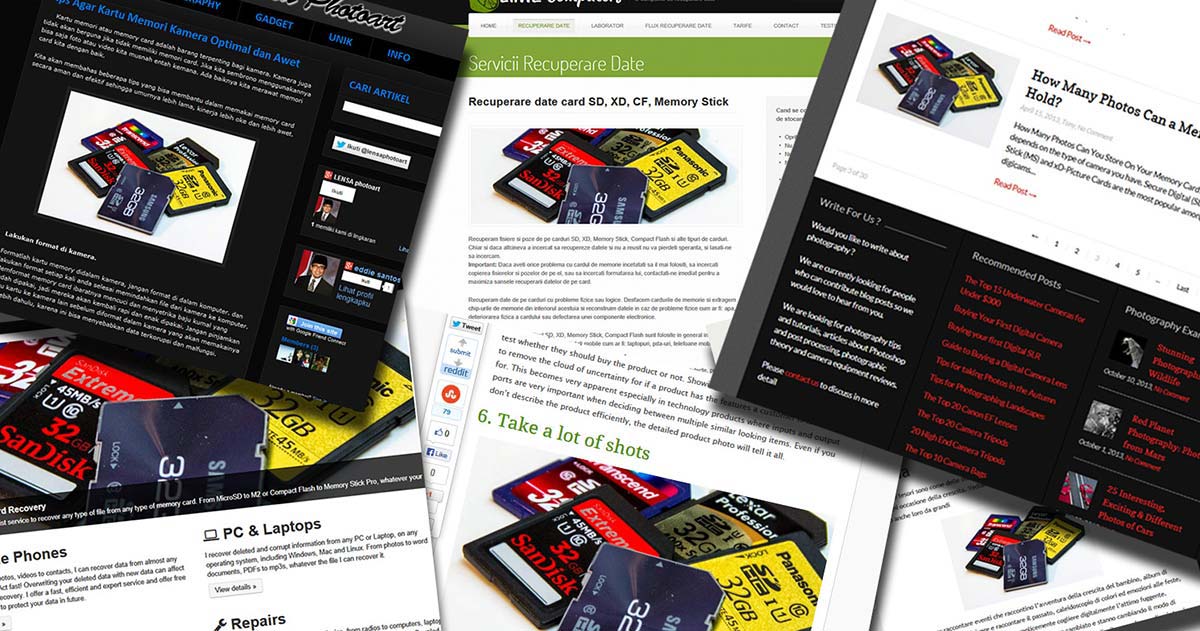
Don’t think for a second that it will only be your best work that’s at risk. Take a look at how many times my snap shot of a pile of memory cards has been used by others (all without my permission). It’s hardly a photo I’m ever going to print out but it’s probably my most stolen!

It’s not just photographers. In the past week I know of someone who found one of her photos published in a magazine without her knowledge. To be fair to the magazine, they were sent it by a reader who claimed it was there’s. Neither the owner of the photo nor the magazine is connected to photography.

Minimise the risk
Short of not uploading anything to the internet, what can you do to stop image theft?

Well, first off you could stop worrying about it. Everyday Facebook users add 300 million photos, so the chances of anyone stealing yours are mathematically very small. You might want to add a watermark to your images or add copyright metadata. Yes they can be easily removed but they can also act as a deterrent to the casual image thief.

There’s also the option for making you photos available with a Creative Commons licence allowing your images to be used in certain ways and not in others.

Image-Theft-2Finding your Images
So who’s using your images without permission? Well probably no one but there are ways to check with the help of a couple of websites. Here are two I’d recommend.

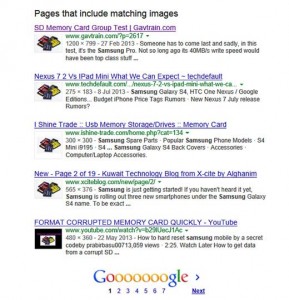
Google Reverse Image Search is like a backwards version of Google’s usual image search. Instead of find images that match words it finds images that match images and then tells you where they are. It’s quick, free and very accurate.

To find it go to Google’s Image search, click the camera icon and paste a link to an image you want to match. Alternatively you can upload a sample image.

The results are displayed just like any other Google search.

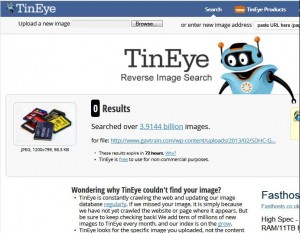
Image-Theft-3TinEye has been around longer then Google but doesn’t have the reach of Google’s reverse image search. Just like Google you can search using an image that’s already online or upload your own.

One nice feature is the option to look at a whole webpage for images and you can choose which of those you want to search for.

TinEye doesn’t have the reach of Google but don’t rule it out. Sometimes if finds results Google misses.

What to do next
Hopefully the only pages using your photos are yours or pages you work with. However if you do find your images in use elsewhere there are a number of things you can do. Some of them involve legal action, not something I do lightly and beyond the scope of this post. However if the transgressor isn’t worth the time and stress legal recourse may require and all you want is the image taken down or credit given, then a polite but firm email often works wonders.