How Focal Length Affects Your Background

There are many reasons for choosing one lens over another and which one you shoot with can have a massive impact on the final photo. Like many photographers I love the flexibility of zoom lenses and often have to make the choice of shooting with a wide angle and short telephoto lens. At first glance the choice of lens is pretty obvious… if I want to go close I shoot with a telephoto focal length and if I want to see more I zoom out with a wide angle focal length.

Look around on the internet or ask your photography peers and you’ll find that the general consensus is that wide angle lenses increase perspective distortion and telephoto lenses compress background. It’s common knowledge but sadly, it’s also not true… although I completely understand why so many photographer think it is.

[youtube]https://www.youtube.com/watch?v=GbESqYkodmQ[/youtube]

In the video above I explain and show how changing focal length alone doesn’t affect compression or distortion but moving your feet does

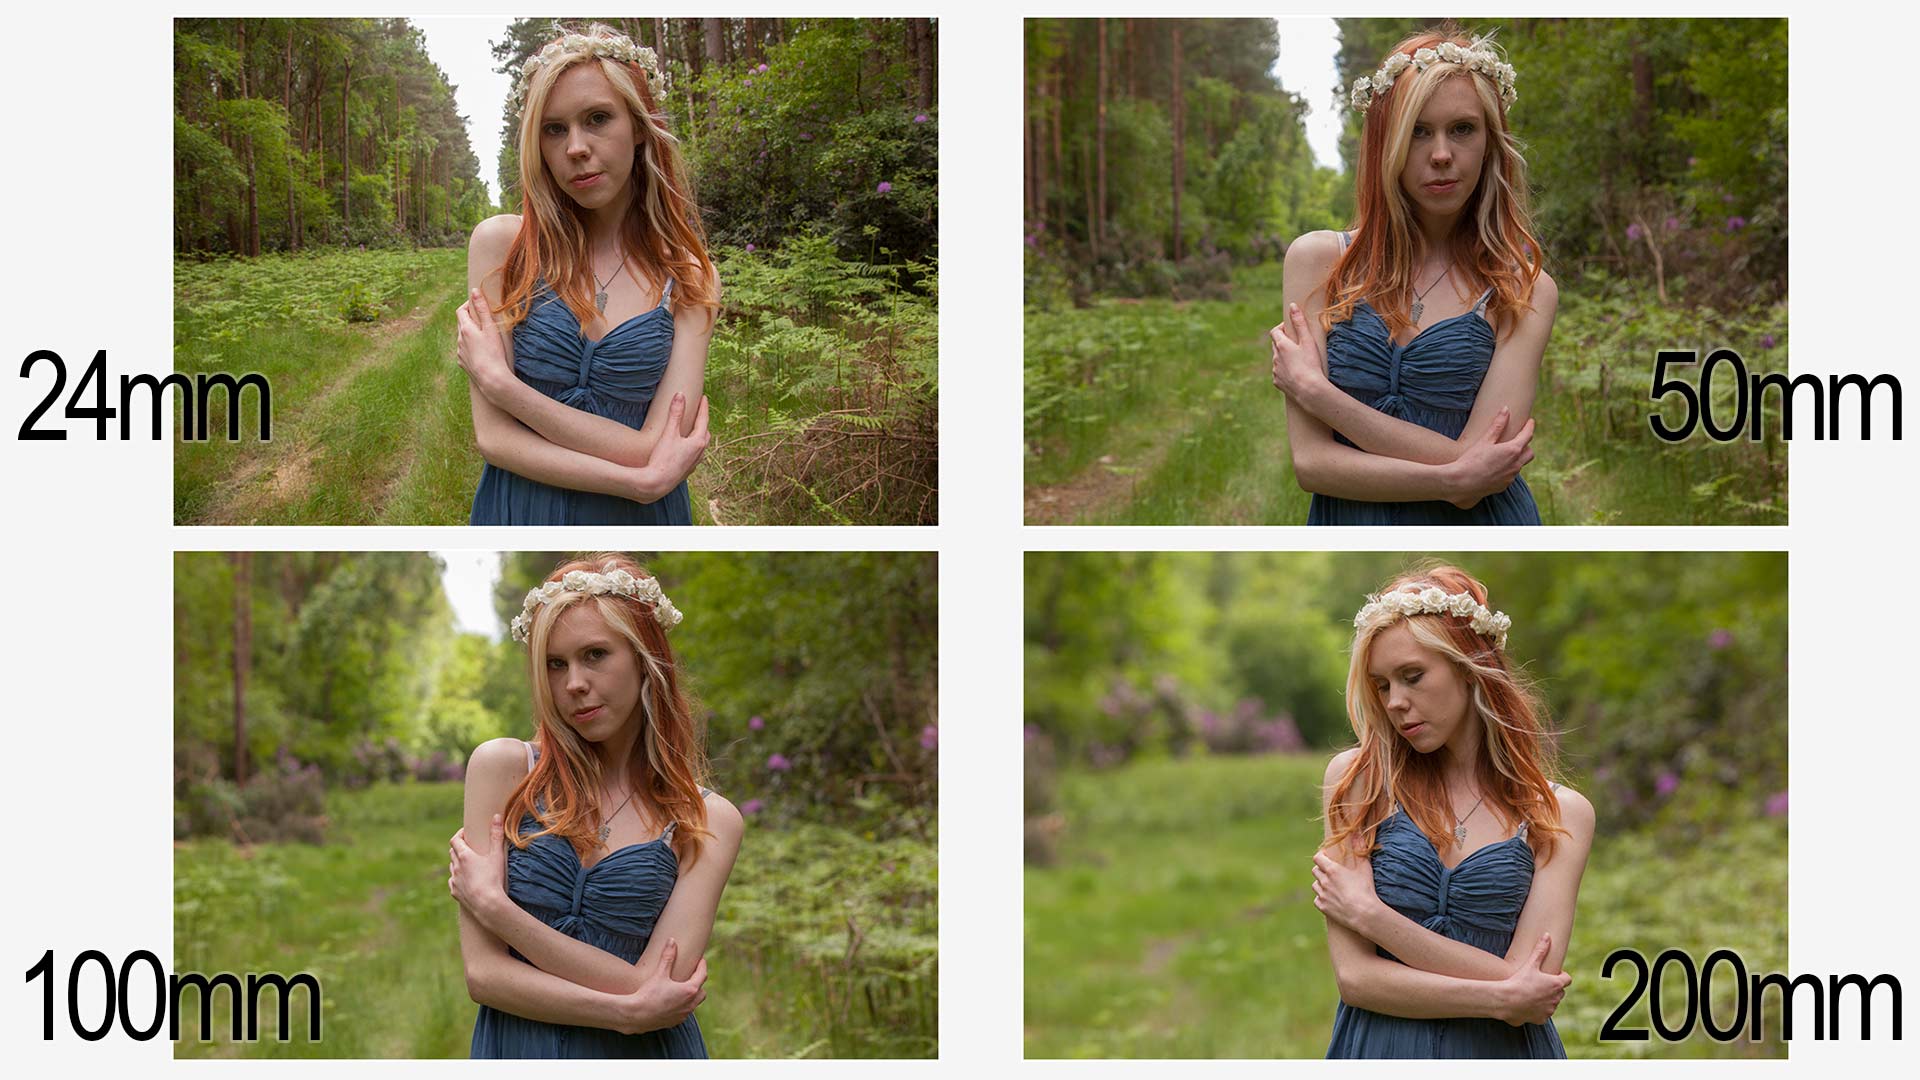
Google focal length compression and you’ll see photos like the one below and as you can clearly see the more I zoom in the more the background appears to grow in relation to the model. We call it background compression and it’s a really handy trick to learn.
Compression-ALL

But in order to keep my model (The amazing model Fern Meave ) the same size I had to increase my shooting distance as I zoomed in and it’s that increase in distance that causes the background to compress. Let me say that again…
Increasing your focal length does NOT compress your shot, increasing your distance from the subject does. Unless you want your subject to be small, once backed up you have to zoom in to maintain the composition and that’s why so many photographers will tell you telephone lenses compress your shot.

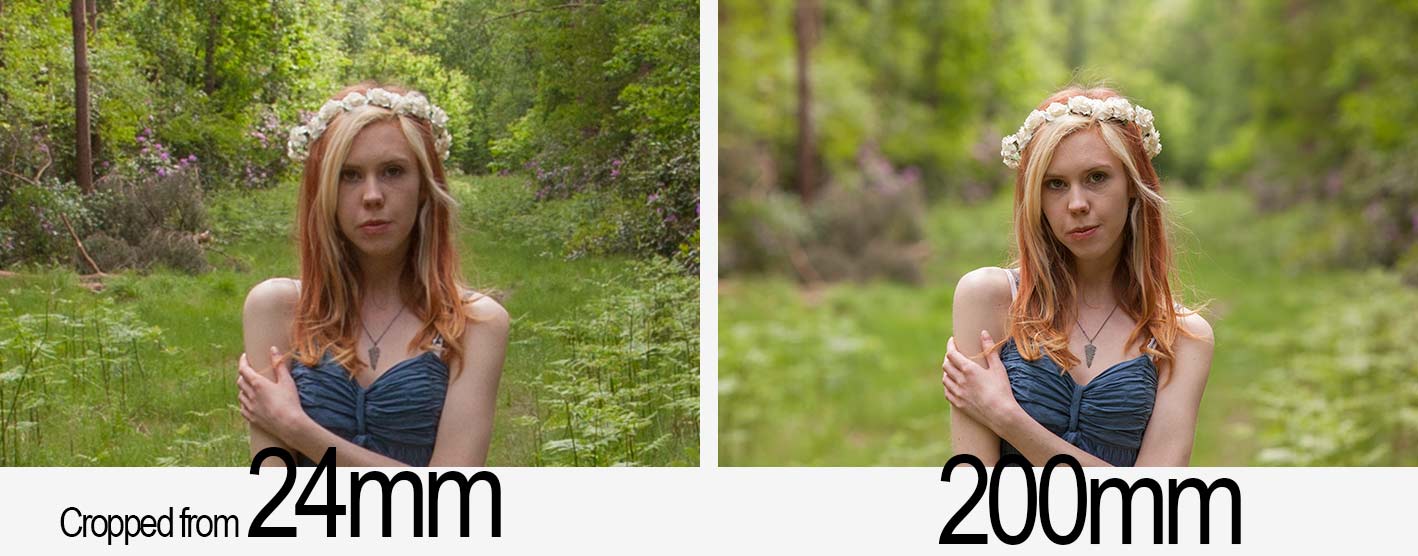
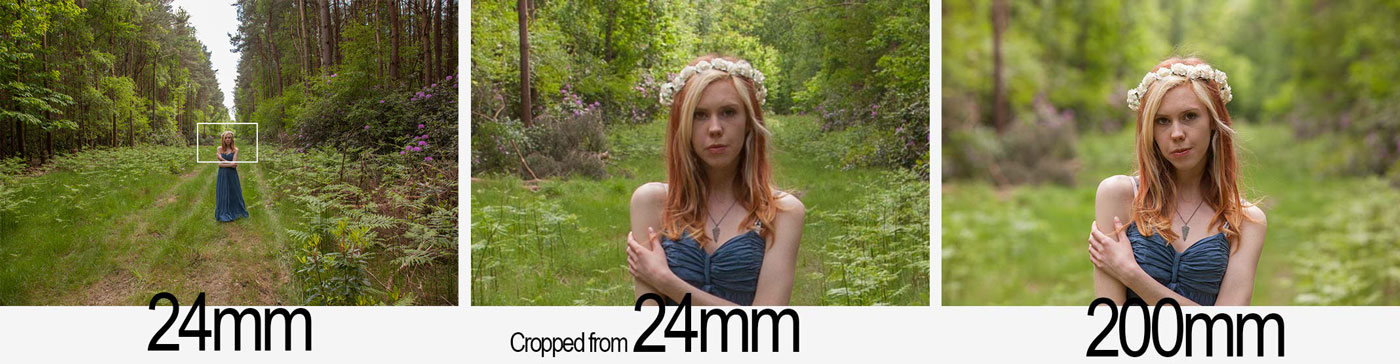
To prove the point. Take a look at the photos below. For the one on the right I used a 200mm lens, the one on the left is a from a shot taken with my 24mm lens and the middle image is a tight crop from the centre.
lens-compress-debunk

The distance from myself and the model was the same in each shot, only the focal length changed. Spot the difference?  Ignore the the depth of field difference between the two shots, that’s a side effect of the different focal lengths and I’ll save that for a future blog post. There really is no difference in compression and perspective distortion when you change lens focal length.

So if background compression isn’t caused simply by zooming in, do wide angle lenses increase perspective distortion? No they don’t (excluding exotic lenses such as fisheye’s). With a wide angle lens you often go close to fill the frame and that increases the distortion. In theory you could take a wide angle shot using a 200mm lens, you’d just need to take lots and lots of images and join them together like a jigsaw puzzle. Search Google for Gigapans to see this in action.

Still not convinced? Here’s a simple test to try, no camera required… next time you’re in front of the bathroom mirror, get your head really, REALLY close. Close one eye and look around at your refection. Your nose will look huge, your ears will look small and all because you’re close to the mirror. Step back and your face will appear as normal as it was before.
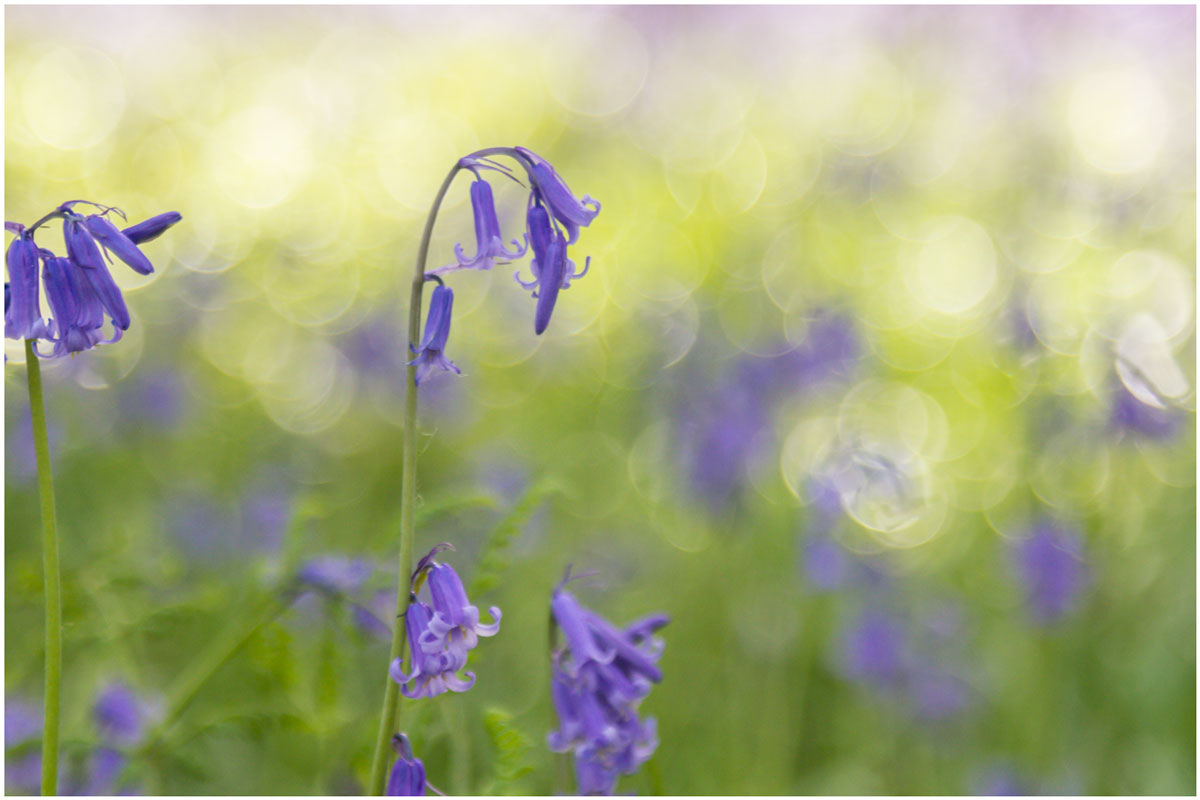
Bluebell 15 Minute Photo Challenge

I’m a sucker for bluebells, so when I got the chance to shoot some at a local wood I grabbed it. The bluebell season can be very short but there’s still something to be said for waiting for the right light and shooting at the right time of day. For me that meant late afternoon when the sun was low but not so low that it would make the woods very dark.

Bluebells, like many flowers, are a bit top heavy so as well as picking the right light I wanted to avoid shooting on a windy day. Luckily everything came together so I packed my camera and by 24-105mm lens and set off to do another 15 minute photo challenge.

[youtube]https://www.youtube.com/watch?v=2b0trjfaRok[/youtube]

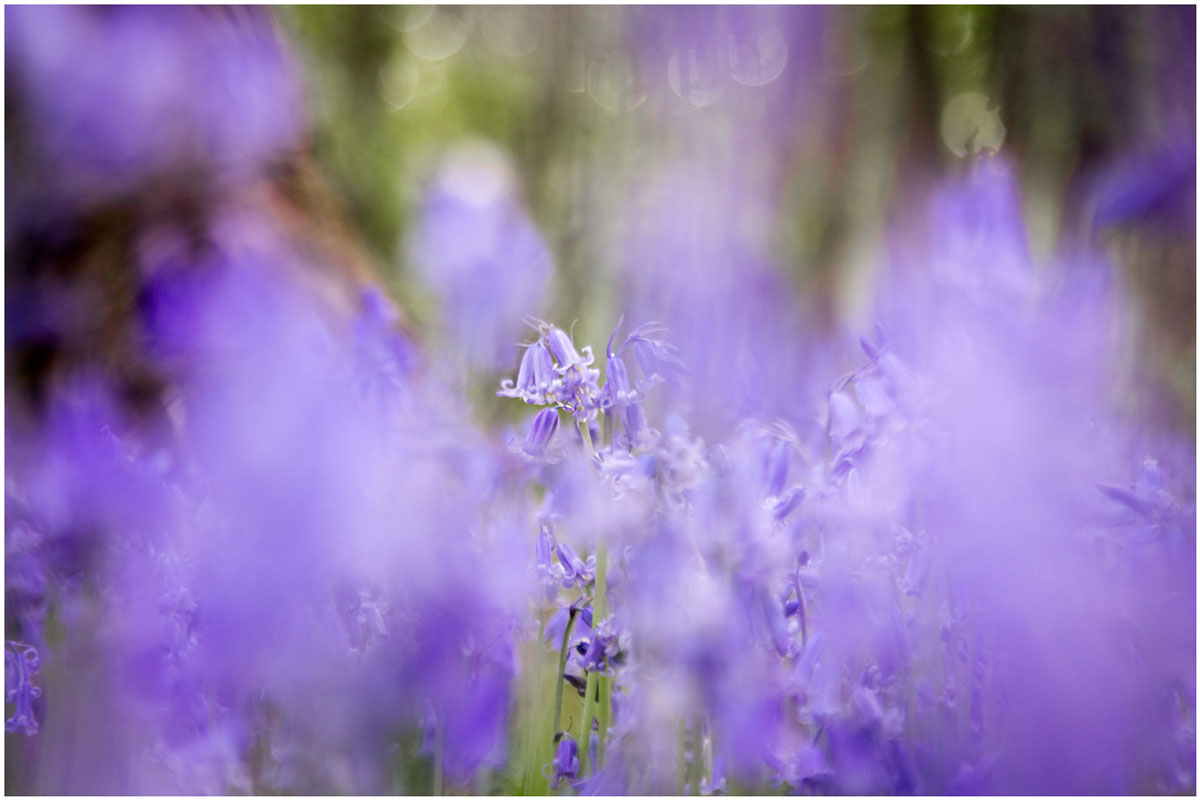
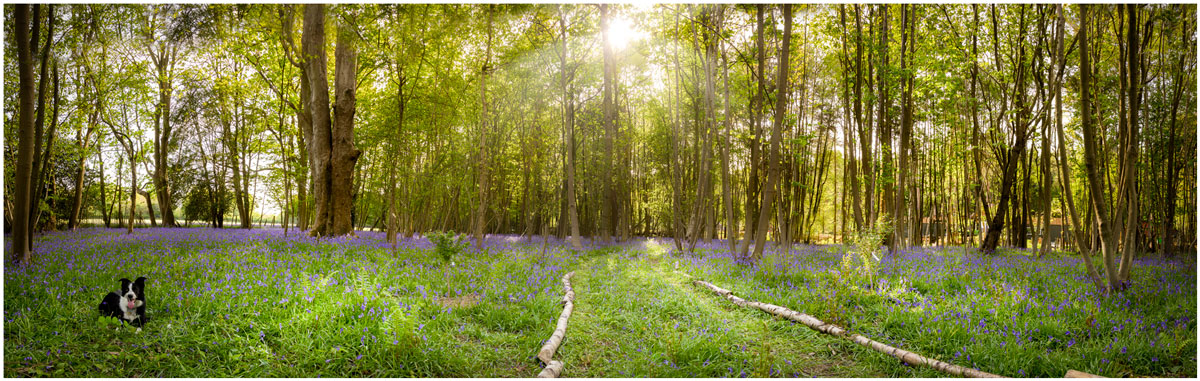
Bluebell-1jpgBluebell-2Bluebell-Pano

Food Photography Workshop

One area of photography that you may not know that I work in is food photography. You’ll rarely see any food photos on this blog but there’s plenty over at Sams Kitchen, which is the blog run by my wife Sam.

Sam is a food writer and recipe creator and also a darn good food photographer. Her work regularly appears in various foodie magazines as does her (and my) photos.

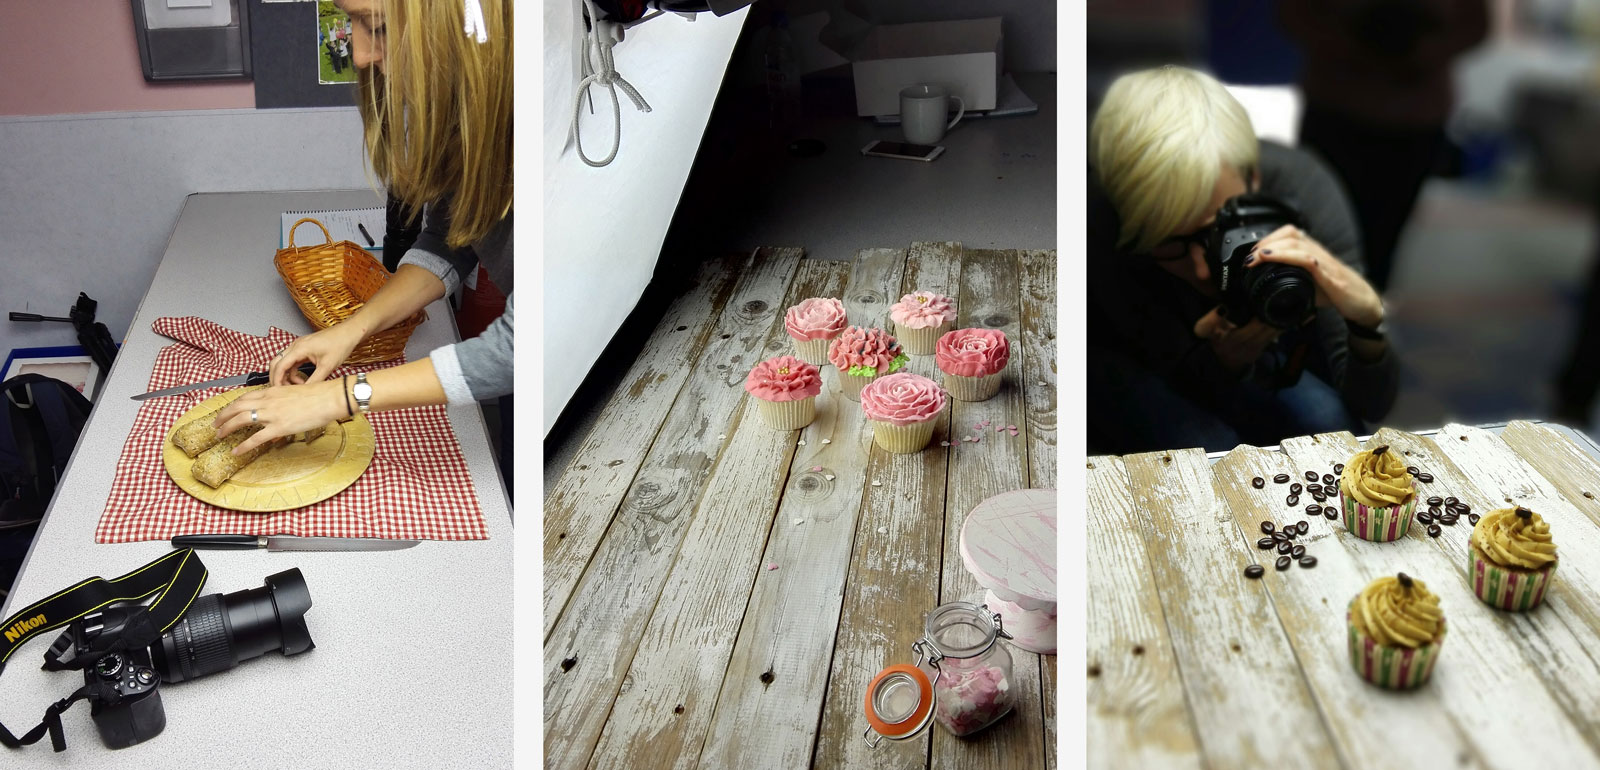
A few weeks back we ran a food photography workshop and will be running it again on the 13th June… Details of the next food photography workshop are here.Food-workshop-1

The workshop was aimed at bakers who wanted to improve their food photography and photographers who wanted to learn the real basics of how the camera worked whilst photographing some great looking baked goodies.

The day was great fun with Sam demoing various food set ups and style tips, whilst I ran around answering camera questions and running through some really quick and simple post processing trick in Photoshop Elements.
[youtube]https://www.youtube.com/watch?v=ziA0gCr2X28[/youtube]
It was really great to see people getting excited about food photography and discovering how really simple changes in styling and shooting made huge improvements to the photos.

If you’d like to get involved in the next workshop visit www.samskitchen.net/?page_id=1682 for more information.

Making The Most of Motivated Lighting

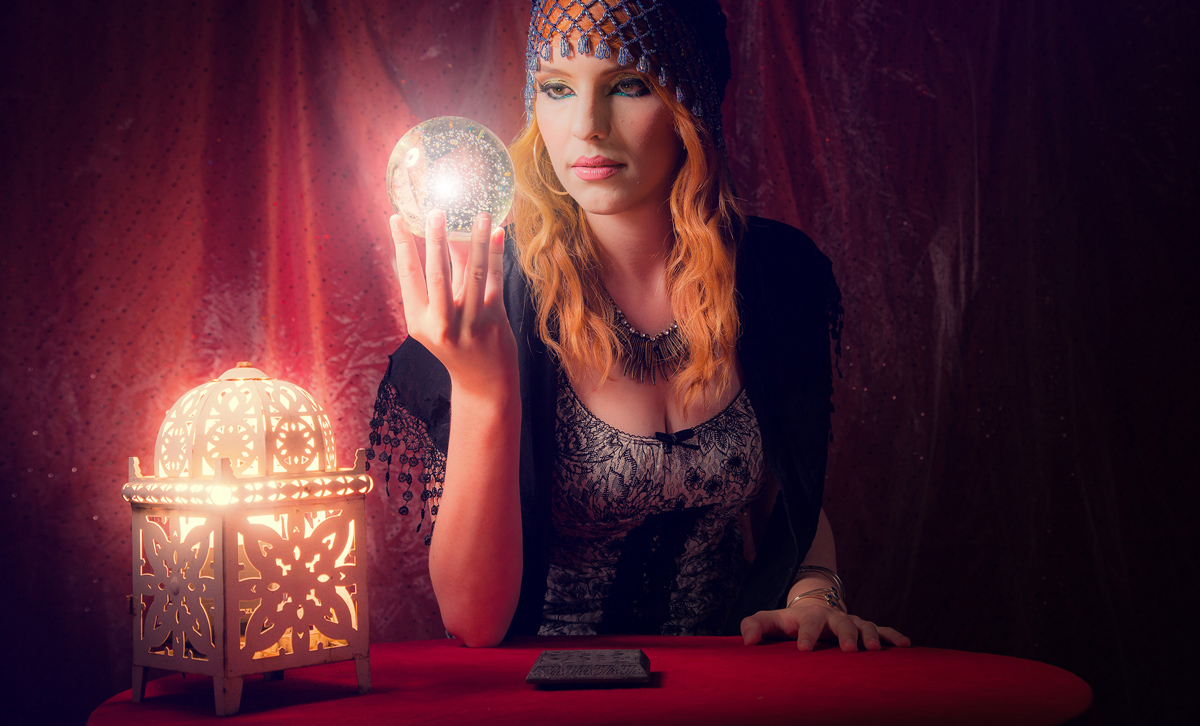
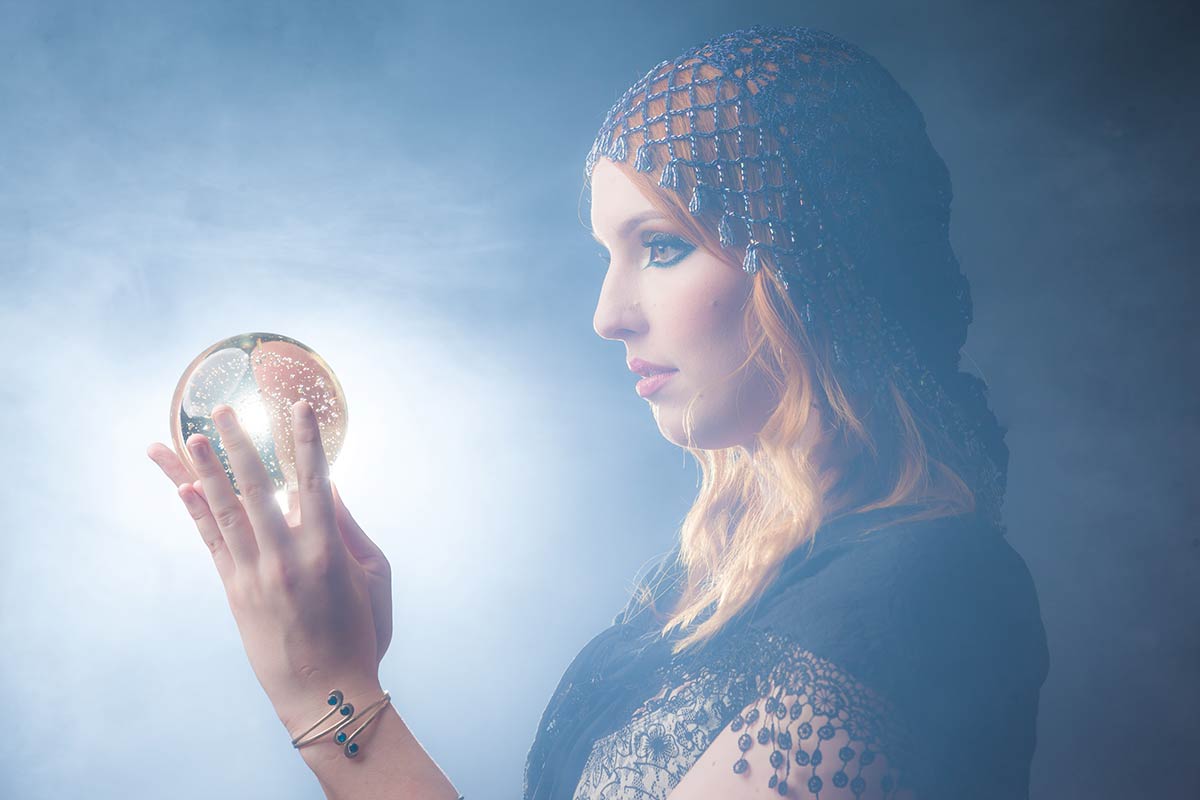
Motivated light is a term that’s more normally used in the world of the movies but there’s no reason for us stills photographers not to be aware of it and use it to create some great effects.

So what is motivated light? Put simply if you can see (or think you can see) the source of the light that’s illuminating the scene, you’re looking at a motivated light. But there’s a bit more to it than that.

Kerry-Fortune-Teller-(2)

Usually I go to great lengths to avoid seeing my lights in the shot, especially if the light is directed towards the camera lens. Even a tiny edge of light in the frame can play havoc with contrast and flare. If I have to see a light I can minimise flare by turning the power right down but then it doesn’t produce the light needed to get the exposure right. So how can I have the motivated light source in the scene and keep control of the exposure?

The answer is… I cheat!

In the video below I’ll look at two ways to create motivated light. The first way is in camera by teaming a low powered flash with a high powered flash that’s out of shot but in the same direction. The second way is by creating the effect in Photoshop.

[youtube]https://www.youtube.com/watch?v=U6sZlhhe3h4[/youtube]

Of course motivated light doesn’t have to be done like this and by definition motivated light can be something as simple as a window or room light that’s in the shot. So the chances are you have used motivated light in the past without even knowing it.

Model: Kerry Allingham
Make-Up: Anna Matos

Gear used in this video

Canon 5D Mark III www.adorama.com/ICA5DM3.html?KBID=67338

Canon EF 24-105mm f/4L IS USM Lens www.adorama.com/CA24105AFUC.html?KBID=67338

Flashpoint Light Stand www.adorama.com/FPLS9.html?KBID=67338

Black Rapid RS-7 Strap www.adorama.com/BRRS7.html?KBID=67338

Flashpoint StreakLight 360 Ws Creative Collection www.adorama.com/FPLFSL360K2.html?KBID=67338

Sekonic L-308S Flashmate www.adorama.com/SKL308S.html?KBID=67338

Flashpoint Zoom Li-on Manual On-Camera Flash http://www.adorama.com/FPLFSMZL.html?KBID=67338

Smoke Machine Background

One of the draw backs of working in any studio is the finite nature of the backgrounds you can work with during a shoot. Of course if you’re handy at a bit of DIY you can build your own sets and create some amazing backgrounds but that takes time and besides, carpentry isn’t one of my strongest skills as you’ll see when I made my current studio background.

So what can you do to quickly change the background? Well I have a bunch of different fabrics which work really well but as you’ll see in this video, nothing beats the smoke machine for effect and downright fun!

[youtube]https://www.youtube.com/watch?v=LvLjiahVBrs[/youtube]

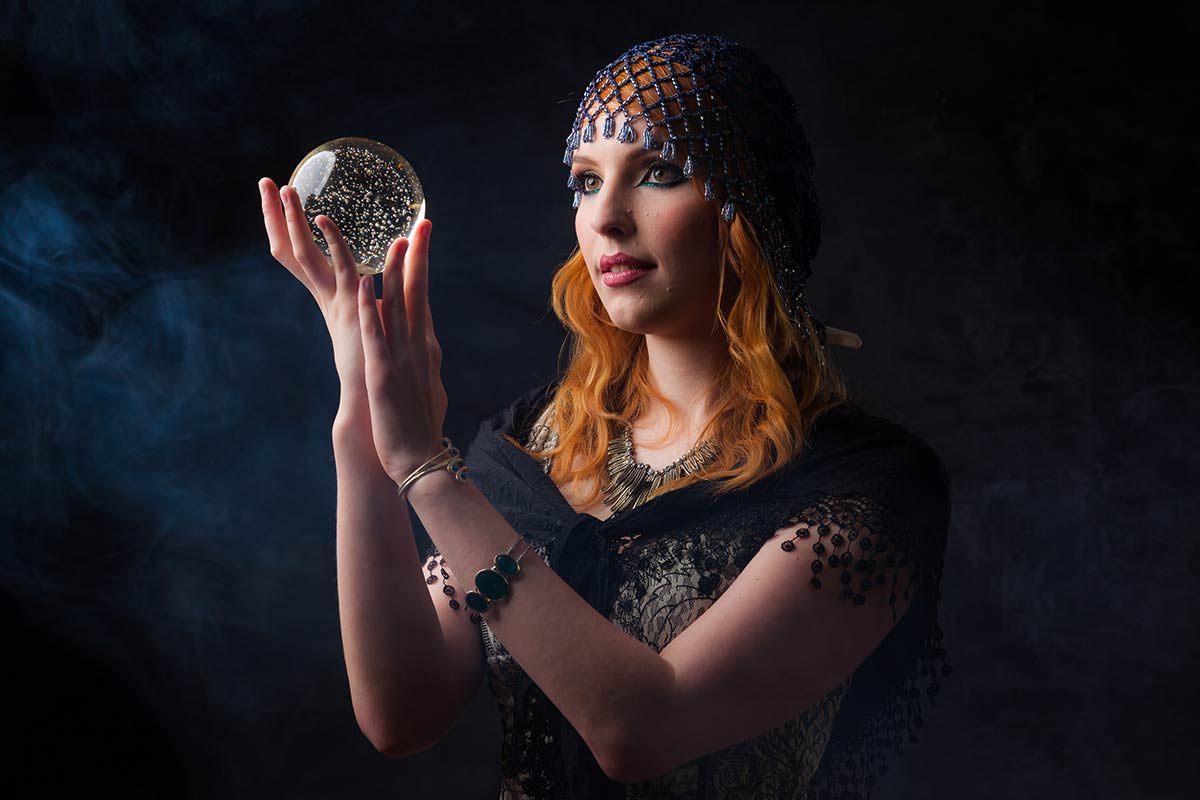
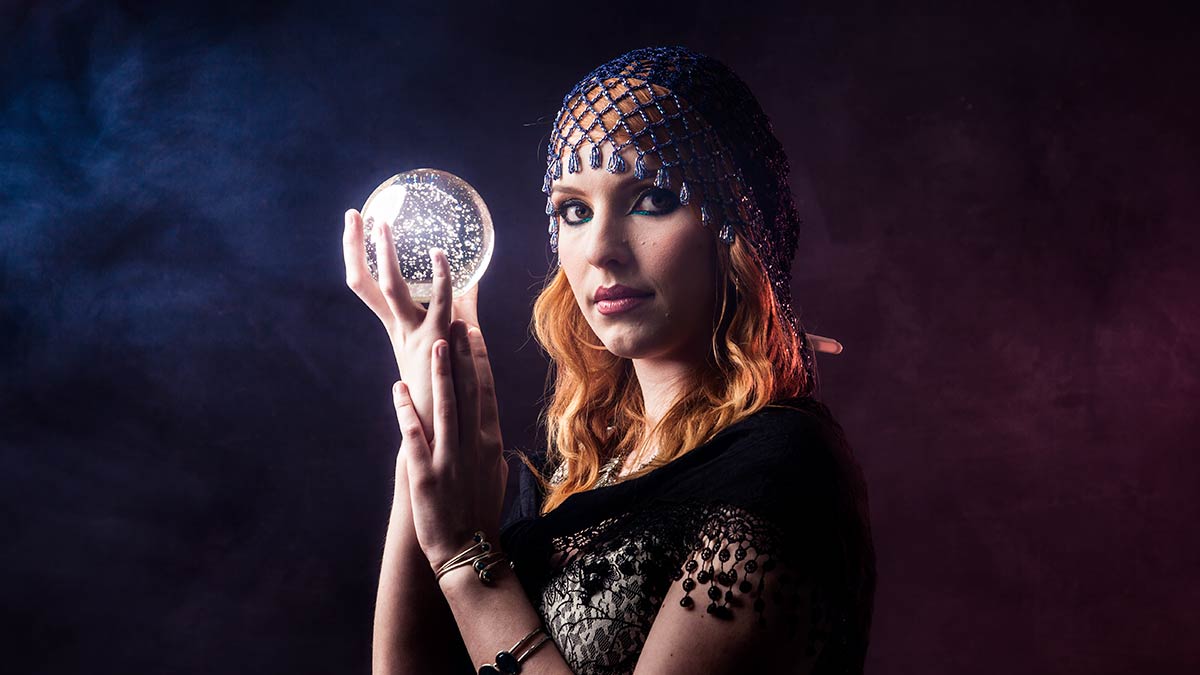
That shoot was part of a series I shot with a Fortune Teller theme and the smoke machine was perfect for the background, as the smoke builds up, the effect changes from a slight haze to thick fog.

Kerry-Smoke-1

The smoke is a whitish/blueish colour so to get the full effect of the smoke you’ll need a dark background and ideally a light to illuminate the smoke from either the side or back.

Kerry-Smoke-2

Adding a splash of colour to the fog is as easy as popping a coloured gel on the flash that illuminating the fog. In this case I added a red gel to the flash on the right and increased the saturation of the natural blue colour of the fog in Photoshop.

Too much smoke can ruin the shot by reducing contrast, especially if you light it from the front. For that reason I keep any smoke shots until the end of the shoot.

Kerry-Smoke-3

Finally it’s worth checking that the smoke “juice” is water based to avoid leaving a residue all over your studio and is non toxic… pretty obviously. The smoke builds up pretty quickly so also keep a check on the model and anyone else in the studio. At the first sign of problems get some fresh air.

Model: Kerry Allingham
Make-Up: Anna Matos

Gear used in this video

Canon 5D Mark III www.adorama.com/ICA5DM3.html?KBID=67338

Canon 50mm f/1.8 II www.adorama.com/CA5018AFU.html?KBID=67338

Flashpoint Light Stand www.adorama.com/FPLS9.html?KBID=67338

Black Rapid RS-7 Strap www.adorama.com/BRRS7.html?KBID=67338

Flashpoint StreakLight 360 Ws Creative Collection www.adorama.com/FPLFSL360K2.html?KBID=67338

Sekonic L-308S Flashmate www.adorama.com/SKL308S.html?KBID=67338


Flash Duration To Freeze Action

One of the many amazing things you can do with flash is use it to stop fast moving things in their tracks. Unlike working with a continuous light it’s not the shutter speed that freezes the action, it’s the tiny amount of time that the flash lasts… its duration.

Flash-Duiration-Final

Basically it works like this. The more light you need the longer the flash duration, so reducing the flash power shortens the flash duration and increases it’s freezing power.

Different flashes produce very different flash durations and older design studio heads worked in a very different fashion but if you take a standard speedlight as an example, it will have a flash duration of around 1/200th second at full power and 1/10,000 sec at minimum power.

In the video below I put the theory into practice by bumping two wine glasses together and photographing the results with different flash powers

[youtube]https://www.youtube.com/watch?v=WwcFbRUfHkk[/youtube]

In case you’re wondering, the wine glasses are made of plastic and I drilled two tiny holes in each to attach them to the fishing line.

Gear used in this video (Links to Adorama)

Canon EOS 60D Digital SLR Camera Body Kit

Canon EF 24-105mm f/4L IS USM AutoFocus Wide Angle Telephoto Zoom Lens

Flashpoint Zoom Li-on Manual On-Camera Flash

Vanguard Alta Pro 284 Carbon Tripod

Universal Swivel Holder

Flashpoint Pro Air Cushioned Heavy Duty Light Stand

Controlling reflections in glasses

So you’ve got the lights, you have your model and you’re ready to shoot. Then you take a test photo and all you see is huge white reflections. It’s a problem that happens all too often but fortunately there are a couple of solutions that are quick, easy and effective.

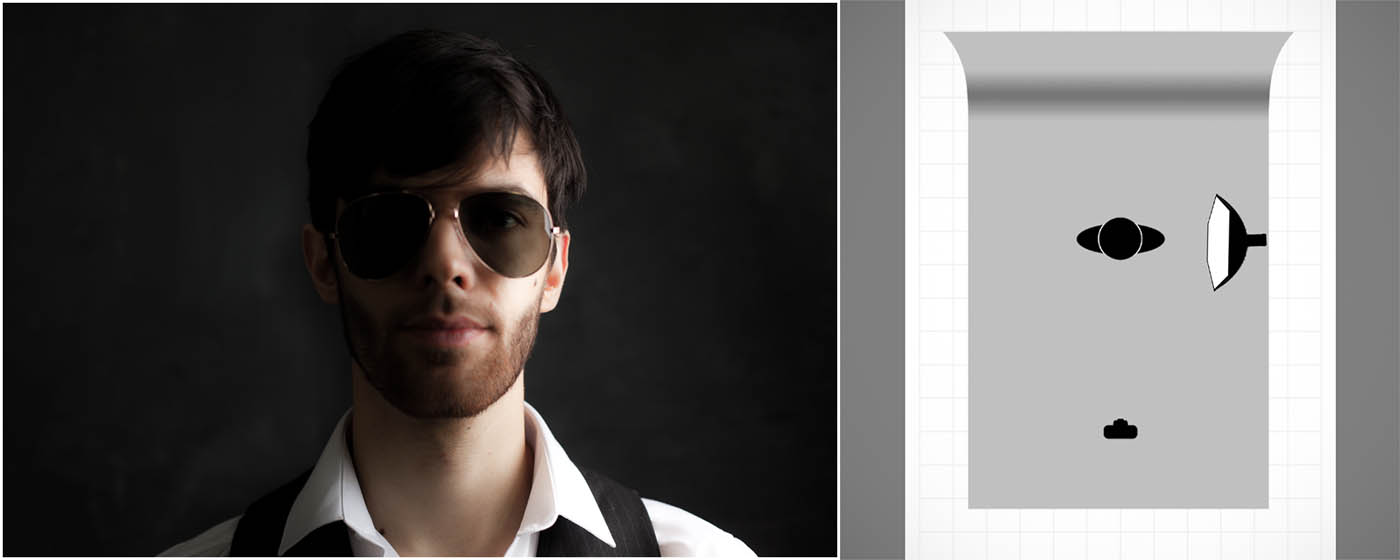
Let’s start with the simplest solution. Get your subject to remove their glasses. It sounds obvious but it’s surprising how many photographers don’t have the nerve to ask. Whilst this can work wonders with occasional spec wearers, anyone who wears glasses full time will look most weird without their specs on. It’s also not going to work with the cool crowd who wear sunglasses all year round.

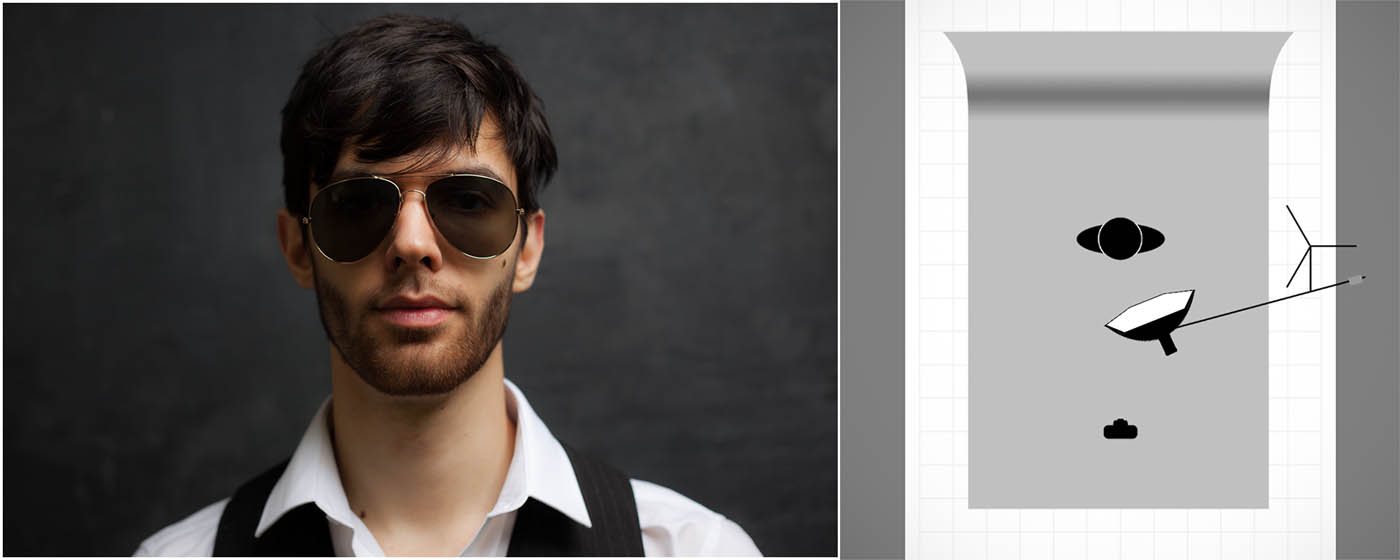
If you’re using flash or continuous light the chances are the reflections are likely to be from your lights and where you position the lights will affect the reflections you see in the photo.

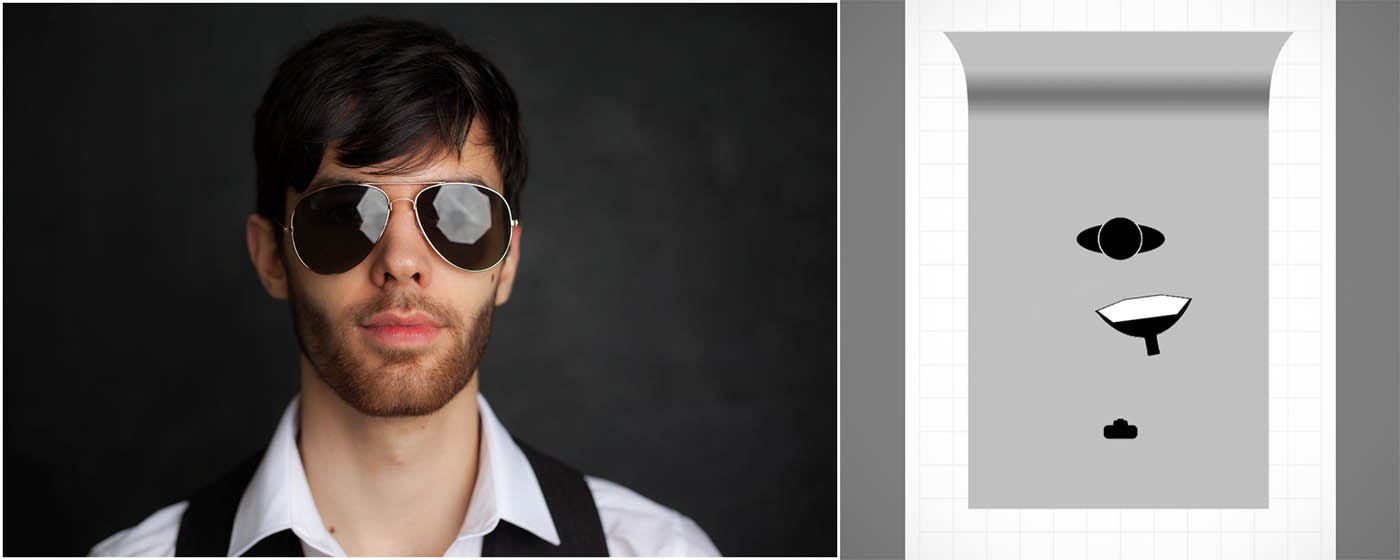
photo-1Light from the front (including on camera flash) will produce the biggest, brightest and least attractive reflections. Because light travels in straight lines it’s going to hit the front of the spectacle lenses and bounce right back in to the camera. This really is one lighting position to avoid.

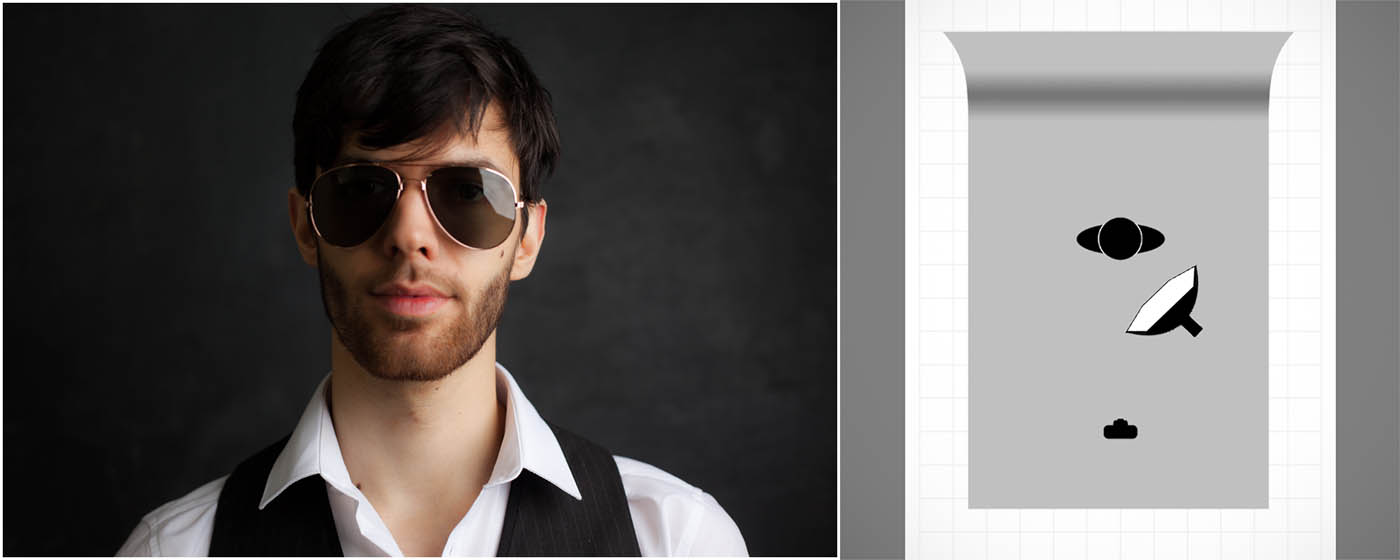
photo-2Knowing that light travels in straight lines means that moving the light source to the side will move reflection. Here the light is at about 45 degrees and the result is a reflection that’s much reduced in size.

photo-3Taking the idea a bit further, if the light is fully 90 degrees to the glasses results in a tiny reflection but also produces a split light effect which might not be the look you’re after. If you look really close you’ll still see a slight reflection. Why? Well the surface of glasses isn’t flat like a window, it’s curved so you’re never at a 90 degree angle across the whole surface of the lens.

photo-5To minimise and remove reflections the best position for the light is up high. By elevating the light the reflections will disappear and the lighting pattern remains flattering too. Asking the model to drop their chin or slightly angle the glasses down can have a similar effect.

In the video below I go through all of the tips in this post in more detail and even give you some tips on how to add a reflection of your own choosing.

[youtube]http://youtu.be/kOzPWkkmZPE[/youtube]

Gear used in this video

Canon 5D Mark III www.adorama.com/ICA5DM3.html?KBID=67338

Canon 50mm f/1.8 II www.adorama.com/CA5018AFU.html?KBID=67338

Flashpoint Light Stand www.adorama.com/FPLS9.html?KBID=67338

Black Rapid RS-7 Strap www.adorama.com/BRRS7.html?KBID=67338

Flashpoint StreakLight 360 Ws Creative Collection www.adorama.com/FPLFSL360K2.html?KBID=67338

Sekonic L-308S Flashmate www.adorama.com/SKL308S.html?KBID=67338

Westcott Rapid Box 26″ Octa Softbox www.adorama.com/WERB26OM.html?KBID=67338

Getting your photography noticed

Recently I recorded a series of short videos as part of the Lovers of light” photography competition. In this clip I have a few words to say about getting your work noticed.

[youtube]https://www.youtube.com/watch?v=10TGbr0XfTQ[/youtube]

Who’s your audience
The first step to getting your photography noticed is deciding who you want to be noticed by. Are you trying to attract customers, looking to reach corporate clients or seeking the approval of your photography peers. If you know your target audience you can start planning a strategy to reach them.

Find your style:
Shoot what you love and it will show in your photos. It might be that you have a hobby or sport that combines well with photography or maybe you have a passion for a type of photography and want to explore it.

If you shoot and share a random selection of photos your audience will be most likely be the same.

Develop your style:
Sticking to a style that you can explore and develop will also help you develop a band of followers who share your style. But don’t get stuck in a rut, challenge yourself to try new ideas within your area of photography. Look at the work of photographers you admire and try and emulate their shots. Don’t try and reproduce the same shot exactly but give it your own spin.

Be Social:
Social media is a great way to talk to fellow photographers and share your work. Post new photos to your social media channels regularly and post your work to more than one place. Stick at it, the more you post the greater the chance you’ll break through.
Don’t give up!

And finally, enter competitions. Even if you don’t win you’ll gain experience and have a reason to shoot more. Remember the first  step of winning a competition is to enter. http://www.velux.co.uk/loversoflight

Softbox Size vs Soft Light

One of the primary uses of a softbox is to give soft lighting, but with so many sizes available, which one should you use?

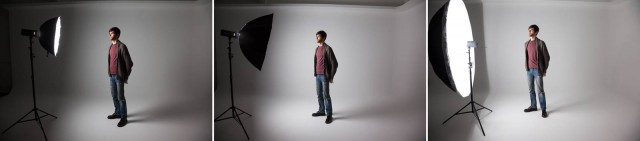
The answer in part comes from the classic rule with soft lighting which is this. The bigger the light source (relative to the subject) the softer the light produced. In other words bigger softboxes give softer light and as long as your softbox is close to your subject that holds true. To test it out I got my 28″ Parapop softbox from Adorama, a medium sized softbox and borrowed a giant 7′ Westcott umbrella softbox.

soft-1

You can see this in action in the three photos above. In each shot the distance from light to the model was 1 meter and the light was metered at f/8. Notice how the shadows blend in with the highlights as the softbox size increases and that’s soft light in action.

Now remember I said the softness of light is also relative to the subject size. Well here’s what happens if you zoom out and shoot a larger, full length portrait. Once again the distance and settings are the same in all shots.soft-2

Look at the shadow behind the model. With the small and medium sized softboxes you’ll see a sharper, harder edge to the shadow then the big softbox. You’ll also see that the smaller softbox gives a smaller spread of light compared to the more even illumination of the large softbox.

So if you want to shoot full length portraits with soft light then an oversized softbox is one answer but it has another use to. Unless you want to spend time in Photoshop cloning out the light you’ll need to back it up. Moving the light away from the subject makes it that much smaller and therefore harder. Oversized softboxes allow you to get soft light without the source being in the scene.

Take a look at this video where I cover all of this and more.
[youtube]https://www.youtube.com/watch?v=a-rAnxVX9kE[/youtube]
Of course there are a few downsizes to large softboxes, one of which is the lack of directional control. In the video above I add some control using Photoshop but in the next video I’ll add it to the light.

Gear used in this video

Flashpoint RoveLight 600 http://www.adorama.com/FPLFRL600.html?KBID=67338
Glow ParaPop 28″ R Softbox http://www.adorama.com/GLSBSM28PPFP.html?KBID=67338
Westcott 7′ Silver Parabolic Umbrella http://www.adorama.com/WEUSLP7.html?KBID=67338
Westcott diffusing cover for 7′ Umbrella http://www.adorama.com/WE4631D.html?KBID=67338
Canon 5D Mark 2 http://www.adorama.com/ICA5DM3.html?KBID=67338
Canon 24-105L http://www.adorama.com/CA24105AFU.html?KBID=67338
Black rapid RS-7 Strap http://www.adorama.com/BRRS7.html?KBID=67338
Sekonic L-308S Flashmate http://www.adorama.com/SKL308S.html?KBID=67338

Tips for buying a camera

With the January sales either looming or already here, you might be considering buying a new camera. Now I’m not going to tell you which brand and model of camera you should choose as there are countless options out there and not one of them is right for everyone. However here are some things to consider when buying a camera

[youtube]https://www.youtube.com/watch?v=_P_3lgXYkpM[/youtube]

The two most important questions are…
What sort of photography will you be mostly shooting?            
How much do you want to spend?

Answer those and your search can begin in earnest.

camera-type

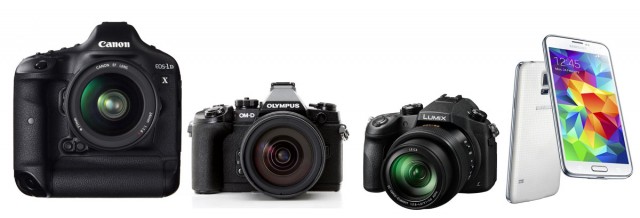
There are basically four types of digital camera. DSLR, Compact System camera (CSC), Bridge Camera and Mobile phone. All types have their pro’s and cons

If you’re want the best quality images then DSLR is probably the way to go. If you’re after great quality but with less bulk the CSC is the answer for you. Need portability and flexibility? Then a Bridge camera could be the answer. If you just want a point and shoot then the mobile phone ticks that box.

Don’t forget the lens. If you’re buying a DSLR or CSC then you’ll need to budget for a lens or two. When it comes to image quality the lens you use can make a bigger difference then the camera it’s attached to.

Bridge cameras are famed for their super long zoom lenses but often that comes at the expense of a true wide angle. The lens is built into the camera so make sure it can do what you want before you buy one.

Mobile phones can get a hard life inside pockets and bags. Before you take a photo check the lenses is clean and scratch free.

Whatever style of camera you choose and whatever name is printed on the front, remember it’s the person behind the camera that makes truly great photos happen.