5 Things Top photographers do & the rest of us don’t

At some time or another we’ve all looked at the work of top photographers and wondered… What makes their photos better then mine? Is it because they use the best camera gear, work with the best models or get access to locations that mere mortals like us can only dream of? Well perhaps but here are five things top photographers do that may be you and I don’t.

1 Fill the frame
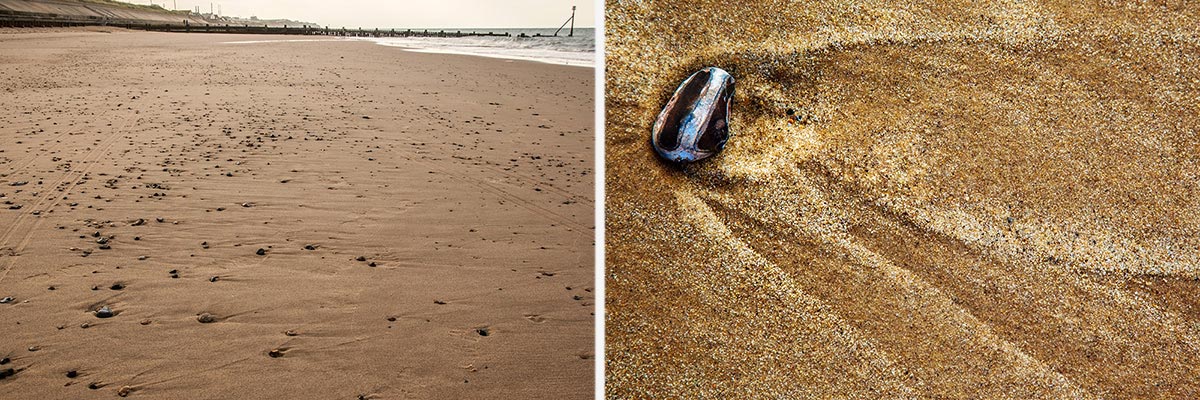
From landscape photographers to portrait photographers there’s one thing that all top photographers know and that’s to fill the frame with your subject. Now I’m not talking about simply zooming or cropping in closer, although that can be one solution. I’m talking realising what’s important to your photo as you’re looking through the viewfinder and pressing the shutter when the composition is exactly what you want
Top Tip: If it’s not part of the story, don’t have it in your photo.
5-Pro-1

2 Revisit a location/subject
Like all photographers I look at the work of my peers and wish I could shoot an image even half as good. From time to time I’ve even gone to the same location to try and recreate the photo. Sadly it’s never quite the same.

So how do top photographers get great photos? They return to the shot again and again and again until they get it right. Each time they learn a little more about where to shoot, when to photograph and what makes a good image. You may have to visit the same location a dozen times before you get the perfect light, or shoot at the same sporting venue many times to discover the best vantage points.
Top Tip: If at first you don’t succeed… go back and do it again5-Pro-2

3 Specialise on a subject
Many photographers flit from one type of photography to another. One day they’re trying to master landscape photography the next they’re trying their hand at shooting weddings. There’s absolutely nothing wrong with mixing it up but try to specialise in one area more then any other.

The fact is top photographers tend to become well known for not for shooting one area of photography but for being the best at a small niche of one area in photography. For example great fashion photographers don’t make great wedding photographers. Motor sports photographers may be rubbish at shooting football.
Top Tip: You only need to be the best in one area of photography 5-Pro-3

4 Learn from failure
All photographers have bad days and most of us have bad weeks too. Sometimes nothing goes your way. Maybe the weather doesn’t play ball or you accidentally shoot with the wrong exposure or perhaps you just run out of ideas.

When that happens, it’s natural to feel down hearted, frustrated and ready to throw in the towel. Top photographers will quickly get over the initial disappointment and the best photographers will embrace failure as all part of learning.

Going further, top photographer will expect to mess up and they’ll plan accordingly. Things like taking more then one photo, moving the view point, bracketing exposure and experimenting with lens choice are all part of the secret of success.
Top Tip: You’re the only one who will ever see your bad shots. 

5-Pro4

5 Think about post processing whilst taking photos
Let’s be honest, every photographer aims to get the photo right in the camera most of the time. We all know that Photoshop can do amazing things to help to fix photos and enhance photos but top photographers are thinking about post processing whilst holding the camera.

Let’s be clear, they’ll not think “I’ll fix that in Photoshop” they’re thinking this might work best with a square crop or this scene would look better in black and white.

Being aware of what can be done in post processing and you’re skills at doing it, should be in your mind whenever the camera is in your hand.
Top Tip: Clicking the shutter is the start of the photo and rarely the end.5-Pro-5
Your Comfort Zone

What’s your style of photography? Are you a landscape photographer, someone who thinks nothing about walking miles over hills or along the coast in order to get your perfect photo. Perhaps you’re a studio based photographer who loves to be in total control of everything from the lighting to the subject or your photo.

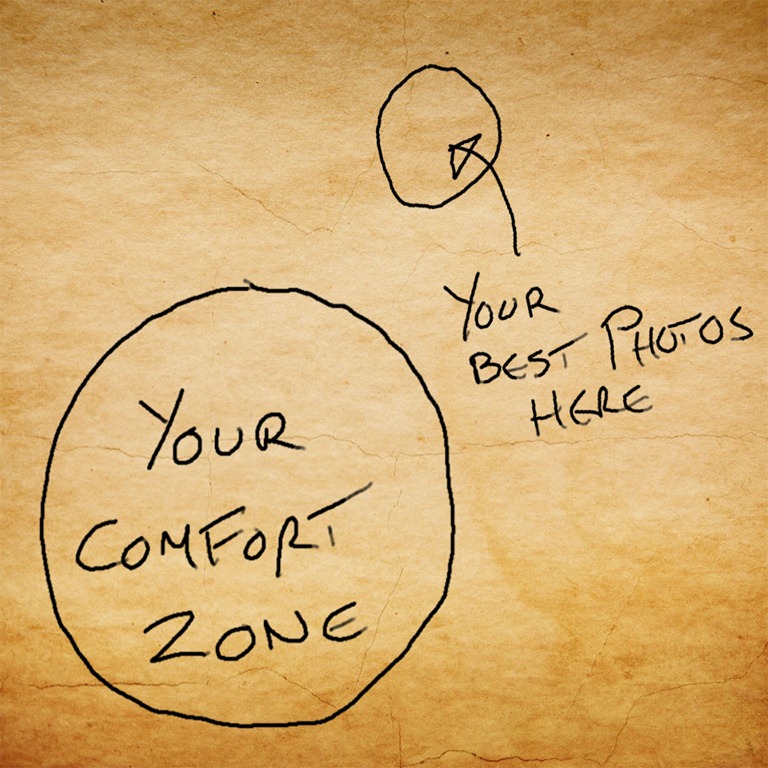
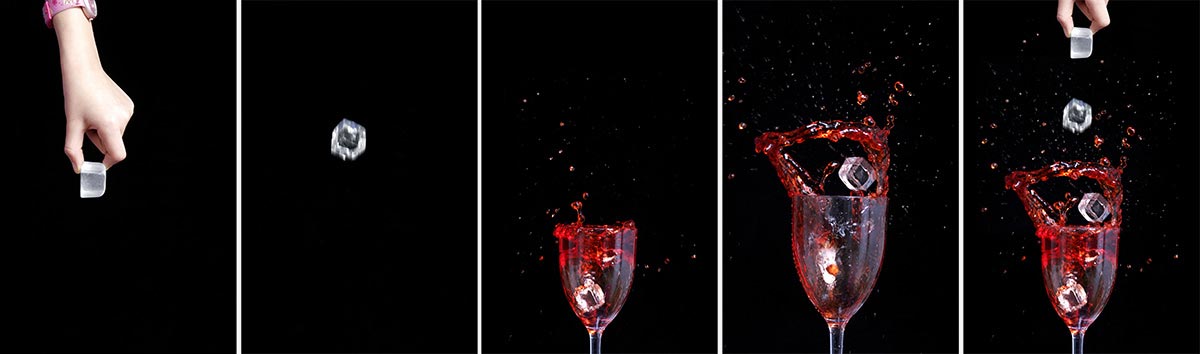
confort-zoneWhatever your photography passion it’s very easy to get stuck in a rut and for your photography to stagnate. You may be the best sports photographer on the planet but if you lose your creativity your work will suffer. Every now and then you need to move outside your comfort zone, try something that challenges your photography and in doing so you’ll give your creativity a boost

This year I’ve been outside my comfort zone on several occasions. For example earlier this year I visited Norway to teach Photoshop to a large group of Photographers who don’t speak English as their first language (I don’t speak Norwegian either). After my presentation there was a wonderful talk by a Norwegian photographer. Although I didn’t understand what he was saying, he showed this image (or something like it) and it really stuck a chord.

One of the areas of Photography I usually shy away from is street photography. It’s not that I don’t enjoy that kind of photo, far from it, it’s more the feeling of being self conscious photographing strangers. So last Sunday I took myself out of my comfort zone by visiting London’s Speakers corner. There were plenty of people to photograph but it was a challenge. Most people were too wrapped up in their heated debates to notice me taking photos but a few people were less happy to be photographed which is all part of the experience of course. You can see a few of the photos below

So what are you going to photograph that’s outside your comfort zone? The best advice I can give you is if and when you venture outside of your comfort zone go with a friend or a group of photographers. The more of you that share the experience the more fun it is. Alternatively you can do what I did and join a photographic workshop. This one was organised by Welshot Imaging.

Speakers Corner

Camera: Canon 60D

Lens: Canon 70-300mm IS

Aperture: f/5.6   ISO:800  Shutter Speed: Various

SplashArt Kit 2 ~ Review

I love photographing drips and over the years I’ve made one or two videos about how it’s done. However the SplashArt kit 2 offers to take drip photography to a professional level.

spashart-1
Verdict: The SplashArt 2 Kit is well designed and simple to use but best of all the photos it helps to create are just amazing. If you’re serious about photographing splashes then this is a must have accessory.
   
Overall Rating

5-Star

Design / Features 4-Star
Performance

5-Star

Price

5-Star

+ Plus Points
    + Everything you need in one kit
    + Repeatable splash photos
    + Choice of single or double drops
– Minus Points
    – No markings on controller
    – Getting perfect splash can be frustrating

Price (at time of review) £179.00
Suppliers Website: http://www.phototrigger.co.uk/

Purchase from here

Getting good photos of water drips isn’t that hard to do, in fact one of my most watched videos covers how to get great photos of basic drips. However the one thing I’ve always wanted to capture is a collision and always failed to do so. The SplashArt kit promises to do exactly that with precise control.

8024524670_38ed353bcf_cWhat’s in the kit
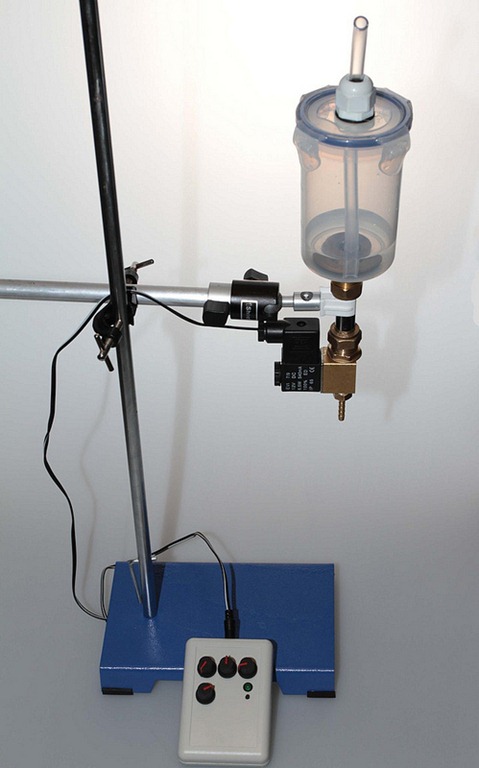
The good news is the kit contains everything you need, all you need to do is add water and a camera of course. The heart of the splashArt kit is the controller which is used to trigger the camera and release the drips. The other vital part of the kit is the solenoid which is basically an electronic tap but you also get all the cables you need including the trigger cable that’s compatible with your camera model.

If you’re a UK buyer you can also buy the kit with a metal retort stand and arm. The retort stand took me straight back to my days in the chemistry lab at school and the arm does look like something out of a plumbers merchants but it works perfectly.

In use
Setting up the SplashArt kit was very simple with some nice touches. For example there are three cables to be connected but each cable has a different connector, so there’s no chance of accidently wiring your camera to the mains!

splashart-2My only complaint is that none of the four dials on the controller are labelled or have scale markings. That made getting up to speed with the unit a little more tricky for the first time user like me.

Of course the big question is how did it perform? Well, after an initially frustrating 10 minutes of missing the magic collision I managed to find the perfect combination of settings for the dials and I was off.

20 minutes later I had dozens and dozens of amazing collision shots in the bag.

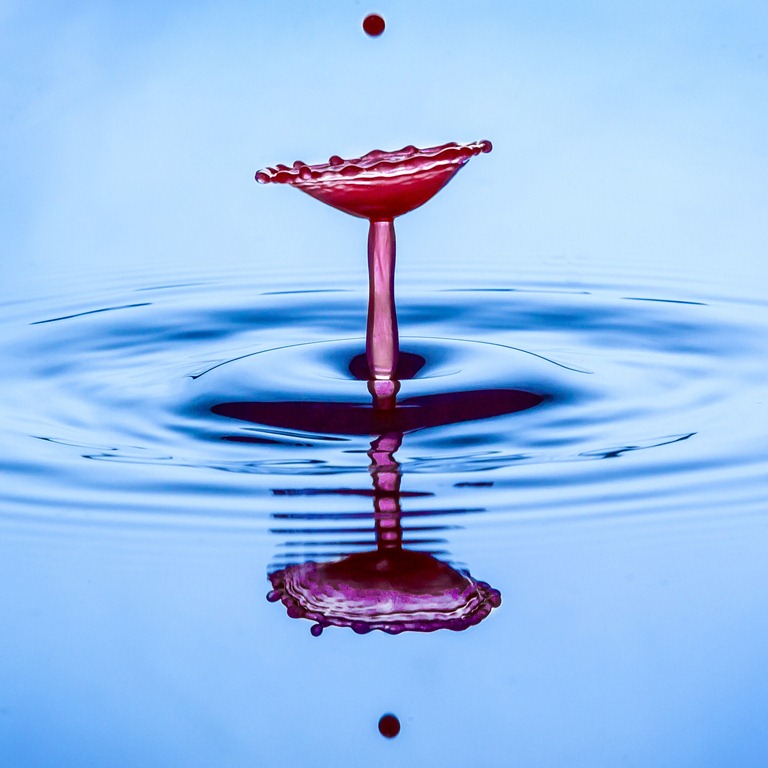
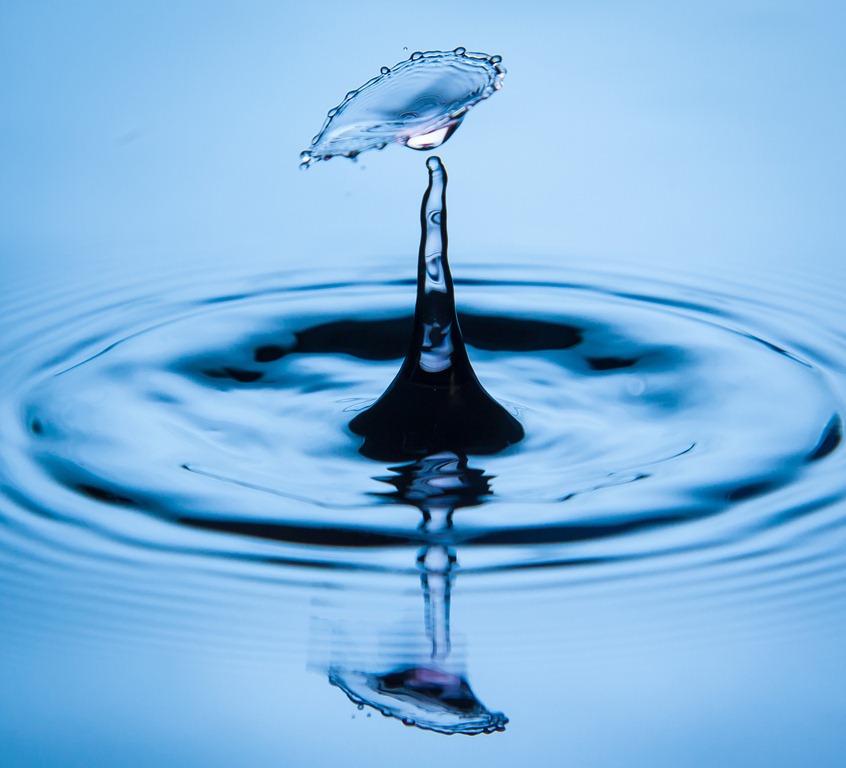
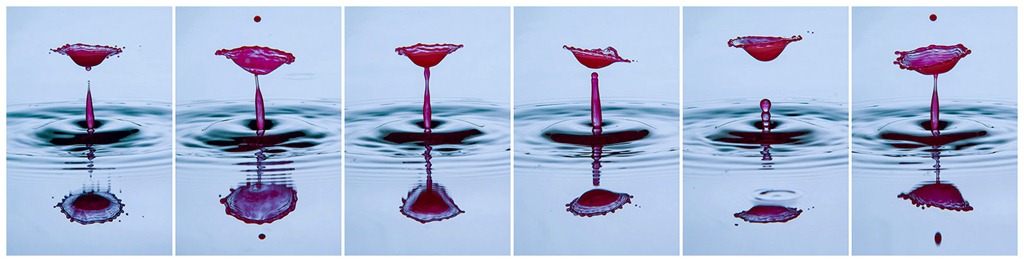
Part of the allure of a kit like this is the predictability of the system and the SplashArt kit excelled here. Take a look at the six photos below. They were taken one after the other and although each is different the timing was perfect shot after shot. Just don’t change anything once you have the look you want!

SplashArt-3Click to enlarge

Who’s it for
At nearly £180 this kit is great value but it’s not for everyone. You’ll need to be fairly serious about your splash photography in order to warrant the money. Moreover, once you’ve mastered the art of capturing splash collisions you’ll need to be resourceful in the creativity department to come up with more uses.

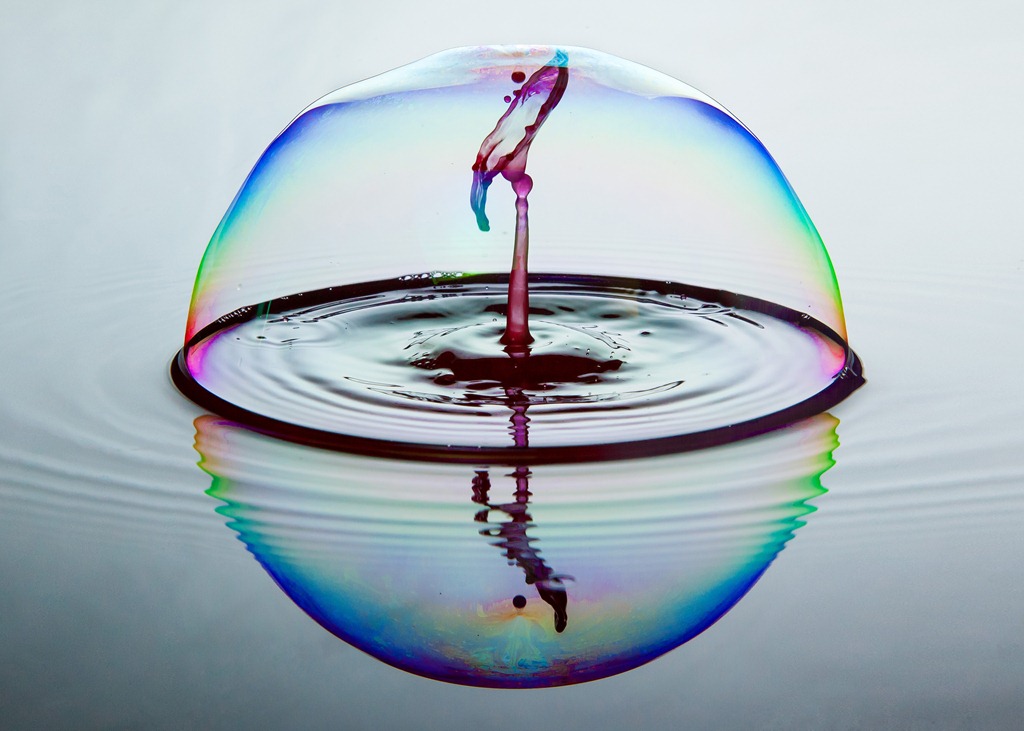
That said there are plenty of alternatives for you to explore. Water can be replaced with milk, paint or any coloured liquid you can get your hands on. Each has it’s own style of splash.

SplashArt-4I can imagine the SlashArt kit would be a brilliant investment for a small group of photographers who can share the skills and the price amongst themselves.

Conclusion
I loved using the SplashArt 2 kit and it’s a keeper for me. At £180 it’s not cheap but it’s hardly expensive either. OK so there’s no markings on the dials and from time to time it would miss a drop but in the space of 30 minutes I went from never having captured a splash collision to having dozens of them… and they were all brilliant!

Adobe “Create Now” Live

Are you around today (11th Dec 2012) at 6pm UK time? Do you want to find out what’s coming to Photoshop? Do you have a creative cloud subscription? If the answer to one or more of these questions is yes, then read on.

imageWhen Adobe launched their Creative Cloud subscription service they promised that they would release any updates to Photoshop (and other Adobe software) to creative cloud members first. Well it would appear that they’re about to come good on that promise.

What will be announced is still under wraps but they’ve lined up some guest speakers to talk us through them. Chief amongst them is Photoshop guru, Scott Kelby.

To watch live you’ll need to first register here: http://www.adobeeventsonline.com/createevent

The start time is 6pm UK time, 10am PST, 1pm EST.

Know Your Camera Quiz

Gavtrain-quiz-2It’s time for another quiz and this time it’s all about camera’s and lenses. There are 10 questions that will put your Photography knowledge to the test.

They range from quite easy to very tricky and all the answers are multiple choice.

Getting the answer to a question right first time will increase your percentage score, so choose wisely. Click the arrow to move to the next question.

REMEMBER… Google-ing the question isn’t in the spirit of the quiz.

Good Luck

[mtouchquiz 3]

15 Affordable Christmas gifts for photographers

Photo-xmasWith the Christmas shopping season now in full swing you’re either reading this page because you need some inspiration on what to buy the photographer in your life or because you are photographer and you’ve been asked to suggest a reasonably priced gift.

With photography being a notoriously expensive hobby I wanted to choose accessories that are affordable and useful. So for this gift guide I’ve chosen things I own or have used that all cost less then £20 GBP or $25 USD. None of them are specific to one make or model of camera so if you’re not a photographer you don’t have to fret that it won’t work.

Battery Storage Box
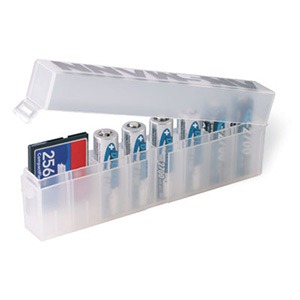
There’s nothing worse then finding three AA batteries in your camera bag when you need four batteries in your speedlight flash. The Ansmann storage box is a brilliantly simple solution for storing 8 AA batteries in one box. It even has a handy diagram printed on the side to show you how which way up to put charged and flat batteries.

If that’s not enough, it’s cleverly designed so you can also use it to store memory cards instead of batteries.
UK Price £ 3.99 From Warehouse Express
US Price
$ 3.99 From Adorama

Untitled-1

3″ Spring Clamp
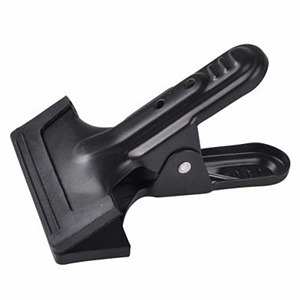
You don’t need me to tell you what these do. Let’s just say they may not be the most sexy piece of camera gear going but they’re probably the most useful.

I’ve used mine for everything from holding up background cloth to holding broken bags closed whilst in the field.
UK Price £3.99 From Smick
US  Price
$2.59 From Adorama

Untitled-2

Op/Tech 18″ SLR Rainsleeve
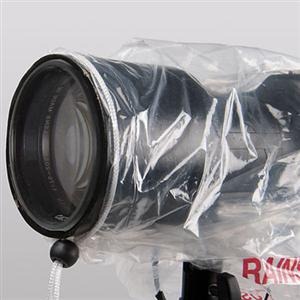
This one should be top of every outdoor photographers list. The rainsleeve is basically a long clear bag with a draw string at the end. You can see one in use in this video.
Once attached it will keep the rain, snow and if used with care even the sand off your precious equipment.

With a price tag that matches it’s no frills design, it’s a bargain but doubly so when you realise each pack contains two of them!
UK Price £ 5.99 From Warehouse Express
US Price
$ 6.00 From Adorama

otrsl

Alpine Innovations Spudz
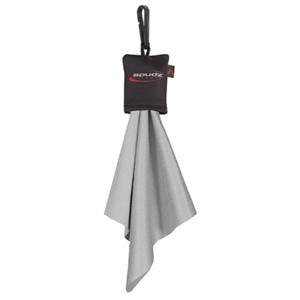
I love these Spudz lens cloths for a couple of reasons. First they do a great job of cleaning my lenses but more then that they keep themselves clean by being stored in their own tiny pouch which is attached to the cloth.

As they’re so cheap, I clip a Spudz cloth in every camera bag so I’ve always got one to hand.

UK Price £ 6.99 From Warehouse Express
US Price
$ 4.95 From Adorama

cpsmfcb

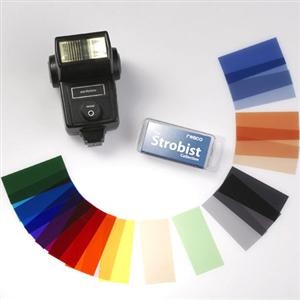
Rosco The Strobist Collection
This one is perfect for all those strobists out there. These are small rectangular coloured gels that fit perfectly in front of a speedlite.

I use two tiny blobs of BluTak to hold them in place and once attached you can change the colour of the light coming from the flash.

This allows you to add a splash of colour to a studio background, or warm up/cool down the flash light on your model.
UK Price £7.99 From Crooked Imaging
USPrice
$7.95 From Adorama

ROSK

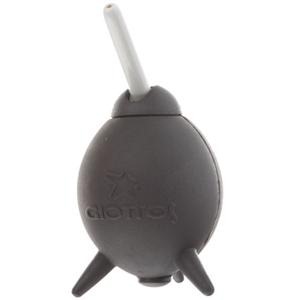
Giottos Q-Ball rocket
Keeping the outside of your camera clean is an important and sometimes overlooked job. OK that might be just me that overlooks it.

The Q-Ball is a powerful blower with a very handy tiltable nozzle. It’s perfect for blowing away dust and dirt from hard to clean parts of the camera and is also my first line of sensor cleaning.
UK Price £7.99 From Warehouse Express
US Price
$10.50 From Adorama

GTRABT

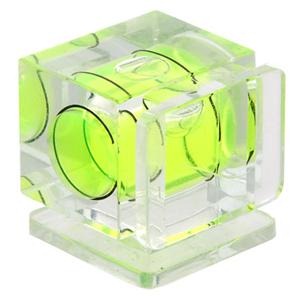
Bubble Level
Is that horizon really straight? Is a question you’ll never need to ask yourself if you pop one of these on the hot shoe of your camera.

Small enough to throw into you camera bag, no landscape photographer should be without one or two of these.
UK Price £8.16 from Crooked Imaging
US  Price
$5.95 From Adorama

TPBLS

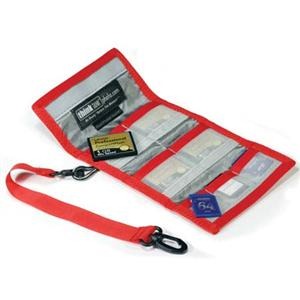
Think Tank Pee Wee Pixel Pocket Rocket
Just like batteries, memory cards have a habit of disappearing so this little gadget is ideal to help you keep everything in one place.

It holds both SD and compact flash sized cards and to stop you losing all your cards in one go, it comes with a security leash so you can clip it to your camera bag.
UK Price £8.99 From Morris Photographic
US Price
$15.75 From Adorama

ttpwppr

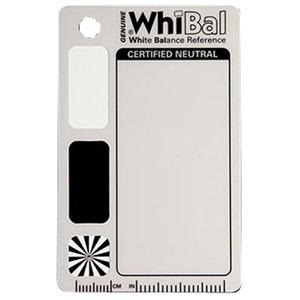
White Balance Pocket Card
If you want perfect colour in your images you’ll need a to start with a true grey reference image taken in the same lighting as the final photo. I reviewed the Whibal card some time back and it’s now a permanent fixture in my studio and I also have a tiny version in my camera bag.

The Whibal is a US import so if you’re buying from the UK I’ve linked to the nearest equivalent I could find.

UK Price £9.98 From Calumet
US  Price
$19.95 From Adorama

WBWB7PC

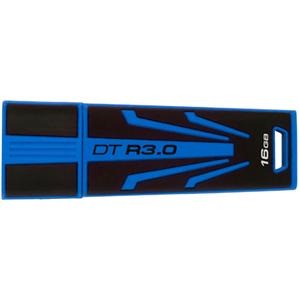
Kingston Technology 16GB DataTraveller
A thumb drive is an essential piece of kit for temporarily storing photos and transferring files. Now you might think that all thumb drives are the same but if you’ve ever tried to read or write large amounts of data to one of these things then you’ll know they can be SLOW!

The DataTraveller is a USB3 device which means if you plug into a USB 3 port you’ll get super fast data transfer. It’s USB 2 compatible as well although the speeds will be slower.
UK Price £12.73 From Scan Computers
US Price
$ 17.95 From Adorama

KGDTR3016GB

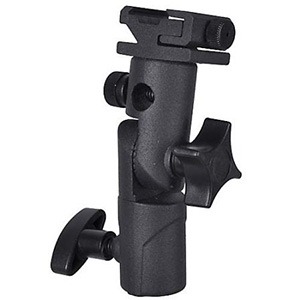
Adjustable Flash Mount
If you’re into off camera flash or strobist work then these things are essential and if like me you have a habit of losing things, you can never have too many.

Basically this little device will attach your flash gun to a lighting stand and allow you to adjust the angle or even attach an umbrella.
UK Price £13.99 From Smick
US Price
$15.25 From Adorama

Untitled-2a

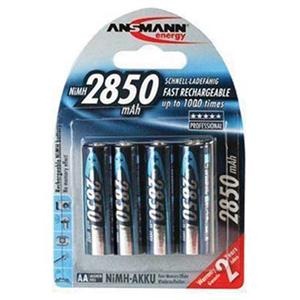
Ansmann Digital NiMh 2850mAh AA Batteries
AA sized batteries seem to disappear in my house and from time to time I’ll have a round up, usually starting in the remote controls for various TV’s and games consoles. That’s why it’s impossible to have to many AA batteries and these are some of the more powerful ones around. If you use them in your Speedlight’s then more power means more flashes and that’s got to be good.
UK Price £13.99 From Warehouse Express
US Price
$16.40 From Adorama

ANAA28504

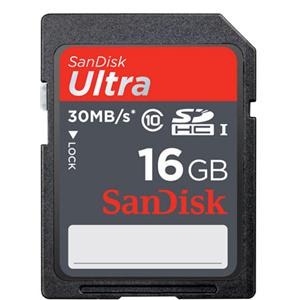
SanDisk 16GB Ultra SDHC
Almost every new digital camera seems to shoot SD format today and with pixel counts going up you’ll need more storage. For most photographers the 16GB size is an ideal balance between price and storage size.

This from SanDisk has a pretty fast 30MB/s write speed which will keep up with all but the biggest cameras shooting in burst mode and is perfect for DSLR video work too.
UK Price £14.00 From Warehouse Express
US Price
$14.95 From Adorama

IDSDUIC1016

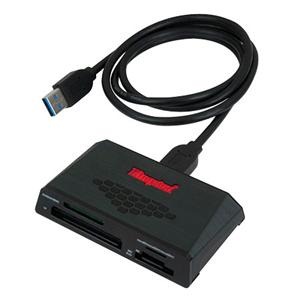
USB 3.0 Universal Memory Card Reader
USB 3 is the new high speed way of moving data onto your computer. Well I say new, in fact USB 3 has been around a while but now prices of compatible devices are falling.

This USB 3 card reader will allow you to move your images from the memory card to the computer at lightening speeds, as long as it’s plugged into a USB 3 port of course.
UK Price £16.13 Amazon UK
US Price
$23.95 From Adorama

kgu3crhs3

Westcott 20-inch 5-in-1 Reflector
A 5 in 1 reflector is one of those “must have” gadgets that has a million uses… OK maybe not a million.

I use mine as a bounce reflector (white/silver/gold sides), A light blocking flag (black side) and as a shoot through diffuser for both flash and sunlight.

This one will fold up small enough to fit in a camera bag and from my experience small is good as if it’s big and bulky I leave it at home.
UK Price £19.99 From Premier Inks
US Price
$19.90 From Adorama

we5i1r20_3

Disclaimer: the prices listed above are correct at time of publishing. They are for guidance only and may not be the best buy. You are advised to shop around to find the best price for each item.

Photo Director 4 ~ Review

In the world of photo editing Adobe have had very little in the way of serious competition. Photo Director 4 from Cyber link would love to change that so let’s find out if it’s got what it takes.

PD4-1
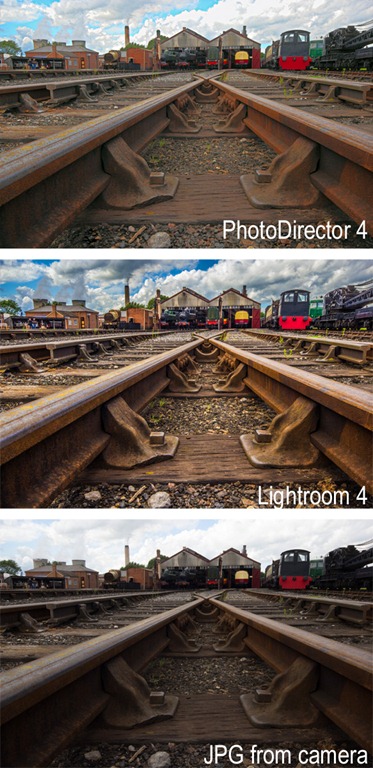
Verdict: PhotoDirector 4 is surprisingly good at what it does. It borrows heavily from the design and interface of Adobe Lightroom 4 and it even throws in some neat tricks of its own. It’s just a shame that PhotoDirector can’t match the image quality gained from using Lightroom 4 that it mimics so closely.
   
Overall Rating

4-Star

Design / Features 4-Star (2)
Performance

3-Star

Price 4-Star (2)
+ Plus Points
    + Fully featured photo editor
    + Wide range of editing tools
    + Excellent pseudo HDR effect
– Minus Points
    – Image quality could be better
    – Controls can be sluggish
Price (at time of review) £72.00
Suppliers Website: http://www.cyberlink.com

As a die hard fan of Photoshop it seems very strange using a bit of software that doesn’t come from Adobe but PhotoDirector 4 has a uncanny familiarity about it. In fact if someone had told me that this was a beta version of “Lightroom Elements” I’d have totally believed them.

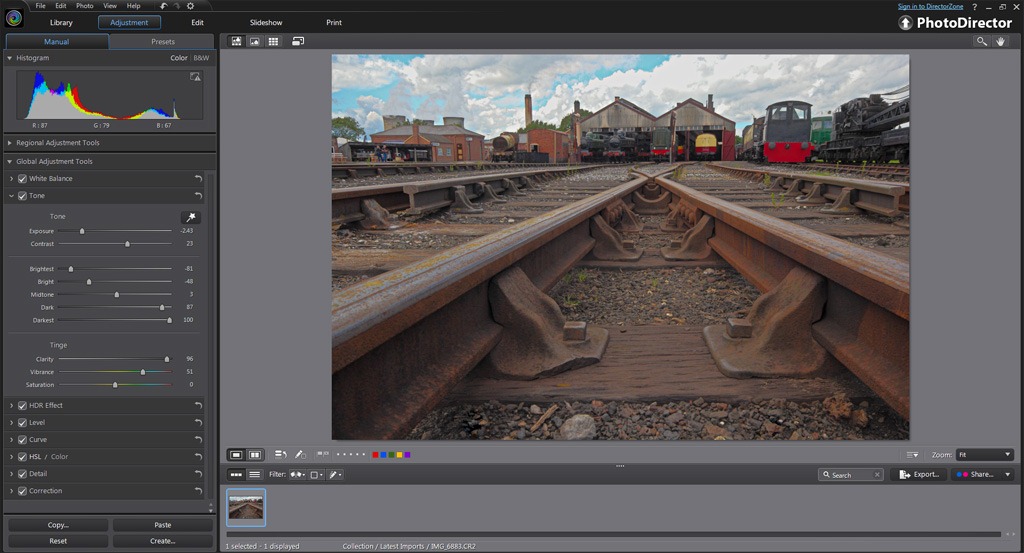
At its core PhotoDirector 4 is a photo organiser and photo editor that can handle pretty much any photo format you can throw at it, including RAW files. The program is split in to five modules which are the Library, Adjustment, Edit, Slideshow and Print sections. You move from one section to another making changes as you go.

You can see Photo Director 4 in action by watching my overview video below.

In use
Editing your photos is PhotoDirector 4 is a pleasant experience. There’s lots of controls at your disposal and adjustments are applied live to the image on screen. The changes appear almost instantly, although there is a momentary delay before the full resolution effect is seen on screen. I did find one annoyance however, the interface had a habit of regularly not moving the slider I was dragging.

PD4-2In the Adjustment section there’s a great selection of preset effects on offer with the option to create your own too. Sadly you can’t make presets for other sections, such as Print, which is a shame.

Unique features
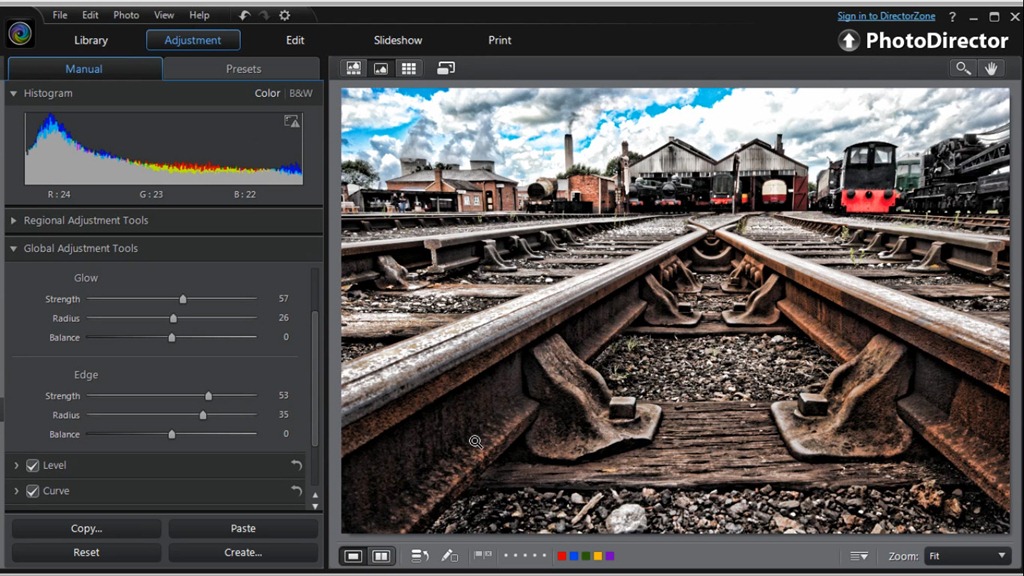
It’s impossible to use PhotoDirector without comparing it to Lightroom but there’s also a bit of Photoshop Elements in there too. There’s a Liquify brush, a skin smoothing brush and a teeth whitening brush. There’s also a brilliant Pseudo HDR effect which was possibly my most favourite feature and not something you’d find in either Photoshop Elements or Lightroom.

Conclusion
PD4-3If you’ve no wish to use an Adobe product then I can whole heartedly recommend Photo Director. If you’ve tried Lightroom and found it lacking in features, I can honestly say Photo Director is well worth a go.

It’s the image quality that really matters of course and here PhotoDirector 4 held it’s head high on most adjustments. Processing RAW files gave some great results with noise free images with good sharpness and colour.

It all sounds and looks great… until you compare it to the image quality obtained in Lightroom or Photoshop. Sadly much as I liked PhotoDirector, I can pull far more out detail from the shadows and highlights in Adobe Camera RAW. I can also add much more clarity and the experience of doing so is far more fluid. That said Adobe need to watch their back as the gap between them and the competition is closing.

Choosing an SD card for video

As a stills photographer I’m used to grabbing the nearest memory card, popping it in the camera and shooting photos. As long as there’s enough space on the card I’m good to go. But when it comes to capturing video with your DSLR, life’s not that simple.

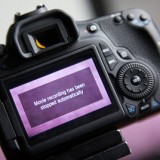
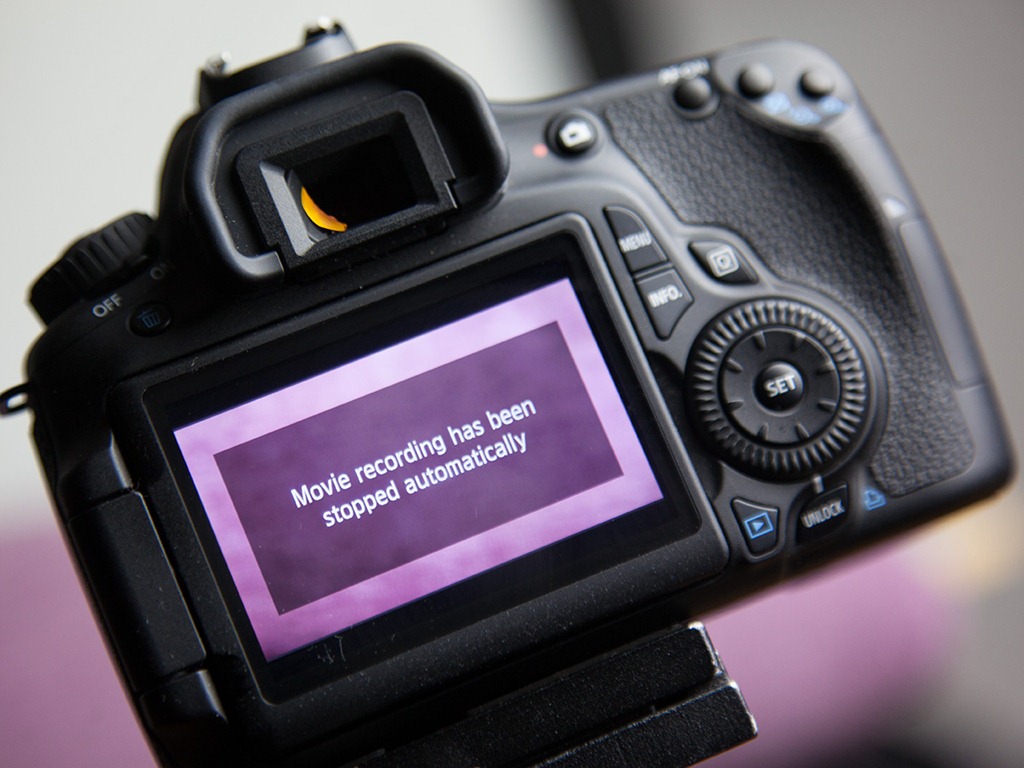
Video-StoppedI learnt the hard way that not all memory cards are the same and even the ones that claim to be suitable for HD video can let you down. Grab the wrong card and you’ll be greeted with a message like this. “Movie recording has been stopped automatically”and basically when you see this it’s game over. So here’s some tips for choosing the right memory card for video.

Compact Flash or SDHC?
If I have the choice then I’d use compact flash cards every time. Generally speaking compact flash cards are faster, which is always good for video and from my personal experience I can testify to their durability too. Having said that, SD cards are now the norm for new cameras and there’s no going back. So it makes sense to invest in decent SD cards if you’re likely to be upgrading your camera body in the future.

The Class 10 rule
When it comes to choosing an SD card for video there’s one golden rule… It absolutely must be rated as a class 10 card. DSLR’s churn out video at an incredible rate and all that data has to be written to the card, a class 10 card can do that at least 10 megabytes per second.

Faster then fast
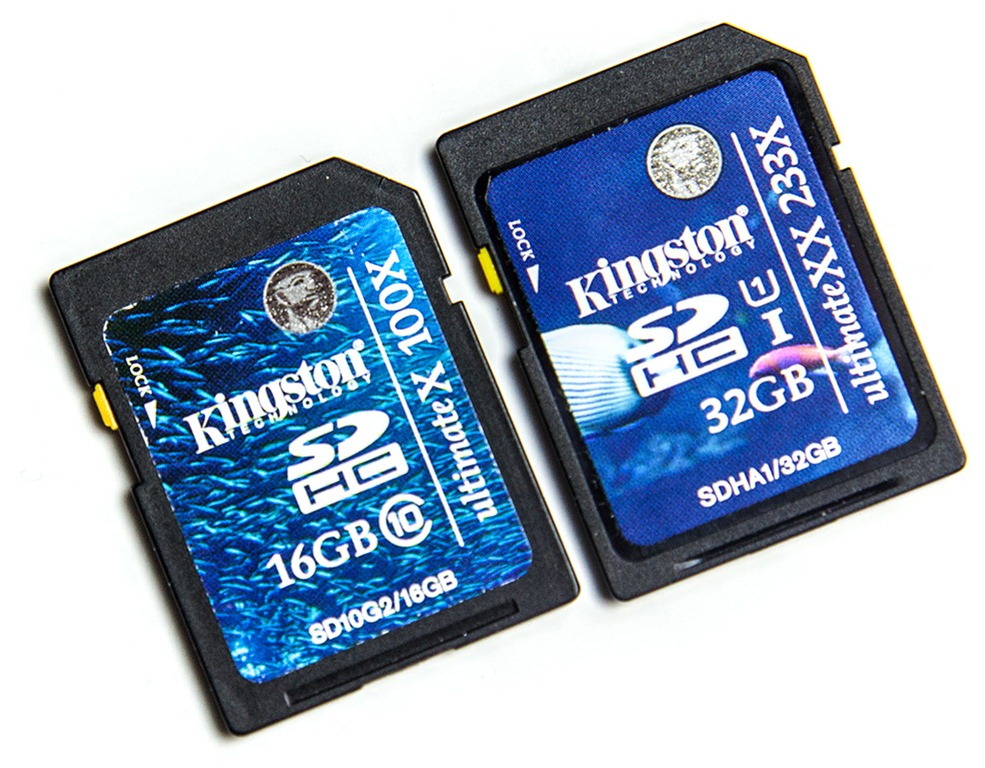
Class-10-2Good as the class 10 rule is, it doesn’t always work. Take a close look at these two cards from Kingston. They’re both rated as class 10 but one is faster then the other. The card on the left is capable of shifting 15mb of data per second where as the card on the right shifts a whopping 35mb of data per second.

From my experience both cards will work just fine at recording DSLR video but when you combine the faster card with a USB 3 reader, you’ll be able access the data far faster.

I’d recommend the left card is the minimum you should relay on for video, where as the card on the right is my preferred card.

Size matters.
For still photography an 8GB card will usually do me just fine for a days shooting but when it comes to video that same 8GB card will be full in just over 20 minutes. So unless you only want to shoot short clips you’re really going to need a big card. 16GB cards represent good value for money but for me 32GB cards are the way to go.

Carry Speed FS-Pro 2 ~ Review

Much as I love my Black Rapid sling straps I’ve never been 100% happy with them. So I was keen to find out how the Carry Speed FS-Pro 2 measured up.

CarrySpeed1
Verdict: There’s no denying that Carry Speed FS-Pro 2 is a well designed and well built piece of kit. The inclusion of a folding, tripod mountable plate is ingenious but only if you fit it correctly to your camera.
   
Overall Rating

4-Star

Design & Features 5-Star
Performance

4-Star

Price

4-Star

+ Plus Points
    + High levels of comfort
    + Clever mounting plate
    + Front Quick Adjustment
– Minus Points
    – Locking “O Ring” can slip
    – Easy to fit back to front
 
Price (at time of review) £56.00 ($70.00 USD)

Suppliers website www.carryspeed.com

The Carry Speed FS-Pro 2 is really a strap of two parts. First there’s the very cleverly designed F1 foldable mounting plate and the strap itself and I’ll tell you right now, they’re both brilliant.

The Strap
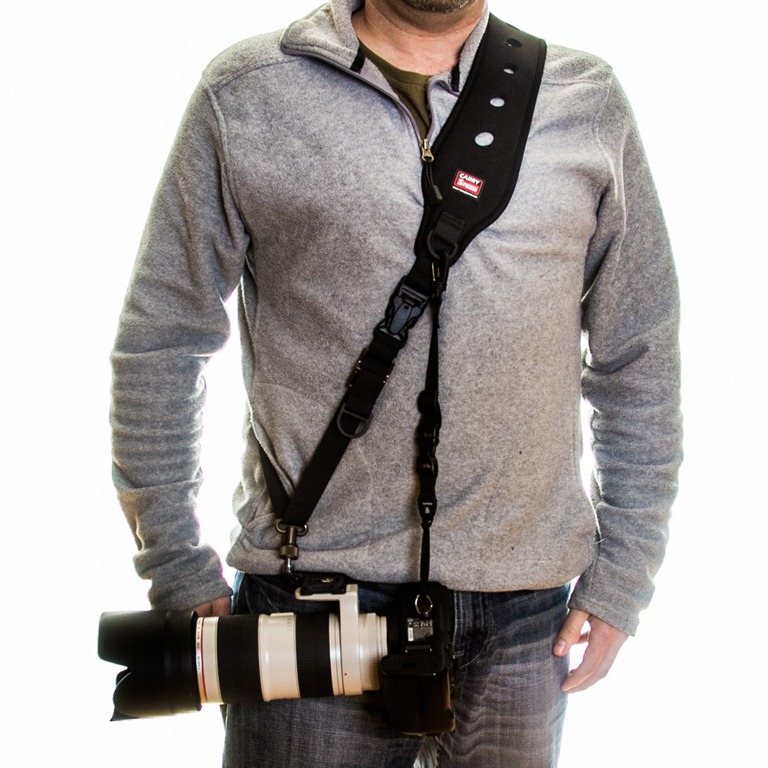
The first thing I noticed about the FS-Pro was it’s huge shoulder pad and to be honest I wasn’t keen on it initially. If, like me, you normally like your camera gear to be discreet then I’d suggest looking at the Carry Speed FS-Slim as a more subtle alternative.

But this strap isn’t trying to hide away, this strap is designed to make light work of carrying heavy cameras and to that end it’s amazing. In fact I’d go so far as to say it’s possibly the most comfortable camera strap I’ve ever used.

CarrySpeed2The comfort factor comes from the shoulder pad being made from a combination of stretchy neoprene and rubber. The strap can be adjusted in length to suit your size, although if you’re particularly tall or wide you might want to contact Carry Speed to check the exact length.

On the front of the strap is a couple of D-Rings for attaching links like the included uni-strap which helps spread the load of long lenses by attaching the strap to both the lens and camera body’s tripod mounts.

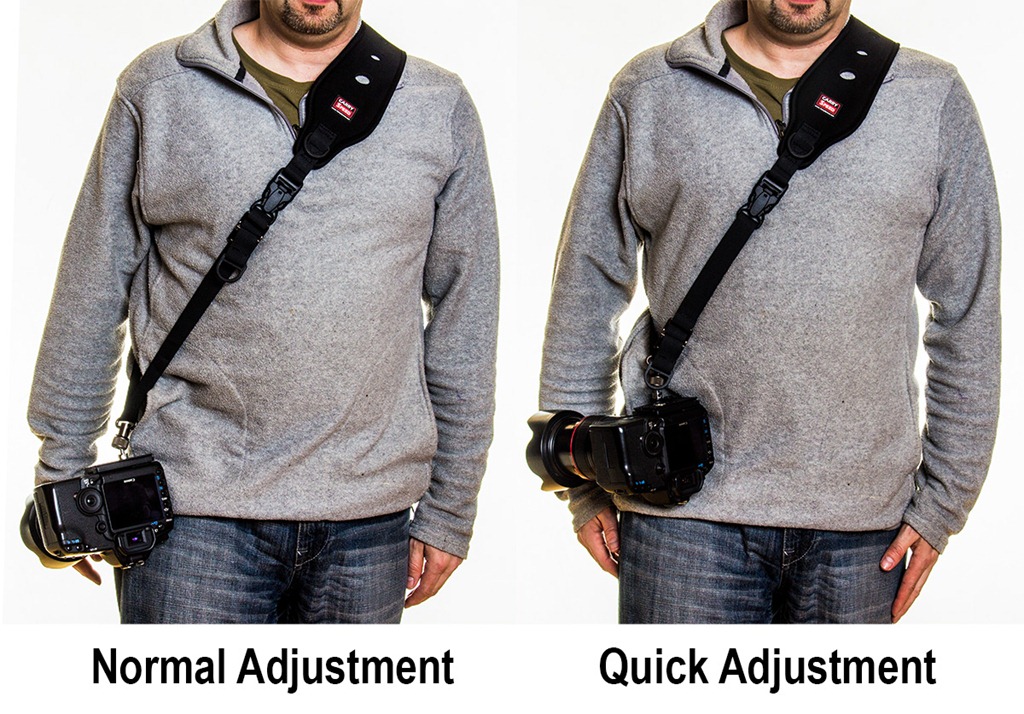
One of my favourite features is the front quick adjustment. Here’s how it works… when I’m not shooting with the camera and I want to keep it close to my body, all I have to do is give a sharp pull on a D-Ring and the strap instantly tightens up. Clever stuff!

The mounting plate
CarrySpeed3I’ve used sling straps for years and much as I love them, things like not being able to put the camera down flat are an annoyance. But having to remove the strap before I can use a tripod is probably top of my gripe list.

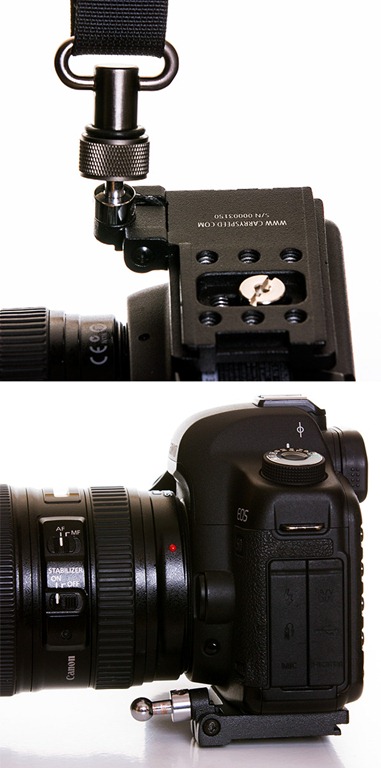
With the F1 mounting plate, Carry Speed have side stepped both those problems because it folds down flat AND it has six tripod holes meaning you can attach pretty much any quick release plate and still use the strap. The design may not be pretty but they work really well.

It’s not all good news though. The mounting plate is attached to the strap by a ball and socket which is huge! I also had concerns about the thread on the ball joint unscrewing. Carry Speed have added a rubber O-Ring which is supposed to prevent accidental unscrewing but it doesn’t. Fortunately in all of my testing I didn’t have any issues but I did keep a weather eye on the ball joint… just in case.

One really important thing to note is that the mounting plate MUST be fitted the correct way round and as there’s no clues on the plate as to which way is the correct way, it’s easy to get it wrong (just like I did the first time). When the plate is fitted back to front the whole system is worse then useless as the folding ball joint will poke you in the face. Ouch!

Conclusion
There’s so much to like about the Carry Speed FS-PRO 2. It’s super comfortable in use, very well made and supports the camera well. I do have some reservations about the design of the ball joint but that’s not enough to stop this strap becoming my “go to” sling strap for use with heavy gear.

3 Questions to ask before buying a camera

What camera should I buy? With the huge and confusing choice of cameras on the market today, it’s a question that I’m asked time and again. I may be wrong but I get the feeling that most people who ask me that question want a short answer like… “You want to buy Camera X” Sadly it’s not that easy so here’s three tips to help you choose wisely.

Which CameraWhat are you going to photograph?
This should be the first thing you ask yourself before going any further. Sports or wildlife photographers will want different features then portrait and wedding photographers. The dream of one camera fits all is getting closer but it’s not here yet.

Things to consider might include:
Are you photographing moving subjects? If so then look for a camera with good autofocus and a fast frames per second (FPS) count.

Are you going to be shooting in low light? If so then a full frame sensor camera might be for you as they generally have much lower noise at higher ISO settings

Do you mostly shoot with long zooms? If you need to get close to your subject (from a distance) then a crop sensor camera will magnify the focal length of your lenses by around 1.5 times.

Do you need an SLR camera? If you’re shooting street photos or simply prefer to travel light then one of the new breed of mirrorless cameras might well be perfect for you.

What’s your brand?
This one’s really simple… If you currently have a Canon buy another Canon. The same rule applies for Nikon, Sony etc. Yes I know it seems like that other brand has all the best features but if you own more than two lenses you’re looking at a very big bill to swap brands.

So what if you’re new to photography, have had all your gear stolen or you only owned the kit lens that went with your old camera. What brand do you buy now?

That’s easy too. Buy whatever brand of camera your friend, colleague or neighbour has. That way you can swap gear and share knowledge with someone you trust.

How much do you have to spend?
At the end of the day it really is all about the money. Cameras are not cheap items so you want to buy the best one you can.

Before you rush out with your credit card let me remind you there is a big difference between the “best camera” and the “most expensive camera”.

Set yourself a budget which will include the things that aren’t in the box. Things like:

  • Memory cards (lots of them)
  • Spare Battery
  • Camera Bag
  • A lens or two

That last one is important. A new camera body may last you three years, maybe five if you’re lucky. A decent lens should last you 10 years or if you’re lucky it might last a lifetime. Invest in lenses whenever you can… but that’s another story.