Free eSeminar

eseminarEarlier this year I held a live eSeminar in association with Adobe UK. Don’t worry if you didn’t catch it at the time because I’ve been booked to do three, all new eSeminars, starting this week. Best of all the eSeminar is 100% FREE

The first eSeminar is this Thursday, 29th September, 2pm UK time and it’s title should tell you everything you need to know.

Photoshop for wedding & portrait photographers

The eSeminar should last for around 45 minutes with a Q&A session at the end. During that time I’ll be covering some of my favourite short cuts, tricks and general tips that should help every portrait and wedding photographer. I’ll be demonstrating Photoshop CS5 cool talents, but as much of the eSeminar will focus on RAW processing, a lot will be equally relevant to Lightroom users.

To watch this free eSeminar, you’ll need to register for the event in advance. Here’s the link

If you’re unsure of the local time you’ll need to be online this handy world clock has 2pm London time in 100’s of different countries.

I hope to see you there.

Find me on Google+

google Google+ finally went public around a week ago, which throws open the doors to the newest social networking platform. At this stage I’m undecided about how this new player will fit in to my life, but if you fancy following me on Google+ (known as adding me to a circle) I’m right here.

So what will I be using Google+ for? Well, at the moment it’ll probably be a copy of my Facebook page. Now you may say that’s a missed opportunity, but I’ve got nothing extra to add to Google+ that I can’t already say on Facebook. That said the "hangouts" idea on Google+ sounds interesting for the future. Hangouts are video (or audio only) calls between small groups of people and I can really see that being useful in due course.

To be clear Google+ is going to compliment my existing presence on Facebook and Twitter. At some point in the future Google will make business accounts available and then I’ll probably take a bigger interest in what it can do.

Just a note of caution. Although Google+ is proving a bit of a hit with many photographers, my teenage daughter and her peer group don’t see Google+ anywhere on their radar at the moment. However when the teenagers of this world drop Facebook and move on to something else, I wouldn’t be surprised if they choose Google+.

Quick Print Resizer – Free Action

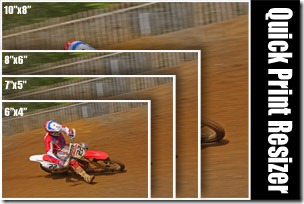
quick-print-resizerHere’s another one of my free downloads. As always it’s hosted on Adobe Exchange which means it’s free to download, but you’ll need to register on the Adobe site. It’s well worth it registering as it opens the door to lots of great Photoshop goodies.

This time, it’s a time saving action for anyone like me who needs to Instantly turn a single image in four photos at popular print lab sizes. The action makes one original sized image plus: 10″x8″ print, 8″x6″ print, 7″x5″ print and 6″x4″ print.

It Includes individual actions to make either 300ppi or 240ppi resolution prints in both upright (portrait) and wide (landscape) formats.

Download the file from here

NOTE: Source photos should be uncropped images from a DLSR camera. Images will be cropped to fit sizes

A day at the races

Usually my email inbox is full of the usual junk mail, spam and the odd bizarre suggestions for videos (but that’s another story). Every now and then an email arrives that’s a bit special and when I read the email from Geoff, I had a big smile on my face.

Geoff wanted to arrange a training session, but rather then meeting at one of my usual locations Geoff had arranged passes to the Goodwood Revival. The weekend long event is a spectacle of 40’s 50’s and 60’s vintage racing cars, bikes and aircraft. That in itself would make it a worthwhile event, but these cars aren’t here to be looked at, oh no, the cars are here to RACE!
Goodwood-10
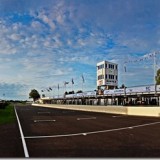
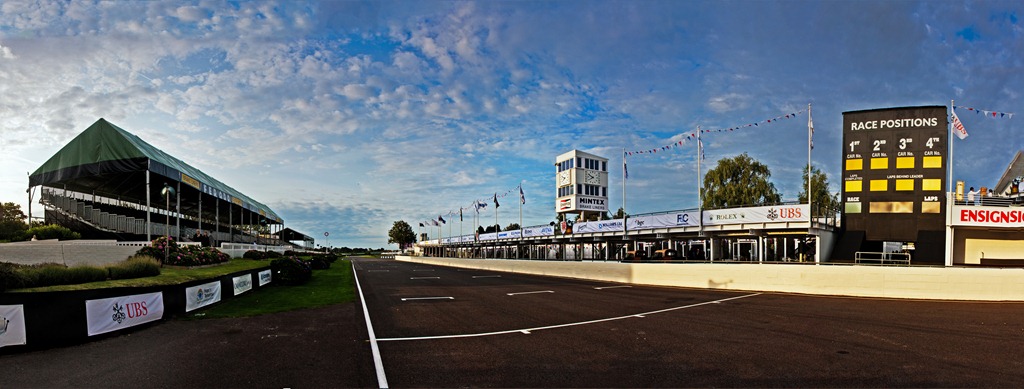
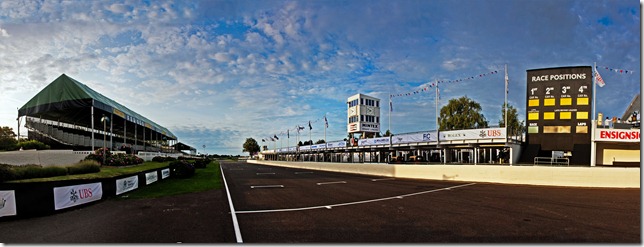
6 shot panoramic of the Goodwood race track

I had arranged to meet with Geoff and his friend Dan at Goodwood just as the gates opened, which made it a very early start, but there were a couple of benefits. Being at the venue early meant we avoided some of the huge crowds that attend the Revival, but the really big bonus of being early was getting access to the race track.

Geoff, Dan and I spent our time on the track perfecting the art of panoramic shooting whist avoiding being run over by some vintage Rolls Royce cars which were cruising round the track.
Goodwood-6
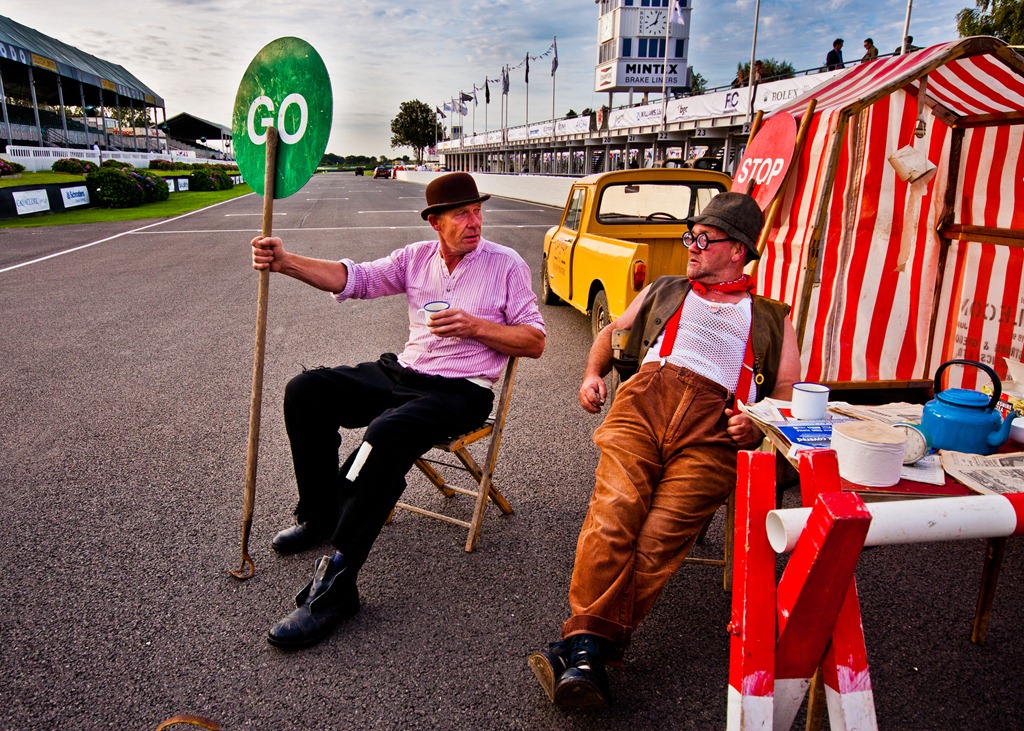
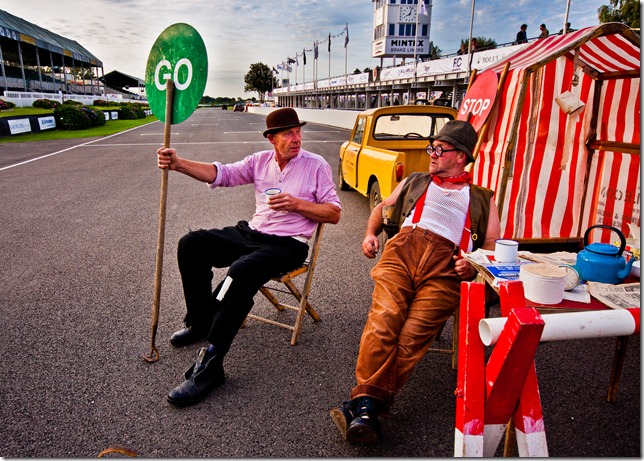
Traffic control, Goodwood style

One of the unique features of the Goodwood Revival is that almost everyone is in vintage costume (including myself, Geoff and Dan). Even the chaps who were ensuring we didn’t become photographic road kill were dressed for the occasion. In fact on the odd occasion I did see someone in jeans and a t-shirt they looked strangely out of place.
Goodwood-3    Goodwood-7    Goodwood-8
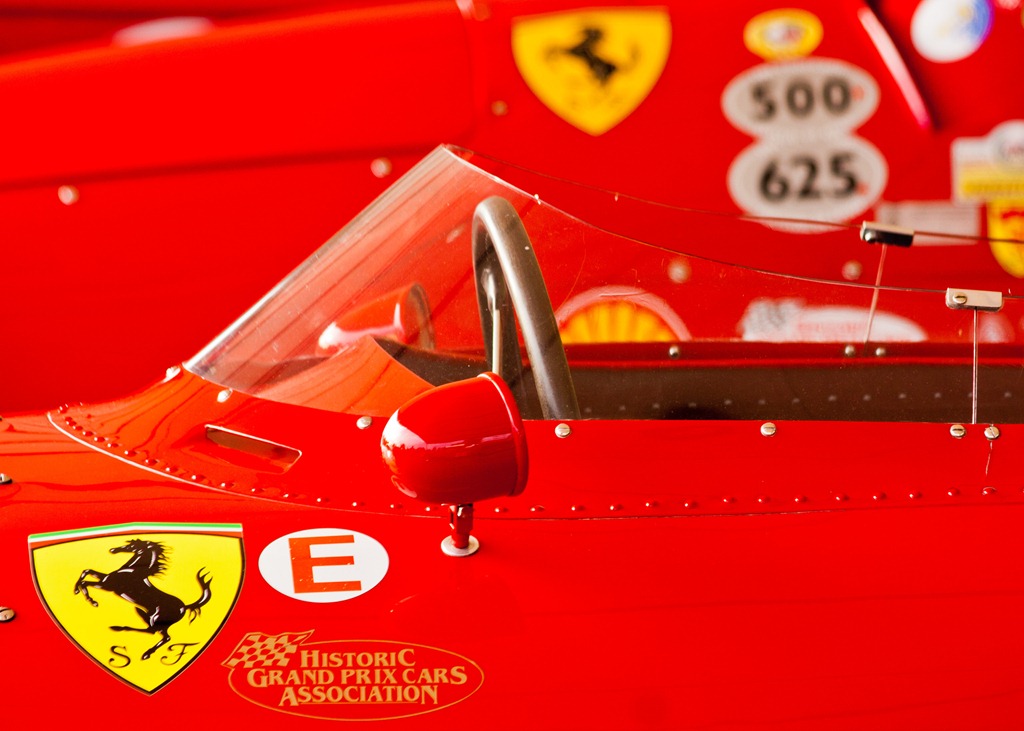
Details of cars

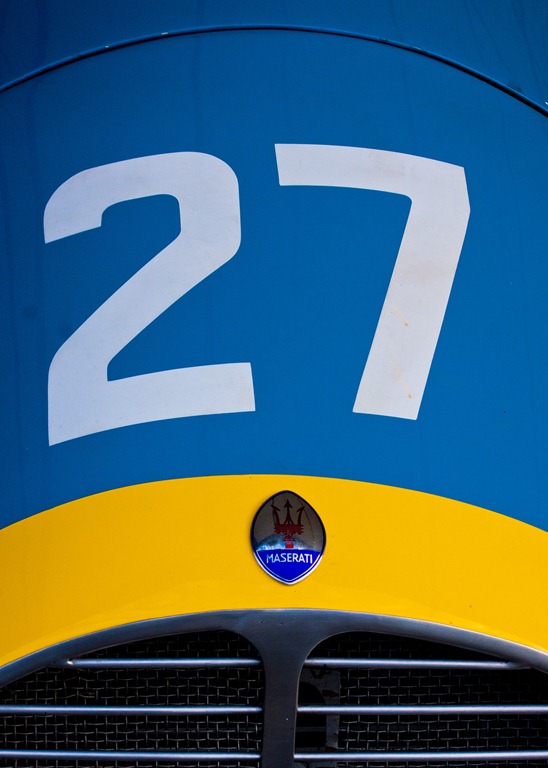
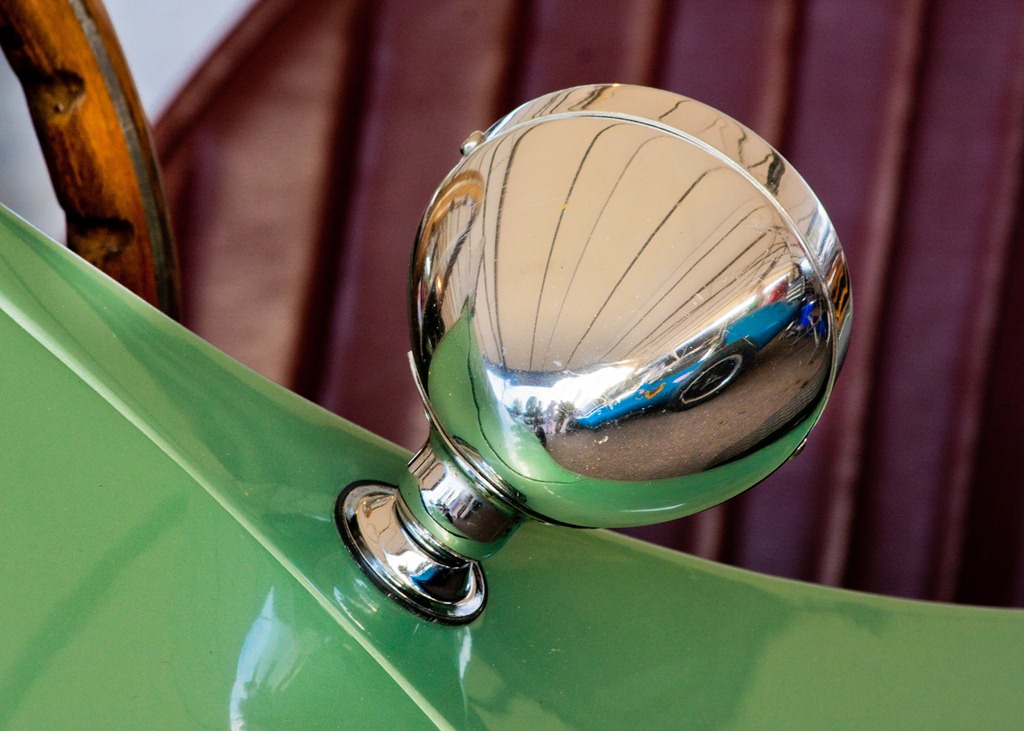
Our next stop was a visit to the paddock. This was where the very best cars were on show and when I say best I actually mean unique and priceless. At one point we found a line of a dozen Ferrari Grand Prix cars. In fact there were so many amazing cars packed into the paddock area that getting a good picture of a single car proved to be very difficult, but going in close and capturing the details was very rewarding.
Goodwood-4
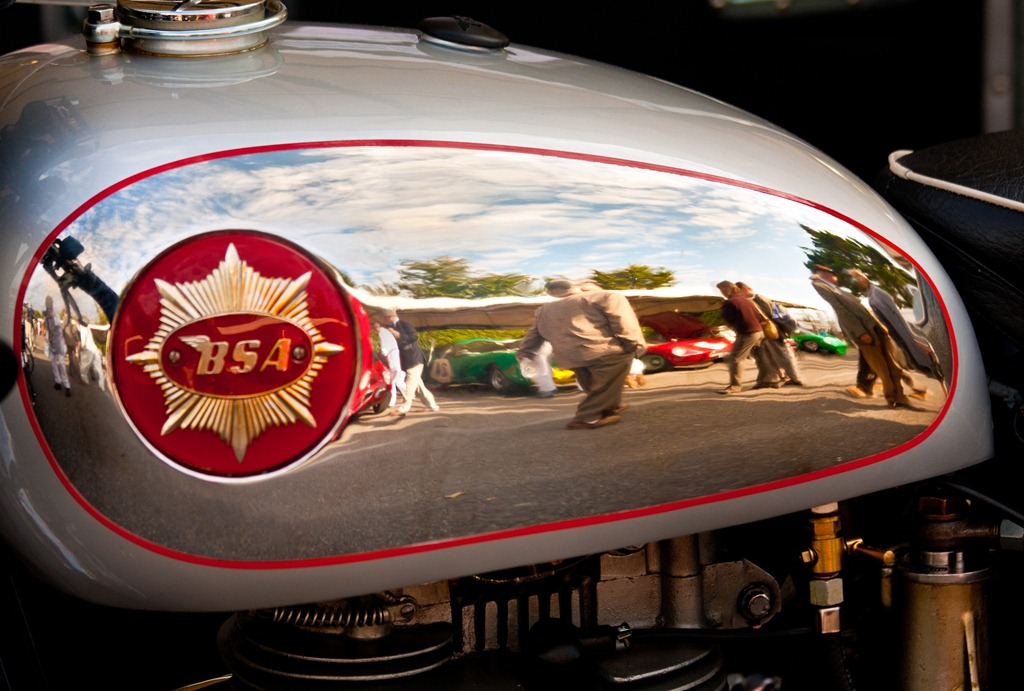
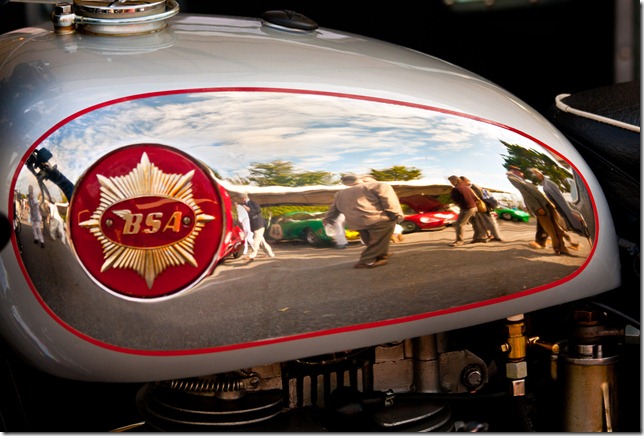
Reflections on a fuel tank

One of the great things about being able to wonder around an event like this is the chance to spot photo opportunities that I might otherwise have missed. The photo above is such an example. It’s the reflection on the fuel tank of a BSA motorbike. To get both the reflection and the badge in focus I took two shots. The first shots had the badge in focus and the second had the reflection in focus. Photoshop was used to align and combine the images into one photo.
Goodwood-5
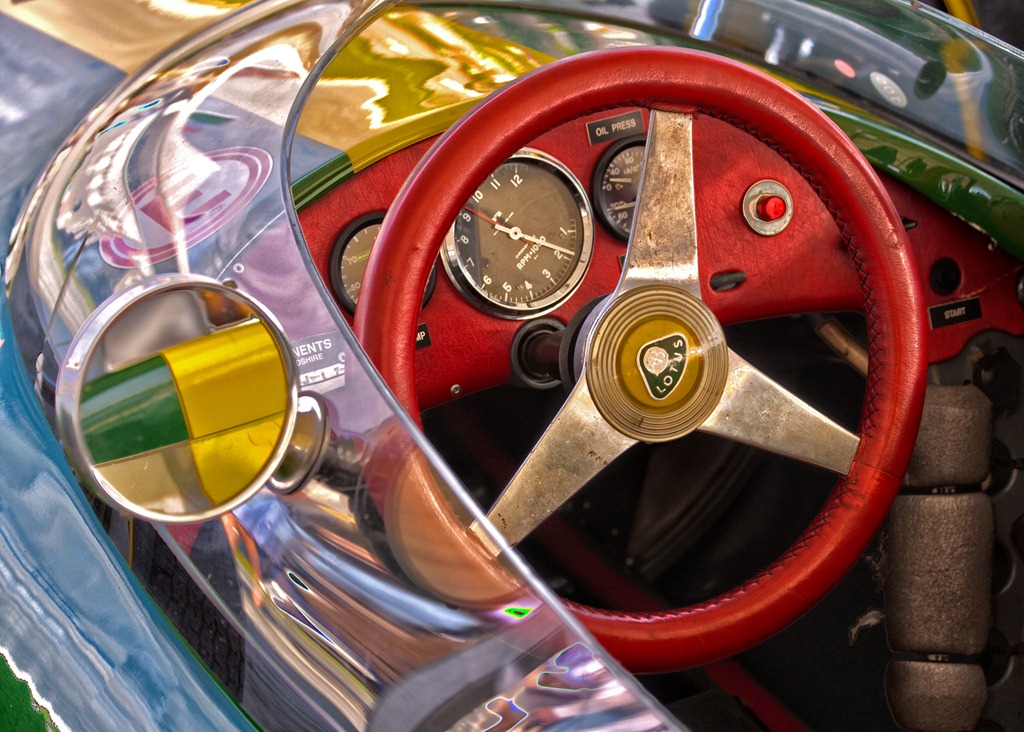
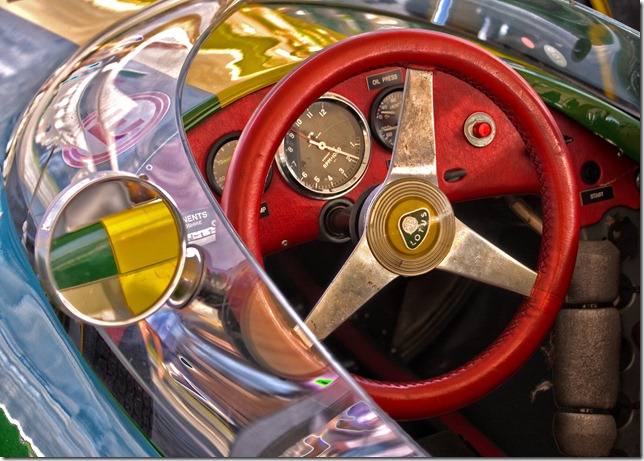
Lotus Cockpit in HDR

I’m always keen to make the photographers that come out with me try something different. Although both Geoff and Dan had tried HDR before it seemed they had found the results to be mixed. So we all had a go a shooting a three shot HDR image handheld. The secret of course, is to use Auto Exposure Bracketing and continuous shooting to minimise the movement from one shot to the next.

This shot above of the cockpit of a Lotus gives you an idea of just how close you could get to all of the cars. I couldn’t believe that I was allowed to dangle my DSLR a few inch’s above a million pound Ferrari.
Goodwood-1 
Racing for real

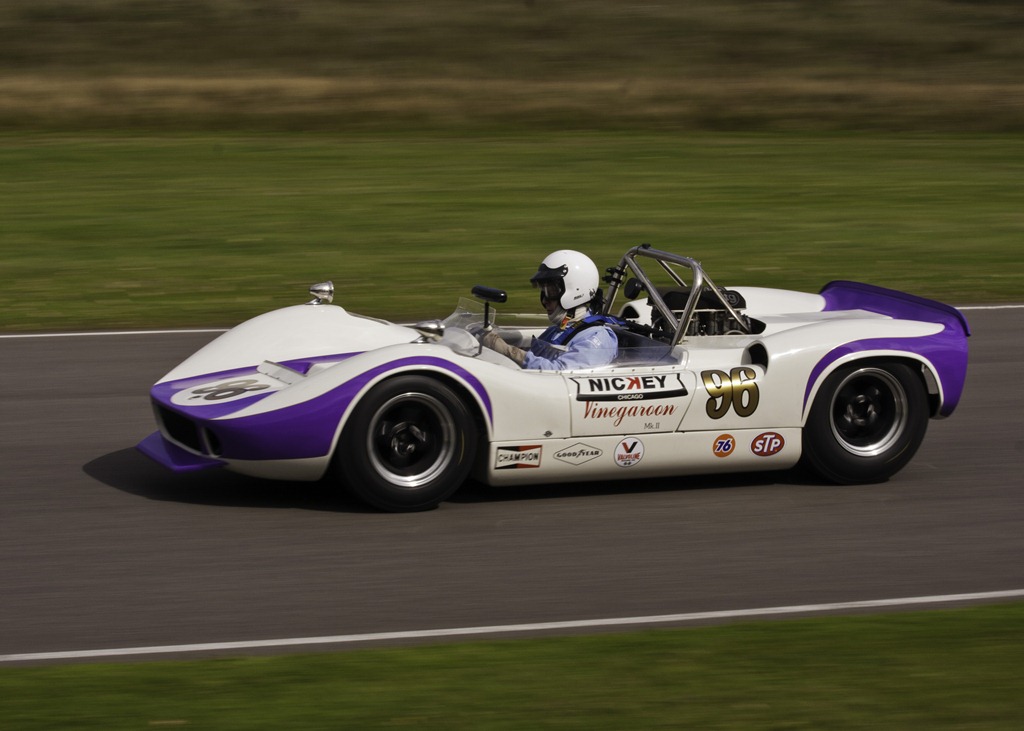
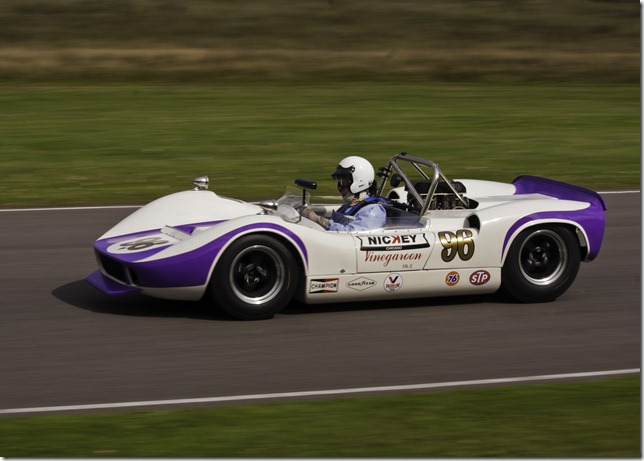
The sound of the cars racing round the track was both deafening and exciting and eventually we could stand it no more and headed off around the track to find a location to try our hand at panning. As I mentioned at the start of this post, the cars were here to race and the drivers were really pushing the cars to the absolute limit.

I’d packed a 70-300mm lens for this part of the day which proved to be a good choice. It took us all a bit of time to get the setting right, but eventually I settled on a shutter speed of 1/250th second as the perfect panning speed to keep the car sharp and background and wheels blurred.

As I often tell my training students, you won’t get a perfect photo every time you press the shutter and when it comes to panning that’s doubly true. There were plenty of soft photos or photos with only half a car in the frame, but practice makes perfect.
Untitled_HDR2
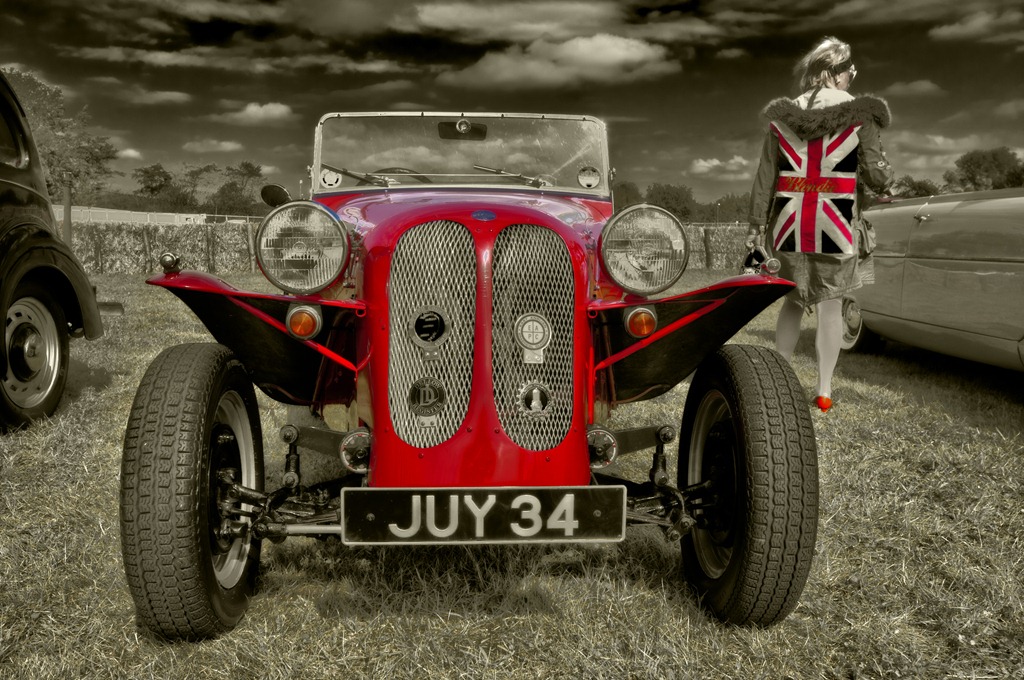
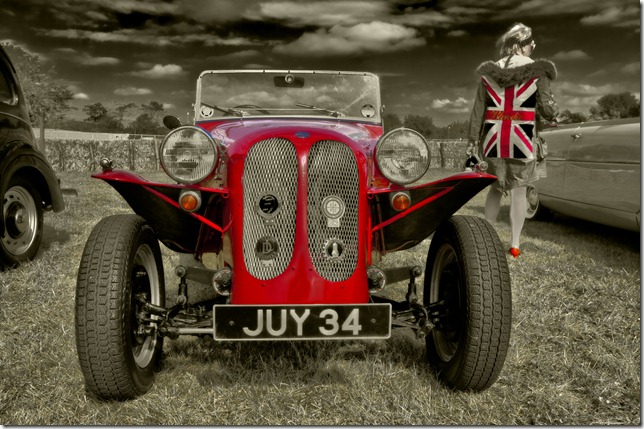
HDR and colour spotting

Eventually all good things come to an end and my time with Geoff and Dan came to an end. I had a great time in their company and I’m sure they went away with a headful of photo ideas. On the way back to car I took a quick detour to a part of the track we hadn’t visited and found a display of classic cars. By now the sun really bright and the shadows very deep, so HDR shooting was the order of the day.

I noticed this lady in a 60’s style Union Jack coat and as luck would have it she was standing next to a bright red car. Getting down low I fired off three photos (2 stops apart) and hoped for the best. After running the images through HDR Pro in Photoshop CS5 I used colour range to select just the reds. Everything else was toned sepia to create the image above.

Goodwood Revival was a blast of sights and sounds. It’s a feast for photographers and petrol heads alike and I hope to return for a longer visit next year.


New training location

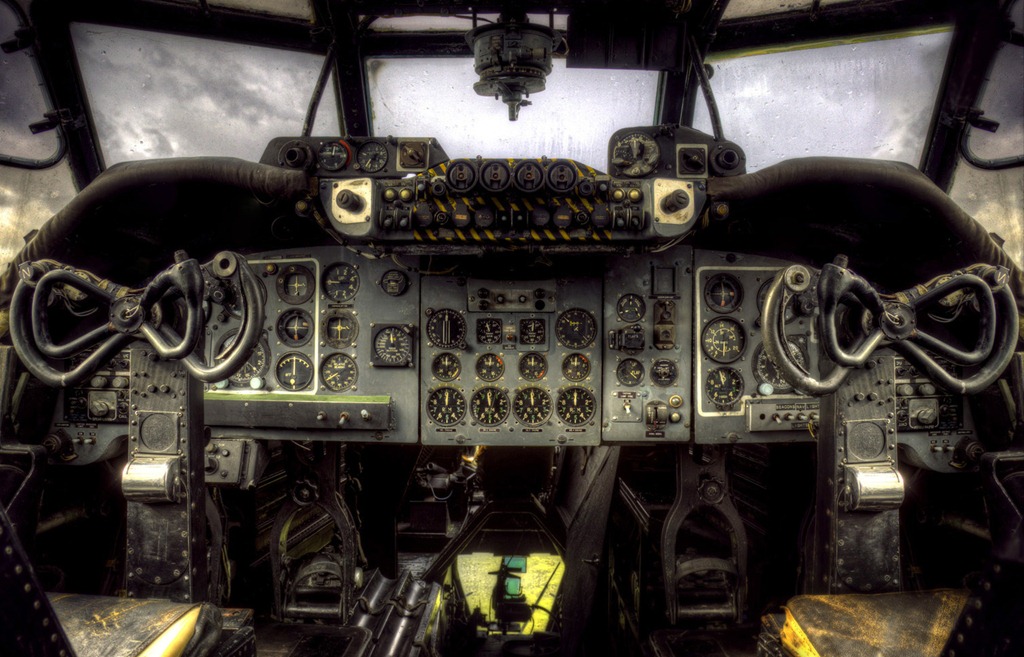
gatwick-cockpit-HDRWay back in January this year i visited the Gatwick Aviation Museum in Surrey to do one of my 15 minute photo challenges. It was a freezing cold day with a biting wind. Half the planes were wrapped up in protective winter covers and the sky was as blank as you’ll ever see. To be honest it wasn’t looking like a great photo opportunity, But I needn’t have worried as the museum is always jam packed with great things to photograph, whatever the conditions.

I enjoyed myself visit so much, I arranged with the owner to hold a one day workshop at the museum.

So in May 2011, a dozen photographers descended on the aviation museum and spent the day getting up close, inside and (in my case) above the airplanes. You can see a few of the photos taken on the workshop Flickr group page. The weather really played ball with blue skies and fluffy white clouds all day long.

5746257396_13edd72e89_b

Ever since the workshop I’ve been looking for an excuse to return, so I’m very excited to say that Gatwick Aviation Museum is now on my location list for one to one photography training.

So what can you expect when we visit? Well first it will be a private session so you (and up to three friends) will have the place pretty much to ourselves for a few hours. That means we can talk photography, test out equipment and learn new skills without fear of getting strange looks from passers by. It also means that you won’t have anyone walking into your photos or stopping you and asking what you’re doing.

Gatwick-Aviation-Museum (10)

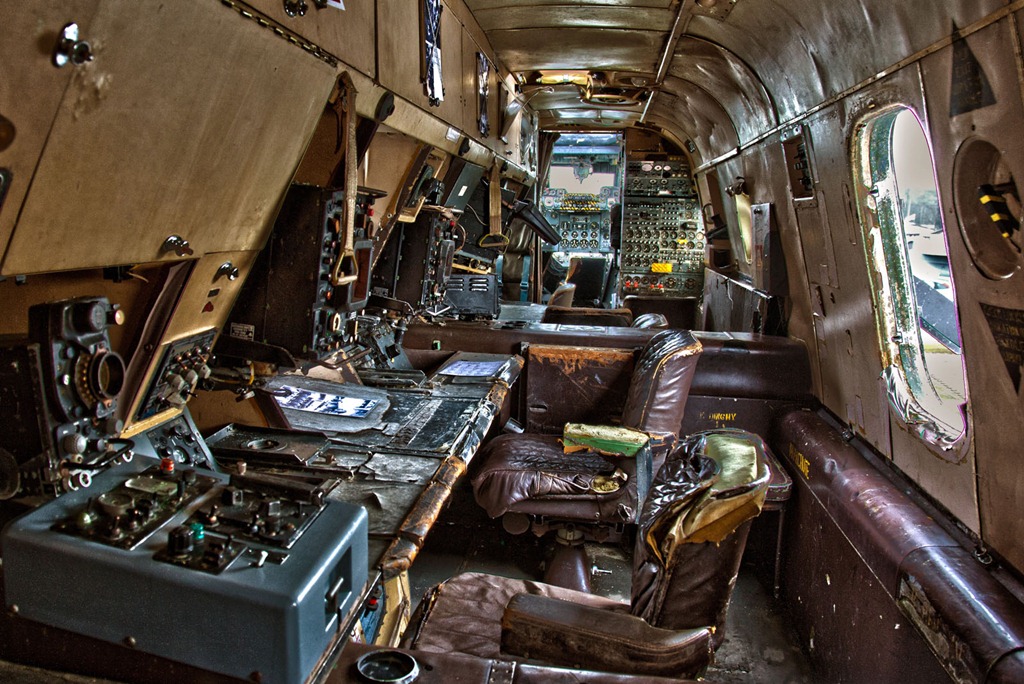
The highlight of a visit to the museum is getting the chance to go inside some of the aircraft. Although most of the planes and helicopters are in various states of “restoration” the interior of the giant Shackleton is a time capsule of the 1960’s. From the original buttons and dials down to the torn leather seats everything inside the Shackleton is a photographers dream.

 
Due to the large difference in exposure between aircraft interiors and the sky, HDR (High Dynamic Range) is the perfect technique to learn and perfect whilst we’re at the museum. If you’ve never tried HDR then remember to bring your tripod and a DSLR camera. I’ll show you all you need to know.

Gatwick-Aviation-Museum (11)
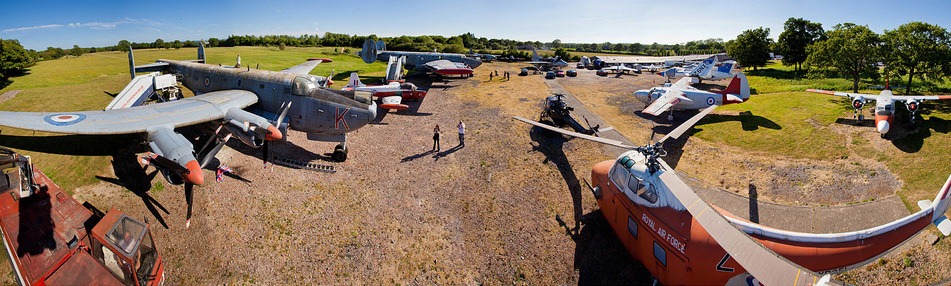
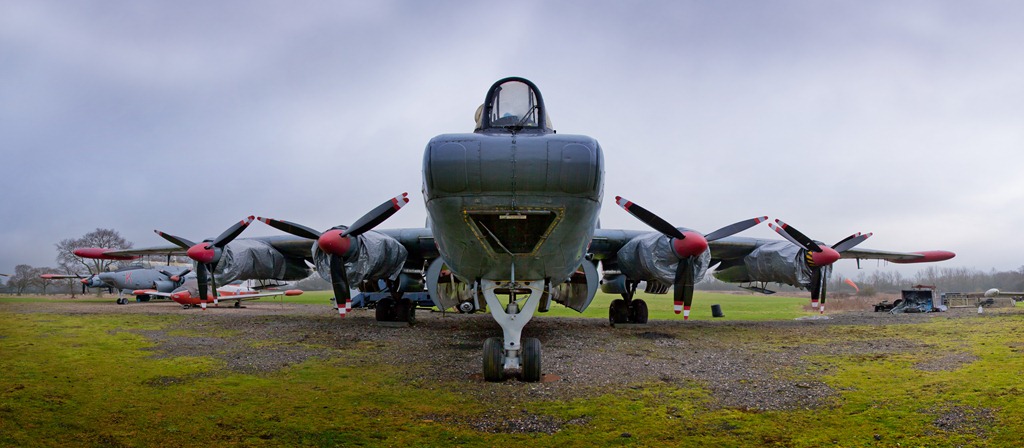
As anyone who’s been on one of my training courses will know, panoramic photography is a personal favourite of mine and standing in front of the Shackleton is the ideal place for a pano.

As usual it’s Sam who’ll be handling the enquiries. So for questions and booking info please send Sam an email sales@gavtrain.com

Gatwick-Aviation-Museum (4)

Flora Light ~ Review

There are seems to be an endless choice of lighting options available to the modern photographer, but the choice often boils down to either flash or continuous light sources. Personally I like and use both on a regular basis, it all depends upon what subject matter I’m shooting.


For portraits I’ll usually use flash, but continuous lighting is perfect when I need a shallow depth of field or I’m shooting products which don’t move. I also use continuous lights for video work.

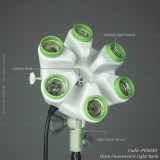
So when Linco offered to send me a set of their new continuous lights I jumped at the chance and jolly good they are to. Six lights and a quick erect octabox makes the a great choice on paper.

There’s a couple of things you need to know…

First Linco are a USA supplier and whilst they may well ship outside of the US the lighting units and bulbs are 110v. You’ll also need to add import duty fee to price, which can be a bit hefty.

Find out more about Flora Lighting products http://www.lincostore.com/search.php?keywords=flora%20light

Hasselblad H4D – Experience and thoughts

Let’s get something clear right from the word go… I love my Canon cameras and lenses and have no plans to buy a Hasselblad any time soon. OK with that out of the way I’ll briefly explain why I’m not using Canon for the photos in this post.

A few weeks back I received an email from Hasselblad offering me the chance to get hands on experience with their H4D medium format digital camera. A few emails and a brief meeting later, I’d arranged to shoot a couple of studio lighting videos at Hasselblads shiny new studios in London. They’re coming soon, but for now here’s my thoughts on the camera.

Dream camera?
Hasselblad is a name I’ve been familiar with since my earliest days in photography. It’s a brand that many photographers aspire to and comes with a price tag to match. But for some professional photographers the initial cost isn’t an issue when quality is all that counts and I tell you right now the H4D produces images with amazing sharpness and detail, far in excess of my usual Canon 5d Mark II.

For my day in the studio I’d lined up Delaney, an up and coming rapper, to be my model. Hasselblad had promised to loan me a H4D-31 for the shoot. It has the smallest sensor in the H4D range, but at 30 million pixels small is a relative term. However when I arrived the H4D-31 was unavailable, so instead used the midrange H4D-50 which packs a massive 50 million pixel sensor. Other then a bigger sensor the two cameras are identical.

If it’s heavy it must be good
First impressions of the H4D is that it’s a big, heavy camera, but surprisingly comfortable to hold. When I swapped the standard 80mm lens for a 35-90mm zoom, the H4D became very heavy indeed, which may explain why so many Hasselblad owners prefer to use a tripod.

In use the H4D was as easy to operate as any DSLR camera. All the usual shooting modes are there (Aperture, Shutter Priority and Manual). Half pressing the shutter button will lock focus and exposure just like my DSLR. Perhaps my favourite feature was the “True Focus” function, which allowed me to retain focus on a subject even after I’ve recomposed the shot. Believe me it was clever stuff.

Pressing the shutter button is a satisfying experience. A half press will focus, which isn’t fast, but it works just fine. Fully press the shutter button to take the shot and you’ll hear a very satisfying clunk. The image pops up on the cameras LCD almost immediately for review.

The drawbacks
So it’s good news all the way then? Well no. The 50 million pixel sensor produces a 75mb RAW file, so you’ll need lots of memory cards, lots of hard drive space and a fairly beefy computer to process them all. You’ll also need a spare battery for the camera as they drain surprisingly fast.

Such is the clarity and resolution of the camera that every little detail is visible. So for example on portraits, every minor pimple, dry skin patch or makeup mishap will need retouching. Don’t believe me? Take at look at this actual pixel view… Click to enlarge. The yellow square shows you the area I’ve enlarged. No sharpening has been added, this is straight from the RAW file.


So would I buy one… No. Good as the camera and lenses are, it’s really not going to suit by style of photography. However I’d definitly use one should the need arise, but I’d opt for the hire service that Hasselblad offer on their gear.

Would I recommend one? Well that depends on what sort of photography you do. If you shoot sports, wildlife, need high ISO or prefer to travel light then no, stick to a DSLR. If you shoot landscapes, portraites or still life work, and demand nothing but the best quality images, then this camera should be on you’re radar.

And Finally…
I recorded a couple of videos whilst at the studios. This shot of Sam is a test shot I snapped whilst I figured out one of the lighting set ups. We all loved the background which is made of large pieces of foam. It’s the stuff that’s usually used to sound proof music studios. I’m pretty sure most of it would have mysteriously disappeared had it not been firmly glued to the wall. Great idea that.

Selective colour in five steps

Selective colour is one of those little Photoshop tricks that’s well worth keeping up your sleeve. The effect is hardly new, cutting edge or revolutionary, but it can still make an eye catching image providing it’s used sparingly.

The basic idea is simple enough. First find a standard colour image that contains a bold area of a single colour. That done you’ll need to select the colour and turn everything else black and white. OK, that sounds easy enough doesn’t it, but how do you select just one colour from an image?

Take a look at the image opposite to get an idea of the direction I’m headed. So let’s begin.


Step One
First open your image, apply any processing you wish and if your image has multiple layers save a copy and then click Layer – Flatten Image to collapse all the layers down into a single background layer.

Step Two
Click Select – Color Range to open the color range selection tools. If you’ve never used this tool before don’t worry it’s all nice and straight forward. Moving your cursor over the image will turn it into a colour sampler tool. Click on the colour you’d like to select, in this case red lettering, and have a look at the result on the Color Range window. White shows the selected areas and black shows unselected areas of the image.

Step three
Either increase the fuzziness to enlarge the range of similar colours sampled or click on the Add to Sample eyedropper and click on more areas of similar colour. Continue until the area of colour you want to select has turned white in the preview window and the majority of the remaining image is black. Remember CTRL+Z will undo your last click… handy to know if you accidentally sample in the wrong spot.


Step Four
Now this is the bit that seems wrong, but trust me it’s important. Click Select – Inverse.
The chances are there will be areas selected that are the same colour as the thing you wanted to selected, but are not part of it. Remove these using any selection tool you like (free hand lasso is a good choice). Remember to hold Shift as you draw your selection.


Step five
Click Layer – New Adjustment layer – Black & White and the colour will disappear from the image except the area you selected. The back and white areas can be adjusted by moving the sliders on the Black & White adjustment layer to create a mono look that compliments the image.

So there you have it, selective colour in five easy steps.

5 photo motivations tips

If one of your new years resolutions was to take more and better photos, you’re not alone. I say exactly the same thing every year and happily I can report that it’s one resolution I stick to. So what’s my secret?

As with any new years resolution the key in hitting your goal is planning and enjoyment, so here are five of my top tips for making 2011 your best ever photo year.

Make some folders
The more photos you take the more you’ll learn about your camera equipment and as your confidence grows your pictures will improve. That’s all well and good, but how do you keep the motivation going?

My trick is to make twelve new folders and name them Jan-2011, Feb-2011, Mar-2011… And so on.

Now stick them somewhere you’ll see them regularly to remind you that they need filling up!

Camera at the ready
When the moment strikes, how quickly could you be ready to take photos? Is you camera to hand and if so is it loaded with a blank memory card and charged battery?

Of course carrying a heavy SLR and a bunch of lenses around just in case a great photo opportunity comes your way isn’t really an option for most people, that’s why I have a small compact camera I leave in the car. I’ll even reach for my phone to take a snap if needs be, just as I did for the photo above.

Take a course
There’s not a photographer on this planet who doesn’t want to improve their skills, so it makes sense to take a training course every now and then.

But there’s more to training then just training. Group training can be a social occasion, a chance for you to meet up with other photographers, swap tips, try gear and make friends with people who share your passion for photography.

Out of your comfort zone
What do you shoot primarily? Is it landscapes, portraits, wildlife or sports? Whatever your speciality it’s very easy to get stuck in a rut and when that happens (and eventually it will) the fastest way to break out is by doing something different.

A great example was when I got the chance to shoot a motocross event last year. I’m not a sports photographer, nor do I plan to be one but I had a great day and learned a lot in the process.

So if you’ve never shot a portrait before, make 2011 the year you give it a whirl. Conversely if you spent the whole of 2010 locked in the studio, then get outside and do a wildlife shoot.

If you’re a social media type why not ask around to find someone who doesn’t do your type of photography and would be willing to take you out to share their knowledge for a few hours. In return you could invite them into your world and share your skills with them.

Borrow, hire, buy.
I love getting my hands on new lenses, but it’s an expensive business especially for exotic things like fish eye’s or super telephotos. A great alternative to buying is hiring. Not only does it give you the chance to experiment with something new and different, but you can really test the lens and decide if it’s a lenses you really need or not.

Having something on loan for a short period should also encourage you to use your camera and in reality it’s taking more photos that will improve your photography.

So there you have it, that’s just a few ideas to get you going. If you have any more suggestions feel free to add them to the comments below.