35mm Film Template

35mm-film-final
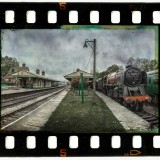
I found this weeks Friday Freebie whilst sorting through a pile of old slides I had gathering dust in my office. I’d used this one during the ’90’s in what was known at the time as a “slide sandwich” and was simply two slides pressed together to create a new third image when projected.

Full download instructions are below but you can also
Click Here To Download the 35mm film template

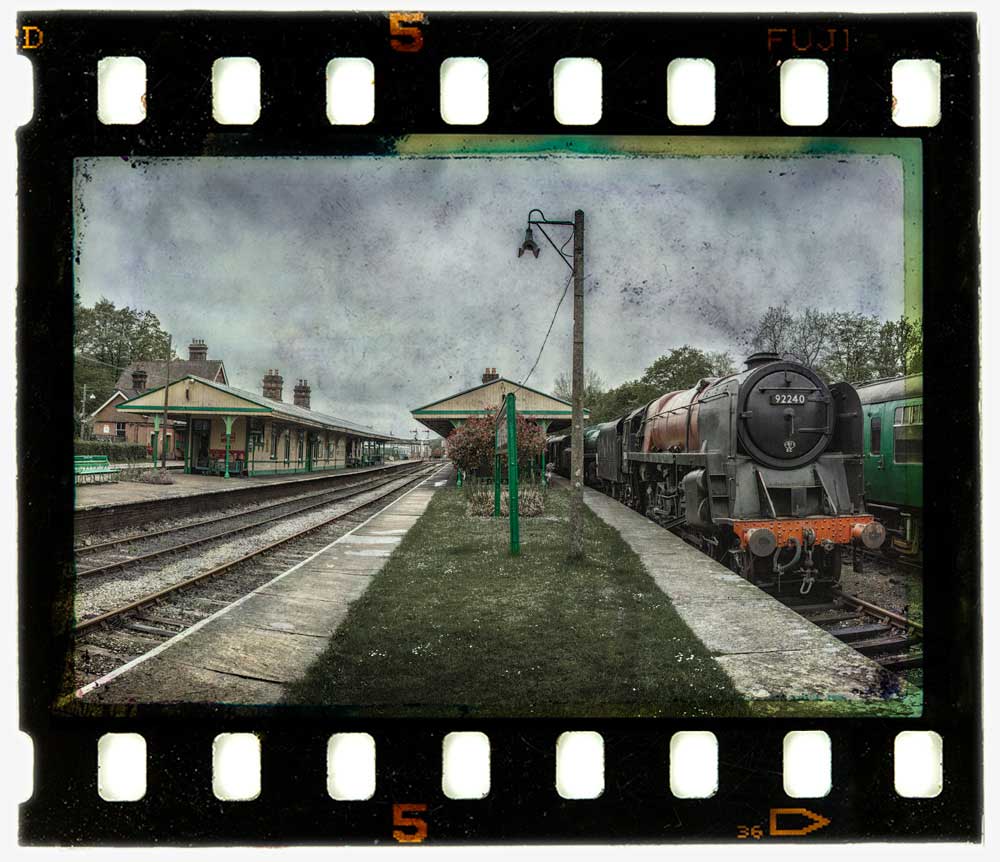
Although the days of the slide sandwich are far behind me, the technique of combining two (or more) images together is alive and well in Photoshop in the form of layers. To make life a little easier I’ve created a template from the 35mm film complete with a note of where your own photo should be added, a blending mode that should work with most photos and a grungy layer mask for if you need to reduce the texture from the centre of the film. Of course you can also change everything if you want.

At 5000 pixels on the longest edge and with lots of fine textured detail, this weeks Friday Freebie PSD template comes in at around 70mb. If you’re not on a fast internet connection if might take a few minutes to download.

As always, if you create a photo using the Friday Freebie then let me (and everyone else) know by leaving the link in the comments below.

Usage rules
The image/template is copyright Gavin Hoey 2013. Use is limited to any personal, non-commercial purposes. Please share the Friday Freebie by linking back to this page. Do not redistribute the original image/template without my permission.

Download instructions
Click the link https://drive.google.com/file/d/0B_Mmmm3K1utNNXpONGJGTk9WUkU/view?usp=sharing

1. Click the Download button download_icon

2. The download should start automatically

3. Save the template to your hard drive

4. Open in Photoshop or Photoshop Elements

5. Paste your photo BELOW the 35mm layer

Five ways to crack high ISO

High-ISOWhat do you do when flash isn’t an option, you can’t use a tripod and your shutter speeds are in danger of dropping too low? The answer is, of course, you increase your ISO. But as we all know, there’s a direct connection between ISO and noisy images and as a general rule it makes sense to keep the ISO at the lower end of the scale. 

I’ve met a few photographers who have taken this advice a little too far and will doggedly stick to ISO 400 and below. I’ve also met photographers who have never, ever used ISO 800 and would faint at the thought of ISO 6400. 

If that sounds like you, read on. 

Try it for yourself
Don’t believe what you’ve been told by your mates, read on the internet or just assumed to be true. If you’ve not tried shooting at your camera’s highest ISO then make the effort to do just that and examine the results. Although the noise at top ISO setting is likely to be pretty ropey, taking the same shot one ISO stop less (half the ISO number) may well produce surprisingly good results. 

Shoot in RAW
Whilst shooting in RAW and editing in Photoshop’s Adobe Camera RAW will ignore the in camera reduce noise feature, the RAW processor in Photoshop is superb at handling noise and keeping it under control. Take a look at the Detail tab and crank up the luminance noise reduction for best results… as seen here.
JPGvsRAW

Nail the exposure
There’s a train of thought that says you can use a lower ISO if you deliberately underexpose the image and pull it back in post processing. That’s great idea at lower ISO’s but it’s a bad idea at high ISO’s. Altering the exposure in Photoshop will always drag out noise from any photo and lightening shadows makes the problem even worse. The higher the ISO used, the more noise you’ll see. 

Bottom line: A perfectly exposed high ISO image will have less noise then a badly exposed, low ISO photo rescued in Photoshop

Go Mono
If all else fails and you have a shed load of noise in your photos then my secret tip is to dump the colour and switch to black and white. Back in the days of film, if you wanted high ISO you used mono film stock and despite all the leaps in technology we’ve made in the last 15 years mono images is still the best way to hide noise in plain sight.ISO1600-mono

Learn to love noise
It’s easy to get carried away with noise reduction to the point where you can loose sight of the bigger picture… quite literally.

Ask yourself the question. Would you prefer your photos to have noise or would you prefer them to be ruined buy either camera shake or over processing in Photoshop? Suddenly a bit of noise in your photos seems like a fair trade off.