Building a DIY studio background
For a long time I’ve fancied the idea of adding a grungy textured background to my studio but due to the limited space available I’ve stuck to using a white vinyl and black fabric backdrops. Now these have worked really well for me over the years but there comes a time when you want to break free and recently I got a great excuse to do just that.
I’m currently in the middle of filming a mini-series of videos for Adorama TV all about shooting portraits in a small studio, something I know a lot about. You’ve probably seen my log cabin studio in various videos before so in order for this series to look and feel different I bit the bullet and built my dream textured background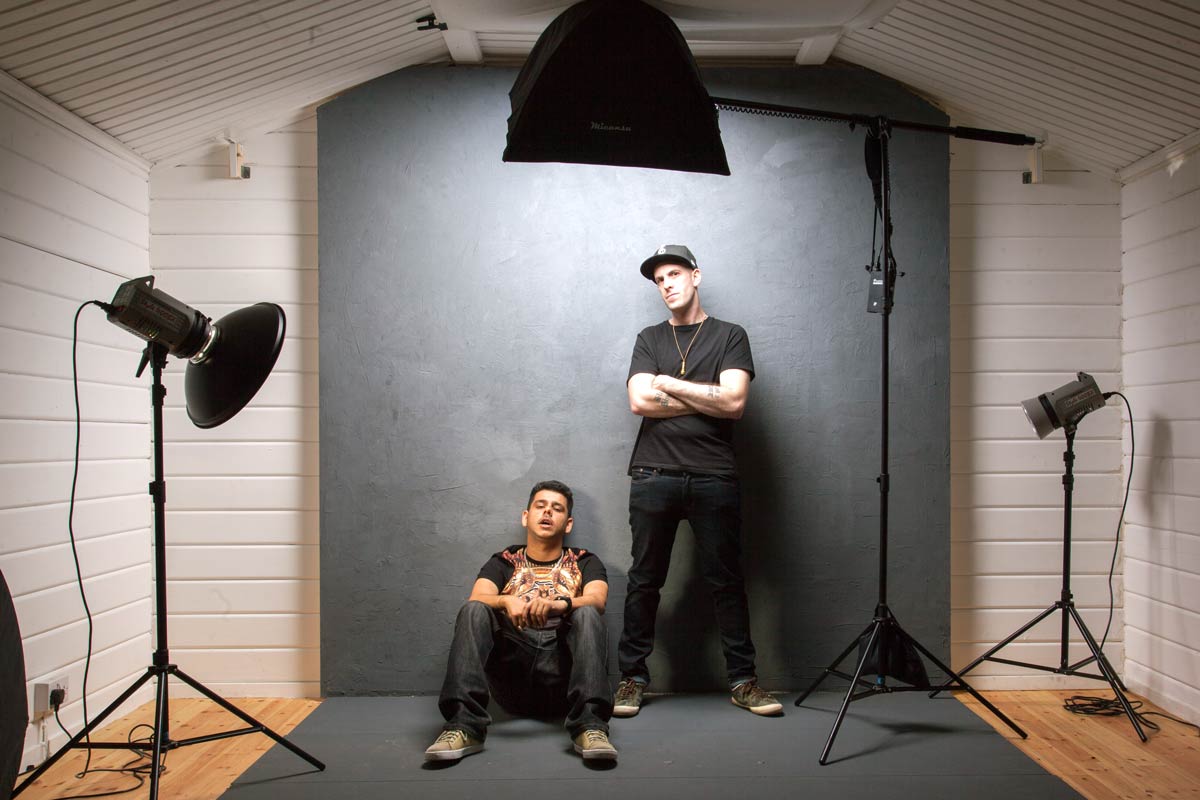
The Plan
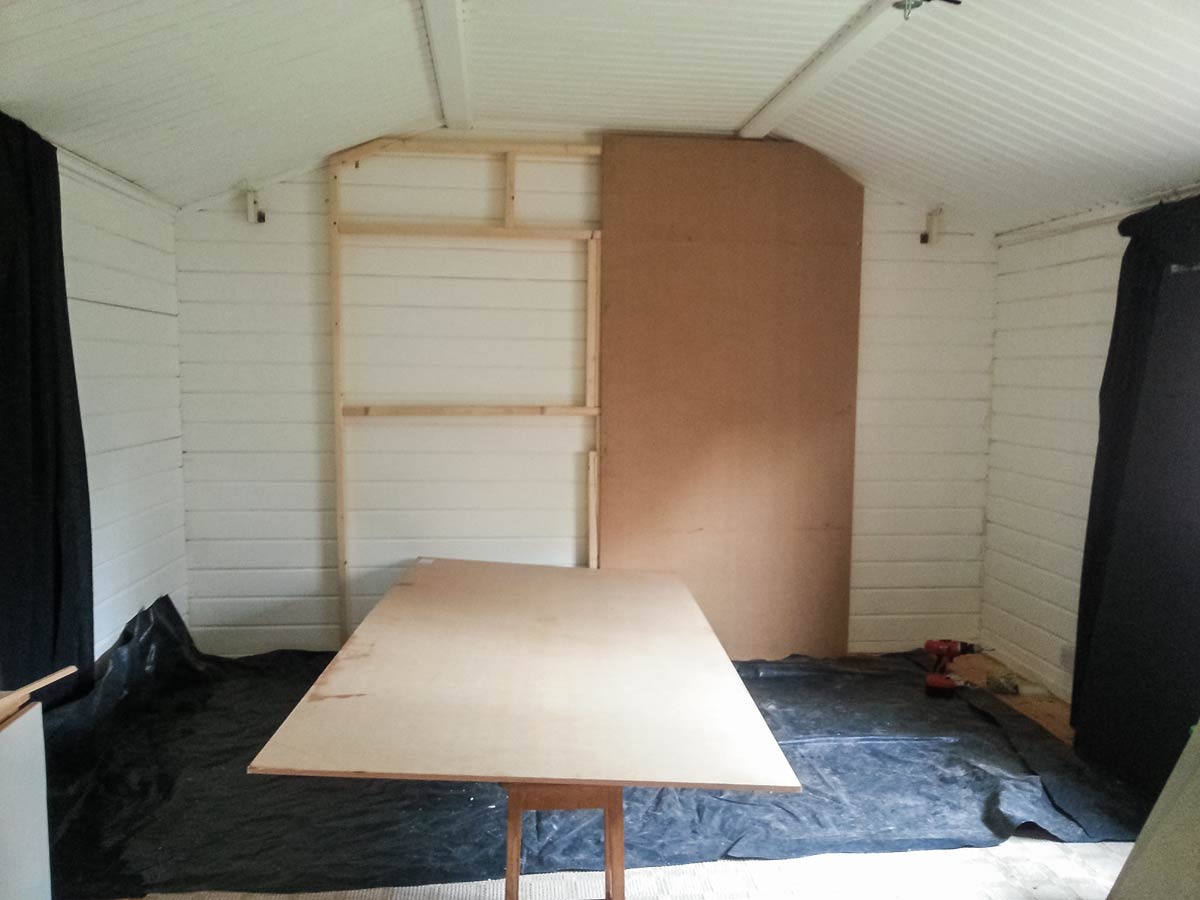
I’m a reluctant DIY guy, so if you’re looking for plans, specifications and a fool proof guide to building a background this ISN’T it. After clearing out my old background and removing anything breakable from the area I went online and ordered a bunch of stud work timber, two 2400mmx1200mmx12mm sheets of MDF and three 2400mmx800mmx18mm T&G chipboard sheets for the floor. I ordered them from a well known DIY store chain, paid a whopping £25 for next day delivery and got them four days later… but that’s another story.
The Build
The idea was to make the background 8 feet (2.4 meters) square but my studio roof height made that impossible, so the frame work “evolved” to fit my needs. One thing I know all too well is log cabins move, even heavy duty ones like mine. So my background is almost free floating rather than permanently attached to the wall.
The MDF panels needed the corners cut too (wearing a mask to avoid inhaling the dust) and screwed to the frame. I then primed the MDF with a coat of PVA glue and water mixed together and left it to dry overnight.
The Texture
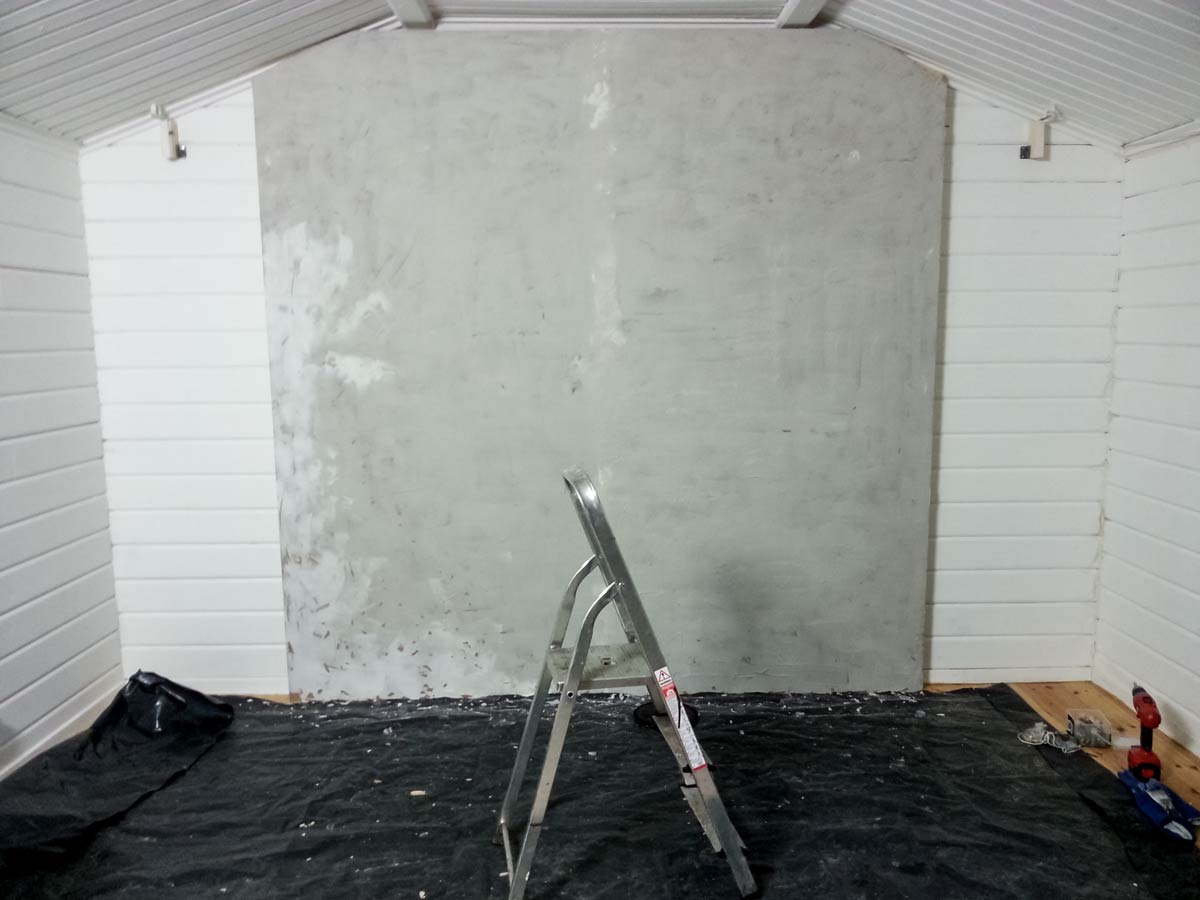
The texture I was going for was a grainy concrete feel. Choosing what material to use was tough. I had no idea of what might work best but I knew it would need to stick to vertical surfaces and be flexible enough to withstand a few knocks without cracking too much or bits falling off.
I settled on a flexible tile adhesive from Dunlop. It did everything I needed and best of all it was pretty cheap. All I had to do was slap it on the MDF and try not to get it too smooth or too rough, not as easy as you might think. Too smooth and the effect would be lost, too rough and it could do some damage to a model or their clothes.
Finishing Touches
Once dry the last job was to give it a coat or two of Matt Grey paint which was randomly added to with a lighter colour for a mottled effect. The mid grey colour is perfect in a small studio as I can add or restrict light to make it appear black or white. I can even add gels to my lights for a splash of funky colour if required.
All in the cost was around £100 for materials and about three days’ work.
In Use
The end results is perfect for my needs. With hindsight I’m not sure MDF was a great choice of wood but it’s working for me.
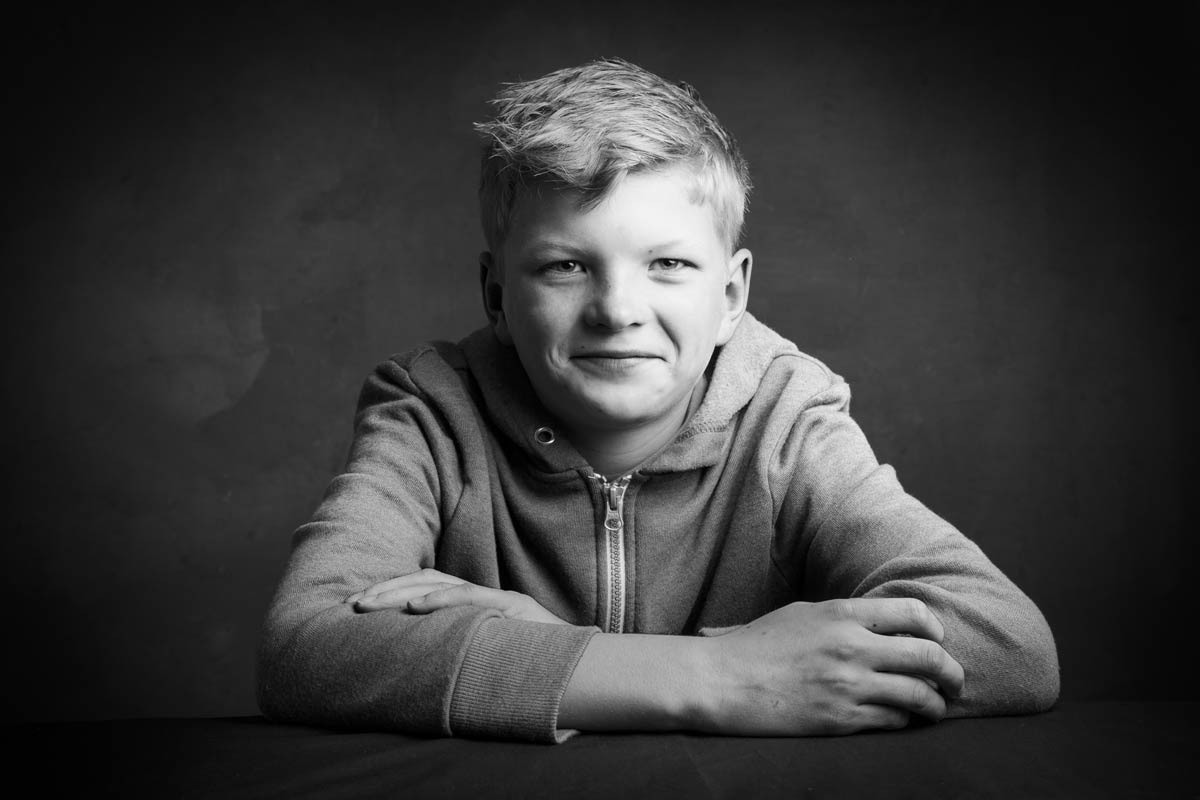
Here’s a few photos of the background in use!


Really? Not a DIY man? Great job, Gavin
Thanks Marco, time will tell if my DIY will survive 🙂
It is now the 31st of december 2015 and I just saw your comp with Mark Wallace. The background still exists, so you MUST be a DIY man!!
Happy New Year!
Gavin,
Very impressive, where do you find the time??
Great Job!
Why was MDF not the right choice? It has given me an idea for my garage.
I’m told MDF tends to absorb moisture so the tile adhesive might crack or worse over time. So far it’s been just fine 🙂
Yes it can BUT you sealed it with the UPVA glue. 🙂
I think I did seal it with PVA. No problems encountered, so whatever I did worked 🙂
Looks awesome Gav – great job. Loving your videos on Adorama and your own posts too – keep up the good work and feeding me with inspiration!
Great job as always Gavin… you are THE MASTER in everything you do!!!
I found this to be a great method and i will plan to use it some time in the future. Great idea and good DIY skills for somebody who do does not feel confident.
Thanks Bradley… it hadn’t fallen apart yet so may be my DIY is better then I thought 🙂
Thanks for the inspiration Gavin.
Thanks Gavin for pointing me to this page. In the third picture is the subject just on black paper?
Hi Wendy. All the photos had the same background 🙂
Depending on how Gavin feathers the light towards or away from the background, he can turn the grey background darker to black (feather the light away from it) or brighter to white (feather the light towards) it, or have a separate light just on the background). He talks about this in the entire 5 series of videos for his small studio series.
I absolutely love that you show what can happen in small studios. Great DIY project! You are very talented; thanks again.
This and the 10 video segments for a small studio has so inspired me to get O.M.A (Off my a$$e) and build the set up…
Thank you for your knowledge and inspirations.
Have a wonderful 2015…’coz I’m going to.
Hello Gavin
My wife and I watch all of your Adorama videos often and learn something new each time. We’re very impressed with your photos taken in your small studio, and my wife wants me to come up with something along the same lines for her own photography work. Can you tell me just how large your log cabin studio is? I’ve been looking at several small barn kits with an interior size of about 12′ x 20′ and I personally think that would work. Your thoughts?
I thank you for your time and all the tips and techniques you have shared. We wish you continued success.
John & Kelly Gardner
Rubber Soul Photography
Woodstock Ga USA
Hi, I love your videos!
How big exactly is your studio?
The shooting area is roughly 25 feet by 16 feet.
Hi Gavin,
This is great! Fantastic idea. I’d like to make one for my studio but can you tell me what Dunlop tile adhesive you used? I’ve googled it and there seems to be a fair few different types.
Many thanks.
I used the Dunlop brad as it was the cheapest on the day. The brand isn’t important, you just want something that has a tiny bit of flex
Gavin,
Purely our of interest is this studio a standalone structure or a separate room?
Regards
Leo
Thats amazing…,
Simple works make great result…
Its inspiring my studio in Indonesia.
Thank’s alot Gavin
Hello Gavin,
I really love the show and the way you explain all the technical detail and post processing in Photoshop. I have learned a lot from these video and have really helped me in my work.
Thanks a lot and keep on doing this good work. You have become my mentor.
its working fabulously, i’d say 🙂
Hi Gavin,
Love your photography videos. Watch them every night when I get home from work.. And thanks for the tip on the streak lights from Adarama… I own 3 of the 360 w/s and ordered another one this past weekend. I had a quick question I’m hoping you can answer for me… I am in the process of building the same backdrop you have posted here. I have completed all but painting and tried to find Matt Grey but no one seems to know the color. Went to Sherwin Williams, Home Depot, Behr, PPG, etc. Could you please tell me what color / brand / where to purchase the color you used? Also, is this a matt finish? Flat?
Thanks— Mike Bursavich
Hi Gavin-
Recently finished watching every video you’ve made (literally – every published video online) and have been curious about the specifics of your home studio. Thank you for providing this resource – Alas, I don’t have the ability to move my studio outside of my home, but the basement has worked out well thus far (save for a 7’10” ceiling height). Have been contemplating a fixed backdrop for a while now – looks like I’m headed to the DIY store soon =)
Keep shooting and thanks again!
Mark G
St. Louis, MO
USA
Mark G,
I was wondering how your backdrop came out. I’m considering one and I have a low ceiling as well. 7’6″ in height. Can you post or send photos?
Art
Hi Art. I’d recommend using the search box on my site. Type the word studio and boom! Lots of stuff using my studio will appear https://www.gavtrain.com/?s=studio
Hi Gav, great job on the background, the MDF will be fine as you primed it with the PVA and water mix! lovely texture 😉
Thanks for the lessons
Glyn Curtis
Hi Gavin,
Only just ‘discovered’ you via youtube and love this versatile background. I know it was a while back but what brand/colour paints did you use please? Thanks for the amazing tutorials by the way 🙂
I’m trying to model my studio after yours please help
So I get everything about your DIY except
How to get the Mix of light gray and darker gray to blend
Did you use a roller or a brush?
Did you apply the Light gray first or second?
Please explain how to get the Mixed tones for the effect
Best regards, Big Rick
I used a roller and a brush, whatever was to hand and just slapped it on. To vary the grey I mixed various black, grey and white paints together and just painted. Nothing clever, nothing planned, just let it happen 🙂
Now ready to build my cabin and really interested in doing something like this. What was your issue with MDF? Was it just the dust or are you finding other problems now it’s in position?
I was told by those with better the DIY building skills that MDF and wet products (like the tile adhesive I used) can be a problem long term but that’s not proved to be the case 🙂
I really enjoy watching your videos. I’ve learned a lot. Thank you. Can you please provide the paint brand and names?
Honestly I’ve no idea. I used a random mix of black and white paint samples all mixed together from my local DIY store. Top tip is to mix small batches to get an inconsistent colour great and build the paint up in coats for that random look.
Thanks for sharing. I’m assuming that it has held up well? It really makes a great background.
It held up MUCH better then ever thought it would!
Hi Gavin, before the tile adhesive is dry, would it be possible to sprinkle some kind of course sand/grit to enhance the texture even more? would it stick?
Hi Gavin great talking with you today again.
There are people who spend loads of money on ready made products who may not really appreciate the work that goes into building a studio from scratch like this.
You are a true inspiration and i love how simple you make your videos and concepts for people to follow.
Keep up the great work my friend and hopefully see you again at the Photography show next year. Take care.
No problem Steve. Sorry I had to cut and run.
Sir please share dimension of your studio ?. How many square feet is it ?
All that and more is here https://scottkelby.com/guest-blog-wednesday-featuring-gavin-hoey
Instead of MDF, you could use the water resistant drywall they use for bathrooms, or outdoor water resistant sheathing.
For your ventilation problems, a high-powered exhaust meant for a kitchen could work. Make sure you have input vents placed to make a good smoke-clearing air flow.
I’m thinking of using plywood instead of MDF for this. It’s lighter and thinner, and once secured shouldn’t have any flex in it.
It’s a very versatile background you have there for sure Gav