Take + Make ~ Episode 1

I’m absolutely thrilled to welcome you to my new series of videos for Adorama TV. The name Take and make great photos should give you a clue as to what I’ll be doing in these tutorials. For me the photography doesn’t stop once I’ve taken the photo and I wanted to show that in the videos, so the Take + Make series will feature both photography and Photoshop.

We’re kicking off with a simple but powerful off camera flash technique. In this case I’m using just a single speedlight to over power the ambient to create the hard, edgy portrait you see in the photo to the right. Then it’s into Photoshop for a bit of RAW processing  to achieve the end result.


Equipment used in the video:
Canon 5D Mark II
Canon 24-105mm L f/4 IS
BlackRapid RS-7 camera strap
Canon 580 EX ii
Canon ST-E2
Photoshop CS6

By using a dedicated flash trigger I could maintain TTL communication between the camera and the flash. That means no flash meters and no cap on the maximum shutter speed I could use.

Many camera’s have the the technology to remote fire a flash built right in. For example, Nikon users have CLS for off camera flash and on cameras like the Canon 7D and 60D the popup flash has the same ability as the ST-E” remote I used,

Adorama TV ~ Season 3

AdoramaTVIf you’ve been thinking that there’s been a distinct lack of new videos from me over the past few months, you’re were not wrong. Well now I can tell you the reason for the video hiatus.

Earlier this year, I teamed up with ‘>Adorama to create lots of new Photography and Photoshop videos. These will be freely available right here on my blog, on my Youtube channel and also on Adorama TV.

This is a really exciting new venture for me as I’ll now be able to create more videos more often and Adorama have given me plenty of freedom to create the style of videos you all enjoy.

Take a look at the trailer video

So who are Adorama? Well, they’re a well respected photography store. Based in New York they’re just as passionate about helping photographers as I am. To that end they’ve been running Adorama TV for the past few years with regular contributions from such photography luminaries are Mark Wallace, Bryan Peterson and Tamara Lackey.

For Season 3 of Adorama TV they’ve added a few new presenters including myself, Rich Harrington and the legend that is Joe McNally.

The new videos should start appearing later this month.

Adobe UK Creative Week

238-Adobe-Creative-Week_306x180Starting next Monday (July 9th – 13th) Adobe UK are having a week of free education, discussion and entertainment of all things Creative Suite 6.

Each day of the week is dedicated to a specific theme and you can watch as little or as much as you like.

  • Monday 9th July – Creative Industry Overview
  • Tuesday 10th July – Design & Publishing
  • Wednesday 11th July – Film & Video
  • Thursday 12th July – Web & Mobile
  • Friday 13th July – Photography & Imaging

You can get an idea of what’s happening in the short teaser video below.

Obviously Friday 13th (I’m not superstitious, touch wood) is the big one for me and I’ll be there all day to soak up the creative goings on which will include.

Registration for the event is totally FREE, just sign up here: http://www.adobecreate.co.uk/creativeweek

Friday Freebie No.2

grunge-border-2I know a lot of you enjoyed using the Friday freebie grungy frame I uploaded a few weeks back, so I’m going to give away another one.

This time the grungy border has a more industrial feel with peeling paint and screw heads. The centre of the image has a smoother painted look which makes it perfect for for blending with other photos.

If you like your photos to have grungy feel you’ll love this grunge photo frame. This is a very high resolution file of 4666px by 3500px in size, which makes it perfect for print use or down sampling for use with your web based images.

IMG_8713

In the photo above I added a colour image as a new layer above the grunge border. Combining the two images is as simple as changing the layer blending mode to Multiply. You might need to use the dodge and burn tools and a levels adjustment layer at the top of the layer stack might be a good idea.

I’d also suggest using images which have lots of sky, large areas of simple colour/tone or lots of nice blurred parts in the photo. Basically a photo with lots of fine detail tends not to blend so well with a textured template like this.

If you create a photo using the Friday Freebie then let me (and everyone else) know by leaving the link in the comments below.

Usage rules
The image is copyright Gavin Hoey 2013. Use is limited to any personal, non-commercial purposes. Please share the Friday Freebie by linking back to this page. Do not redistribute the original image without my permission.

Download instructions
Click the link https://drive.google.com/file/d/0B_Mmmm3K1utNZEx4MEdDNEJldkU/view?usp=sharing

1. Click the Download button download_icon

2. The download should start automatically

Photoshop PC to Premiere PC

New PC-1-1600Less then 8 months ago I wrote a series of blog posts about my DIY power PC build. If you missed it you can read it from the links below:
Building a Photoshop power PC – Part 1
Building a Photoshop power PC – Part 2
Building a Photoshop power PC – Part 3

For a Photoshop power PC the specification is excellent even for Photoshop CS6 and I’d still recommend the original component list to anyone who wishes to build there own PC today. The only change I’d make for Photoshop CS6.is to add a 1GB graphics card.

So if it’s such a great PC why am I updating it so soon? The short answer is Video Editing.

Over the past few months I’ve been shooting more and more videos on my DSLR and editing them in Premiere Pro CS6. Before you ask, yes some of those are new photography tutorials which you’ll be able to see later this year. If you think still images takes a lot of computing power you’d be right but that’s peanuts compared to 1080p HD video editing. So with that in mind I’ve upgraded some of the core parts of my computer to make it a video power PC.

New PC-1600

First up this is an upgrade not a complete new build so I am able to recycle the case, card reader, DVD drive and hard drives. With that in mind lets go through what changed and why.
(All red text is a hyperlink to Scan computers who supplied many of the parts)

CPU
This is the brains of the machine so it makes sense to get one that’s smarter, bigger and faster then before. Mine is a 980 model which isn’t cutting edge but a solid performer with 6 cores and 12 threads. It’s also overclocked to 4.3GHZ

CPU Cooler
A big, fast processor is going to get hot and overheating is the biggest cause of system instability so CPU cooling is a priority. The Antec Kuhler H20 is a self contained water cooling system which should keep the heat away from the CPU.

Motherboard
A new CPU means a new motherboard for me. With a slightly older CPU I can also use a slightly older motherboard so it’s an Asus Rampage 3 black edition which ties in perfectly with the i7 980 cpu.

RAM
As with Photoshop, Adobe Premiere will happily take all the ram you can throw at it. Even if it doesn’t use all the ram  having more gives the system plenty of breathing space. I took my existing 16GB and added another 8GB bringing the total to 24GB in 6 slots. A lot of ram means yet more heat so I also have a Corsair ram cooler sitting above the sticks.

SSD drive
The best decision I made in my Photoshop Power PC build was adding an SSD drive. This thing makes your PC fly. Unfortunately the original 120GB drive is just to small for my needs so I doubled it to a 240GB SSD from OCZ. Interestingly the new 240GB SSD cost the same as the 120GB SSD I bought 8 months ago.

Graphics GPU
Finally we come to the Graphics card. In Photoshop almost any graphics card will do but not so with Premiere. To truly unlock the power of Premiere you need to choose your graphics card wisely. Adobe Premiere Pro works great with a good graphics card but it preforms miracles when paired with a select bunch of Cuda enabled Nvidia cards. There’s a full list of supported cards here and I went with the Geforce GTX 580

Running some quick stress tests showed the new build to be roughly double the speed of the original build. However rending speeds in Premiere Pro were in the region of four times faster then before, which is all thanks to the cuda power in the GTX 580 graphics card.

Five avoidable photography traps

From time to time every photographer I’ve ever met has fallen into one or more of these traps. I know that I’ve done all of these at one time or another and if you’re honest, so have you. In fact you’re probably stuck in one of these traps right now.

Any one of the things on this list could be preventing you from becoming the photographer you aspire to be and the more of these you identify with, the more you’re holding yourself back.

Here comes the good news… Once you’re aware of the traps it’s incredibly easy to amend your ways, bypass the problem and improve your enjoyment of photography. By the way, a happy photographer is a better photographer in my book.

Trap 1 – Not reading the manual
5-1Like most men it’s in my DNA to avoid reading anything that has the words “User Manual” on the front cover. I might flick through the “Quick start guide” if something looks very complex but lets face it, who has time to read a whole book? However I make an exception to that rule when it comes to cameras.

Digital SLR cameras are super complex things and although controlling them usually becomes easier with each new model the menus can hide a wealth of advanced features which could help you get more from your camera.

Things like mirror lockup for shake free tripod shots, flash exposure compensation and setting up custom menus for your favourite features could be just the ticket to taking your photography to the next level. Even if you don’t use those features now, by reading the manual at least you’ll know that a feature is there, so when the time comes that you really need something like second curtain flash, you can do what I do, hunt around in the menu muttering “I know it’s here somewhere”.

Trap 2 – Not filling the frame
5-2
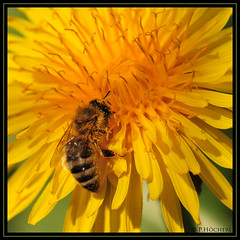
There will always be a time when you can’t zoom the lens anymore and moving closer isn’t possible. That’s not what I’m talking about here. No, what I mean are the times you see something that has the potential to be a great photo and then photograph the thing that caught your eye AND everything that’s around it.

When you’re taking the photo try and think about the story it will tell to someone else. A magnificent sweeping landscape needs lots of space, a photo of a flower does not.

Of course there are always exceptions to every rule but on the whole filling the frame will add impact, drama and interest to your subject. Remember, if it’s not part of the story you want your photo to tell, leave it out.

Trap 3 – Shooing at eye height
5-3Here’s what happens. You see something you really want to photograph so you grab your camera, frame up the shot and take the image. But when you look at other peoples photos of the same subject, they always seem to look different. Why?

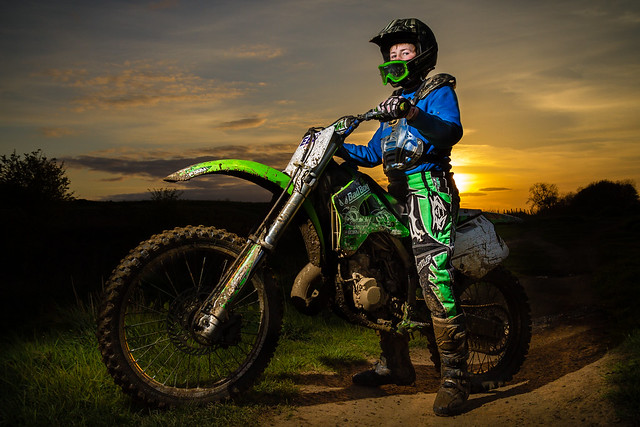
One of the fastest and most effective ways to create a photo that looks different is to shoot from a high or low angle. Going lower is the easiest of the two and something as simple as dropping down to one knee is often all it takes to transform a humdrum image into something a little special.

Think about it. You always see the world at eye height so looking at photos taken at the same height really isn’t that different. Looking at the world from the height of a child is always more fun, as is getting a birds eye view.

Trap 4 – Going Stale
Writers get writers block and so photographers must get photographers block. At some time we all run out of creative enthusiasm and when it happens it can be crippling. The only way I’ve found to reverse the feeling is to force yourself to go and photograph something, anything!

Things that can make you go stale include…

5-4Visiting the same locations time and time again. The world is a big old place, go somewhere new for once and see what you can find to photograph.

Shooting on your own can be great but taking along a photo buddy will often make the experience far more enjoyable and what did I say about happy photographers?

Sticking to what you know is generally a good idea. You can become an expert landscape photographer or wildlife photographer. But every now and then venture outside your comfort zone and photograph something you’ve never done before. Sports, portraits, night shoots or whatever takes you fancy.

Still feeling stale? Book onto a workshop that will allow you to try something new, whilst meeting new photographers and visiting new locations.

Trap 5 – Being a virtual photographer
5-5I love the internet, it’s changed my world forever. I could spend all day on Facebook, Twitter and YouTube just following other photographers and learning new skills. Well that’s what I tell myself I’m doing but good as the internet is, you can’t beat a bit of real, hands on photography.

So grab your camera and go and take a photo of anything right now (no not a photo of your keyboard). Learning the theory is important but so is putting it into practice.

Putting your photos online is a great way of sharing your passion, but don’t get caught up in reading every comment, answering every question and passing judgement on every other photographers work you see. Step away from the computer every once in a while and watch your photography soar.
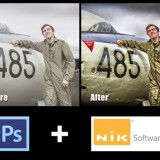
Friday Freebee

It’s been a while since I’ve posted a Friday Freebee, so let me correct that right now…

If you like your photos to have gungy feel you’ll love this grunge photo frame. This is a high resolution file of 4000px by 3100px in size, which makes it perfect for both web and print use. The canvas texture has lots of mottling and even a small rip, all of which was there in the original photo.

grunge-frame-FB

In the photo above I dropped on a mono image and changed then layer blending mode to Hard Light. This template works best either with black and white images but can also work with colour images, especially if you desaturate the template back to black and white.

I’d also suggest using images which have lots of sky, large areas of simple colour/tone or lots nice blurred parts in the photo. Basically a photo with lots of fine detail tends not to blend so well with a textured template like this.

You can download the 5mb high res file from here

If you do use the template and create an image that you share on Facebook, Flickr, 500px, Google+ etc. then remember to leave the link in the comments below. Enjoy!

Usage rules
The image is copyright Gavin Hoey 2012. Use is limited to any personal, non-commercial purposes. Please share the Friday Freebie by linking back to this page. Do not redistribute the original image without my permission.

Download instructions
Click the link https://drive.google.com/file/d/0B_Mmmm3K1utNbzlxdjVrODlrd0E/view?usp=sharing

1. Click the Download button download_icon

2. The download should start automatically

May Photo Challenge – The Results

The theme for the May photo competition was “Something beginning with B” which, when it comes to themes, is just about as open as you can get.

First up I’d like to thank everyone who got into the spirit of the competition. There was another strong entry with 127 photo being entered and I although the quantity was slightly lower then last month the number of top quality entries was much higher. You can view all the entries by going to the Flickr group page.

As always I looked at all 127 entries very carefully and over the course of a few days I whittled down the number. First I rejected anything that, in my opinion, didn’t start with B. The only problem with that idea was almost all of the entries were bang on theme. So once again it came down to personal taste (mine in this case), so I selected my favourite photos. Even though I was being quite tough with my selection I was still left with 29 photos!

To be honest there were several photos which could have easily taken the top spot as I think they’re outstanding. However there can only be one winner and this month the winner is…B for Bike By martin tyson

B for bike

Martin will be getting a copy of his print made by my good friends over at Print Yours.

Near Misses…
I really agonised over the top 10 but I’m very happy with the choice.The runners up in no particular order are below. Click on an image to view it large on Flickr. If you didn’t win this time there will be a new challenge. Details are coming very soon.

Band3
Band4 by mleepeak
B for Blossom... 
B for Blossom by Ajay Shrestha 
Blind - Gav Train : May 2012 Photo Challenge Blind by AdrienPerinot
Busy Bee
Busy Bee By P.Höcherl
Bugatti
Bugatti By Jellymoon Photography
Are you talking to me?
Are you talking to me? By ♔Siroker♔
B for Butterfly - an insect that was not camera shy for once.
B for Butterfly
By Oh no he has a camera
Bewildered and Confused
By SiuSiu.com
Something Beginning With Bee
Something Beginning with Bee
By _David Thomas

Free Nik Software Webinar No2

Nik PSLast months webinar with Nik Software was a massive success, so much so that not everyone was able to get in the room to watch it live. So, I’m very excited to announce that I’ll be running another brand new webinar hosted by Nik Software.

Thursday 7th June 2012
7.00pm UK time

The Webinar should run for around an hour with a Q&A session at the end.

The best news is it’s totally FREE! All you have to do is register for the event on the Nik website and you’re ready to go.

I don’t know what the maximum number of live viewers will be but I recommend registering as that’s the only way you’ll get the chance to download the recording.

So what will I be covering? Well, I’ll be starting the webinar in Photoshop and demonstrating how I use it in combination with the Nik Software plug ins. Don’t worry if you’re new to Nik Software as I’ll explaining everything as I go along. Nik have kindly left the subject matter for this webinar totally open, so I’ll be running through some of my favourite images, showing you exactly how I made them and passing on as many hints, tips and techniques as I can fit into an hour.

Although I’ll be using Adobe Camera RAW and Photoshop CS6 as my host program I’ll be spending lots of time inside my favourite Nik Plugins. Nik Color Efex Pro 4 and Nik Silver Efex 2

You can find out more information about those plugins and even download a 15 day free trial from the Nik Website or you can buy them outright from many retailers like here at Adorama.

See you there!

Sun or Shade, which is best?

What’s the best lighting conditions for taking photos? OK, so that’s a rhetorical question as there is no ideal light for every occasion but light does have the power to influence your enthusiasm for photography.

Be honest, when you look out the window on a grey overcast day where the chances of rain is fairly high, the last thing that’s on your mind is grabbing your camera and taking some photos. Of course the flip side is as soon as the sun comes out, everyone’s up for a bit of photo fun.

If that sounds like you then think carefully before taking photos of people or objects in direct sun as the contrast can often be to much for most cameras to capture.

Sun-Shade

The photo above illustrates the problem and a solution.

The image on the left is full sun and trust me, it looked perfect to my eyes. However the camera couldn’t see what I saw and the resulting image is a contrasty mess.

To improve the photo I simply used my hand (just out of shot) to cast a shadow over the flower and the end result is much improved colours and contrast.

So next time you’re out on a sunny day remember to look in the shade for your best photos.