Light Textured Background

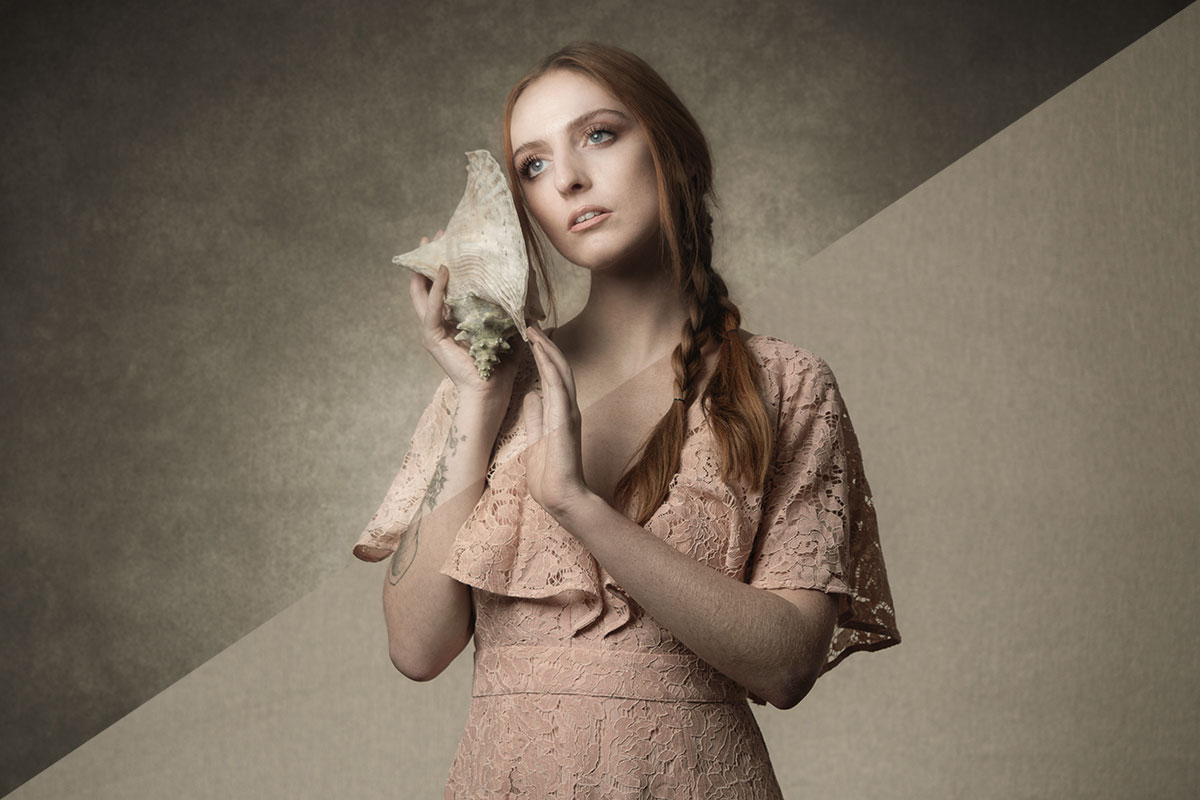
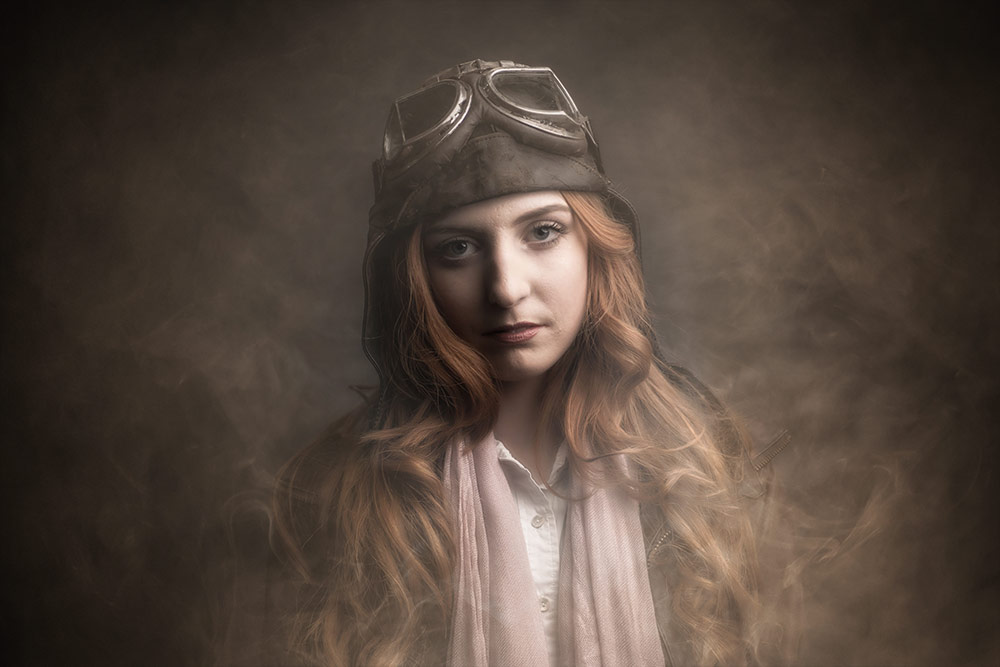
Not everyone is lucky enough to have a permanent studio and even fewer have the space for a textured wall. So being able to add texture to your portraits is a handy skill to have.

Of course for this to work you’ll need some great textures. So to start you off here’s one of mine. It’s a combination of multiple blank pages from old books and textures found mouldy surfaces… glamorous  work, it’s not!

The end result is a subtle texture with fine grain which makes it the perfect choice for portraits.

Usage rules
The image is copyright Gavin Hoey 2020. Use is limited to any personal but non-commercial purposes. Only share by linking back to this page. Do not redistribute the original image without my permission.

Download instructions
       1. Click on the download link below https://drive.google.com/file/d/1MmTbLar1DDb6dfssloUxq8koGSNYlDsP/view?usp=sharing

  1. Click the Download button download_icon (top right of screen)
  2. The download should start automatically
  3. No support is provided. If you need help Google or YouTube the question and you’ll almost certainly find the answer

Festive Stars Template

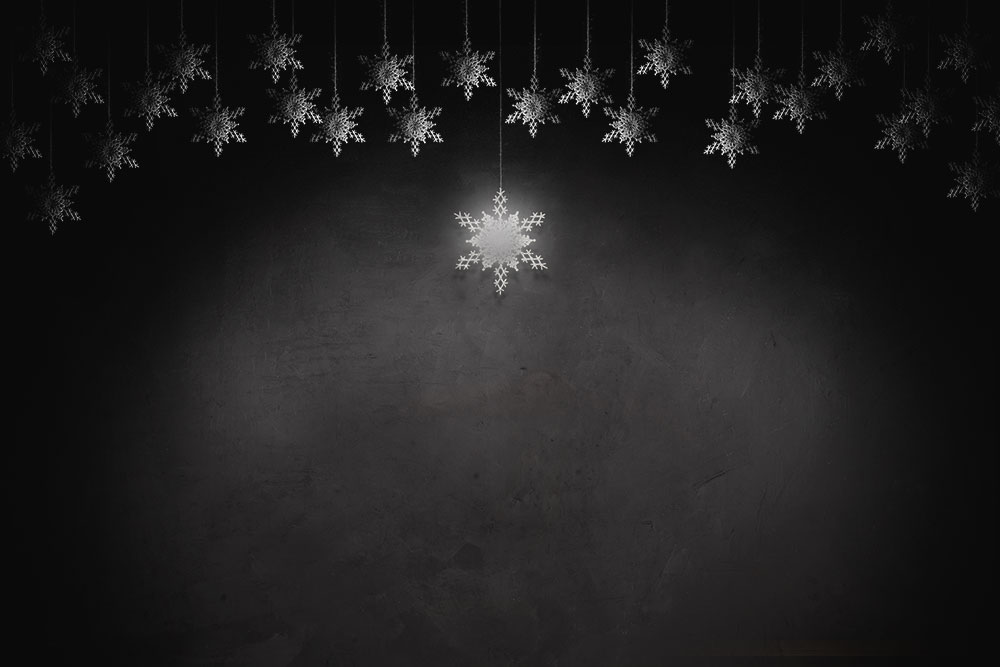
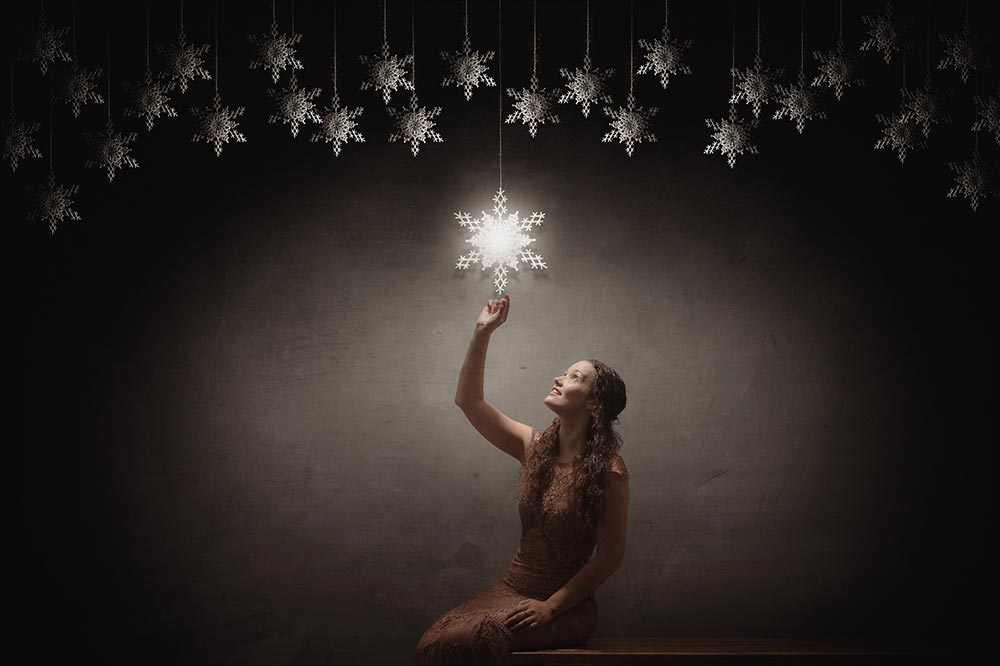
With the festive holidays fast approaching I thought I’d share my festive stars template. My planned use for this is that it will become a background for a fine art portrait but I’m pretty sure there’s plenty of other uses too.

To use this template, download it (see the link below) then open it in Photoshop. The template is made up of a bunch of layers, you need to paste your image into the one called “YOUR PHOTO HERE”. Make sure your photo stretches to the edges of the template and use a layer mask to hide or reveal whatever is under the stars.

You can see how I use it in this video https://www.youtube.com/watch?v=VNVOAJI7Q4w

You can download my festive stars template here
https://adobe.ly/2AY2nvZ

If you create a photo using the Friday Freebie then let me (and everyone else) know by leaving the link in the comments below.

Usage rules
The festive stars template is copyright Gavin Hoey 2018. Use is strictly limited to any personal but non-commercial purposes.
Please share the Friday Freebie by linking back to this page. Do not redistribute the original action without my permission.

Download instructions
     1. Click on the correct download link below (no sign up is needed)
https://adobe.ly/2AY2nvZ

  1. You may see a message saying “There was a problem with the network” Just ignore it
  2. Click the Download icon download_icon The download should start automatically
  3. Open the .PSD file in Photoshop
  4. Paste your photo into the layer “YOUR PHOTO HERE”
  5. No support is provided with the Friday Freebies. If you need help Google or YouTube the question and you’ll almost certainly find the answer

Instant Snow V2

Way back in 2013 I made a simple Photoshop action that made snow. As it turns out it makes REALLY good looking snow and even today it’s regularly in the top three most visited pages of my blog.

The secret to it’s success is down to it’s one click simplicity which runs the action, makes three layers of snow and still keeps your original image intact. The snow it makes can then be tweaked, copied and saved for future use.

Five years on an I felt it was time for a refresh, so here it is. You can download Instant Snow V2 here:
https://drive.google.com/open?id=1s6EUBs5jFwPN-ZnszTTMB11W1ZT9_kuu

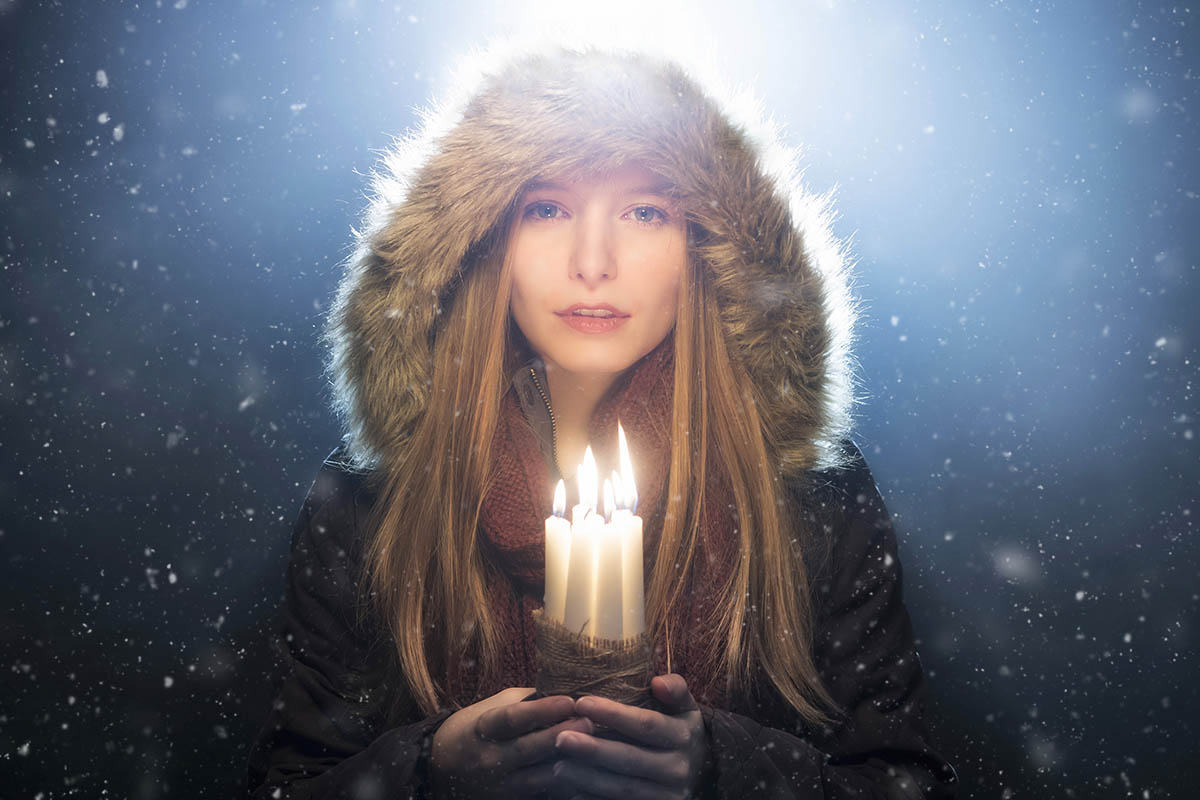
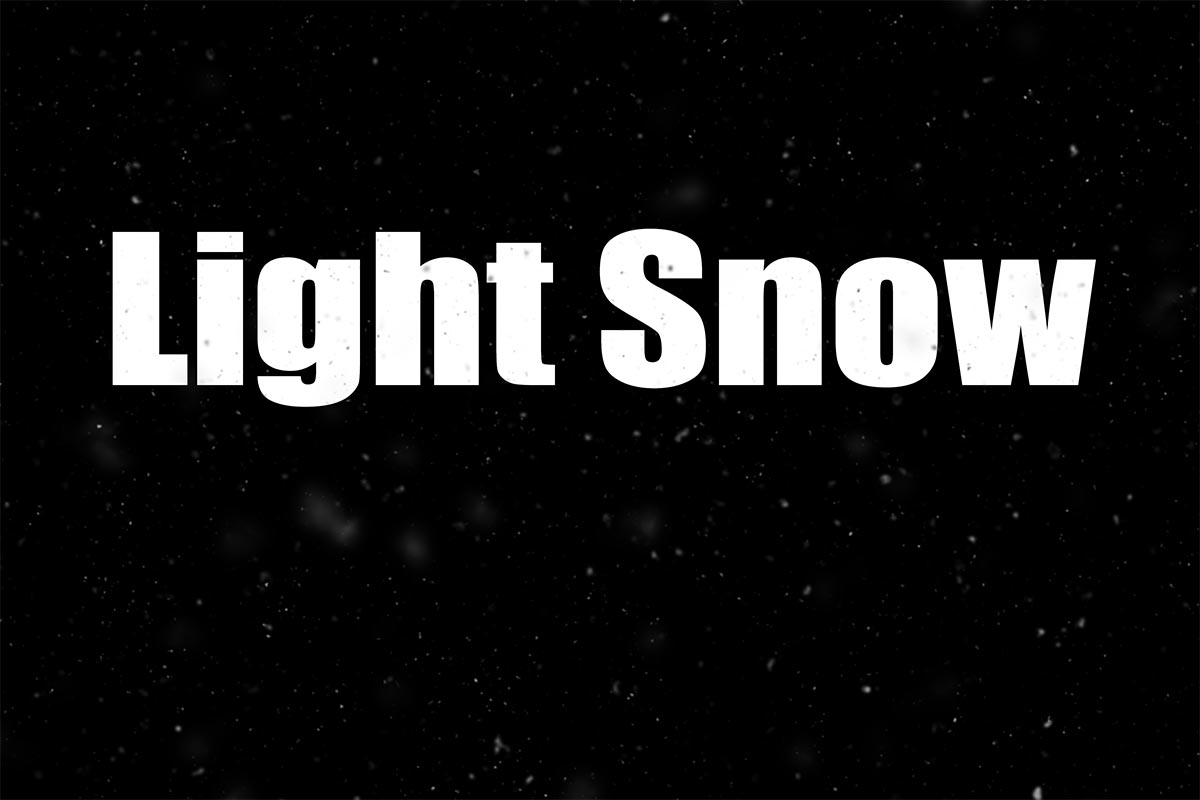
Instant Snow v2 now has four levels of snow effect. Blizzard, Heavy Snow, Light Snow and  First Flakes.

If you create a photo using the Friday Freebie then let me (and everyone else) know by leaving the link in the comments below.

Usage rules
The Photoshop Action is copyright Gavin Hoey 2018. Use is strictly limited to any personal but non-commercial purposes. A commercial license is available.
Please share the Friday Freebie by linking back to this page. Do not redistribute the original action without my permission.

Download instructions
     1. Click on the correct download link below (no sign up is needed)
https://drive.google.com/open?id=1s6EUBs5jFwPN-ZnszTTMB11W1ZT9_kuu

  1. You may see a message saying “There was a problem with the network” Just ignore it
  2. Click the Download icon download_icon
  3. The download should start automatically
  4. Unzip the download and install the Photoshop Action
  5. No support is provided with the Friday Freebies. If you need help Google or YouTube the question and you’ll almost certainly find the answer

F-Stop Chart

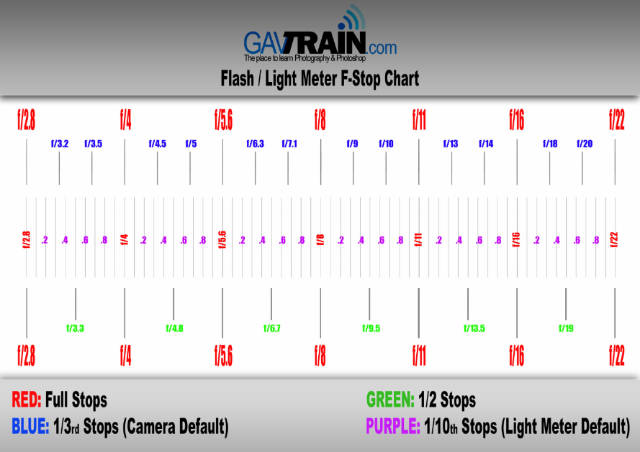
Flash meters are super helpful for lots of reasons but to really get the most from them you also need to know your f stop aperture numbers. You might already know that you need one more stop of light to move from f/5.6 to f/8 but how good are your intermediate f stops. For example you want to shoot at f/8 but your flash meter tells you f/7.1 or even f5.6.8, how close are you to your target aperture?

Learning the full stop scale is a must for any serious photographer and for me, so is learning the third stops too. Tenth stops is a bit more niche but many flash heads work in tenths. So to help you learn and as a quick reminder for me, I made an f-stop chart

Usage rules
The chart is copyright Gavin Hoey 2018. Use is limited to any personal but non-commercial purposes. Do not redistribute the original images without my permission.

Download instructions
       1. Click on the correct download link below (no sign up is needed)
        https://drive.google.com/file/d/12H6LrCVIgkA_R0PEKCTfZtlrd8rkh61s/view?usp=sharing

  1. Click the Download button download_icon
  2. The download should start automatically
  3. No support is provided with the Friday Freebies. If you need help Google or YouTube the question and you’ll almost certainly find the answer

Wall of sound background

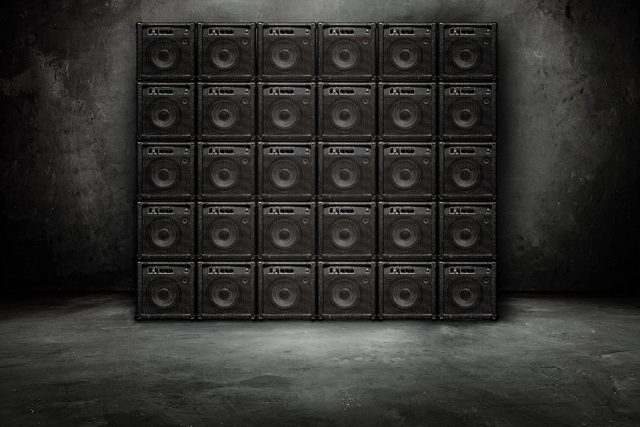
Recently I needed a wall of speakers in my studio to make an amazing background for an upcoming music shoot. But after a bit of thought I realised there were three major problems with the idea. First, my studio space is a lot smaller then my imagination. Second, I don’t have easy access to the 25 – 30 speakers I would need for a person sized wall and third, what would I do with all those speakers after the shoot? However I do own one small PA amp (I use it during my camera club talks) and of course I have Photoshop.

So here it is, a wall of sound in my studio and all it took was a couple of photos plus an hour or two in Photoshop. The only thing missing is a musician but I’ll get to that in a later post. In the meantime, I’m sharing this background as a Friday Freebie.

If you create a photo using the Friday Freebie then let me (and everyone else) know by leaving the link in the comments below.

Usage rules
The images are copyright Gavin Hoey 2018. Use is limited to any personal but non-commercial purposes. Please share the Friday Freebie by linking back to this page. Do not redistribute the original images without my permission.

Download instructions
       1. Click on the correct download link below (no sign up is needed)
          https://adobe.ly/2AUg8td

  1. Click the Download button download_icon
  2. The download should start automatically
  3. No support is provided with the Friday Freebies. If you need help Google or YouTube the question and you’ll almost certainly find the answer

Free Smoke Textures

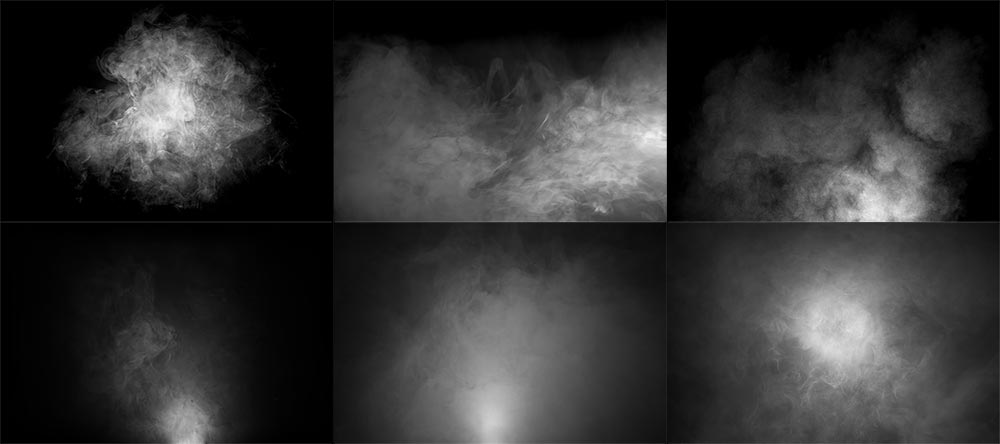
Recently I’ve run a couple of workshops that used smoke effects, the Music and Magic workshop was a great example. During the workshops I’ve mentioned that the volume of smoke can easily be enhanced with a little help from Photoshop. All you need is a shot of smoke against a black background and you’re good to go. Of course there’s smoke and then there’s smoke, so what you actually need is a library of various smoke patterns in order to match it to your scene.

To kick off your smoke collection I’m sharing 6 of my smoke shots as a Friday Freebie. You can download them from here:
https://drive.google.com/open?id=0B_Mmmm3K1utNam9wUk9yUFpVdEk
Please read the usage rules below.

How To Add Smoke
There’s a several ways to use my smoke textures but first you need to download and unzip them. In Photoshop simply open a smoke image and select it (CTRL+A). Then copy it (CTRL+C) and go to the image that needs smoke and paste it in (CTRL+V). To blend the smoke into the photo go to the Layers Panel and change the Layer Blending mode from Normal to Screen. Of course it’s unlikely that the smoke will be in the right place or even the right size, so press CTRL+T and use the Free Transform handles to resize the smoke and then drag it around as you need.

How you use the smoke in your photography is up to you but you. It can be used as realistic smoke by following the advice above or it can be more mist like by lowering the opacity and applying some Gaussian Blur. Alternatively you could add it to the whole image and use it as a texture, may be add some colour with CTRL+U (Hue/Saturation) or try different blending modes for interesting and unexpected results.

If you create a photo using the Friday Freebie then let me (and everyone else) know by leaving the link in the comments below.

Usage rules
The images are copyright Gavin Hoey 2017. Use is limited to any personal but non-commercial purposes. Please share the Friday Freebie by linking back to this page. Do not redistribute the original images without my permission.

Download instructions
       1. Click on the correct download link below (no sign up is needed)
https://drive.google.com/open?id=0B_Mmmm3K1utNam9wUk9yUFpVdEk

  1. Click the Download button download_icon
  2. The download should start automatically
  3. Once downloaded you’ll need to Extract or Unzip the file to access the images
  4. No support is provided with the Friday Freebies. If you need help Google or YouTube the question and you’ll almost certainly find the answer

Vintage Bookshelf – Friday Freebie


Recently IBook-Background-GAVTRAIN did a shoot which required a background made up of vintage books (video coming soon) and as luck would have it, I found 40 old books at a local boot sale for a bargain price. The books looked brilliant in the shoot but at the end of it I was left with a box full of slightly damaged Reader Digest books which I no longer needed.

So what do you do with 40 unloved books? Well the answer is obvious. I made them into a Friday Freebie to share on my blog. The more eagle eyed will notice there’s a few more books here than the 40 I started out with. You can thank the, magic of Photoshop for that.

You can download the book background here:
https://drive.google.com/file/d/0B_Mmmm3K1utNeVFyV0s4WUo0aVE/view?usp=sharing

This isn’t a template or a texture, it’s a stock image for you to use as you see fit (subject to the usage rules below).

BTS-Books-FF

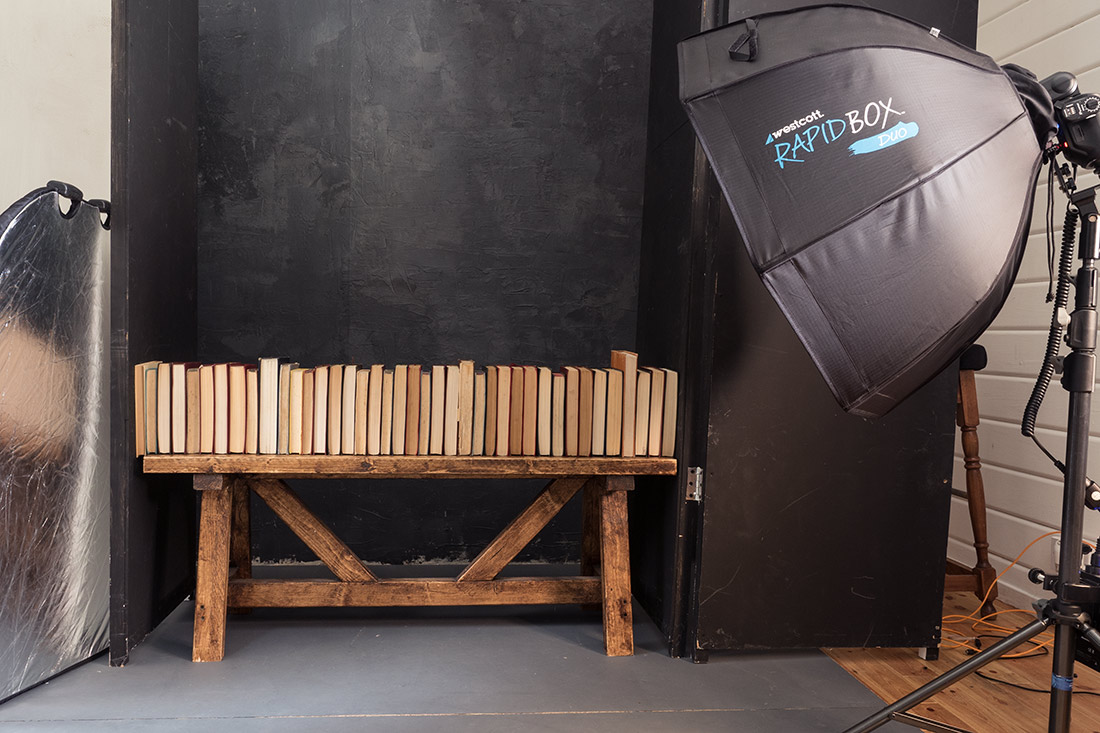
As you can see from the behind the scenes shot above, I shot the books on a wooden bench in my studio. I then randomised the book order a couple of times and took some more shots. In Photoshop I did a quick cut and paste job to create the illusion of book case stacked high with books. You’ll also notice that you only see the pages of the book and not the spine. That’s a deliberate choice on my part for a couple of reasons but mostly because the pages are the bit with all the texture.

If you create a photo using the Friday Freebie then let me (and everyone else) know by leaving the link in the comments below.

Usage rules
The image is copyright Gavin Hoey 2016. Use is limited to any personal but non-commercial purposes. Please share the Friday Freebie by linking back to this page. Do not redistribute the original image without my permission.

Download instructions
1. Click on the correct download link below (no sign up is needed)
https://drive.google.com/file/d/0B_Mmmm3K1utNeVFyV0s4WUo0aVE/view?usp=sharing

  1. Click the Download button download_icon
  2. The download should start automatically
  3. No support is provided with the Friday Freebies. If you need help Google or YouTube the question and you’ll almost certainly find the answer

Bokeh – Friday Freebie

Recently I visited the historic city of Winchester which was decked out with wonderful Christmas lights. Not surprisingly I couldn’t resist grabbing a few shots, especially around the pretty little Christmas market.

But I didn’t just stick to the usual type of photos, I also shot some bokeh images that might come in handy as backgrounds or textures for other photos. You can download them here:
https://drive.google.com/file/d/0B_Mmmm3K1utNMkRIWHhUUnFlMW8/view?usp=sharing

BOKEH-FF

The shooting technique is simple enough. I used a wide open f/2.8 aperture and manually focused to 20cm. I then pointed my camera at the Christmas lights and zoomed in or out to adjust the size of the bokeh circles.

I’ve shared three of my favourite bokeh patterns in this Friday Freebie, I hope you find them useful.

If you create a photo using the Friday Freebie then let me (and everyone else) know by leaving the link in the comments below.

Usage rules
The image is copyright Gavin Hoey 2015. Use is limited to any personal but non-commercial purposes. Please share the Friday Freebie by linking back to this page. Do not redistribute the original image without my permission.

Download instructions
1. Click on the correct download link below (no sign up is needed)
https://drive.google.com/file/d/0B_Mmmm3K1utNMkRIWHhUUnFlMW8/view?usp=sharing

  1. Click the Download button download_icon
  2. The download should start automatically
  3. No support is provided with the Friday Freebies. If you need helpGoogle or YouTube the question and you’ll almost certainly find the answer

Curtain Action – Friday Freebie

It’s been a while since I’ve done a Friday freebie so lets put that right with a Photoshop action.

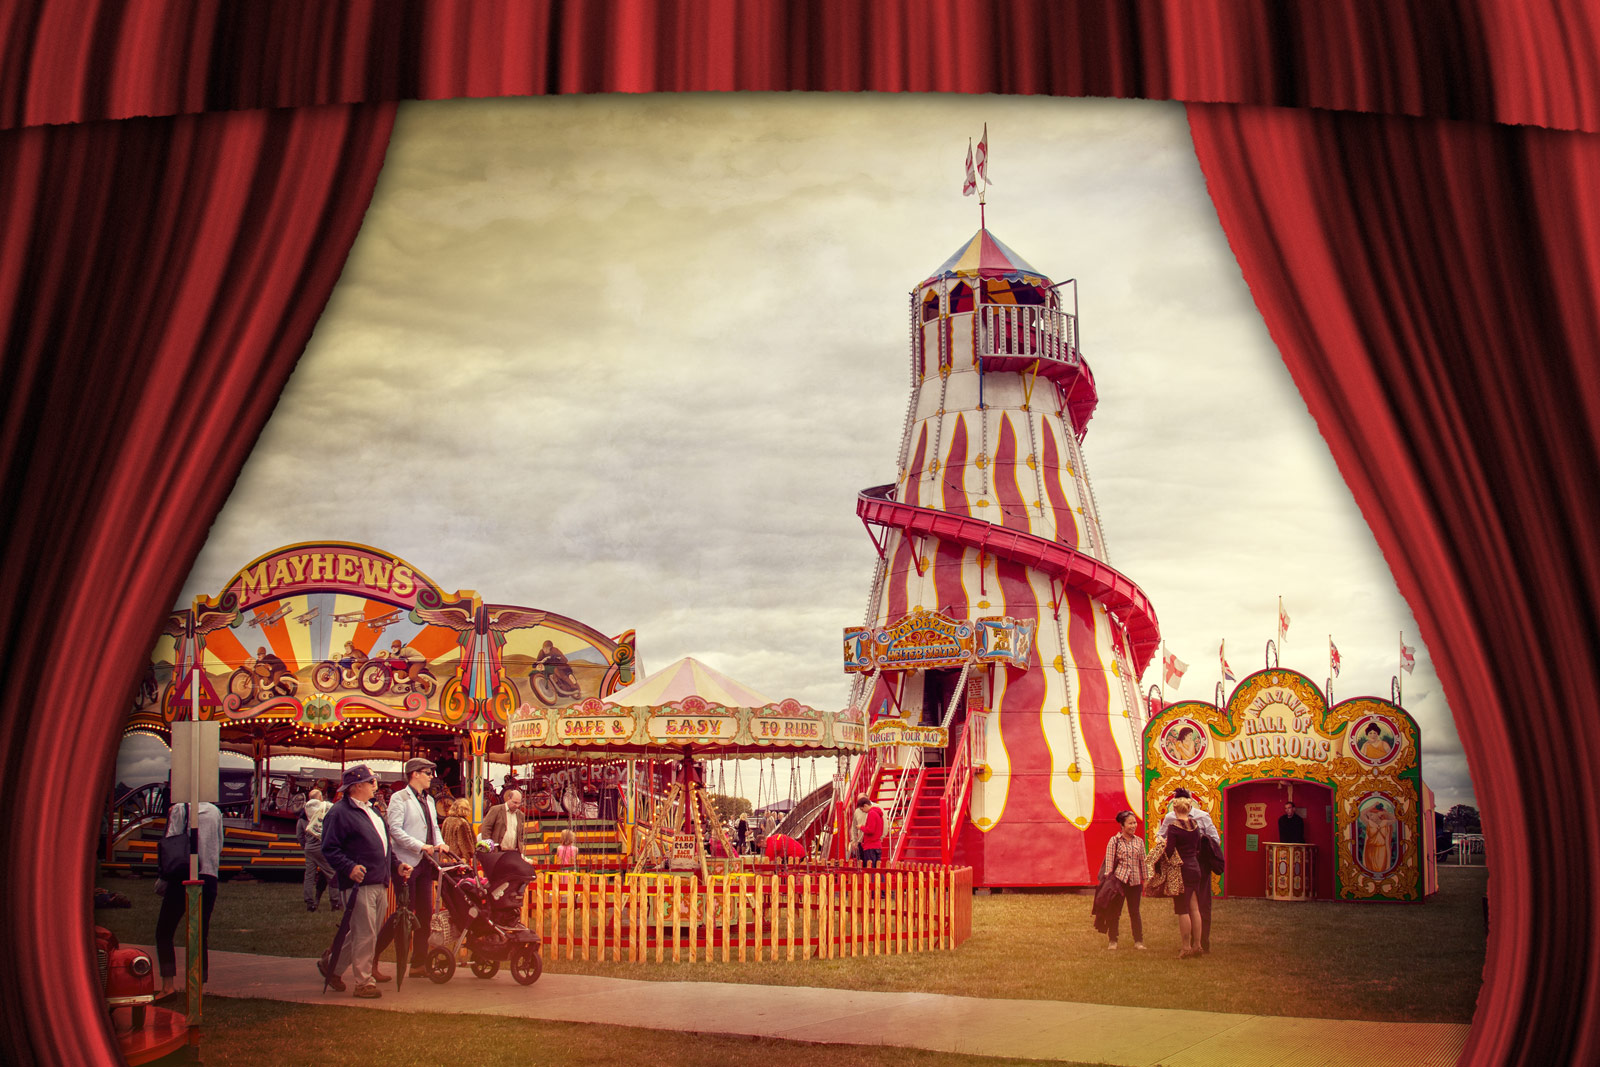
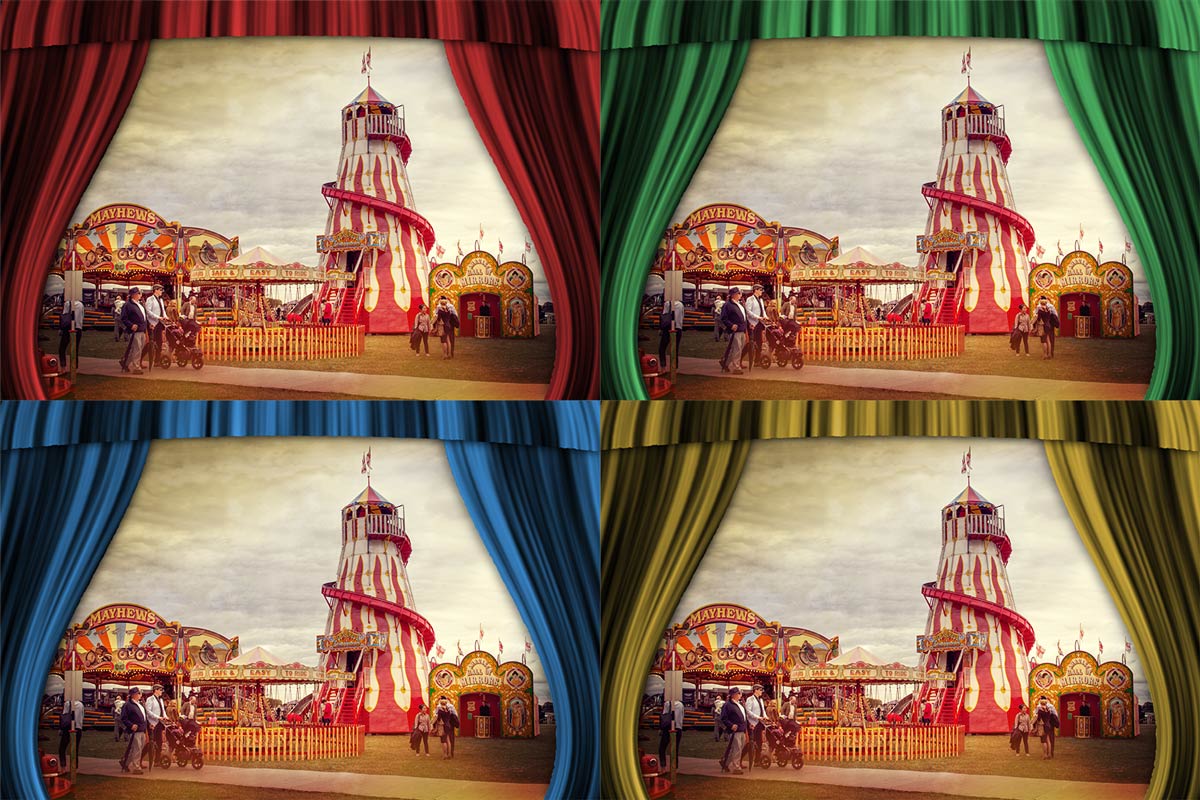
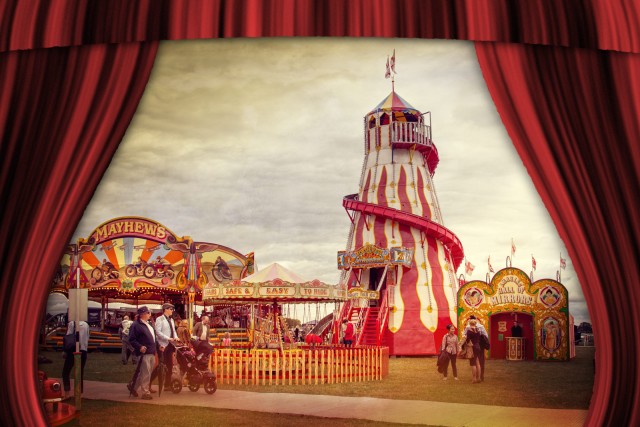
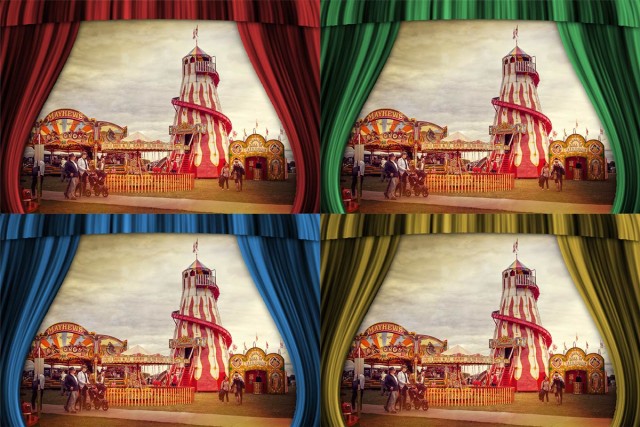
This Action creates a set of beautiful curtains in a theatrical style with a single click of your mouse. There’s four colours to choose from and it’s a brilliant way to frame your vintage style images. The curtains are created from scratch using standard Photoshop filters and effects and to add an extra touch of realism they have a ragged edge and a gentle bow.

Full download instructions are below but you can also Download the Curtain Action
Basic-Curtains

Once downloaded just unzip and install the action into Photoshop. Unfortunately this action is unsuitable for  Photoshop Elements

To use the action, start with the photo you wish to use already open in Photoshop and then play one of the four actions in this set. The first thing it does is make a copy of your photo so the original will be untouched and safe. There’s a lot of things for Photoshop to do with this action so it may take a minute or two to run through.
DO NOT switch to another image whilst running the action.

There are no options or controls for this action but at the end you may need to use Free Transform (CTRL+T) to re-size and re-positing your photo under the curtains

The action will work with Photoshop CC2014, CC, CS6, CS5 and CS4

If you create a photo using the Friday Freebie then let me (and everyone else) know by leaving the link in the comments below.
all-curtains

Usage rules
The action is copyright Gavin Hoey 2015. Use is limited to any personal but non-commercial purposes. Please share the Friday Freebie by linking back to this page. Do not redistribute the original image without my permission.

Download instructions

he direct link to download the actions is https://www.gavtrain.com/wp-content/uploads/2015/05/Cutains-Gavtrain.zip

You must UNZIP the action before installing it in Photoshop

No support is provided with the Friday Freebies. If you need help Google or YouTube the question and you’ll almost certainly find the answer :-)

Fractured Paint Brush – Friday Freebie

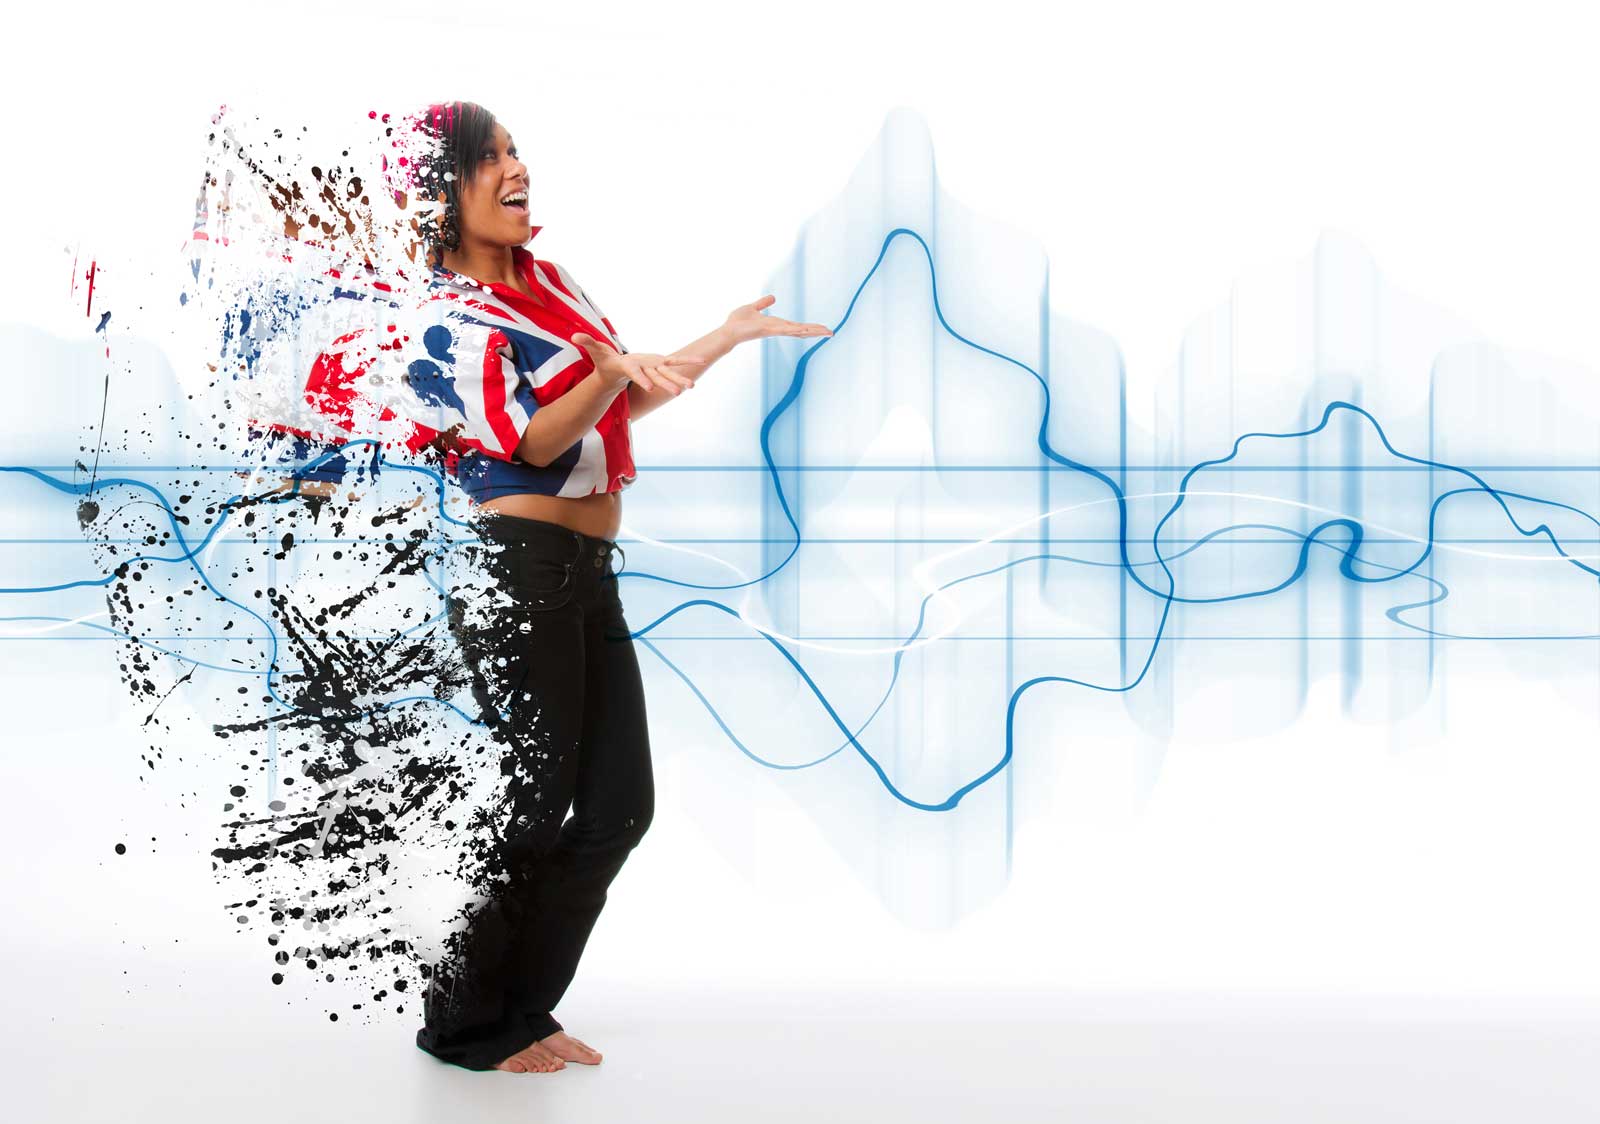
Back in 2011 I made a video on how to create a fractures or shattered image using Photoshop. I’ve added it to this post in case you missed it. To create the effect I made some fractured paint brushes which I uploaded to the Adobe Exchange website and shared for free. Three and a half years is a long time in the fast moving world of the internet and the Adobe Exchange (as I remember it) is no more, so I’m sharing them again here.

Spatter-copy

Full download instructions are below but you can also
Download the Paint Spatter brushes

Once downloaded just unzip and install the brushes into Photoshop or Photoshop Elements and your ready to go. The video below should give you some ideas of how to use the brushes.
[youtube]https://www.youtube.com/watch?v=JUjXJ5ZPO5M[/youtube]

If you create a photo using the Friday Freebie then let me (and everyone else) know by leaving the link in the comments below.

Usage rules
The brushes are copyright Gavin Hoey 2015. Use is limited to any personal but non-commercial purposes. Please share the Friday Freebie by linking back to this page. Do not redistribute the original image without my permission.

Download instructions
1. Click on the correct download link below (no sign up is needed)
https://drive.google.com/file/d/0B_Mmmm3K1utNcjlPYWRvekRYanc/view?usp=sharing

2. Click the Download button

3. The download should start automatically

4. No support is provided with the Friday Freebies. If you need help Google or YouTube the question and you’ll almost certainly find the answer :-)