Photo Restoration ~ T+MGP 06

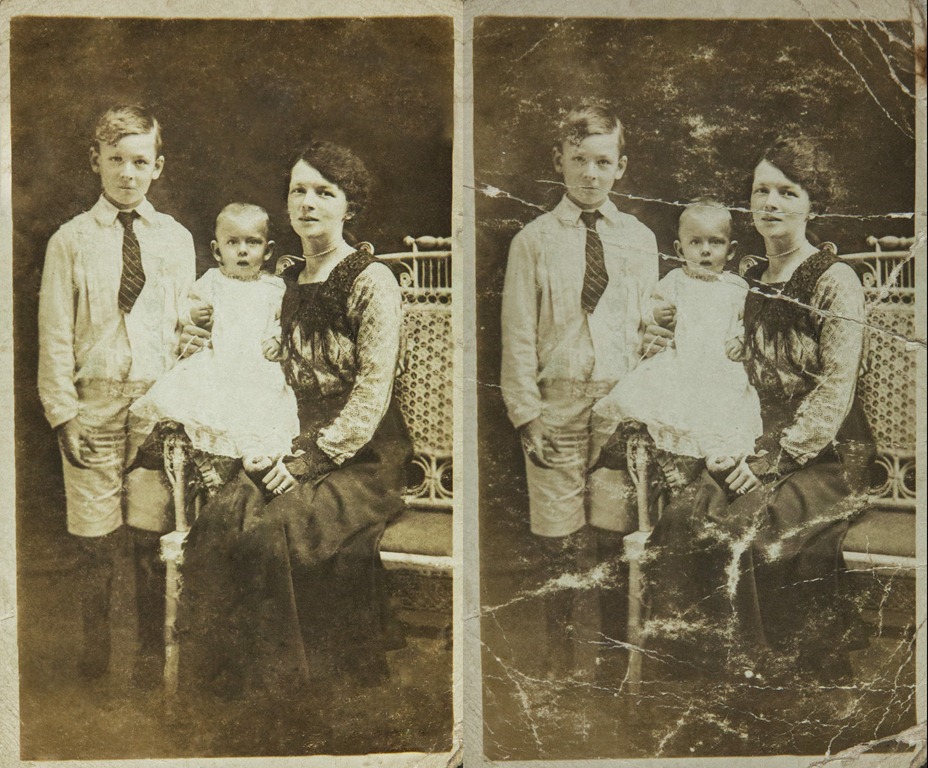
Restored(Final-Original)When it comes to restoring old and damaged photos a flatbed scanner isn’t always the best option. Join me as I show you an easy two light setup that’s prefect for copying old photos. As always I’ll cover the Photoshop processing too 🙂

You might be wondering why I didn’t just use a scanner to copy the photo. It’s a good question that has many answers.

The first problem I have with using is a scanner is… I don’t have one. OK that’s not 100% true because I think I have one lurking at the back of a cupboard but it’s not something I’ve need for a very long time.

Handy as a scanner is, a camera offers many advantages. It has a higher resolution, it shoots RAW I can set and control the lighting and finally if I have lots of photos to shoot, it’s quicker to use this kind of set up.

You may also ask why I didn’t use flash. Well there’s no reason why I couldn’t use flash and the end result would have been just as good. The reason I love continuous lighting for restoration is simply that I can see exactly what the end result will be before I take the photo.

Equipment used in the video:
Flashpoint two light kit http://www.adorama.com/LTO2S.html?KBID=67338
Canon 5D Mark II http://www.adorama.com/ICA5DM2.html?KBID=67338
Canon 24-105mm L f/4 IS http://www.adorama.com/CA24105AFU.html?KBID=67338
Manfrotto 055 Pro http://www.adorama.com/BG055XPROB.html?KBID=67338

The Photo itself was brought into the studio by a local resident who was compiling a family history. This photo forms part of her family tree. At nearly 100 years old the photo and the album it was glued into were very fragile so careful handling was the order of the day. I’d like to thank the family for allowing me to use the photo in this video.
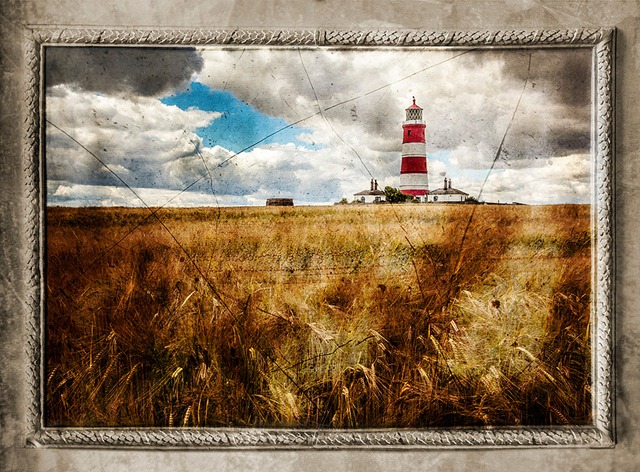
Happisburgh, The Alternative Ending

Recently I uploaded a video for Adorama TV that I shot at Happisburgh on the Norfolk coast. If you missed it then you definitely missed out, so click here to go back and watch it.

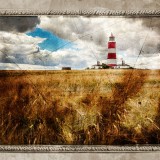
In the first video I showed both the photography and basic Photoshop editing but I thought it would be fun to take one of the photos and come up with an alternative Photoshop ending. In this case the alternative ending is a lot more creative then the original and surprisingly simple to do.

[youtube]https://www.youtube.com/watch?v=ifc7hfPDgKo[/youtube]

Let me know if this is useful and if there’s enough demand I’ll make more “Alternative Ending” videos in the future.

As I mention in the video I’ve uploaded the background texture image to Adobe’s Creative Cloud and made it free to all. My normal rules of usage apply (see below). All you need to do is click this link and away you go, no sign up or login is required. http://adobe.ly/1rJnPNdPlaster-Border-Fina-smalll

Usual rules apply. The image is copyright Gavin Hoey 2012. You may use it for personal, non-commercial purposes. Do not redistribute without permission.

Take & Make ~ Episode 5

582727_468001846543160_1867358966_nSomehow I managed to bypass this video to the blog which wouldn’t have been right as this one was really fun to do.

Living in the UK we have a reputation for wet weather and although in reality it doesn’t really rain all that often, the weather is always a great topic of conversation for us Brits. So in this video I aimed to become the master of the weather and make it rain on command.

The rain itself came courtesy of a hose pipe and the umbrella is an old shoot through translucent brolly from my studio. Now, studio umbrellas may or may not be water proof but I wasn’t taking any risks so I covered my flash with a clear plastic bag.

My camera was well away from the hose but again I opted for the better safe then sorry approach, so my camera was protected by a Op-Tech rain sleeve… or the long plastic bag with a drawstring at one end, as I call it.

Equipment used in this video
Canon 5D Mark II
Canon 24-105mm L f/4 IS
Op/Tech 18″ SLR Rain sleeve
Manfrotto 055 Pro
Canon 580 EX ii
Canon ST-E2

Take & Make ~ Episode 4

You may have noticed a bit of radio silence on the Gavtrain.com site of late. That’s been down to two things. Firstly I’ve been working for Adobe in the media centre during the recent London Olympics and after that, I’ve been away on my summer holiday.

Whilst we were away I was able to find time to record a couple of new videos and the first one is now live.

The lighthouse at Happisburgh

For this video I visited the beautiful town of Happisburgh on the north Norfolk coast. To be honest I didn’t know much about the place but a brief search on the internet quickly unearthed this location as a “must visit” place to shoot.  My good luck started at the beginning of the day when we arrived to find the lighthouse was open for visitors, so a climb to the top was the first thing we did.

Fun as that was, the best photos are from the coast path and my good luck continued with this amazing sky and a field full of barley ready to harvest. The gentle sea breeze which was blowing, gave me the idea of capturing the movement of the crop in the photo and that’s exactly what I demonstrate in this video.

Equipment used in the video:
Hoya ND400 filter: http://www.adorama.com/HY77ND400.html?KBID=67338
Canon 5D Mark II http://www.adorama.com/ICA5DM2.html?KBID=67338
Canon 24-105mm L f/4 IS http://www.adorama.com/CA24105AFU.html?KBID=67338
Manfrotto 055 Pro http://www.adorama.com/BG055XPROB.html?KBID=67338

Take + Make ~ Episode 1

I’m absolutely thrilled to welcome you to my new series of videos for Adorama TV. The name Take and make great photos should give you a clue as to what I’ll be doing in these tutorials. For me the photography doesn’t stop once I’ve taken the photo and I wanted to show that in the videos, so the Take + Make series will feature both photography and Photoshop.

We’re kicking off with a simple but powerful off camera flash technique. In this case I’m using just a single speedlight to over power the ambient to create the hard, edgy portrait you see in the photo to the right. Then it’s into Photoshop for a bit of RAW processing  to achieve the end result.


Equipment used in the video:
Canon 5D Mark II
Canon 24-105mm L f/4 IS
BlackRapid RS-7 camera strap
Canon 580 EX ii
Canon ST-E2
Photoshop CS6

By using a dedicated flash trigger I could maintain TTL communication between the camera and the flash. That means no flash meters and no cap on the maximum shutter speed I could use.

Many camera’s have the the technology to remote fire a flash built right in. For example, Nikon users have CLS for off camera flash and on cameras like the Canon 7D and 60D the popup flash has the same ability as the ST-E” remote I used,

Photoshop CS6 top 5 ~ Video

Photoshop-CS6In this video I talk about and demonstrate my top 5 BIG headline grabbing new features of Photoshop CS6.

Obviously I’m looking at this from a photographers point of view, so if you’re into 3D or graphic design then your top features list will be radically different.

My Top 5 CS6 photo features are:
The new dark interface
The content aware move tool
The three new blur and oil paint filters
Content aware Patch Tool
and finally the big one… Adobe Camera RAW 7

More Photoshop Sneak Peeks

Over the past few weeks there has been a steady stream of short sneak peek videos from the team at Adobe. So far there have been four videos released which give a glimpse of some of the new or improved features of a future Photoshop.
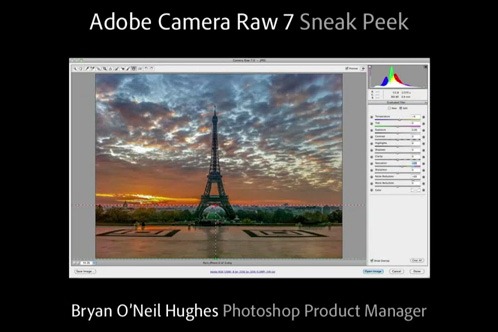
In case you missed them I’ve gathered them all together for you.

Sneak Peek No. 4
In this video Bryan O’Neil Hughes takes a look at the improvements and new features of the Content Aware tools.

Sneak Peek No. 3
In this video Zorana Gee takes a quick look at enhancements for graphics designers, such as a dashed stroke

Sneak Peek No. 2
In this video Zorana Gee demos background save and a speeded up Liquify filter

Sneak Peek No. 1
In this video Bryan O’Neil Hughes takes a look at the new Adobe Camera RAW tools & dark interface

Photoshop Sneak Peek video

The next version of CS6-sneak-1Photoshop isn’t here just yet, but the first “official” sneak peek video is now on YouTube. Senior Product Manager, Bryan O’Neil Hughes, gives us a tiny glimpse at what’s new in Photoshop. Before you get to excited, let me tell you you’re not going to see any impressive new tools in this video. That’s partly because much of the video is dedicated to Adobe Camera RAW (which is the same as to the LR4 public beta), but mostly because it lasts less then 3 minutes.

Aside from RAW, what you will see is Photoshop’s new darker interface and some useful new cursor info. As it’s title suggests, I’m sure we’ll being seeing a few more of these videos as time goes on.

More splash photo tips

January in the UK usually means cold days, long nights and a lack of enthusiasm to go out and find new things to photograph. If that sounds familiar then you’re going to love this idea as it involves staying inside where it’s warm and dry.


Did I say dry? OK that might not be strictly accurate as when you’re dropping objects into tanks of water things are going to get wet.

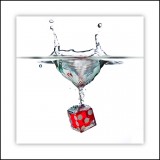
For this photo I filled a small glass fish tank with clean water and set about finding things from around the house to drop in the drink and photograph. It wasn’t long before I’d lined up an eclectic mix of candidates including, bottles of bath gel, items of fruit and even a piggy bank! But it was the red dice that really worked for me.

In the video I start by going over the strobist speedlight adaptor. I used the adaptor to attach a beauty dish which spreads and softens the light a little. It’s a very useful gadget, but not essential for the shot. If you don’t have a beauty dish, a small softbox will work just as well or even the bare flash if all else fails.

Best of 2011

As the year draws to a close it’s the perfect time to look back at my videos from the year.

2011For those of you who like statistics, I uploaded 53 video tutorials to my YouTube channel during the past 12 months, which have had just over 4.75 million views in total this year, which is 13000 views per day. With a mixed bag of Photoshop, photography and review videos, I suppose it;s inevitable that some videos will be more popular then others. So here are the winners and the losers from the class of 2011.

Most watched video from 2011
Standing head and shoulders above everything else is my Fractured image effect Photoshop video. With over 110,000 views and 1260 “Likes” it’s easily my most popular video of the year.

Most Talked about video from 2011
When I say talked about I mean comments left by YouTube viewers. Once again there’s a clear winner, “Timelapse Photography tips from start to end” may not have the snappiest title but it’s had almost 250 comments.

Longest Video from 2011
The shortest video of the year lasted less then a minute, but the longest ran for almost 23 minutes. Many of you might remember I spoke at Photoshop World in Florida earlier in March 2011 and “Photoshop CS5 top 5 new features” was my way of rehearsing a small part of the live presentation.

Most disliked video from 2011
Of course not everyone likes everything I publish and on YouTube there’s a dislike button to anonymously vent your displeasure. A close fought race with 9 dislikes each, the winners are “Fractured image effect” and “Super quick painterly effect”


My favourite video of 2011

Finally I have to choose the one video that I’ve enjoyed the most in 2011. This year that’s a really tough choice as I’ve really enjoyed sharing both my Photoshop and photography knowledge, but it’s the Photography videos that I find I can watch time and again. In 2011 I made videos in some amazing locations… in the sewers of Brighton, at the modern studios of Hassleblad and even whilst relaxing on my holiday in Norfolk.

So which was my favourite? Gatwick Aviation Museum – 15 Minute Photo Challenge. Why? Well it was a bitterly cold day, so cold that the batteries failed on both the video camera and audio recorder. The weather was terrible for photography with flat lighting and blank grey skies. None the less the location was so amazing that I saw great photos everywhere I turned.

New for 2012
So what’s coming up next year? More 15 Minute Photo Challenges, more Photoshop, more Lightroom, more Elements… I hope you keep watching Smile