Controlling reflections in glasses
So you’ve got the lights, you have your model and you’re ready to shoot. Then you take a test photo and all you see is huge white reflections. It’s a problem that happens all too often but fortunately there are a couple of solutions that are quick, easy and effective.
Let’s start with the simplest solution. Get your subject to remove their glasses. It sounds obvious but it’s surprising how many photographers don’t have the nerve to ask. Whilst this can work wonders with occasional spec wearers, anyone who wears glasses full time will look most weird without their specs on. It’s also not going to work with the cool crowd who wear sunglasses all year round.
If you’re using flash or continuous light the chances are the reflections are likely to be from your lights and where you position the lights will affect the reflections you see in the photo.
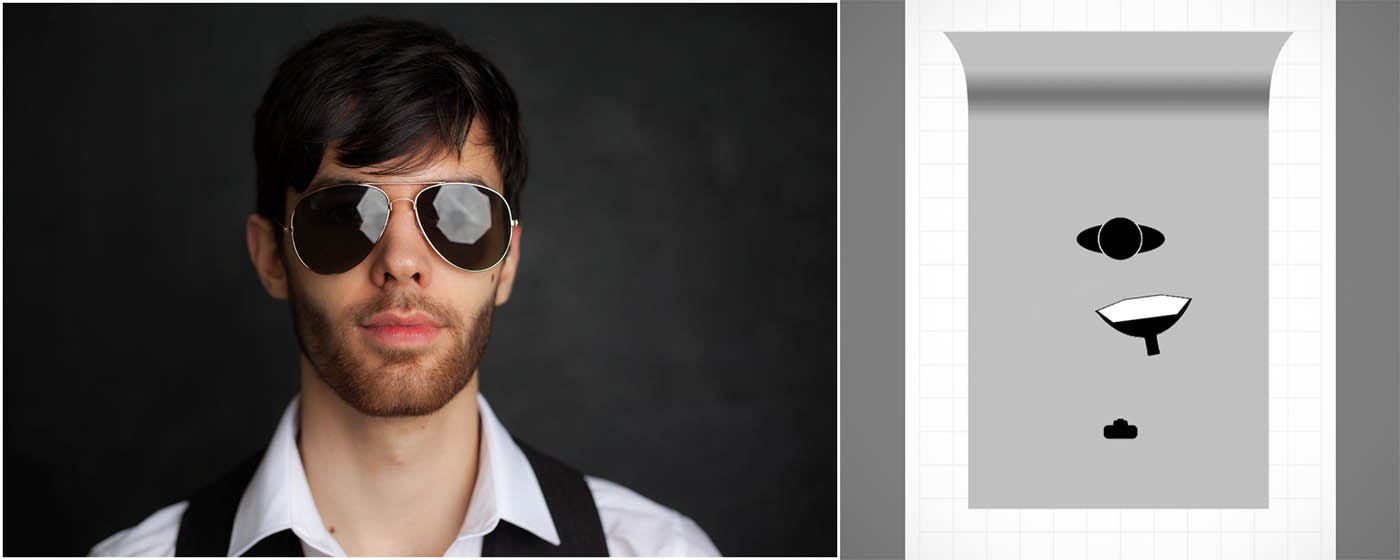 Light from the front (including on camera flash) will produce the biggest, brightest and least attractive reflections. Because light travels in straight lines it’s going to hit the front of the spectacle lenses and bounce right back in to the camera. This really is one lighting position to avoid.
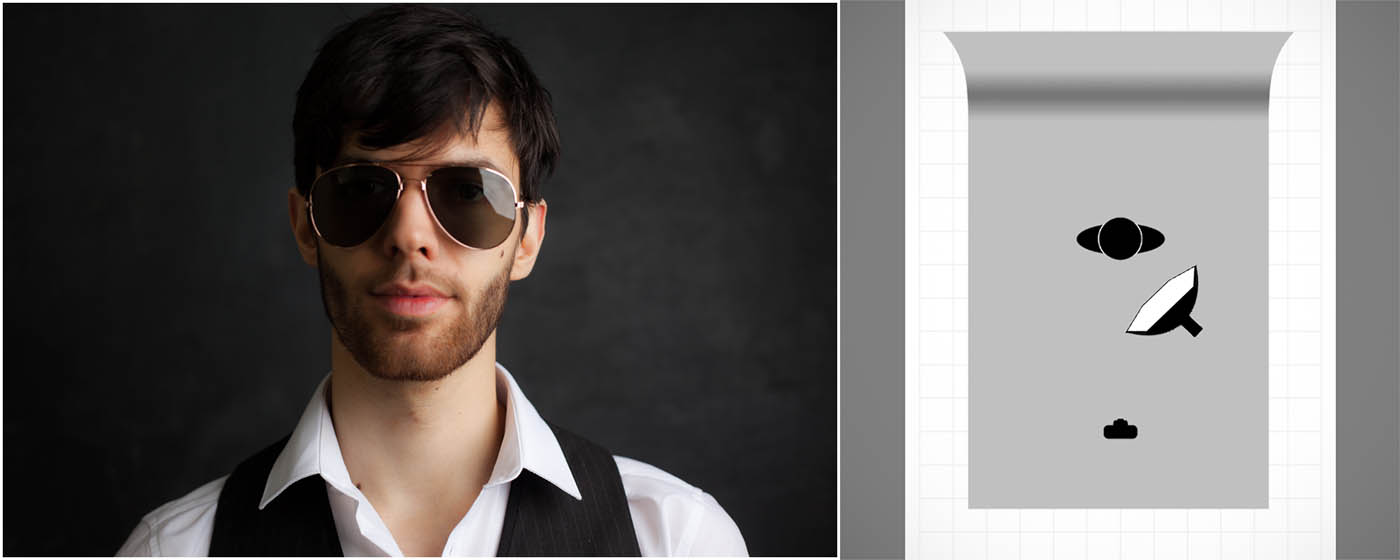 Knowing that light travels in straight lines means that moving the light source to the side will move reflection. Here the light is at about 45 degrees and the result is a reflection that’s much reduced in size.
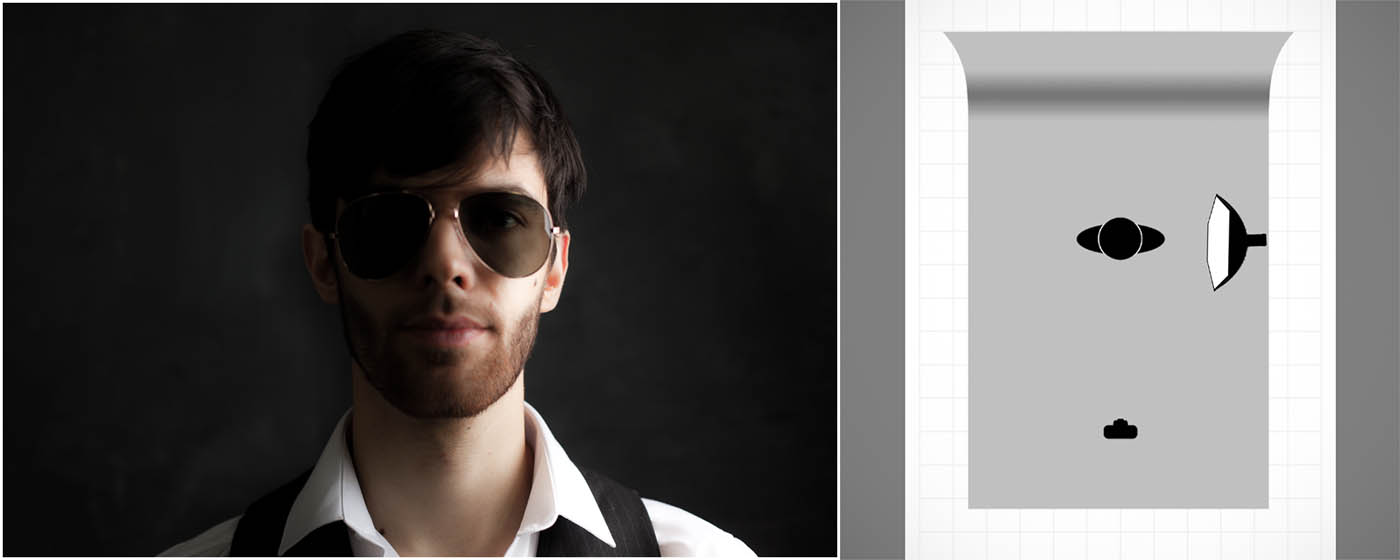 Taking the idea a bit further, if the light is fully 90 degrees to the glasses results in a tiny reflection but also produces a split light effect which might not be the look you’re after. If you look really close you’ll still see a slight reflection. Why? Well the surface of glasses isn’t flat like a window, it’s curved so you’re never at a 90 degree angle across the whole surface of the lens.
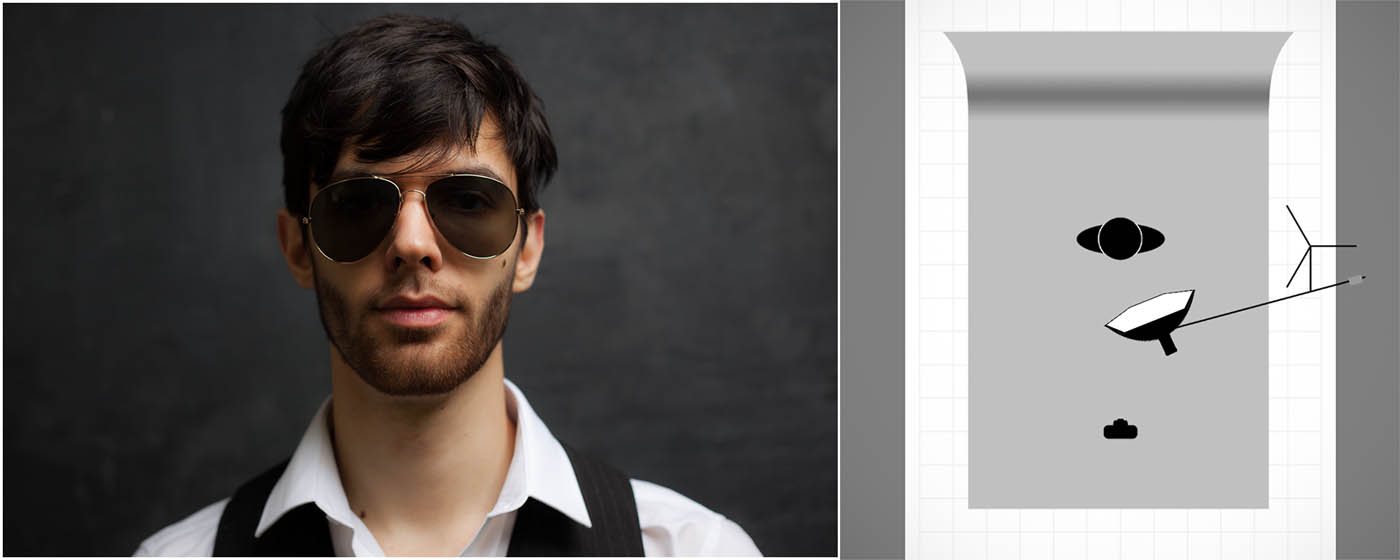 To minimise and remove reflections the best position for the light is up high. By elevating the light the reflections will disappear and the lighting pattern remains flattering too. Asking the model to drop their chin or slightly angle the glasses down can have a similar effect.
In the video below I go through all of the tips in this post in more detail and even give you some tips on how to add a reflection of your own choosing.
Gear used in this video
Canon 5D Mark III www.adorama.com/ICA5DM3.html?KBID=67338
Canon 50mm f/1.8 II www.adorama.com/CA5018AFU.html?KBID=67338
Flashpoint Light Stand www.adorama.com/FPLS9.html?KBID=67338
Black Rapid RS-7 Strap www.adorama.com/BRRS7.html?KBID=67338
Flashpoint StreakLight 360 Ws Creative Collection www.adorama.com/FPLFSL360K2.html?KBID=67338
Sekonic L-308S Flashmate www.adorama.com/SKL308S.html?KBID=67338
Westcott Rapid Box 26″ Octa Softbox www.adorama.com/WERB26OM.html?KBID=67338


Excellent tutorial! as always!
You show not only how to remove a reflection, But how to make your own reflection too!!
This is not just a tutorial, it’s an inspiration, as you have always done!
Thank you Gavin!
Excellent tutorial Gavin! Enjoy watching your tutorials and thank you very much.
Gavin, one suggestion, Your video course is almost perfect. To make it 100 full mark I strongly suggest Adorama to sponsor you with a better Monitor, say iMac 27 ?? isn’t that a good idea?
Excellent series….easy to understand & duplicate. It inspires me to better my photography. Thanks Gavin
I always enjoy his video. He gives more way to shoot and can make amazing photo without heavy instruments. I want to go his lesson one day.
Thank you Mr. Gavtrain,you make me a dream of photo shooting.