The making of a great landscape photo
I’ve been keen to visit the coastal town of Selsey ever since I saw a great photo of the RNLI lifeboat house and last week I got my chance. I was in the area to present a talk on photography and Photoshop so a headed off early to get a couple of hours at the location.
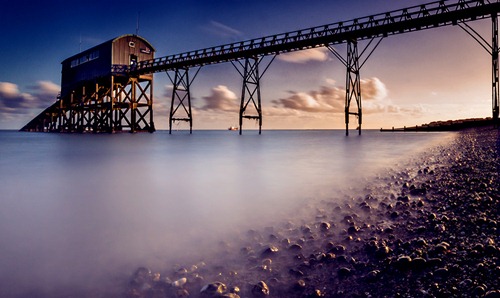 Getting this beautiful landscape photo required more then just turning up and taking the shot, it started long before I arrived at the location. For me that means starting with research and that comes in several forms.
Planning and research
First thing I did was work out how long it would take for me to get to the location and where I was going to park once I arrived. Google Maps and Google Street View proves invaluable for this. Next I checked the sunset and tide times as I didn’t want to get to Selsey and find the lifeboat house high and dry or worse still, miss the best light of the day.
The next thing I tend to do is look at a website like Flickr to see how other photographers have interpreted the scene. I only had one chance to visit Selsey and only an hour or two of shooting time, so looking at other photographs of Selsey helped me work out what might work and what I wanted to avoid shooting.
 First Impressions count
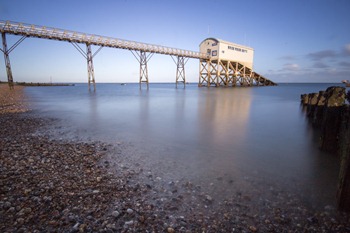
Despite all the advance planning the weather will make or break a landscape photo and here I got really lucky. I had blue skies with fluffy white clouds on the horizon. Perfect!
Grabbing my camera bag and tripod I walked down to the lifeboat house, set up my camera and started shooting long exposure photos with my Hoya ND400 9 stop neutral density filter. Sometimes the first view that draws your attention is the best one… but not this time.
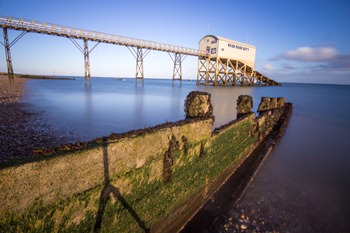 Often I find moving my position even a tiny bit will improve the photo. So as the first spot wasn’t doing it for me I moved a few feet to the other side of the groyne hoping to use it as a lead in line to walk the eye into the picture. Unfortunately the groyne seems to be acting as a visual barrier more then a lead in line.
I also noticed that the low sun was casting long shadows which was causing my shadow to appear in the photo. In this photo I walked away during the 30 second exposure but you can still see the tripods shadow. Time for a rethink.
Moving along
Over the next 45 minutes I slowly walked along the shore line getting closer and closer the the lifeboat house, taking lots of photos as I went. I tried shooting with different focal length lenses but I preferred the extreme wide angle view of my Sigma 10-20mm.
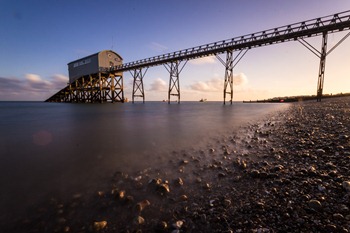 Eventually I ended up shooting from what I thought would be the wrong side of the scene. At the widest end of the Sigma lens I was pretty much shooting into the rapidly setting sun. It was causing a bit of lens flare but also left the lifeboat house back lit which I was sure wasn’t going to work.
Never give up hope
The lighting really wasn’t working for me and I was ready to move on but then a little bit of magic happened. Just before the sun dropped below the horizon it was reflected off the wet pebbles and for a few amazing minutes the beach glowed in the evening light.
The photo opposite is the straight shot off the camera. The photo at the start of this post is the same one but has been run through Photoshop.
One last photo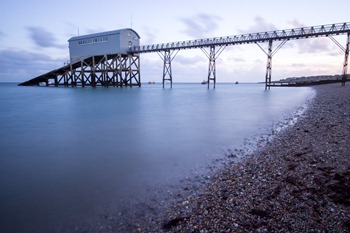 Once the sun disappeared behind the houses on the coast the amazing light was gone. I hung around for a few more minutes just in case there was going to be a glorious autumn sunset but it soon became clear that wasn’t going to happen.
To show you how important great lighting is here’s a photo taken just a few minutes after the last one. Now the pebbles look flat and the lighting has taken on a much cooler tone.
So there you have it. A combination of careful planning, good camera technique, a little bit of patience and a spade full of luck all added up to make a great photo.


This topic is quite interesting because it shows with pictures how important the light is in photography.
Hi Gavin,
nice landscape photo!
I’ve tried to use your shot straight off the camera and use photoshop to get to your final version. I can’t do it-still can’t straighten up boathouse + bridge + see line, always at least 1 part is skewed.
Any unknown photoshop magic in that?:)
that little bit of magic certainly paid off nice shoot Gav & a great little read 5 star ***** other news the back is on the mend so photo walk is back on time & place unknown:)
Gavin,
Thank you for sharing this wonderful tips. I have read and watched all your awesome articles and Video. My favorite of course are your 15 mins photo challenge. Any chance you will be doing more of those?
Best wishes
Thanks for sharing you experience Gavin. As you say the light certainly gave the shot a bit of magic, and then you bundled it all together with your photoshop talent.
As Picasso said, luck does exist but has to find you at work… Excellent photo and description, Gavin!
This story has a happy ending and we thank you Gavin for letting us be a part. I felt as though I was there with all the bits and pieces coming together to finally walk away with the prize you sought as you planned and executed that outing. There is a lot more that goes into a great image than just clicking the shutter. I thank you with a tip of the hat.
Thanks for the interesting post Gavin! Loved it!
Great article and images. Would love to know the secret of achieving that sea surface effect.