Behind the image – Luke
A few days ago I was presenting an all day digital workshop for Ludshott Photo Club. After a morning of non stop Photoshop tips and tricks I was ready for some photography in the form of a live portrait shoot.
If you’ve ever had a bash at shooting portraits then you’ll understand that it can be one of the more tricky forms of photography to master. Well, imaging trying to do a portrait shoot on stage in front of a large audience with a model pulled from the audience. It certainly challenged me but that’s half the fun.
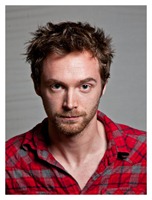
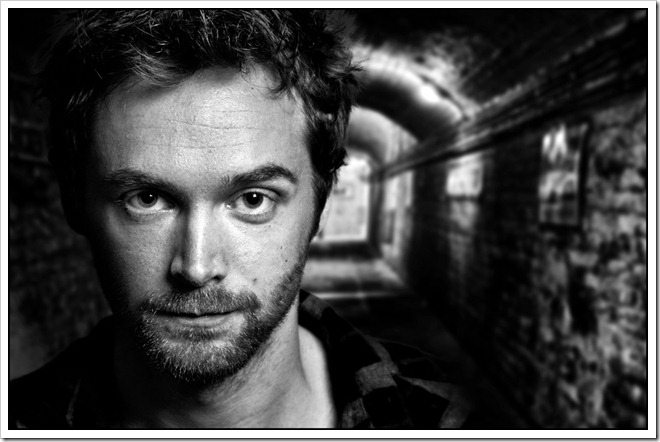
Fortunately I’d spoken to Luke earlier in the day and he was more then happy to stand in as my model for the shoot. As it turned out the shoot went without a hitch, Luke turned out to be a brilliant model and the final image (as seen above) was better then I had hoped.
 So how did I get to the final image? Well it’s a combination of two image. The shot of Luke was taken during the workshop. He’s lit with a single speedlite fired through a small softbox from Smick. The background is also from Smick is a black/white reversible popup. Without a light to brighten the background it appears grey in the photo instead of white.
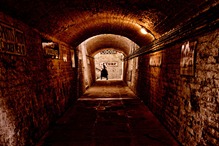
The second photo is one of my stock images. It’s a view down a passenger tunnel at a station on the Bluebell Railway in West Sussex. The grungy effect is a result of processing the original image in Nik Color Efex Pro 4.
 For the workshop I did a live demo on how to effectively cut out hair. To be honest its a job that’s been made incredibly simple thanks to the amazing Edge Detection found in Photoshop CS5’s Refine Edge. After Luke had been removed from the original background, it was a simple job to paste him onto the new background and apply a Black/White adjustment layer to hide the colour difference. Cop out? Yeah a bit, but hey. it was all done LIVE!


Hey Gavin,
Great photo! Is there going to be a video tutorial on how the shot was made? Would love one! Cheers
Wow. Fantastic image. Very moody.
Simple set-up, GREAT photo.
I like Gavin tutorials. They are generally brief, to the point, highly informative and often times inspirational. Keep up the great work!
Luv this 🙂
Fantastic portrait Gav. I hve really enjoyed and learned from your YouTube stuff.
Thanks for sharing.