How to sharpen in Photoshop
 Sharpening your photos is one of the least exciting things you can do in Photoshop but also one of the most important things too. It’s also right at the top of the frequently asked questions I get whilst teaching photo post processing.
Let’s start by clearing up a few misconceptions. You don’t need to sharpen every photo and you don’t need to sharpen a whole photo the same amount. For example if you’ve taken a dreamy soft portrait you may want to sharpen just the eyes or you may want to sharpen nothing at all… It’s ultimately your choice.
When to sharpen
In this post I’m only looking at sharpening in Photoshop and I’m assuming you’re starting with a photo that’s basically in focus where it should be. Many people will make the fundamental mistake of sharpening just after they’ve applied their Photoshop effect, whatever that may be. WRONG!
For me sharpening is the very last thing you do moments before the image leaves your computer and goes to your printer, blog, Facebook page etc. In other words don’t sharpen your image and then resize it, always resize it first and then sharpen.
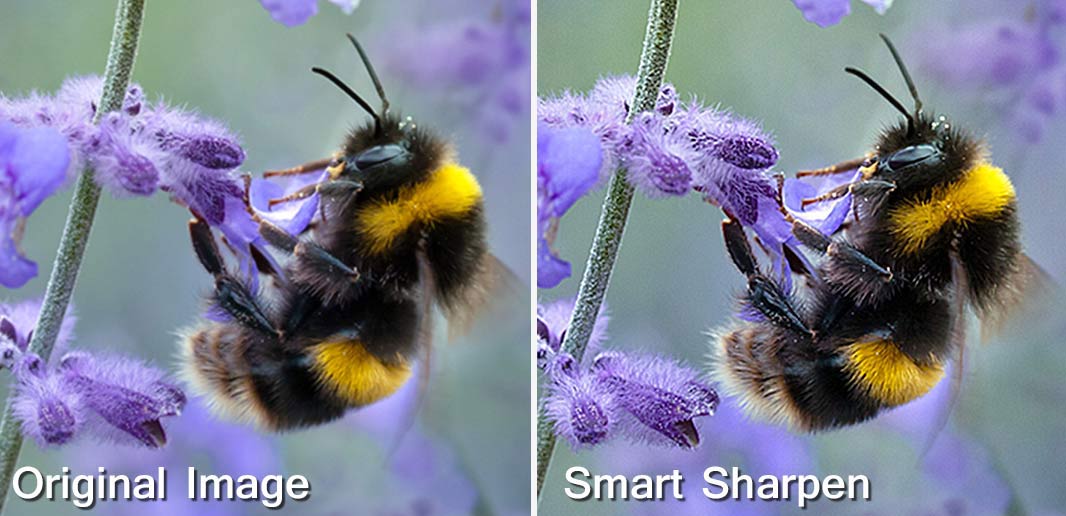
Unsharp Mask vs Smart Sharpen
For years I’ve used Unsharp Mask as my “go to” sharpen tool but no more. Photoshop has a raft of sharpening options but the Smart Sharpen filter has a couple of features that make it the best sharpening filter in Photoshop.
The Smart Sharpen Filter has three type options. “Gaussian Blur”” is in effect the same sharpening as Unsharp Mask. “Lens Blur” is my usual setting and “Motion Blur” try’s (and usually fails) to reduce blur from moving subjects.
To get the best from Smart Sharpen set the amount to 500% and the radius to around 20 and you’ll notice a bunch of halos around edges in the photo. Slowly reduce the radius until the halos are all but gone. That’s the radius set for that image. Finally, reduce the amount slider to get the sharpen effect you desire.
Obviously there’s no magic number that works for all images so be prepared to experiment a little.
Local Sharpening
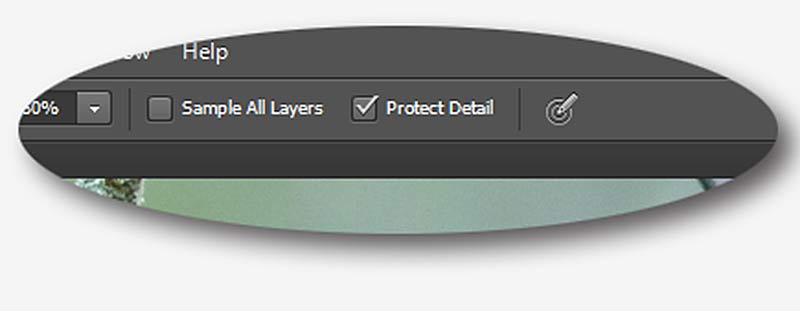 Good as Smart Sharpening is you do have to remember that it’s a global effect which effects all the pixels in the image and whilst that’s usually exactly what you want there are times when it’s not. For example perhaps you have a shallow depth of field image, you don’t always want to sharpen the out of focus areas.
One way to do this is to make a duplicate layer of the image, sharpen the duplicate layer and use a layer mask to limit the sharpened layer to just the bits you wanted to sharpen.
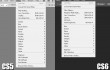
However for users of Photoshop CS5 and CS6 the best way to do this is with the Sharpen Brush which had a radical overhaul in CS5 onwards and is the best sharpening tool in any part of Photoshop as long as “Protect Detail” is turned on in the tool option bar. It’s as simple to use as any brush in Photoshop, all you do is paint where you want to sharpen and the more you paint the sharper thing become. Gone to far? CTRL+Z will undo the last click and CTRL+ALT+Z will keep going back one histrory step at at time.
So remember…
- Only sharpen AFTER you resize your photo
- Use Smart Sharpen for Global Sharpening
- Paint with The Sharpen Brush for local sharpening


Thanks Gavin, thats a really handy tip regarding leaving the sharpening til last, I supspect I am one of the many thousand that used to sharpen quite soon into the workflow. Cheers
Hi! Mr.Hoey can you post more instruction on how to edit a photo.thanks
Everything Gavin does is about editing photos. You’ll be provided with a wealth of information on editing photos by browsing his website for a few minutes or checking out his YouTube channels. It is his job to inform and educate people on editing their photographs…and very good at it he is too!
Another great blog post, Gavin. I can’t remember the last time I sharpened one of my photos. Maybe that’s something I’ll think about more often now.
Good stuff Gav. Its good to be able to sharpen Globally and Locally. This feature is also available in Camera Raw using the adjustment brush?
Yes it is but only in Photoshop CS6 and Lightroom 4.
Hi Again Gav… Im having issues finding the sharpening brush for some reason… Can you point me in the right direction please…
In Photoshop it is in the side tab with the Blur, Sharpen and Smudge tools, just underneath the Gradient and Paint bucket tool in CS6. Hope this helps John.
It does… Thanks Tony…. Was active on the blur tool. Just needed a right click to choose sharpen.. Cheers.
Thanks Gavin, something quite simple but very handy to know. I tend to use Topaz quite a bit in post but this is a nice easy quick way .
thanks Gavin not just for this one but, for all the other tutorials you have done and shared whit us .
Nice tip Gavin. Would you prefer to sharpen in CS6 over sharpening in LR? And if you didn’t have CS6 would the same procedure work in Elements?
Thanks
I’d do the same in Elements but a different workflow in Lightroom… that for anothet post I think 🙂
Thanks! I’ll be watching for that post.
Hi Gavin, thank you very much for this useful tip. For a long time I have been using the Unsharp Mask, but thanks to you I have been able to “upgrade” on the sharpening. =)
Just a little side note: In the part about Local Sharpening you wrote about undoing with CTRL+Z and then CTRL+ALT+S allows you to go back further in the history. Did you mean CTRL+ALT+Z? For me using CTRL+ALT+S just opens the “Save As” box…
Do you prefer plugins over photoshop native tools?
When i export my 1000px wide photo i sharpen it in nik sharpener pro, and then mask it if i need local sharpening. I found this workflow works better for me.
Thanks.
I only use the built in tools of Photoshop.
So if you use the Smart Sharpen Filter in PS do you set the amount of sharpening in Camera Raw to 0? Thanks!
I also have this same question. Should any sharpening be done in Photoshop’s Camera Raw editor before opening the processed Raw picture in Photoshop?
Hi Gavin
Could not quite remember about sharpening from Sunday’s Welshot meeting. Found it here. Thank you.
What about sharpening using high pass filter in comparison to what you just described? If using high pass filter to sharpen, will it cause any adverse effect when I resize the image later?
Hey Gavin! Great article although i prefer LAB sharpening since it doesn’t amplify the noise levels and it doesn’t affect the colors.
You just need to go to the top menu -> Image -> Mode -> LAB Color. Then from the layers panel you choose channels and you need to click on the “Lightness” channel. Do the sharpening as described above. Then you can also sharpen the “B” channel slightly.
This way you have a much more control of what is being sharpened.